AI Summary
Would you like to allow your users to choose multiple quantities of a product on your payment form? WPForms allows you to enable quantity support on some payment fields.
This tutorial explains the steps to enable payment quantity in WPForms.
Before getting started, make sure WPForms is installed and activated on your WordPress site and that you’ve verified your license.
Creating a Payment Form
To start, you’ll need to create a new form or edit an existing one to access the form builder. In the form builder, go ahead and add the field(s) you wish to display on your form. For our example, we’ll add the following fields:
- Single Item or Dropdown Items
- Stripe Credit Card
- Total
To create a payment form, you’ll also need to integrate your site with one of the supported payment gateways. For more details, be sure to see our tutorial on creating a payment form.
Note: To see how quantity selection can be effectively implemented, take a look at our Sweatshirt Order Form Template, which demonstrates multiple product options with quantity selectors.
Enabling Quantity for a Form
Note: Enabling quantity is only supported on the Single Item and Dropdown Items fields.
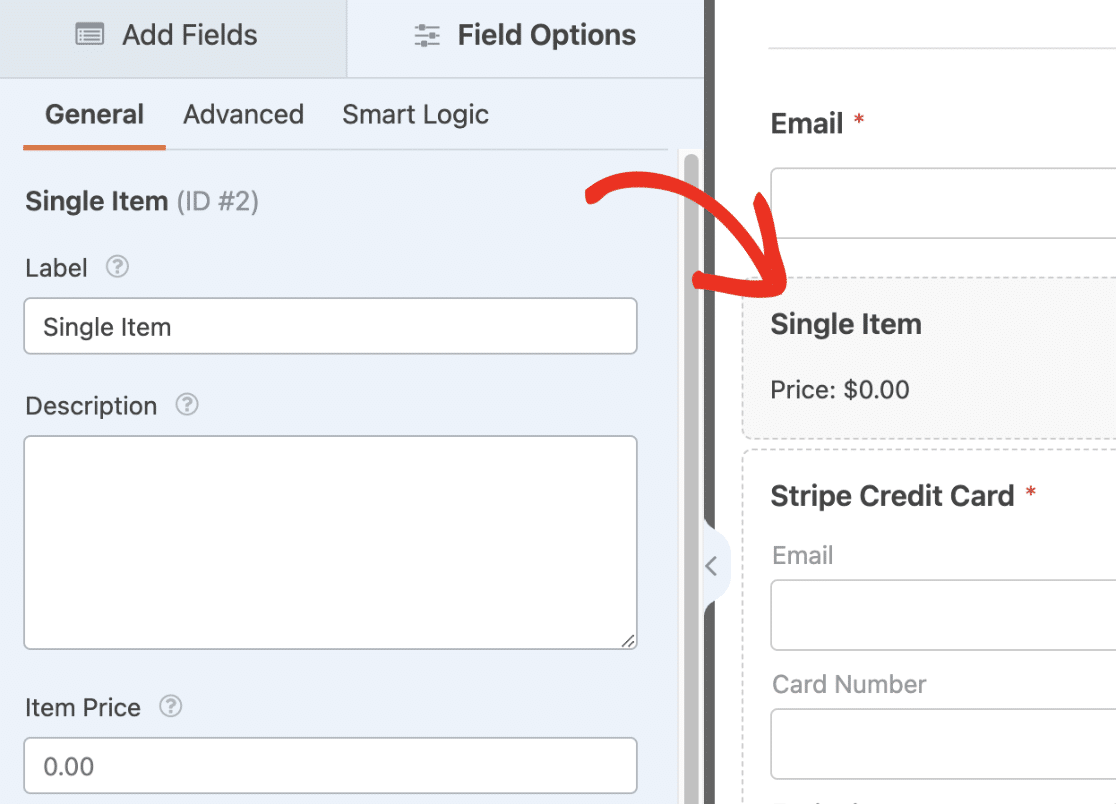
After creating your payment form, select the Single Item or Dropdown Items field to open its Field Options.
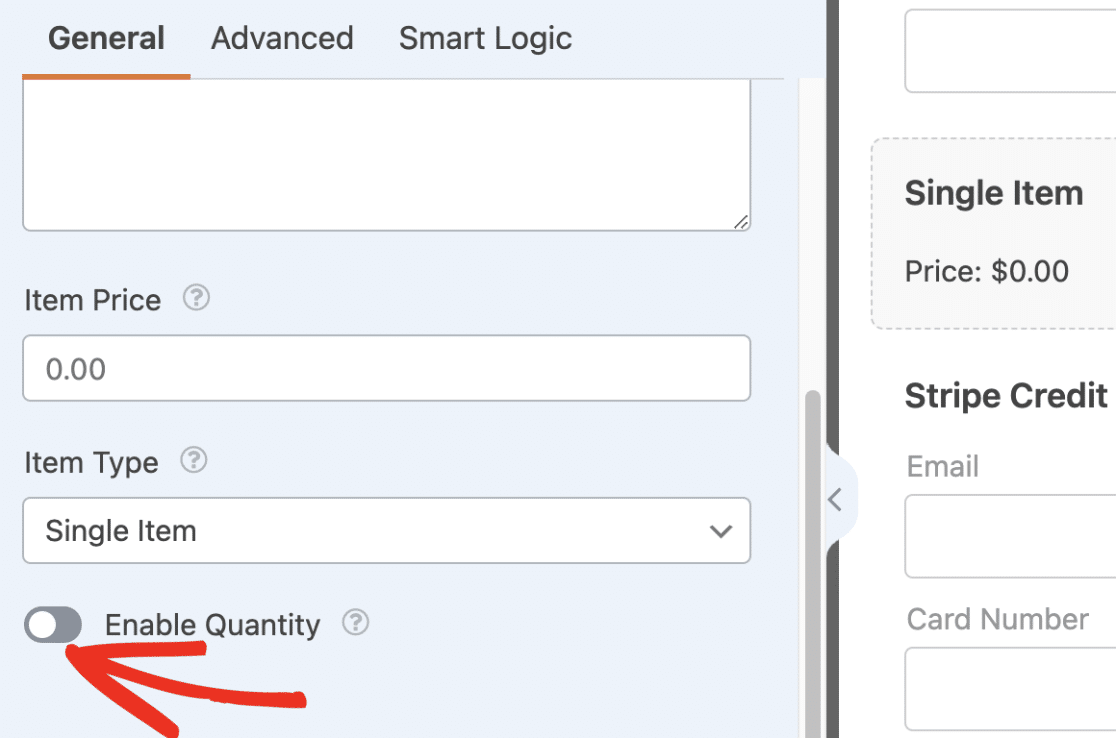
Under the General tab, scroll down and toggle the Enable Quantity option to the on position.
Note: If you’re using any of the following addons: PayPal Commerce, PayPal Standard, Square, Save and Resume, or Coupons, be sure to update them to the latest version. Otherwise, you won’t be able to enable the quantity option.
After enabling it, you’ll see a dropdown in the preview area next to the payment field. This dropdown will allow users to choose a number representing the quantity they wish to purchase.
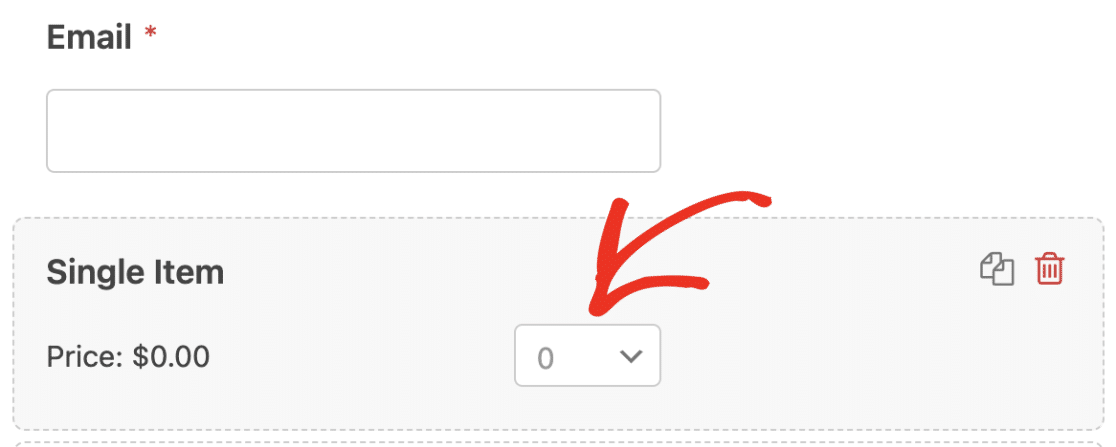
Note: If you’re using the Dropdown Items field, it’ll also look and function the same way.
Below the Enable Quantity toggle, you’ll see the Range option. This setting lets you control the minimum and maximum number a user can select for a particular payment item.
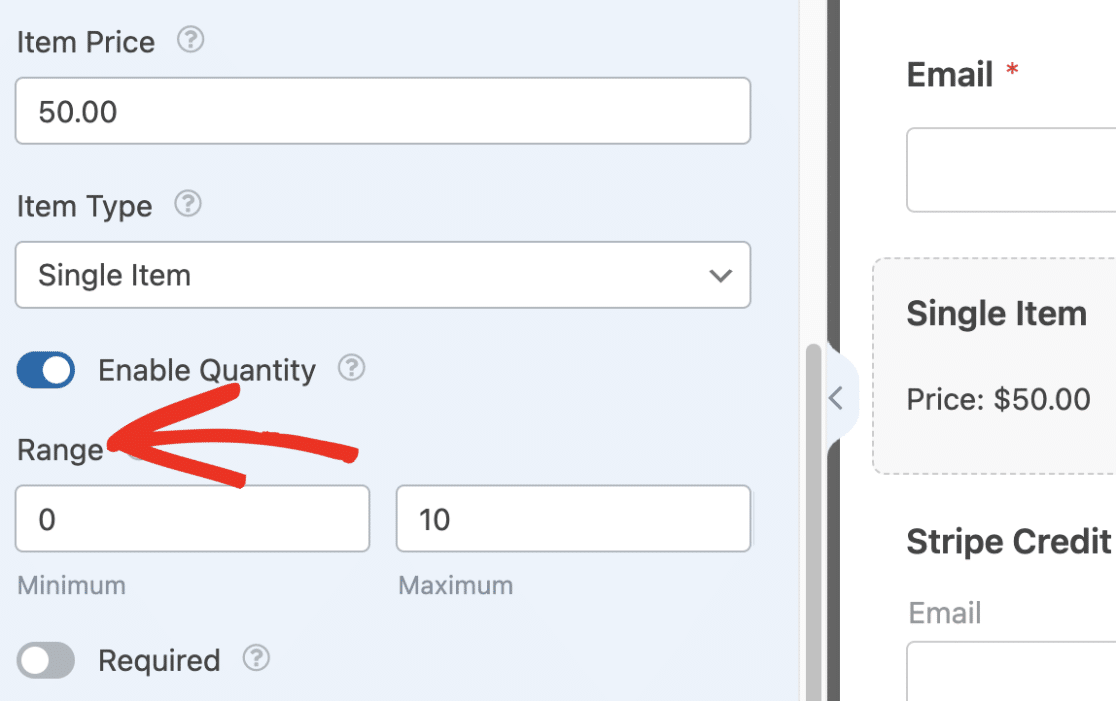
Note: The minimum number you can set is 0. While the maximum number supported is 9999.
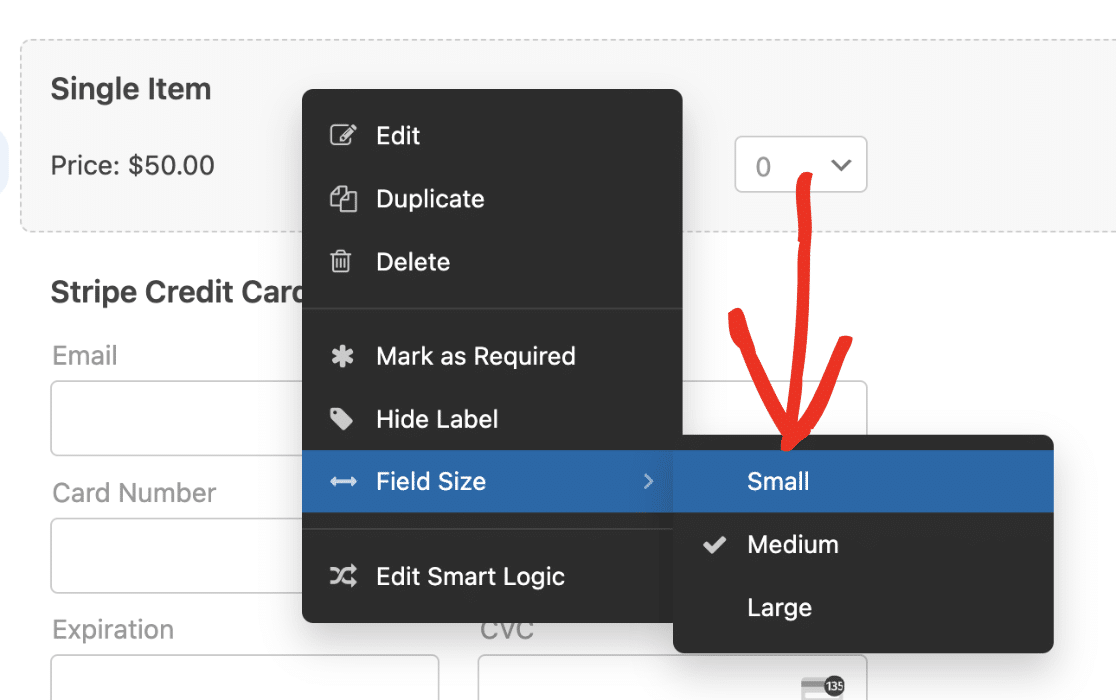
If you’d like to align the quantity dropdown next to the payment field, simply reduce the field size. To do so, right-click on the field, then select Field Size and choose the Small option.
Note: If you’re using the Form Pages, Conversational Forms, or Lead Forms addon, you won’t be able to adjust the size of your form fields.
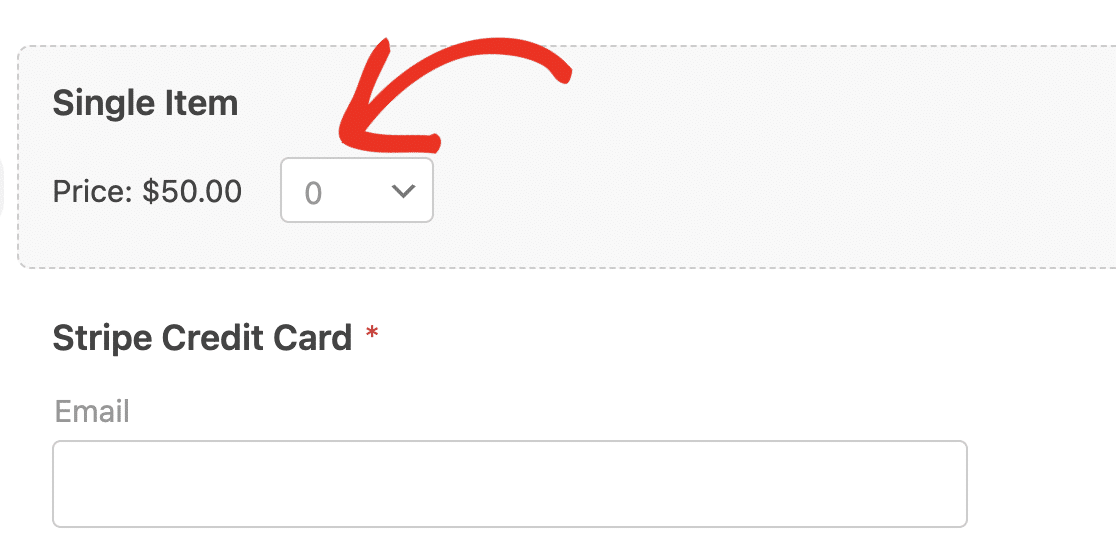
Reducing the field size will align the quantity dropdown next to the item price.
Testing Your Form
After customizing your payment form, be sure to save your changes. We also recommend testing your form to ensure it looks and functions properly.
When you preview your form in the frontend, you’ll be able to choose a quantity from the quantity dropdown.
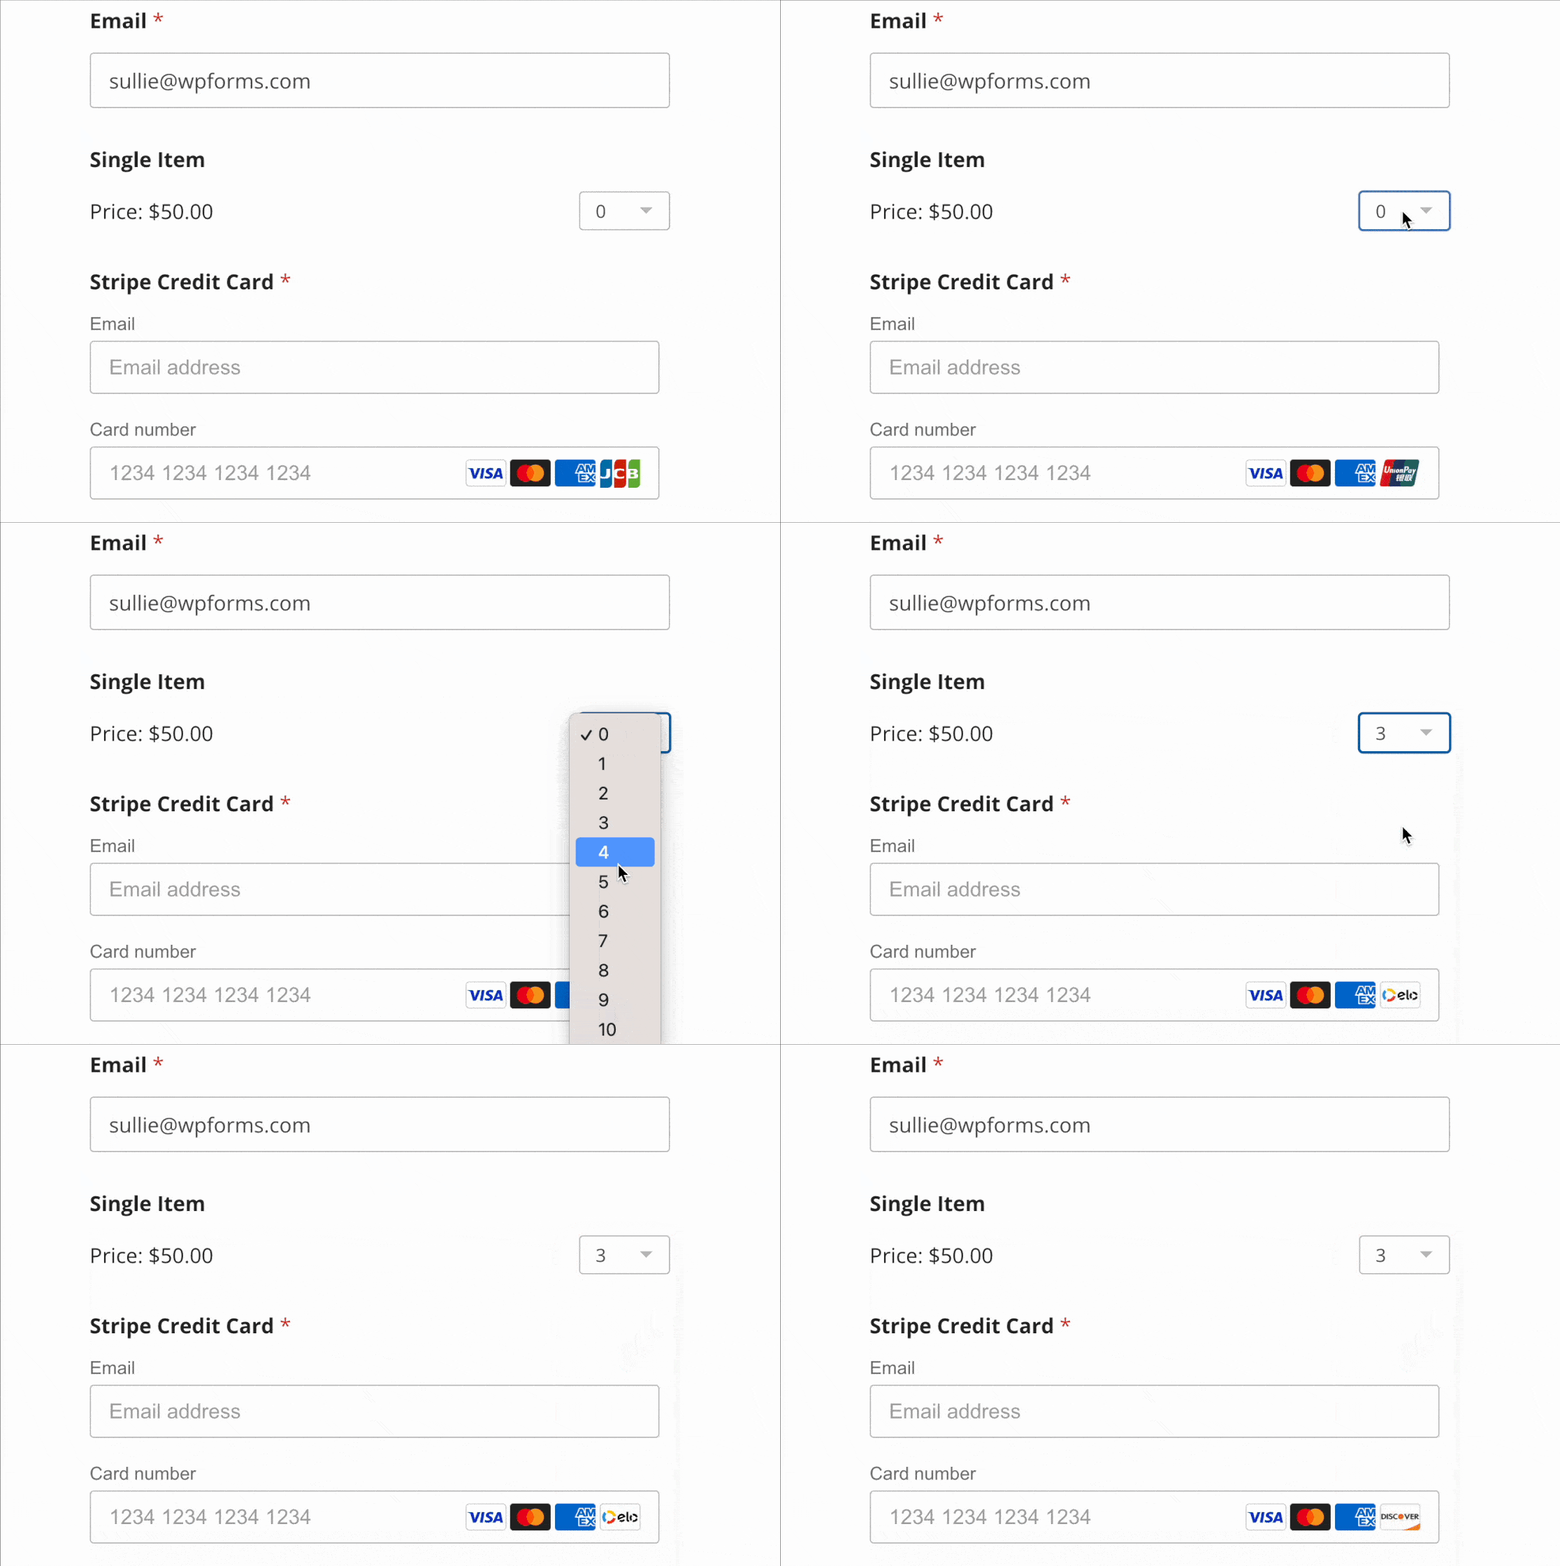
The quantity dropdown will only show numbers within the range you set during its configuration.
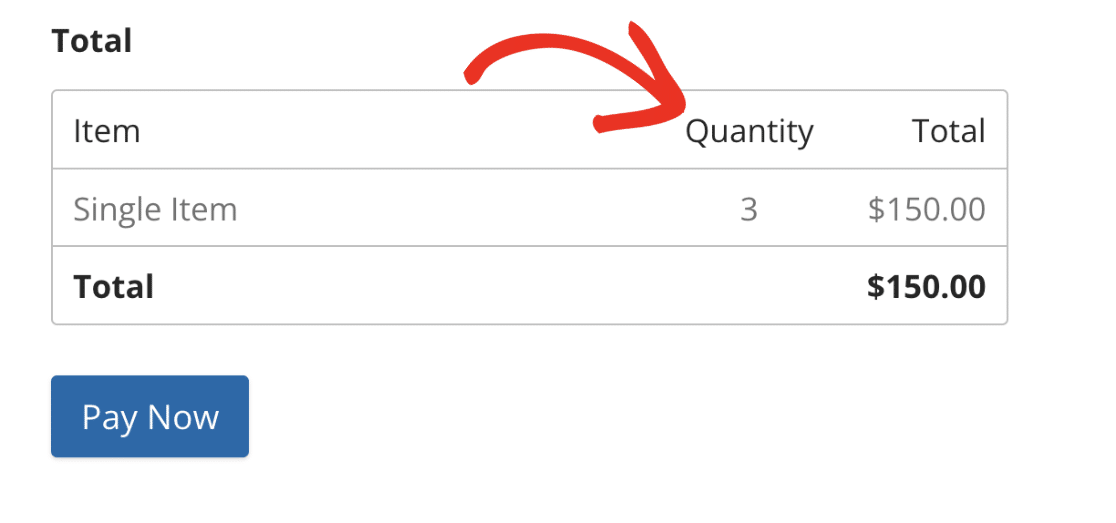
If you’ve enabled order summary in the Total field on your form, users will also see a summary of the items before completing their payment.
Note: Want to learn how to display an order summary on your payment forms? See our guide on using the Total field for more details.
Viewing Your Payment
When viewing payment entries with quantity enabled, it shows the item price and multiplies it by the quantity the user selected.
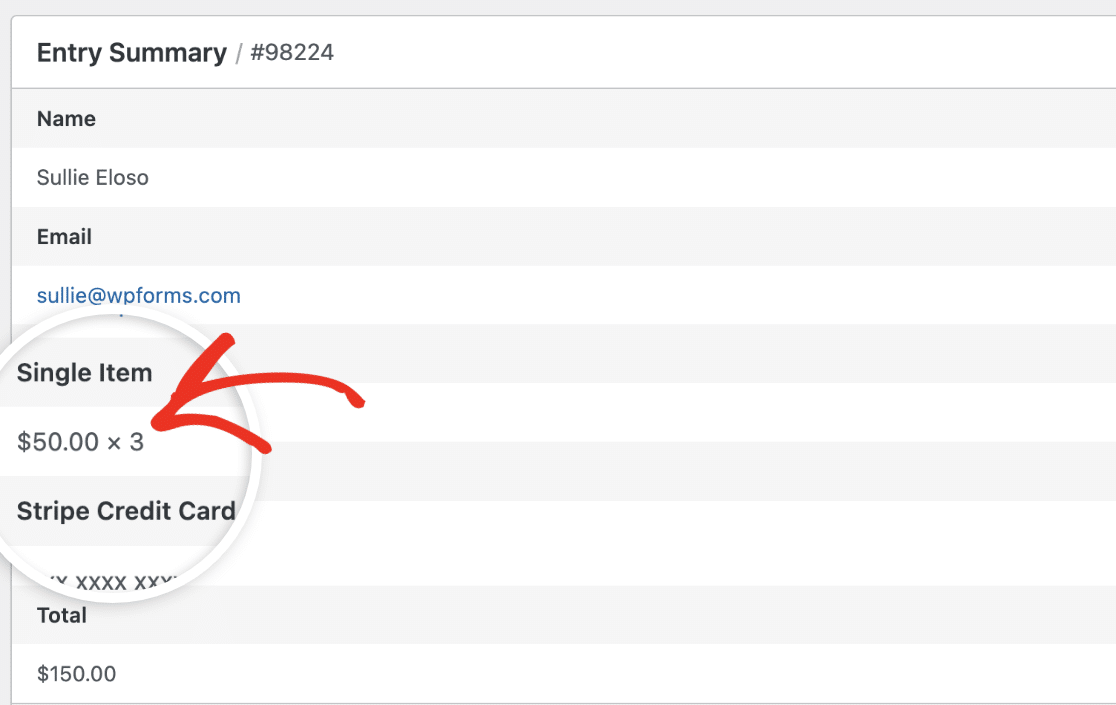
This helps you to properly manage and track your sales. To learn more about viewing payments, be sure to check our tutorial on viewing and managing payments.
That’s it! Now you know how to allow users to purchase multiple quantities of an item in your payment form.
Next, would you like to offer discounts to users on your WordPress forms? Our Coupons addon tutorial explains all the steps in detail.
