AI Summary
Would you like to customize which details appear in the columns on the Forms Overview page in WPForms? Our column management feature lets you easily display only the form details that matter to you.
This tutorial will explain how to customize columns on the Form Overview page.
In This Article
Before getting started, you’ll first need to make sure WPForms is installed and activated on your WordPress site and that you’ve verified your license.
Customizing Columns in the Forms Overview Page
Note: To manage form columns in WPForms, you must create at least one form. Additionally, managing entries requires at least one submitted entry. If you haven’t done so yet, you can create a new form and submit a test entry to proceed.
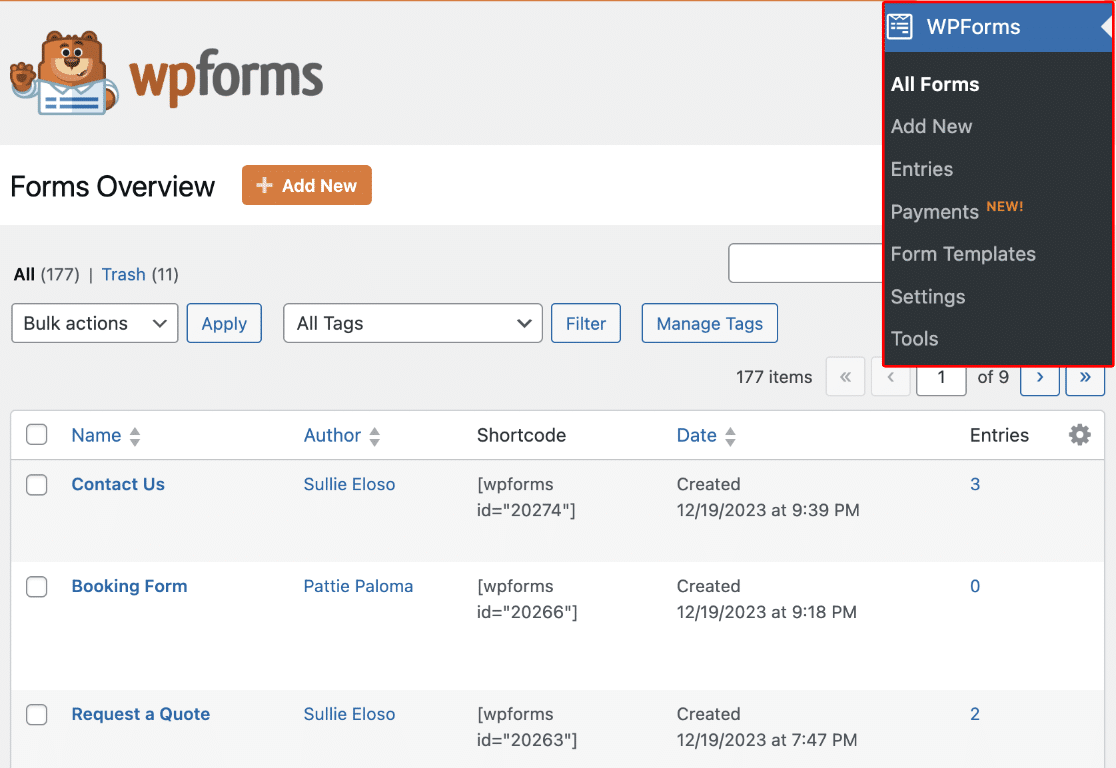
To start, go to WPForms » All Forms to access the Forms Overview page. On the Forms Overview page, you’ll find a list of all the forms you’ve created on your website.

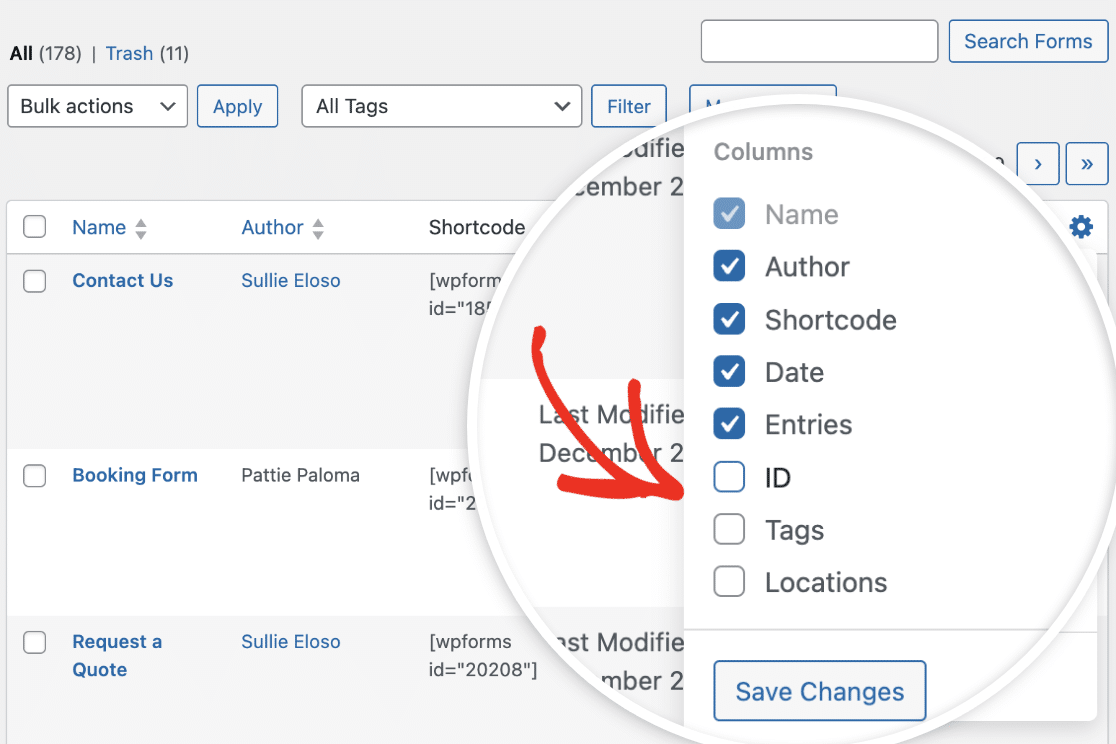
Here is a list of the possible columns that can be included in each form row:
- Author: The user that created the form.
- Shortcode: This is the shortcode that includes the form ID.
- Date: The date that the form was created.
- Entries: This shows the number of entries the form has.
- ID: The unique identifier for each form.
- Tags: Assigned tags for organizing and categorizing forms.
- Locations: The places on your site where the form is displayed.
By default, each row will display each form’s name, shortcode, date, and number of entries.

If you’d like, you can add or remove columns from the overview page. To do so, click the Settings icon to view all available options.
![]()
From here, check the box next to the column(s) you’d like to add to the overview page.

After making your selections, click the Save Changes button to add the columns.

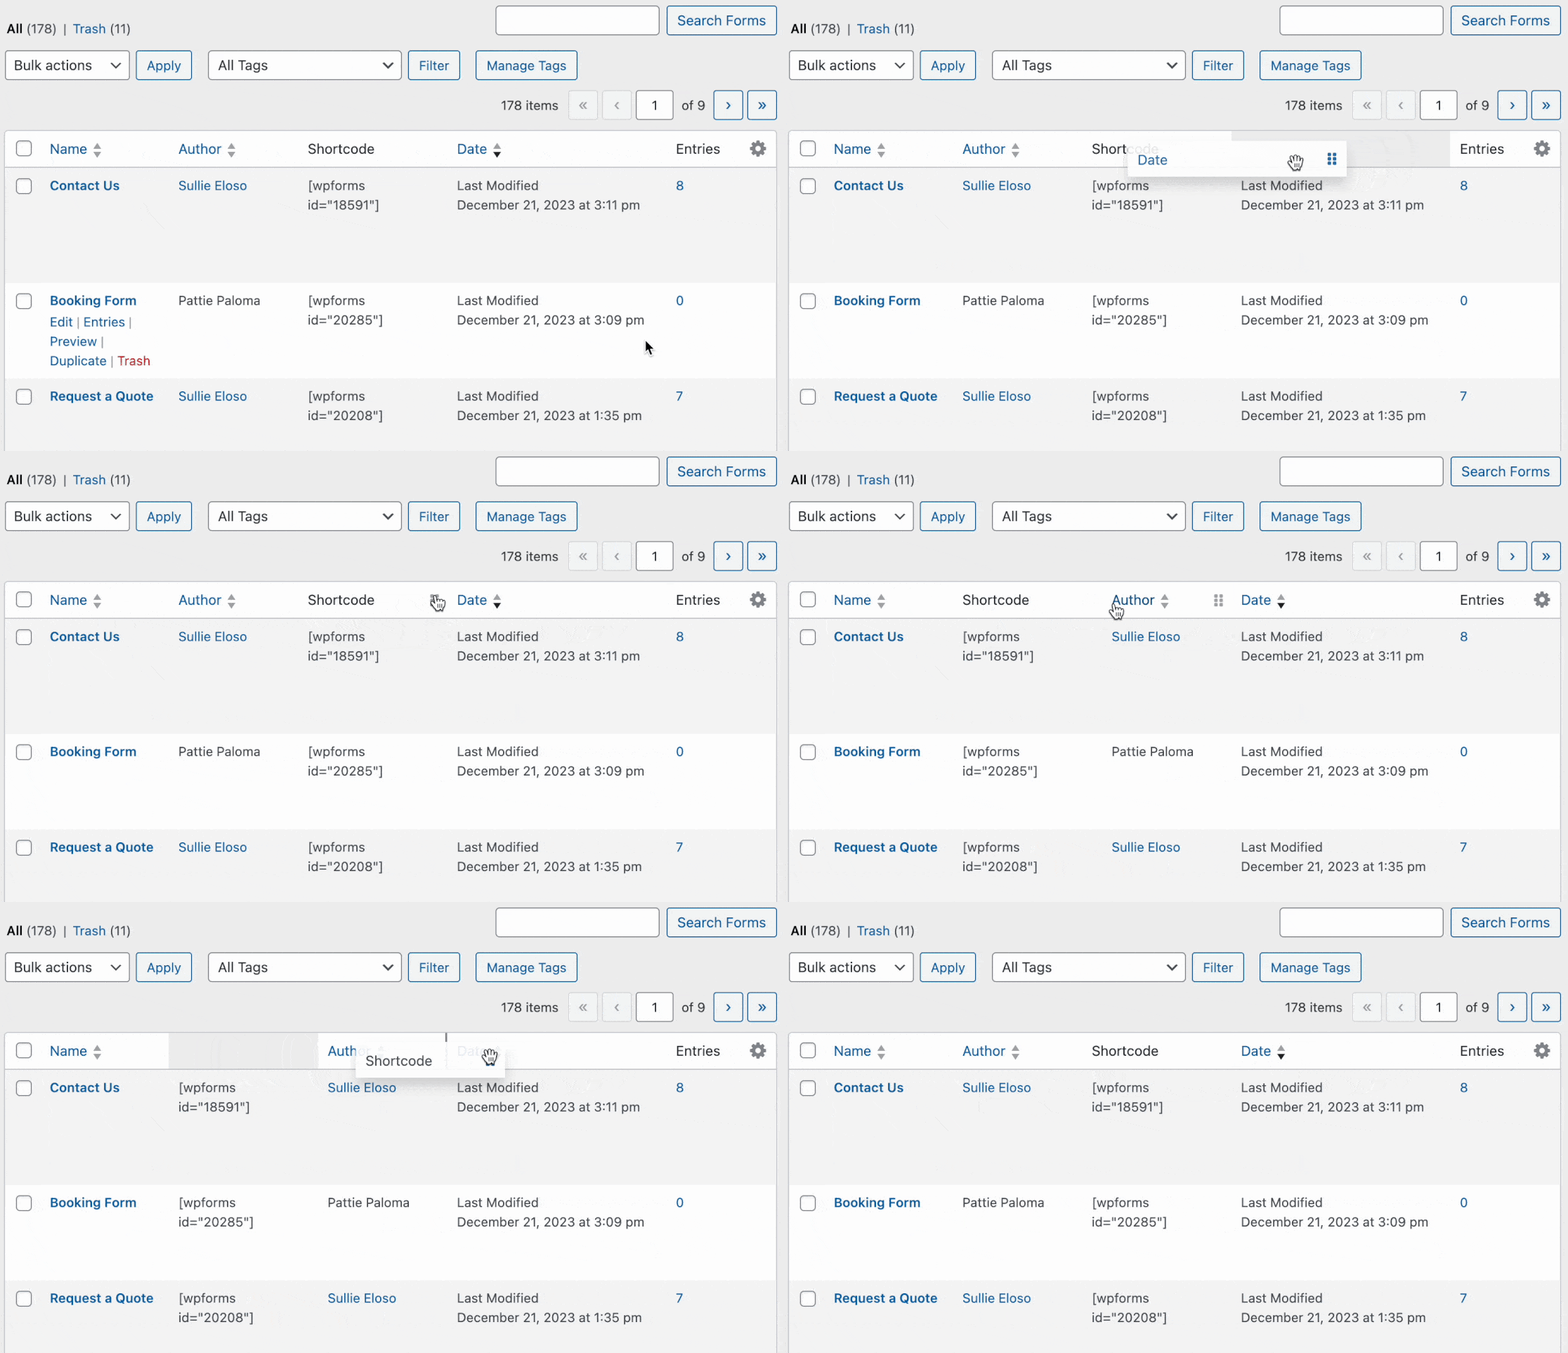
Once done, the new columns will be added to the overview page. Similarly, you can select any of them to reorder the columns.
When you hover over a column title, you’ll see the grab icon, indicating that the column can be moved around. To rearrange columns, select and drag the column title to the area you wish to place it.

Customizing Rows in the Forms Overview Page
If you’d like to customize the number of form rows displayed on the Forms Overview page, you can do so by clicking on the Screen Options tab on the top right corner of the page.
Simply change the number in the box next to Number of forms per page. For example, we’ll change it to 5, so only 5 forms are displayed on a single page.

Once you’ve added the number of forms you’d like to view per page, click on the Apply button to save your changes.

That’s it! You now know how to customize and manage columns in WPForms Forms Overview page.
Next, would you like to sort your forms to make them easier to find? Check out our complete guide to form management for details.
