AI Summary
Would you like to learn more about how to manage your WordPress forms? WPForms makes it easy to organize and manage all your forms right from the WordPress admin area.
This guide will answer some of the most common questions about form management in WPForms.
Before getting started, you’ll first need to make sure WPForms is installed and activated on your WordPress site and that you’ve verified your license. Then, be sure to create a form if you haven’t already.
Viewing Your Forms
To view all your forms in the WordPress admin area, go to WPForms » All Forms. This will take you to the Forms Overview page. Here, you’ll see a list of all the forms on your site, along with performance columns for each one:

- Conversion: The percentage of views that ended in a submission.
- Entries: How many entries the form has received.
- Views: How many times the form appeared on a visitor’s screen.
- Interactions: How many times visitors engaged with the form’s fields, like clicking into a field or typing.
To dig deeper into a form’s performance, hover over its name and click View analytics. For a full walkthrough of the analytics page and every metric, see our complete guide to form analytics.
Accessing Form Options
Once you’re on the Forms Overview page you can quickly access options for managing each form. To display these options, simply hover over an individual form’s name.
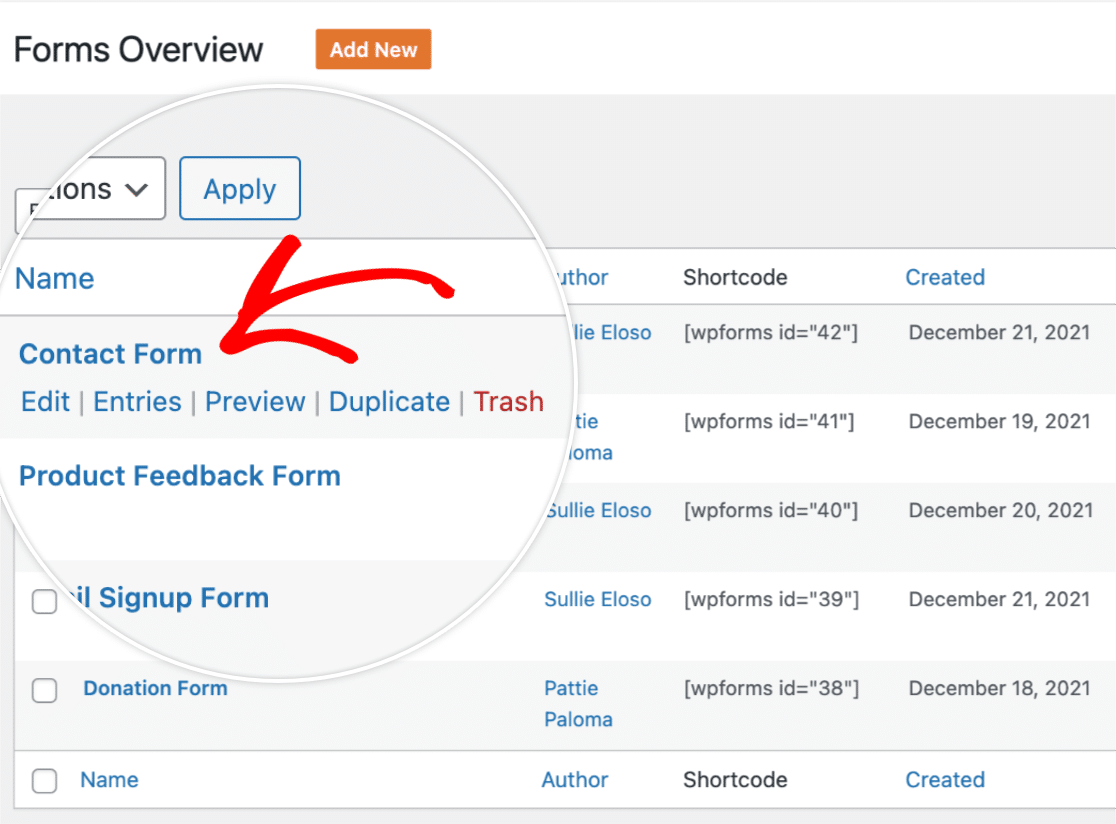
Here you’ll see the following options:
- Edit: This link takes you to the form builder, where you can make changes to this specific form.
- Entries: This will take you to the form’s Entries page, where you can view and manage your entries.
- View analytics: Opens the form’s analytics page, where you can see how the form is performing.
- Preview: This allows you to see how the form looks on the frontend of your site. You can also use it to submit test entries.
- Duplicate: Creates a duplicate of the form. This is a great way to test or repurpose forms.
- Trash: Adds the form to the trash.
Adding Forms to the Trash
To remove a form from your site, you can add it to the Trash folder.

When a form is in the trash, you will not be able to view it or its entries. To reverse this, you can restore the form from the Trash page.

Or, if you no longer need to be able to access the form or its entries, you can permanently delete it.

For more details on how to use the forms trash, see our guide to deleting forms.
Organizing Your Forms
On the Forms Overview page, there are several ways you can organize your forms. For example, you can customize the page layout and sort your forms. We’ll cover each of these options below.
Customizing the Page Layout
You can choose which columns are included in the form rows and how many form rows are displayed on each page. To do this, click on the gear icon in the top right corner of your forms list.
After clicking the gear icon, a dropdown menu will appear with a list of column options that can be displayed in the forms list.
Select the columns you want to appear by checking the box next to each column option.

When you’re ready, go ahead and click the Save Changes button to apply your changes.

To customize the number of form rows displayed on the Forms Overview page, click on the Screen Options tab on the top right corner of the page. Here you can enter the number of rows you would like to include per page.

Click Apply to save your changes.
For more details, see our guide to form column management.
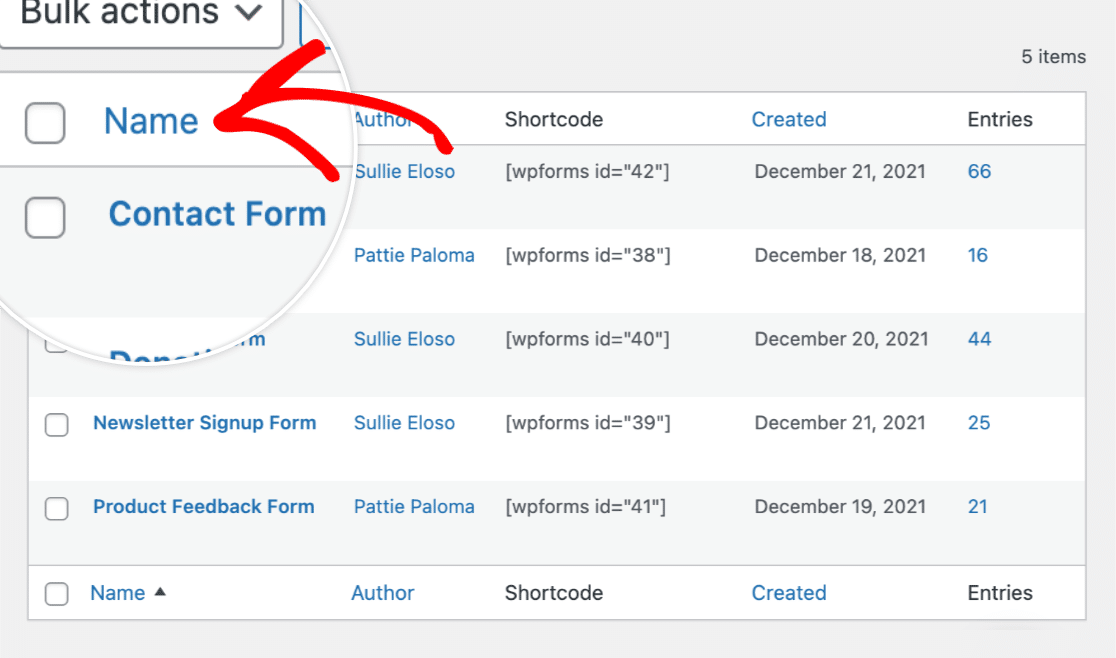
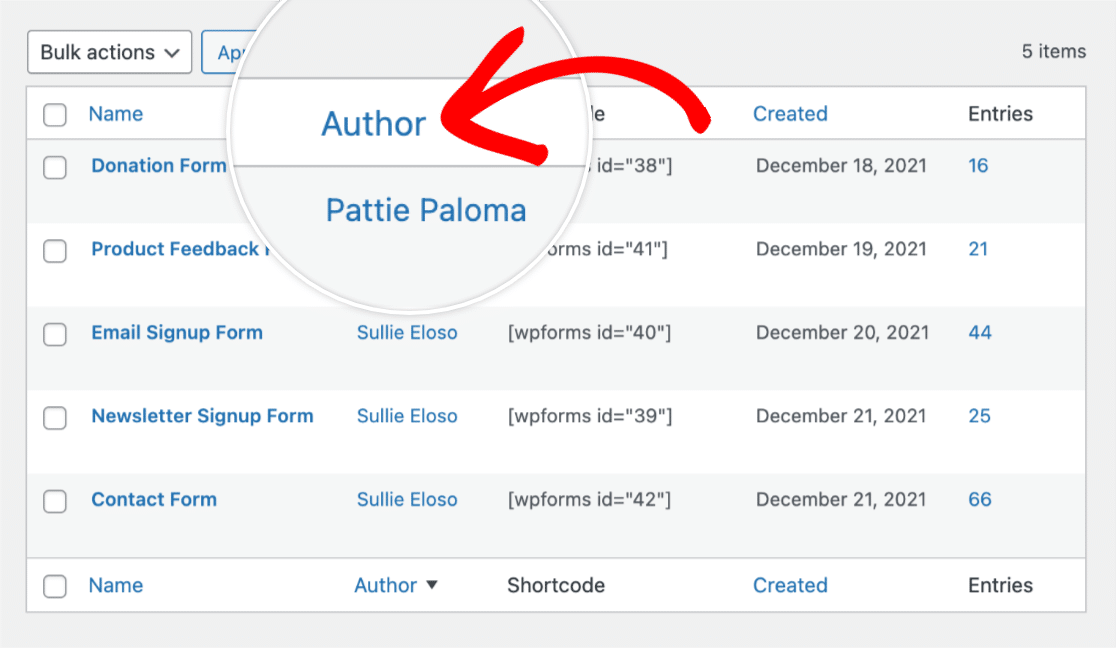
Sorting Your Forms
Sorting your forms with a single click is a great way to quickly organize your forms. On the Forms Overview page, you can sort your forms by form name, author, or date created.
To sort your forms alphabetically by form name, click on the Name link on the top left of the form table.
If you’d like to sort your forms alphabetically by form author, click the Author link.
To organize the forms by the date they were created, click on the Date link.

Using Form Tags
If you manage a large collection of forms, tags offer another way to keep them organized. Tags are custom labels you can assign to any form, making it easier to group related forms and filter your Forms Overview page to show only the ones you need.

For example, you might tag forms by department (Marketing, Support, Sales), by campaign, or by form type (Lead, Feedback, Registration). Once your forms are tagged, you can filter the Forms Overview by any tag using the All Tags dropdown, or bulk edit tags across multiple forms at once.
For full instructions on enabling tags, adding them to forms, bulk editing, and filtering, check out our complete guide on using form tags in WPForms.
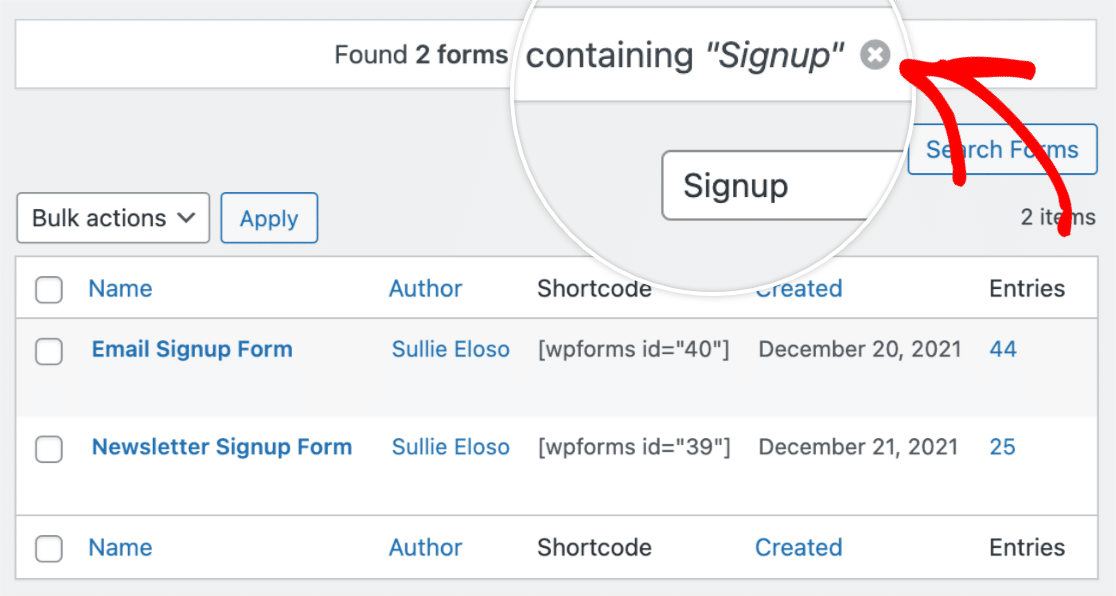
Searching for Forms
Searching for forms on the Forms Overview page is a great way to quickly locate specific forms by form ID, name, or description.
Searching by Keyword
To search for a form, enter keywords in the search bar and click the Search Forms button.
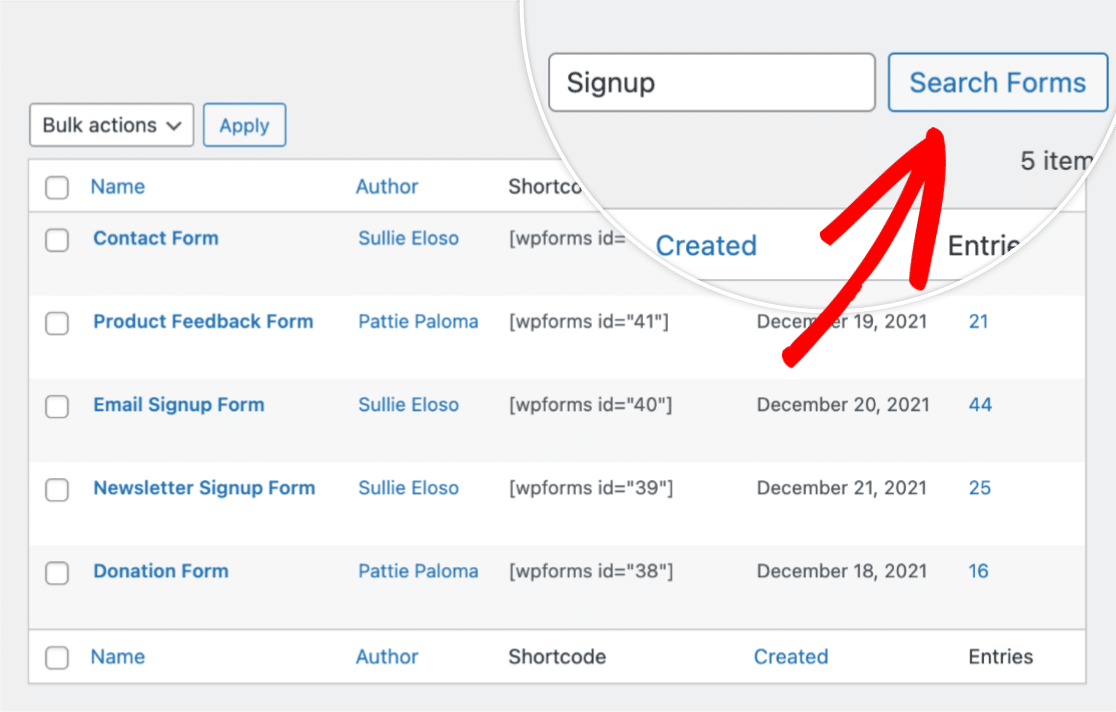
Any forms that contain the keywords in the form name or description will appear in the search results.

If you’d like to clear your search results, simply click the X icon.
Searching by ID
To search for a specific form using the form’s ID, enter the ID into the search bar and click the Search Forms button. This will filter only the form matching the ID you entered.

Similarly, click the X icon if you’d like to clear your search results.

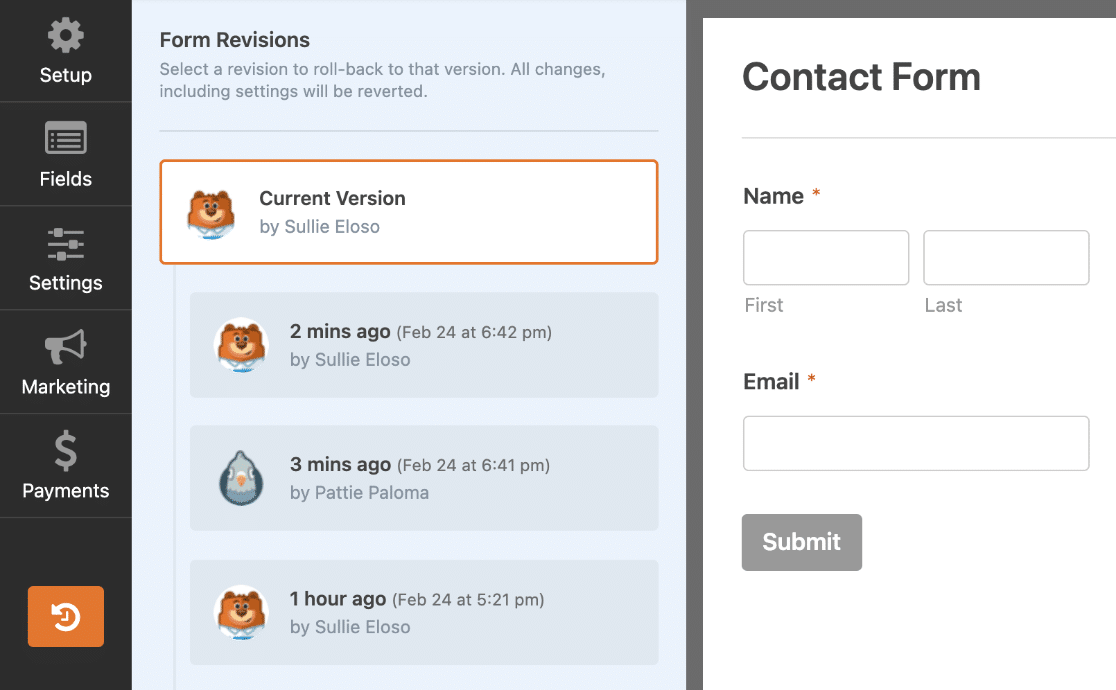
Using Form Revisions
Form revisions make it easy to restore earlier versions of your forms, view when forms were updated, and see which users made changes.
To view form revisions, you’ll first need to access the form builder. Then, click on the form revisions icon located in the bottom-left corner of the form builder.
This will take you to the Form Revisions panel, where you can browse and manage your form revisions.
For more in-depth details, be sure to check out our tutorial on using form revisions in WPForms.
That’s it! Now you know all the different ways to manage your forms.
Next, are you wondering what you can do with the information a user submits through your forms? Be sure to check out our complete guide to form entries for all the details.