AI Summary
Would you like to send notifications to your Slack workspace when forms are submitted? With the WPForms Slack addon, you can easily send messages to channels, direct messages to users, and set reminders in Slack when users complete your forms.
This tutorial will show you how to install and use the Slack addon with WPForms.
Requirements:
- You will need a Plus license level or higher to access the Slack addon
- Ensure that you’ve installed the latest version of WPForms to meet the minimum required version for the Slack addon
Before getting started, you’ll first need to make sure WPForms is installed and activated on your WordPress site and that you’ve verified your license. You will also need to have a Slack workspace and the necessary permissions to add integrations.
Installing and Configuring the Slack Addon
Once the core WPForms plugin is in place and your license is verified, go ahead and install and activate the Slack addon.
After installing the Slack addon, you’ll need to connect WPForms to your Slack account. To do this from the WordPress dashboard, you’ll need to go to WPForms » Settings and click on the Integrations tab.
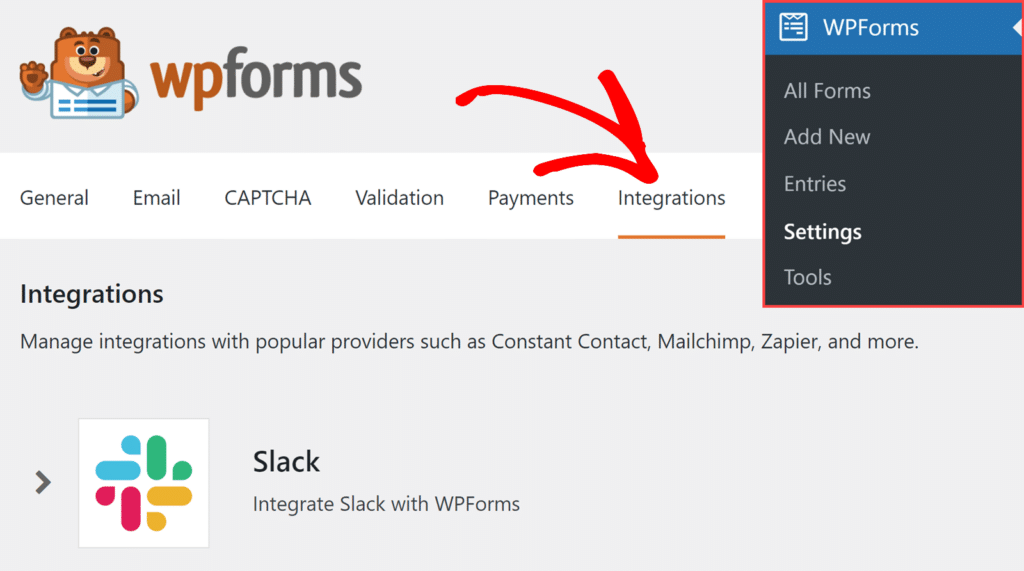
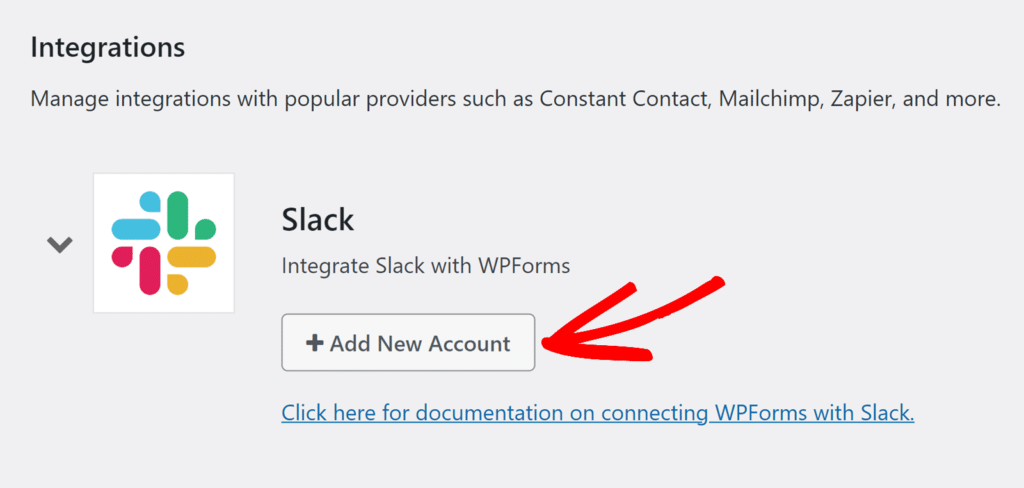
Then, click on the Slack integration to expand its settings. From here, click the Add New Account button.
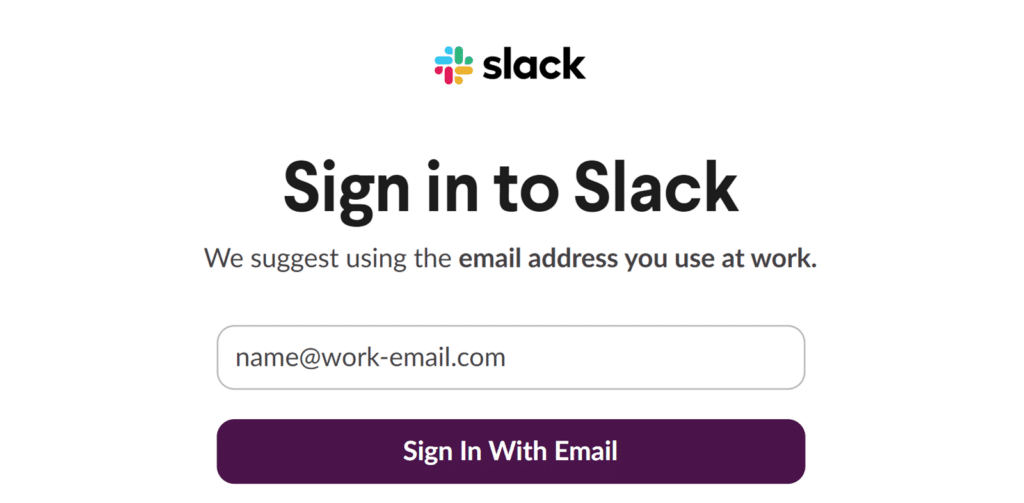
This will open the Slack sign in page where you’ll need to sign in to your Slack workspace.
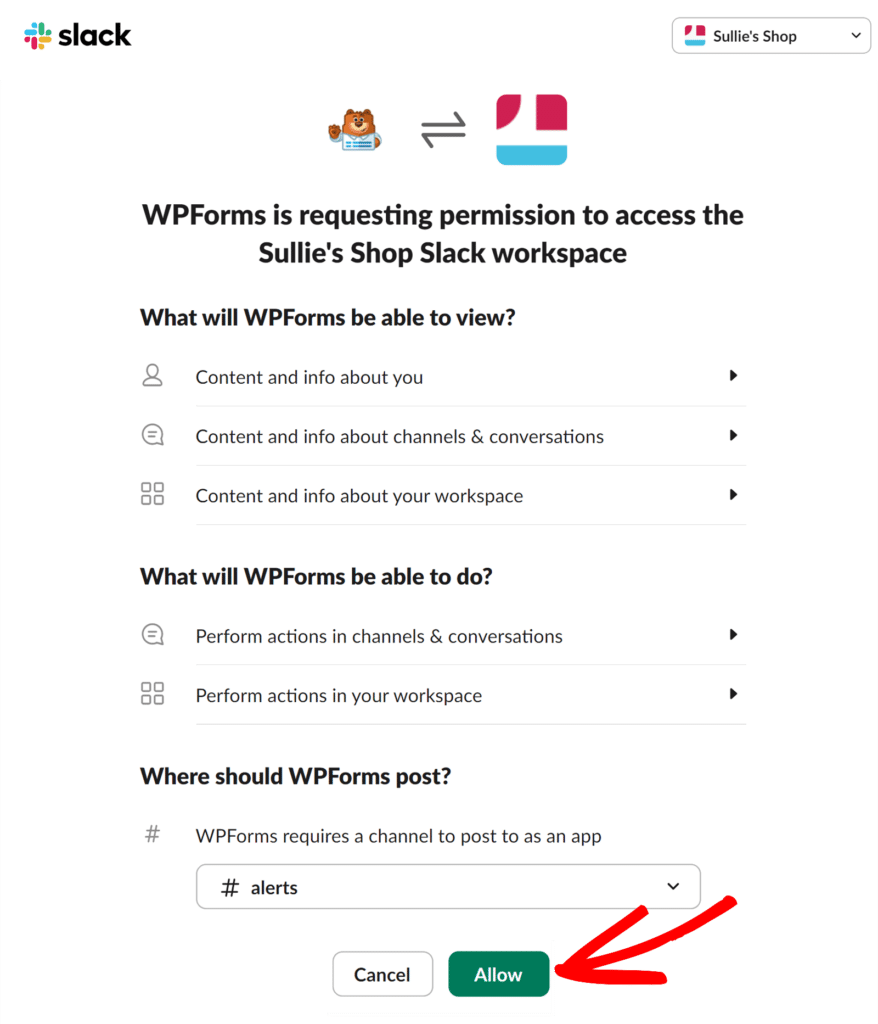
After signing in, you’ll see a screen asking for permission for WPForms to access your Slack workspace and send messages. These permissions are necessary for WPForms to send notifications and updates to your Slack channels.
On this screen, you’ll need to select a channel from the dropdown where WPForms can post messages. Choose a channel from the dropdown and click Allow to complete the integration.
Once you’ve granted permission, you’ll be redirected back to your WPForms Integrations page. You should now see that Slack is connected with a green Connected status.

Adding a Slack Integration to Your Forms
Once you’ve successfully connected your Slack account, you’re ready to link it to a form. To do this, you’ll first need to create a new form or edit an existing one to open the form builder.
In the form builder, go to Marketing » Slack. Then, click on the Add New Connection button.
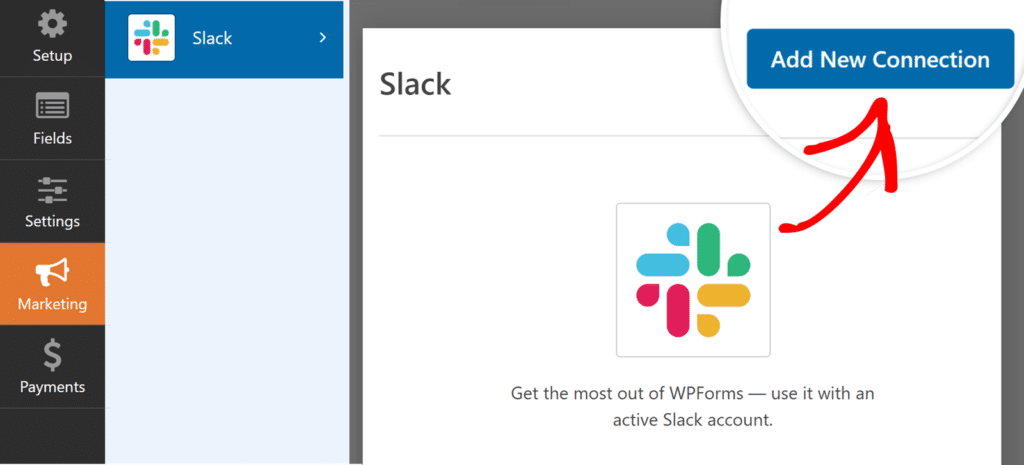
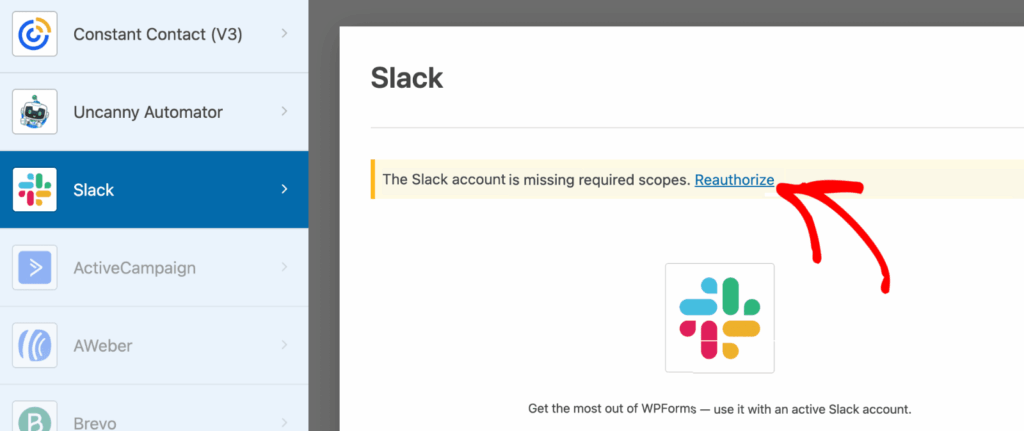
Note: After updating to Slack addon v1.1.0, you might see a reauthorize notice to enable private channel access. Check out our FAQ below for more details
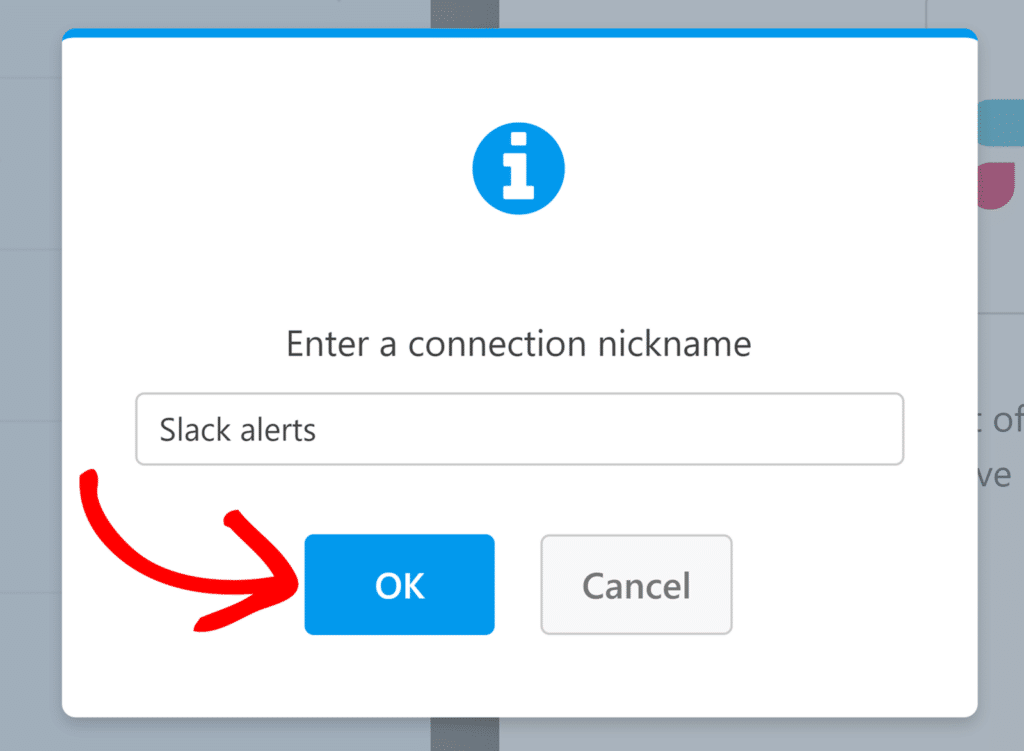
Clicking this button will open an overlay where you can provide a nickname for this connection. You can enter any nickname you’d like, as this is for internal reference only.
Go ahead and click OK once you’ve added a connection nickname.
After naming the connection, you’ll need to select an account and choose an action to perform when someone submits your form.
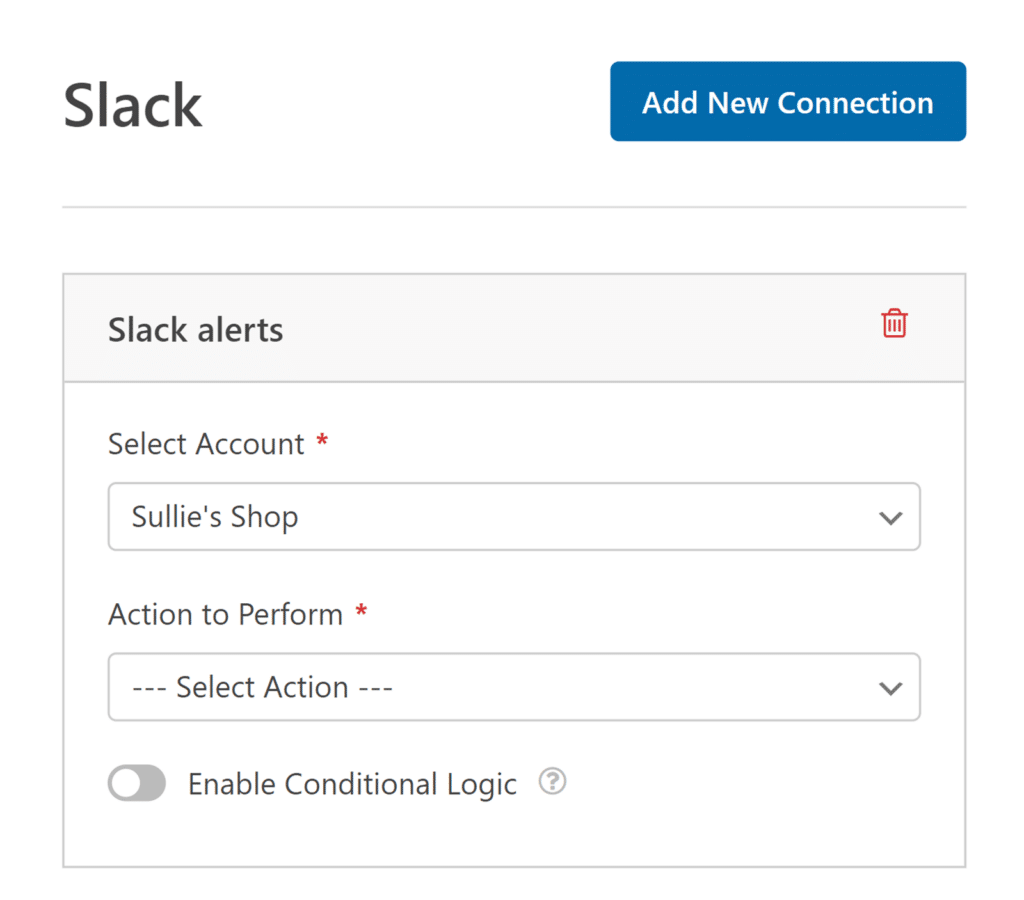
- Select Account: Choose from any of the Slack accounts you’ve connected.
- Action To Perform: Select the action you want to execute when a user fills out this form. The option selected here will also determine which additional settings are displayed.
We’ll cover each of the available actions, and their related options, in more detail below.
Send a Channel Message
This action allows you to send a message to one or more Slack channels when the form is submitted.
Once you’ve selected an action to perform, additional configuration settings will appear.
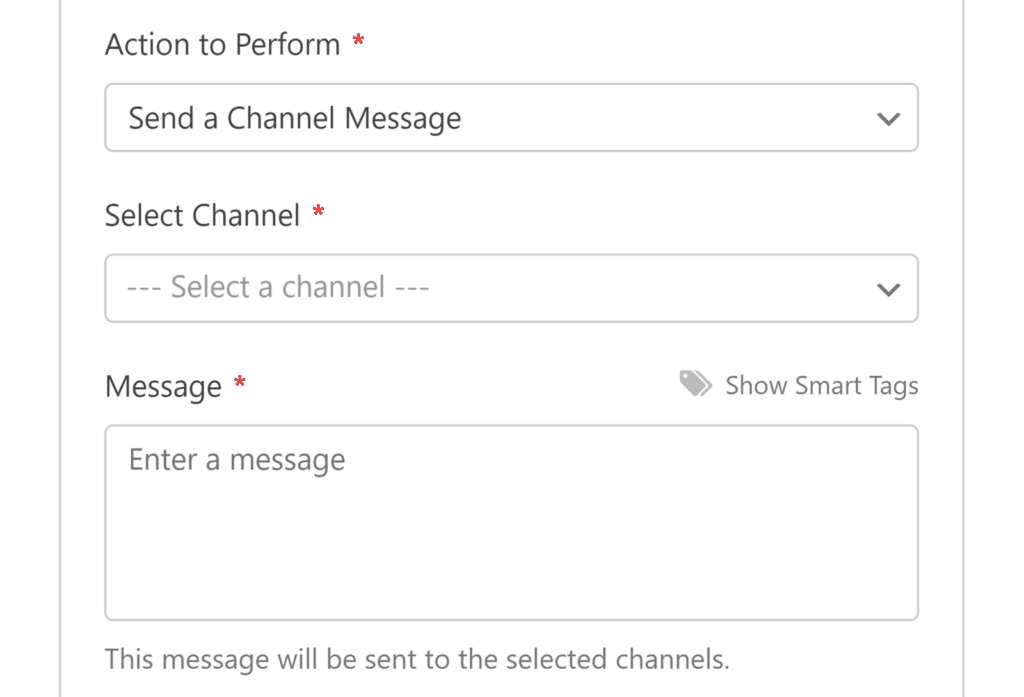
- Select Channel: Choose the Slack channel(s) where you want to send the message.
- Message: Enter the message you want to send. You can use Smart Tags to include form field data in your message.
Send a Direct Message
This action lets you send a direct message to one or more Slack users when the form is submitted.
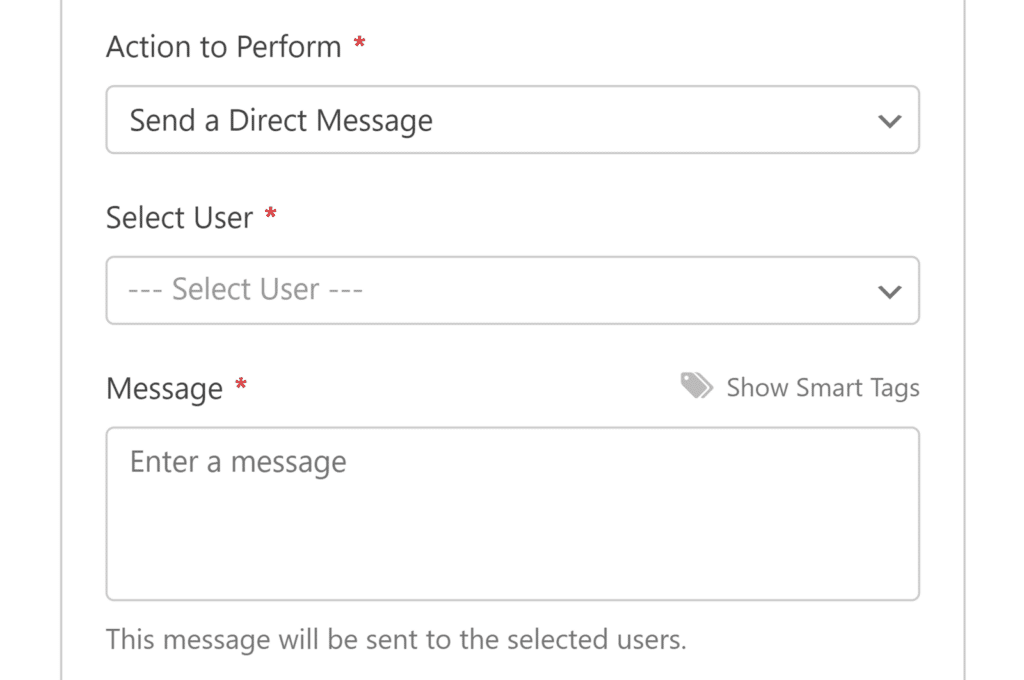
- Select User: Choose the Slack user(s) who should receive the direct message.
- Message: Enter the message you want to send. As with channel messages, you can use Smart Tags here.
Set a Reminder
This action lets you set reminders in Slack with custom messages when the form is submitted.
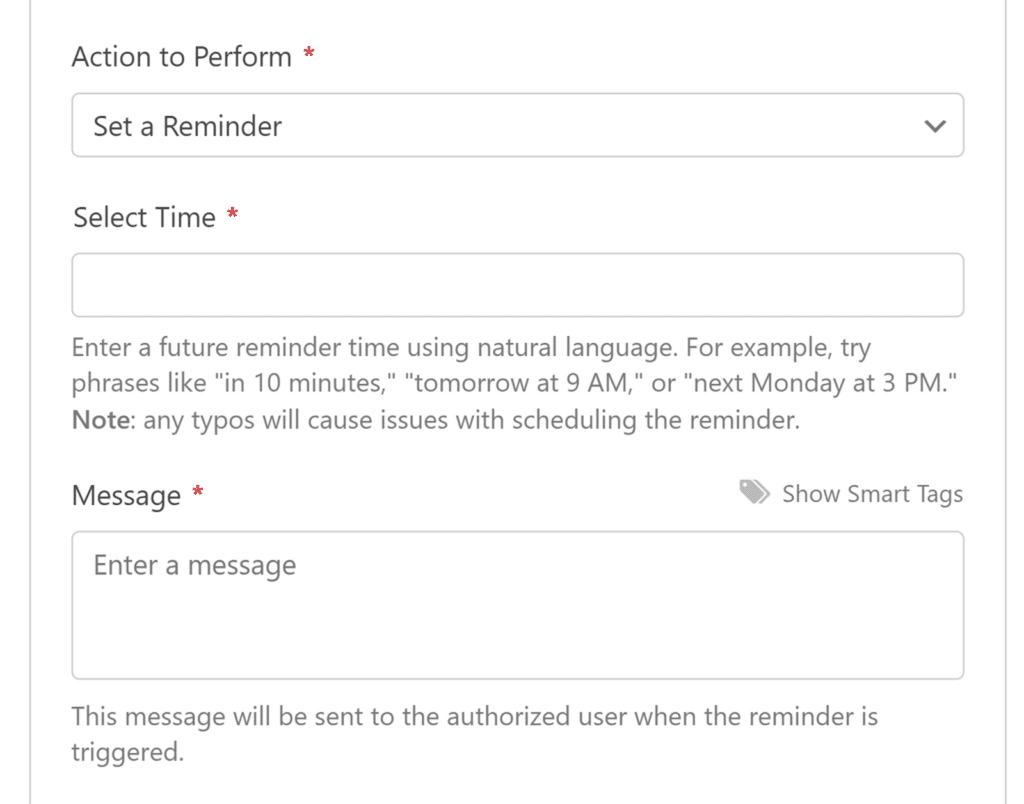
- Select Time: Enter when the reminder should be set using English natural language expressions, such as “in 10 minutes,” “tomorrow at 9 AM,” or “next Monday at 3 PM.” Note that only English phrases are supported for setting reminder times. Be sure to double-check the text you enter here, as any typos could prevent the reminder from being scheduled correctly.
- Message: Enter the message that will be sent when the reminder is triggered. Smart Tags can be used here as well.
Once you’ve configured all your settings, be sure to save your form.
Setting Up Conditional Logic (Optional)
Conditional logic allows you to choose whether or not an action is performed based on a user’s choices in your form.
As an example, we’ll show you how you can use conditional logic to send a message to Slack if a user submits an entry to our contact form with a message that contains the word “Help.”
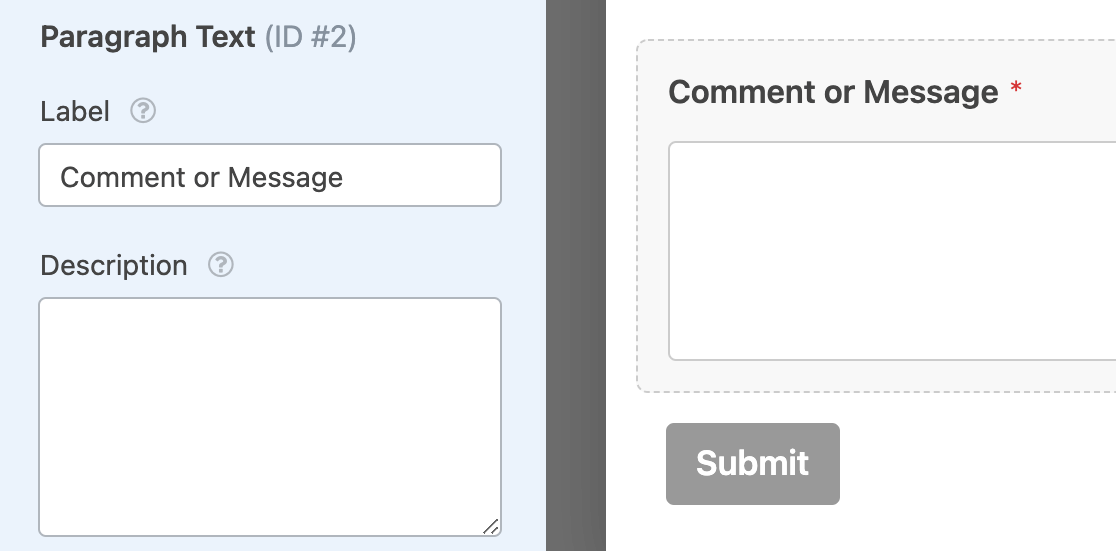
To set this up, you’ll need to make sure your form has either a Single Line Text or Paragraph Text field. For our example, we’ll add a Paragraph Text field.
Then you’ll need to adjust the label for the message input field. For our example, we’ll add the label Comment or Message.
Next, you’ll need to set up your conditional logic. At the bottom of your Slack settings, toggle on the option labeled Enable Conditional Logic to reveal the dropdowns to create your rule.
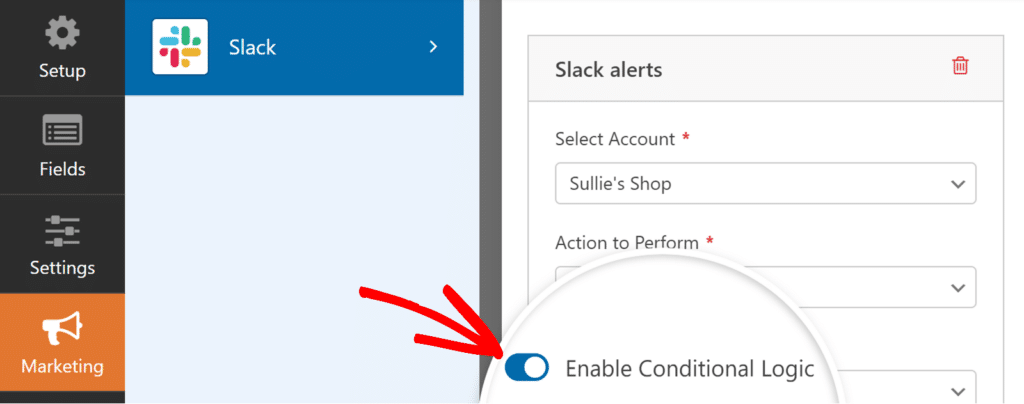
Then add the rule for your conditional logic. For our example, we’ll set the dropdowns to read, Process this connection if Comment or Message contains help.

Finally, be sure to save your form to apply the conditional logic.
Frequently Asked Questions
These are some of the most common questions we receive about using the Slack addon.
Why am I seeing a reauthorize notice after updating Slack addon to v1.1.0?
WPForms Slack addon v1.1.0 adds support for sending messages to private channels. To use this, you need to reauthorize your Slack connection. To do so, click Reauthorize from the form builder. Then, select a channel (public or private) and click Allow to update your connection.
Can I format my Slack messages?
Yes, you can use Slack’s built-in formatting in your messages. This includes options for bold text, italic text, inline code blocks, and block quotes.
For a complete list of formatting options and how to use them, refer to Slack’s text formatting guide.
Can I send messages to multiple channels or users?
Yes, when using the Send a Channel Message action, you can select multiple channels to receive the message.
Similarly, with the Send a Direct Message action, you can choose multiple users to receive the direct message.
What language should I use for setting reminders?
When using the Set a Reminder action, the Select Time input field only accepts English for natural language processing. For example, you should use English phrases like “in 2 hours,” “on Friday at 9 AM,” or “next week at 2 PM” when setting your reminder time.
That’s it! Now you know how to set up the Slack addon for WPForms.
Next, would you like to explore more ways to streamline your form notifications? Check out our guide on how to set up form notification emails for more details.
