AI Summary
Would you like to automatically send form data to your Pipedrive CRM? With the WPForms Pipedrive addon, you can seamlessly create or update contacts and deals in your Pipedrive account whenever someone submits a form on your WordPress site.
This tutorial will show you how to install and use the Pipedrive addon with WPForms.
Requirements:
- You will need an Elite license level or higher to access the Pipedrive addon
- Ensure that you’ve installed WPForms version 1.9.5 or higher to meet the minimum required version for the Pipedrive addon
Once the core WPForms plugin is in place and your license is verified, you’ll be able to quickly install and activate the Pipedrive addon.
Connecting Pipedrive to WPForms
Before you can use the Pipedrive addon, you’ll need to connect your WPForms account to Pipedrive.
To do this, go to WPForms » Settings in your WordPress admin area and click on the Integrations tab.

Then click on the Pipedrive option to expand its settings. From here, click the Add New Account button.

You’ll be redirected to the Pipedrive login page. Log in with your account credentials.
Once logged in, you’ll see a screen requesting permission for WPForms to access your Pipedrive data. Click Allow and Install to authorize the connection.

After granting permission, you’ll be redirected back to WPForms » Settings » Integrations, where you should see the green Connected status along with your connection details.

Adding a Pipedrive Integration to Your Forms
After connecting your site to Pipedrive, you’re ready to link it to a specific form.
To do this, create a new form or edit an existing one to open the form builder. Then navigate to Marketing » Pipedrive and click on the Add New Connection button.

Next, an overlay will appear where you can enter a connection nickname. Feel free to use any nickname you’d like, as this won’t be visible to your users. Once you’ve added a nickname, click the OK button.

Once you’ve named the connection, you’ll need to complete the next two steps:
- Select Account: Choose the connected Pipedrive account from the dropdown.
- Action to Perform: Choose what you want to do with the form submission. There are two available actions, each with its own set of configuration options.

Choosing an Action to Perform
After selecting an account from the dropdown, you’ll need to choose the action that WPForms should perform when someone submits your form. The Pipedrive addon offers two options:
Create/Update Person
Selecting this action allows you to create a new contact in your Pipedrive account or update an existing one if the email already exists.
- Name: Map this to the form field that collects the user’s full name.
- Email: Select the form field that collects the user’s email address.
- Phone: Choose the form field where the user enters their phone number.
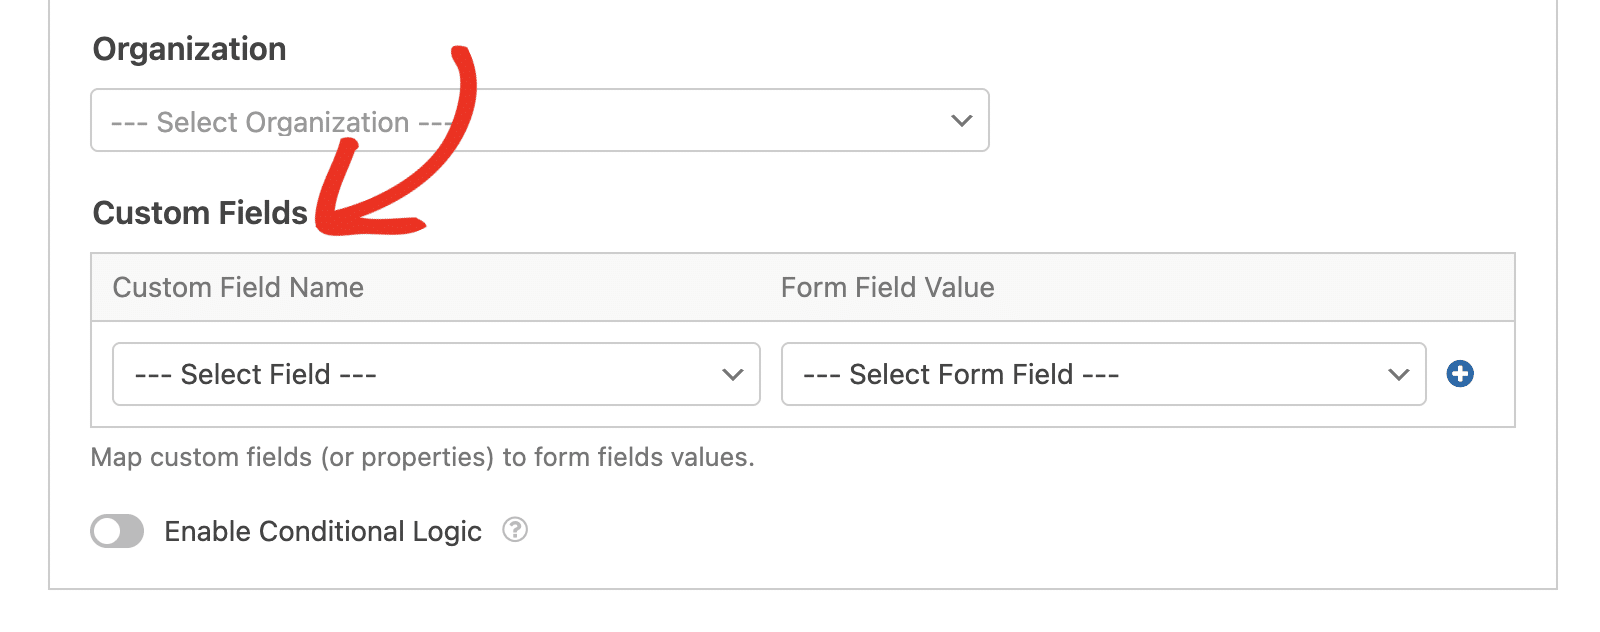
- Organization: Select the organization to associate with this person. Organizations must be created in your Pipedrive account.
- Custom Fields: You can map additional custom fields from your form to fields in your Pipedrive account.

Create Deal
This action lets you create a new deal in your Pipedrive account and associate it with a contact and organization.
- Deal Title: Enter the title for the new deal. You can also use Smart Tags to dynamically include form field data.
- Deal Value: Select a form field that collects the monetary value of the opportunity. This field will be used to define the value of the deal in Pipedrive.
- Pipeline: Select the Pipedrive Pipeline you want to assign this deal to. The available options are dynamically fetched from your Pipedrive account.
- Stage: Select the stage within the chosen Pipeline where the deal should be placed. The available stages update automatically based on the Pipeline selected above.
- Person Name: Select the field that captures the name of the person associated with the deal.
- Person Email: Choose the field that collects the associated email address.
- Person Phone: Select the form field that contains the person’s phone number.
- Person Organization: Link the deal to an existing organization in Pipedrive.
- Custom Fields: Map any additional custom information using the form’s fields.

Once you’ve configured your connection, click Save to apply the settings.
Setting Up Conditional Logic (Optional)
Conditional logic allows you to control when the Pipedrive integration runs based on users’ form selections. For example, you can set it up so that only users who choose to subscribe are added to your Pipedrive list.
To use conditional logic with the Pipedrive addon, turn on the Enable Conditional Logic option and create your conditional logic rule.

Finally, be sure to save any changes and test your form before displaying it on your site.
Frequently Asked Questions
Here are some common questions about using the Pipedrive addon with WPForms.
How do I use custom fields with Pipedrive?
Before you can use custom field mapping in the Pipedrive addon, you’ll first need to create the custom field from your Pipedrive account area. Here’s how to do it:
Once you’re logged in to Pipedrive, click the User icon at the top-right corner and select Company settings.
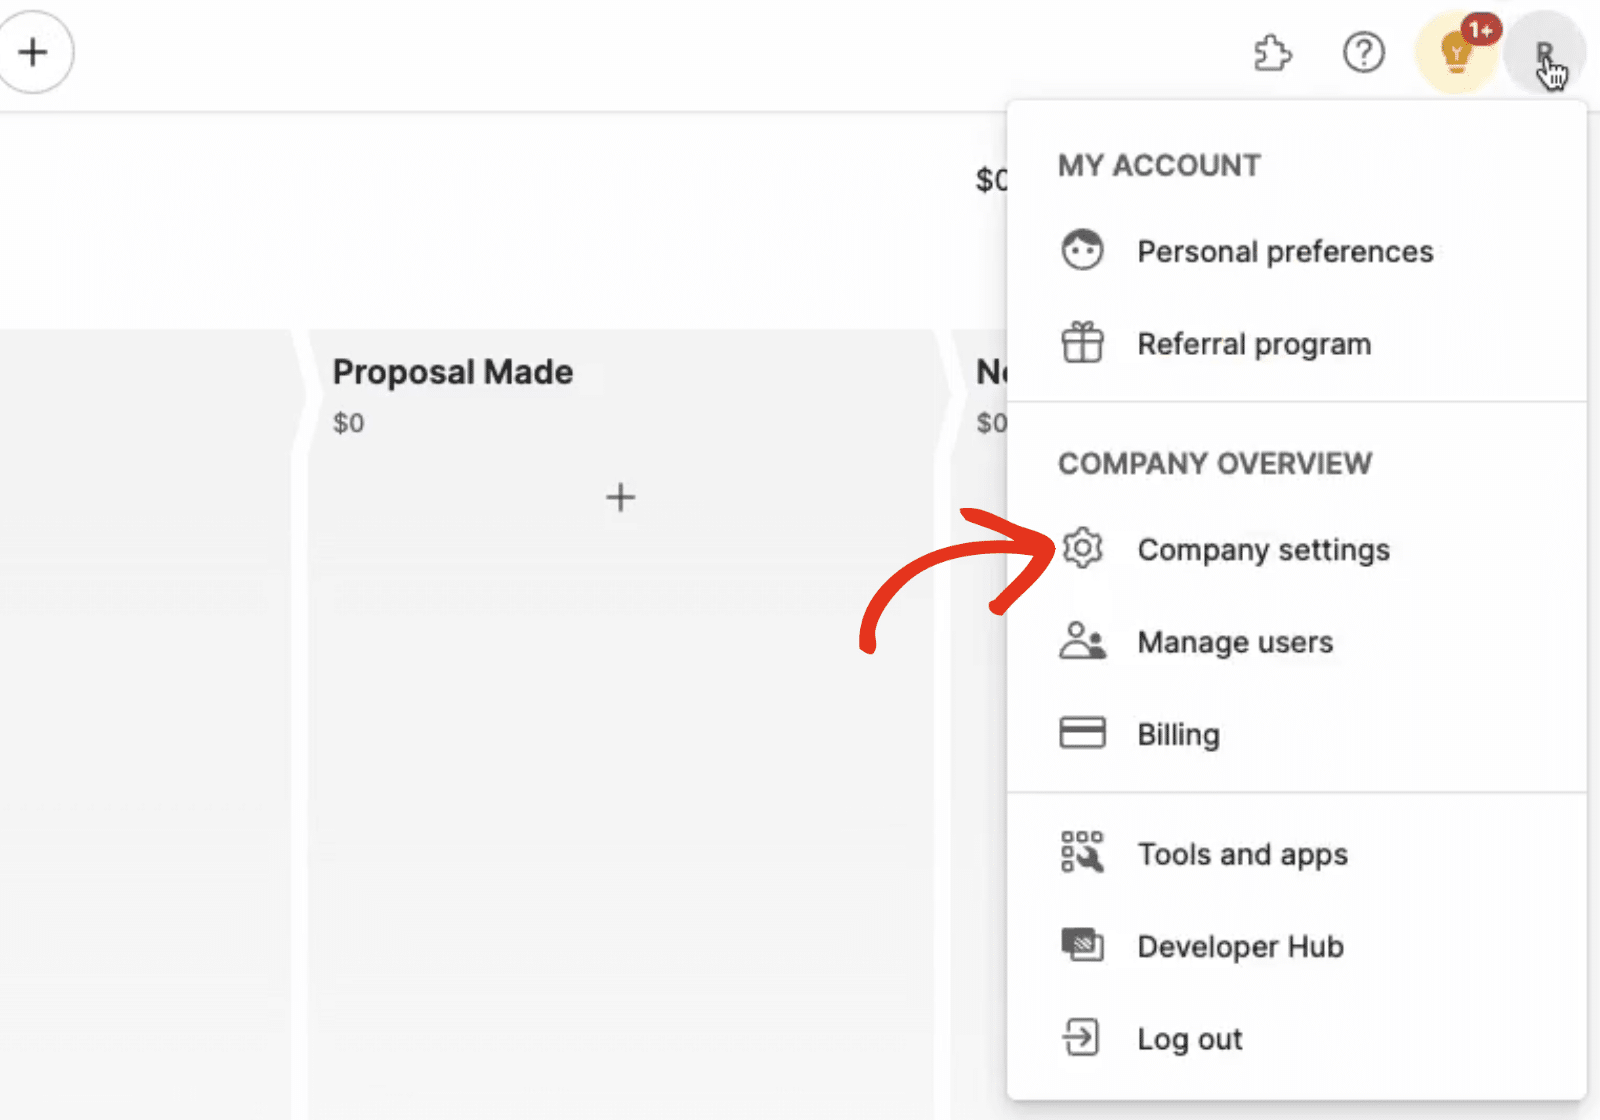
Under Company Overview, click the Data fields sidebar menu.
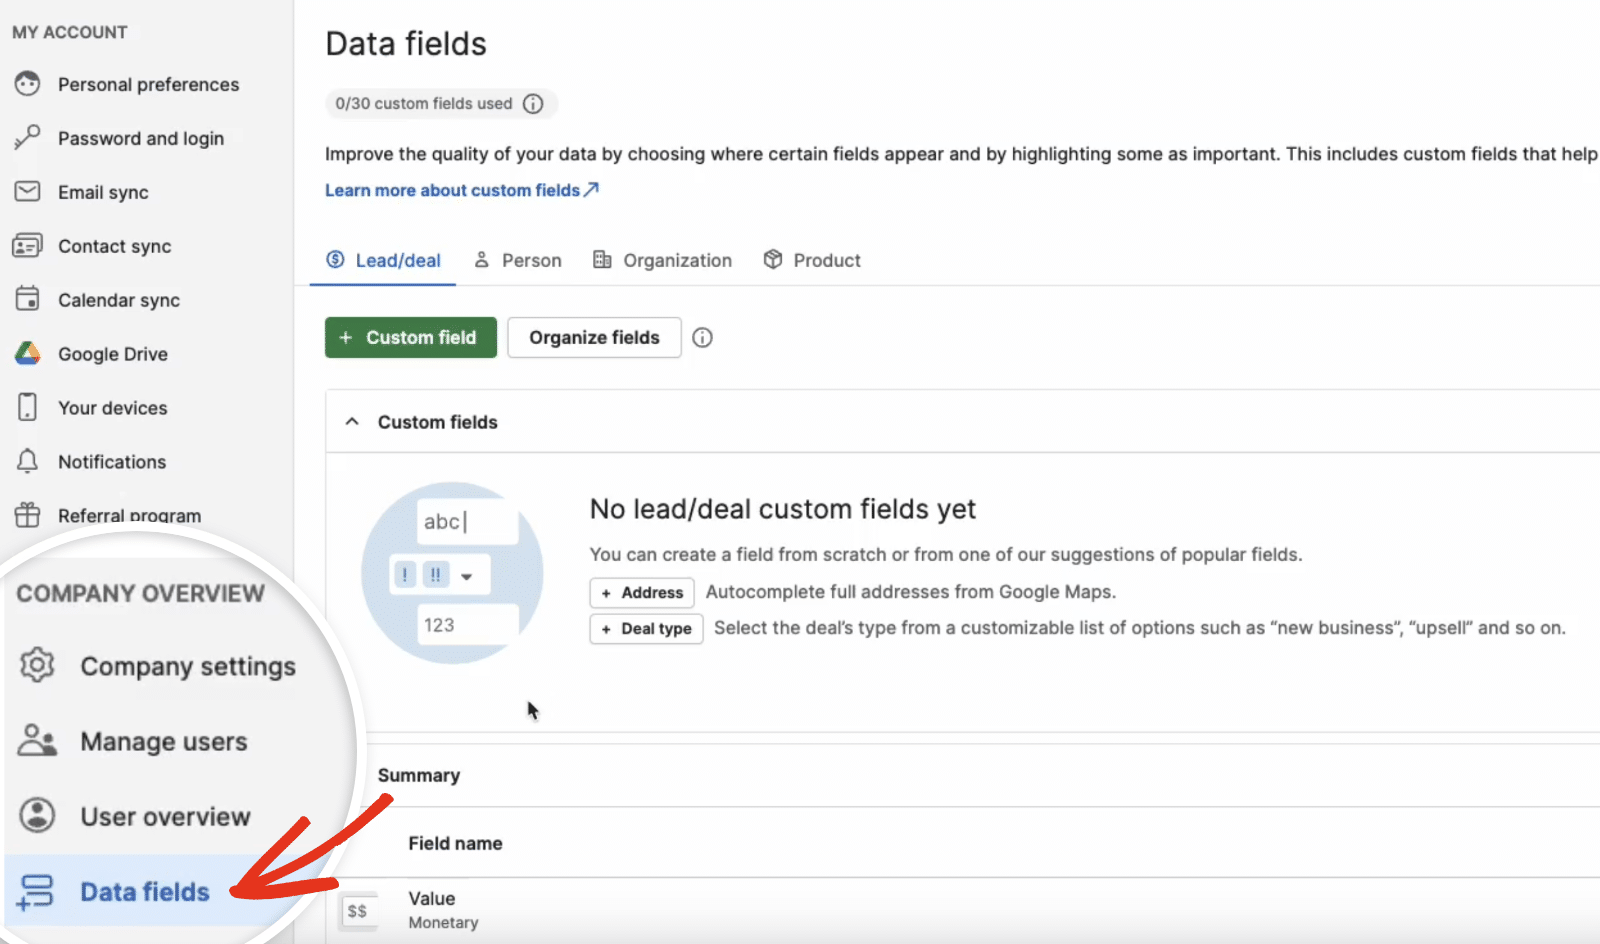
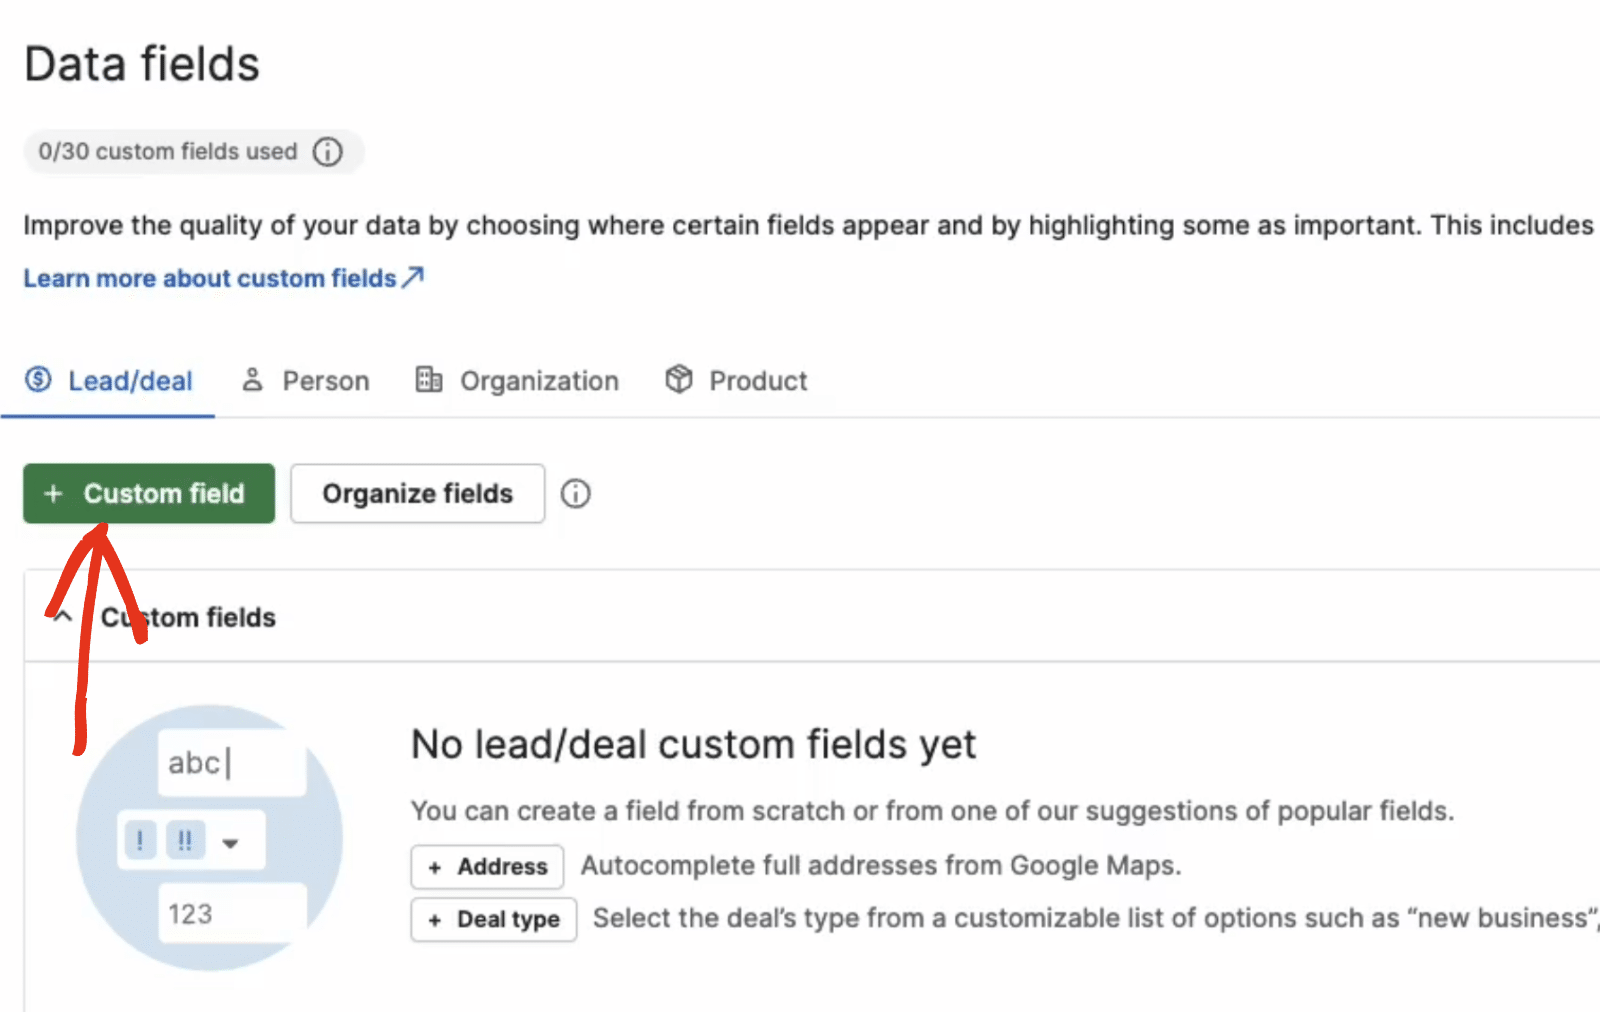
Then click on the + Custom field button to create a new custom field.
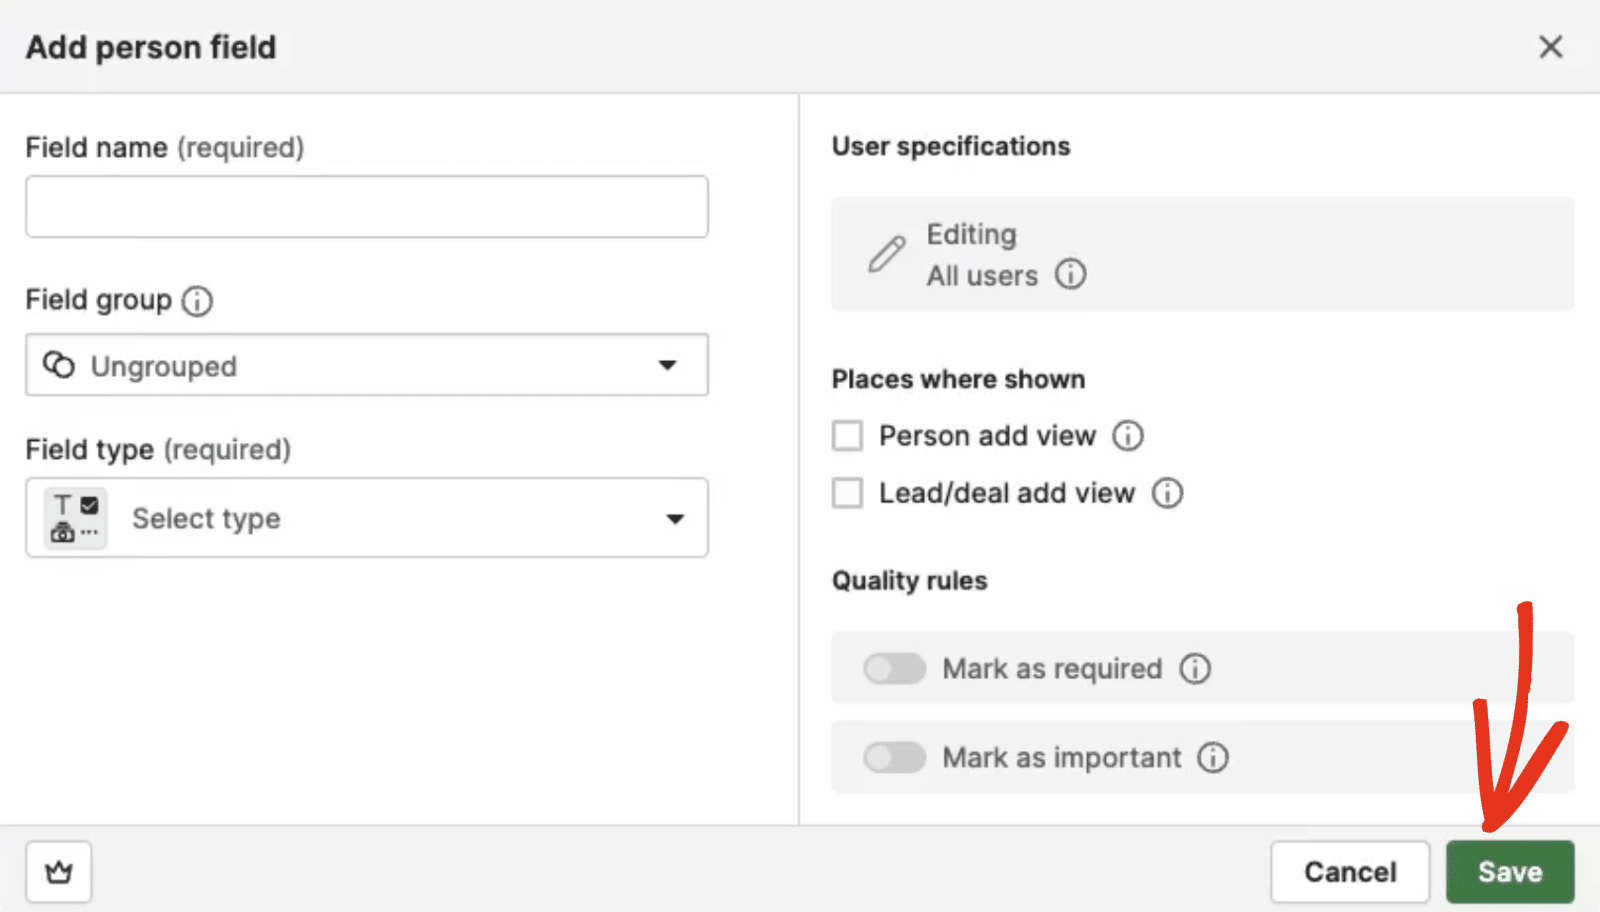
Note: If you create a custom field under the Lead/deal tab, it will only be visible when you select ‘Create Deal’ as the action to perform on WPForms’ Pipedrive settings page. You’ll need to create a separate custom field under the Person tab if you’d like to use it for the ‘Create/Update Person’ action in WPForms.
In the overlay that appears, go ahead and fill out the Field name field and select the type of field you’d like to create from the Field type field. Then click the Save button to create your custom field.
After creating the custom field, return to the form builder and refresh the page. The new field you created will appear under the Custom Fields section when adding Pipedrive integration to your form.
That’s it. Now you know how to install, connect, and use the Pipedrive addon with WPForms to streamline your lead management workflow.
Next, would you like to learn how to create a dedicated lead-capturing form? Check our tutorial to learn how to use the Lead Forms addon.