AI Summary
Would you like to provide more information to your users as they complete your WordPress forms? Users can get a better understanding of form requirements with additional instructions, making it more likely they will successfully complete your form.
This tutorial will show you different ways to add extra text and descriptions to your forms with WPForms.
Before you try out the options below, make sure WPForms is installed and activated on your WordPress site. Then create a new form or edit an existing one.
Adding a Form Name and Description
The name and description of a form allow users to get an overview of the form at a quick glance.
On the Setup page of the form builder, you can add or edit your form’s title in the Name Your Form field.

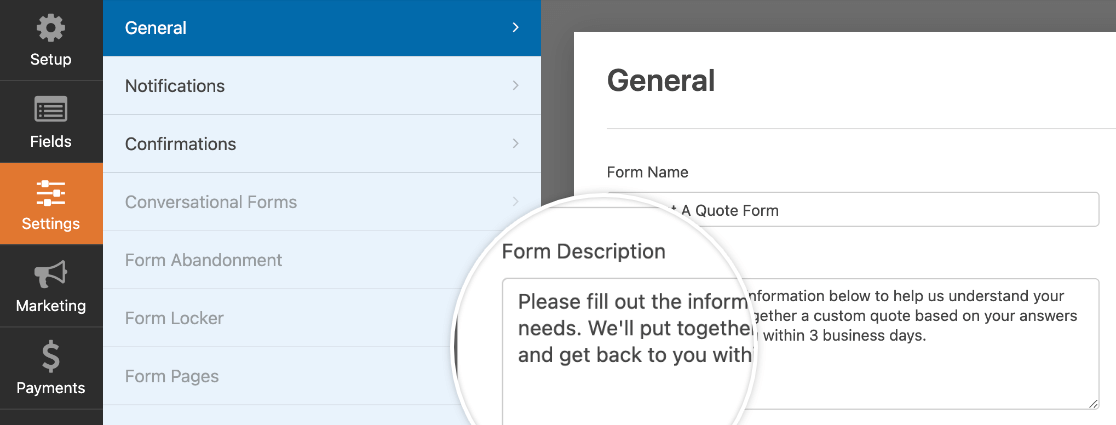
The form description allows you to provide more information to users. To add a description to your form, go to Settings » General and edit the Form Description field.
By default, the form name and description are not visible on the frontend when you publish your form. If you would like to show them to users, click on the three-dot icon in the WPForms block toolbar and select Show more settings.
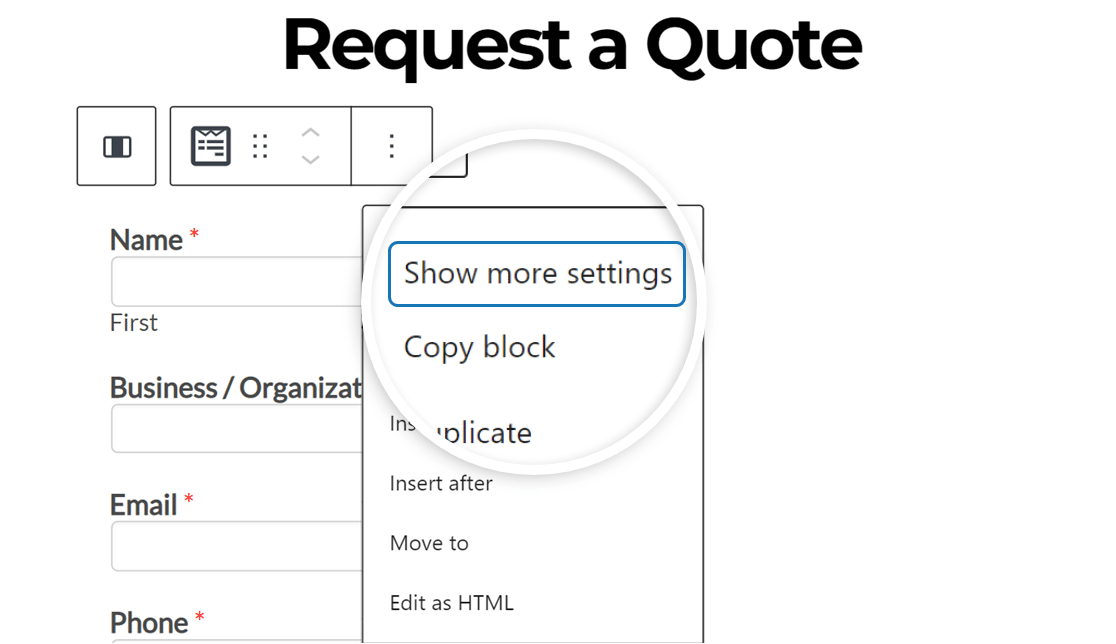
Note: If Display button labels is enabled, this button will be labeled “Options” instead. You can toggle this feature in Options » Preferences » General » Appearance in the WordPress block editor.
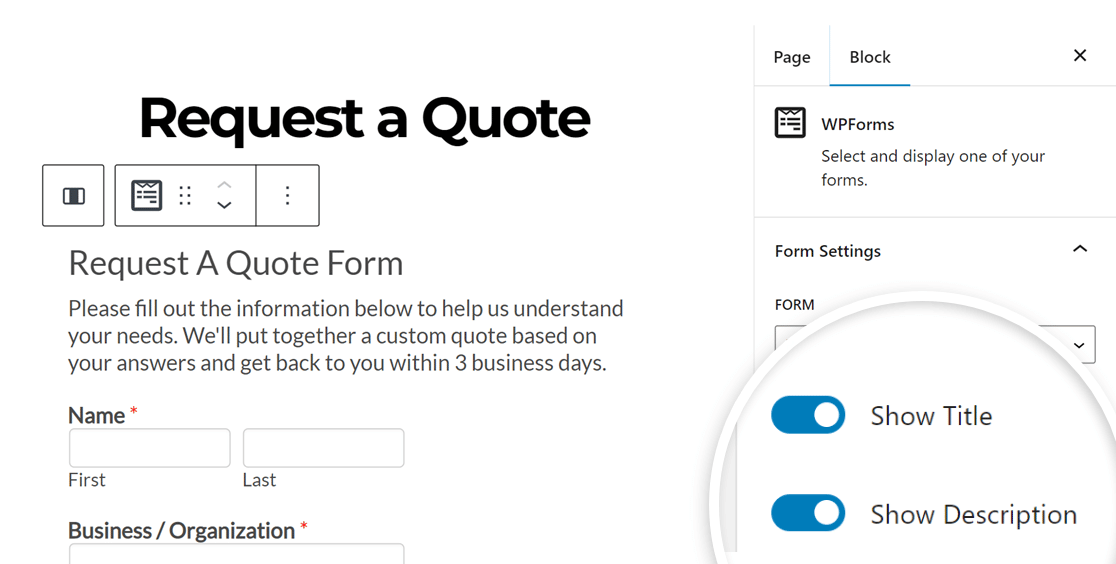
This will open the block options panel on the right side of the editor. Here, toggle on the Show Title and Show Description options.
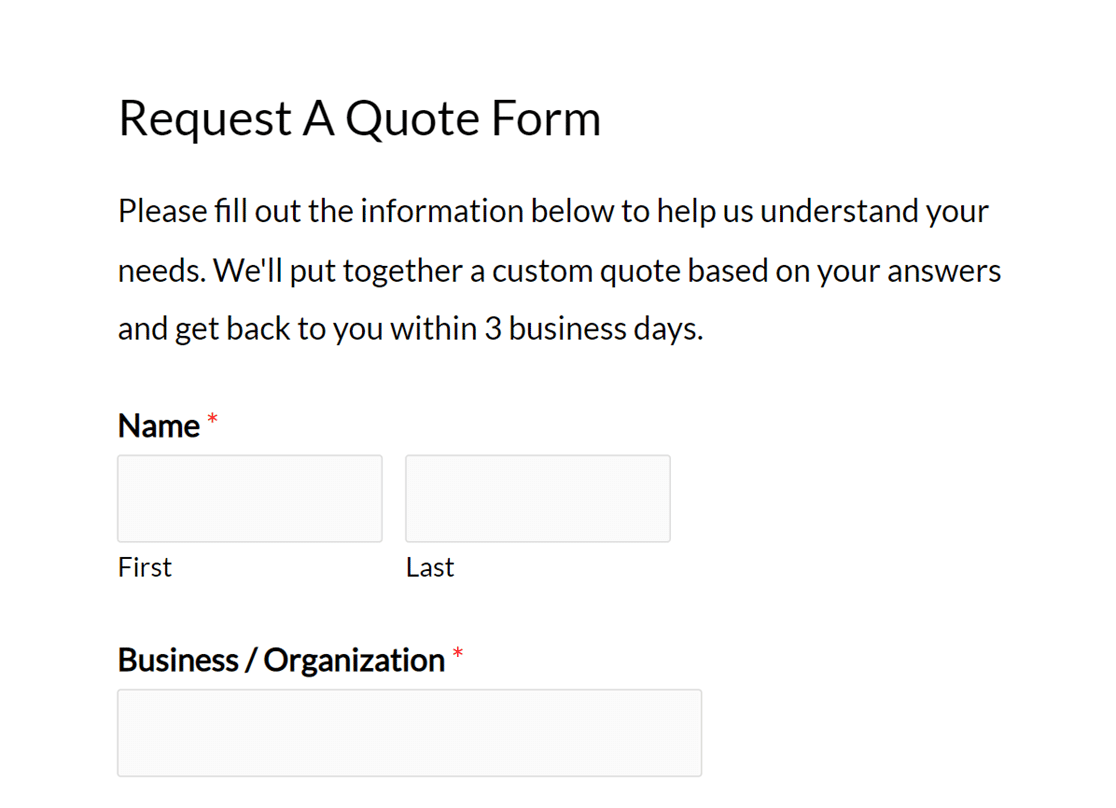
Then save or update the page. On the frontend of your site, here’s how the form name and description look:
Adding a Field Label, Description, and Placeholder Text
While your form’s name and description can give users an overview of your form, adding field labels, descriptions, or placeholder text (or a combination of these) allows you to provide specific information for an individual field.
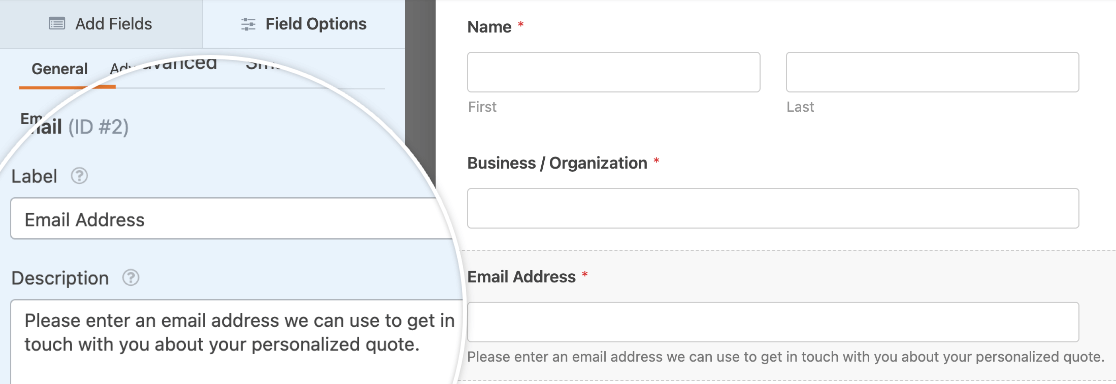
In the form builder, click on the field you’d like to add information to. This will open the Field Options panel, where you can edit the field’s Label and Description.
Note: Interested in adding images before or after your form labels in WPForms? For step-by-step instructions, refer to our developer documentation.
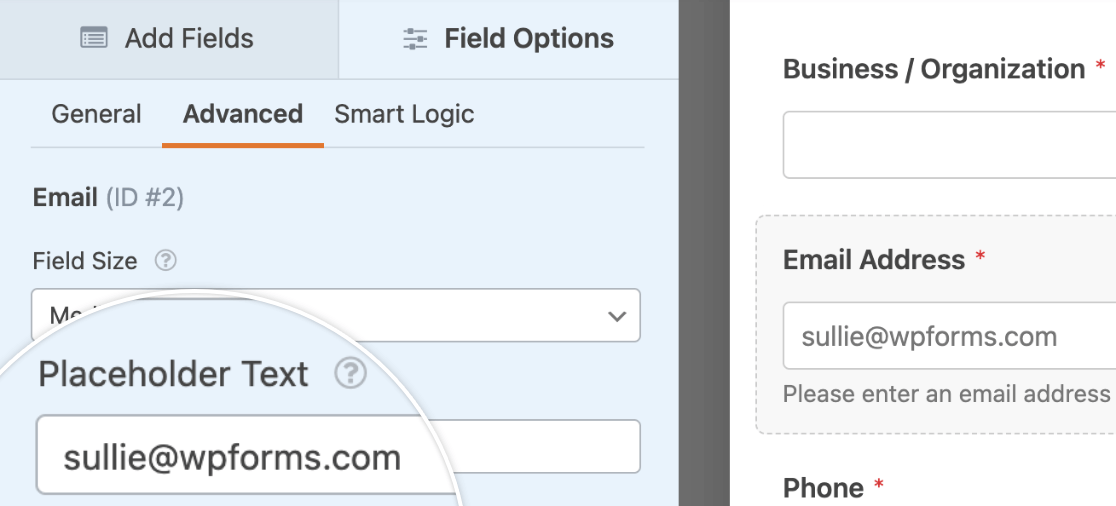
If you’d like, you can also add placeholder text to show users some example input. This text will be visible until a user starts typing their own input or makes a selection.
To add placeholder text to a field, click on it in the preview area to open its field options. From there, click on the Advanced tab and fill out the Placeholder Text field.
Note: Want to learn more about all the ways you can use placeholder text in your forms? Check out our tutorial on adding placeholder text to fields in WPForms.
Here’s how the email field looks on the frontend with a field label, description, and placeholder text:

Using an HTML Field
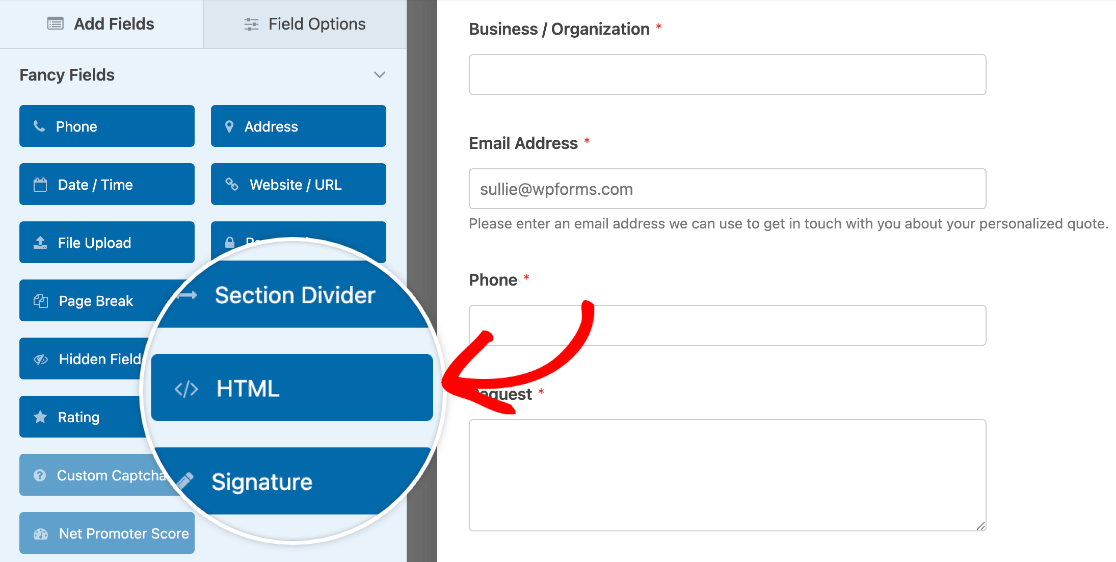
The HTML field in WPForms allows you to add standalone text or HTML code to your form. To add this field to your form, look under Fancy Fields and click on HTML or drag and drop it into the preview area.
Then, simply add the text you’d like to include in the Code field in the Field Options panel. If you’d like to, you can format the text with HTML.
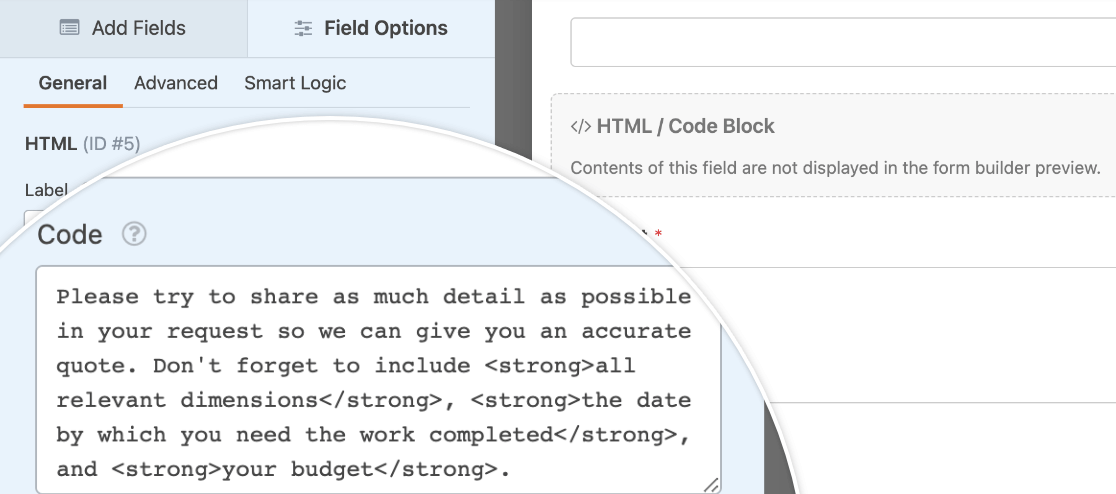
Here’s how the text in the HTML field looks when published in a form above a paragraph input field:
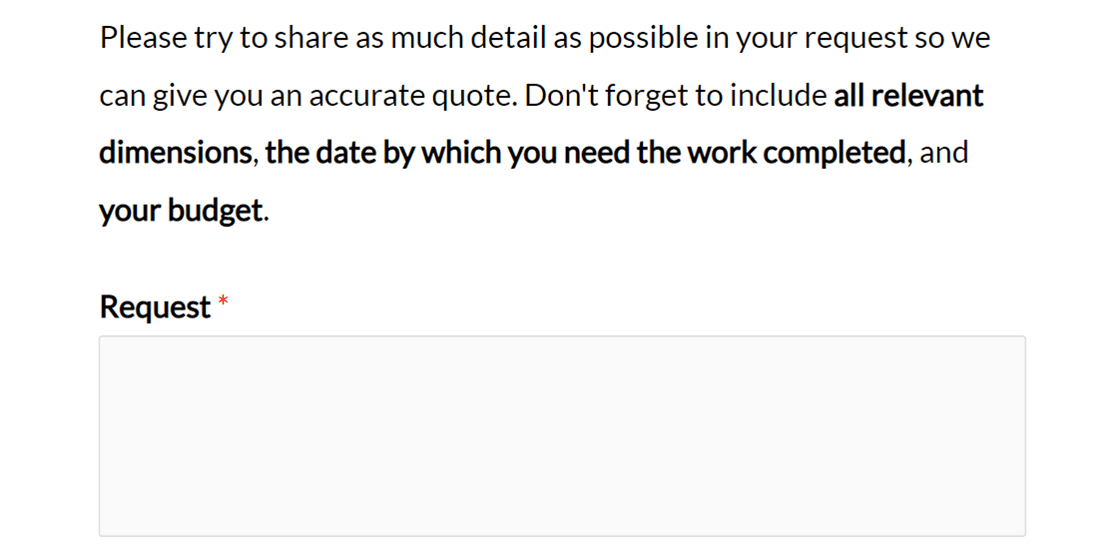
If you want to add a link in your form, you can use the HTML field for this as well. All you need to do is add the code for the link to the HTML field:

Here’s how a link will look in a published form:
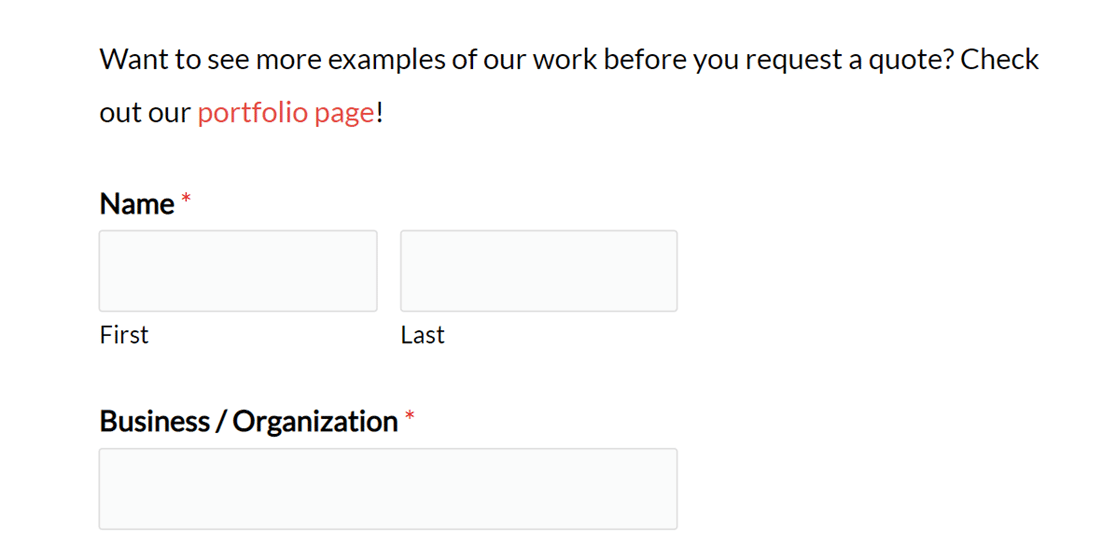
Note: If you’re unsure how to create an HTML link, be sure to check out Mozilla Developer Network’s guide to creating hyperlinks for more details.
To see all available options for the HTML field in WPForms, be sure to check out our tutorial on incorporating custom HTML fields.
Using the Content Field
The Content field in WPForms provides a simple and user-friendly way to add content such as headings, lists, paragraphs, and media to your forms. To add this field to your form, look under Fancy Fields and click on Content or drag and drop it into the preview area.
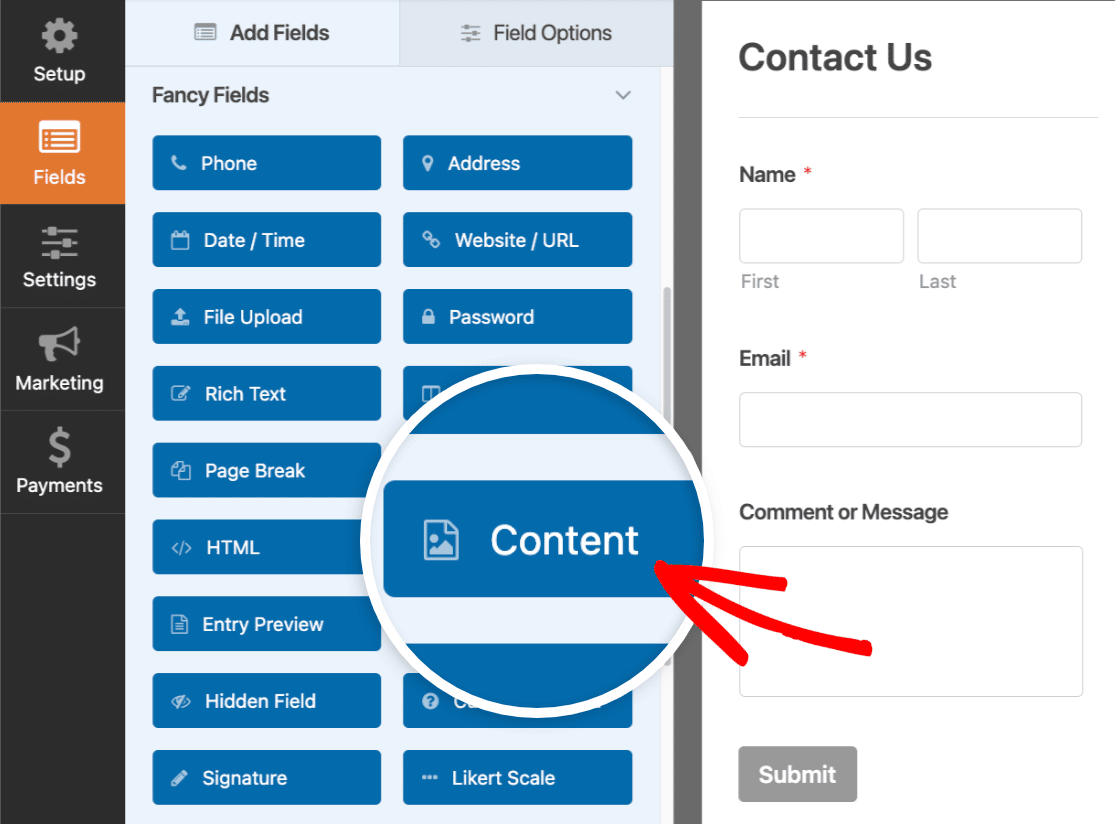
Then, simply add your content in the simple editor. The editor has 2 different modes that you can choose for adding content: visual and text.
Note: Be sure to check out our complete WPForms Content field guide for details on visual and text editors and how to add media with the Content field.
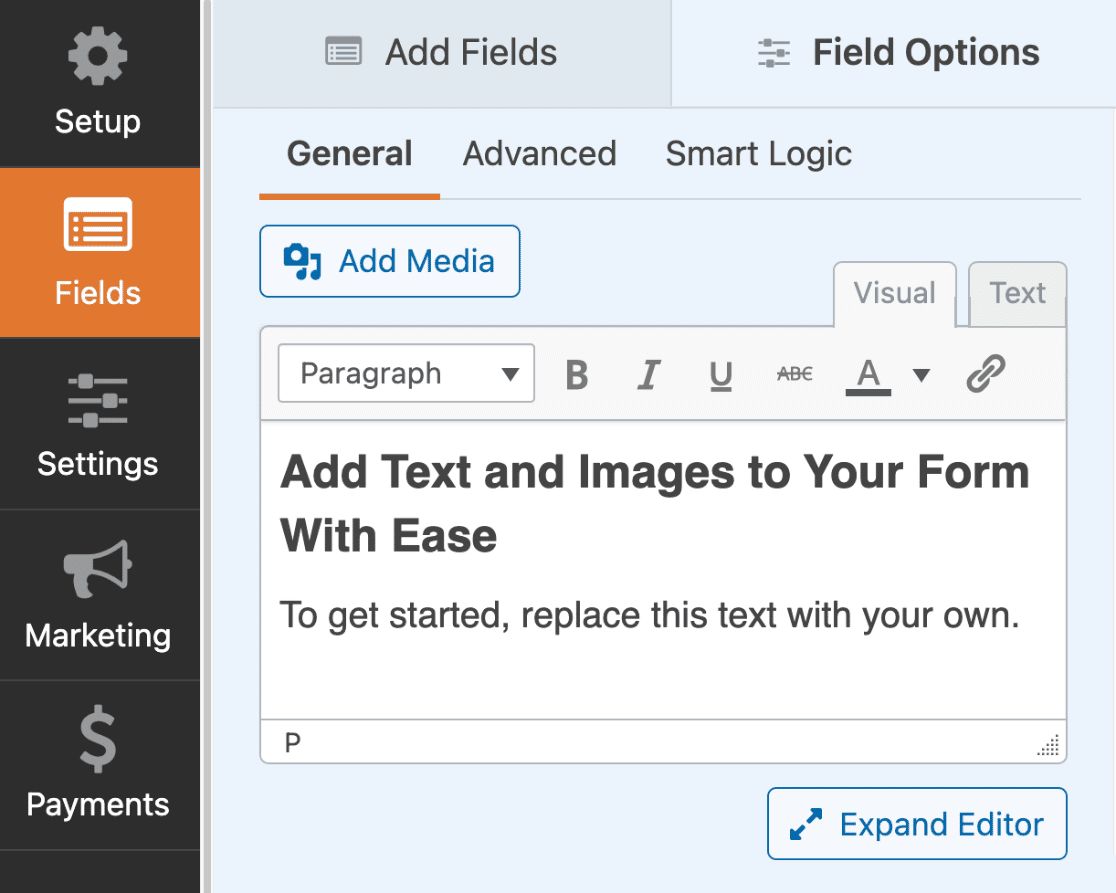
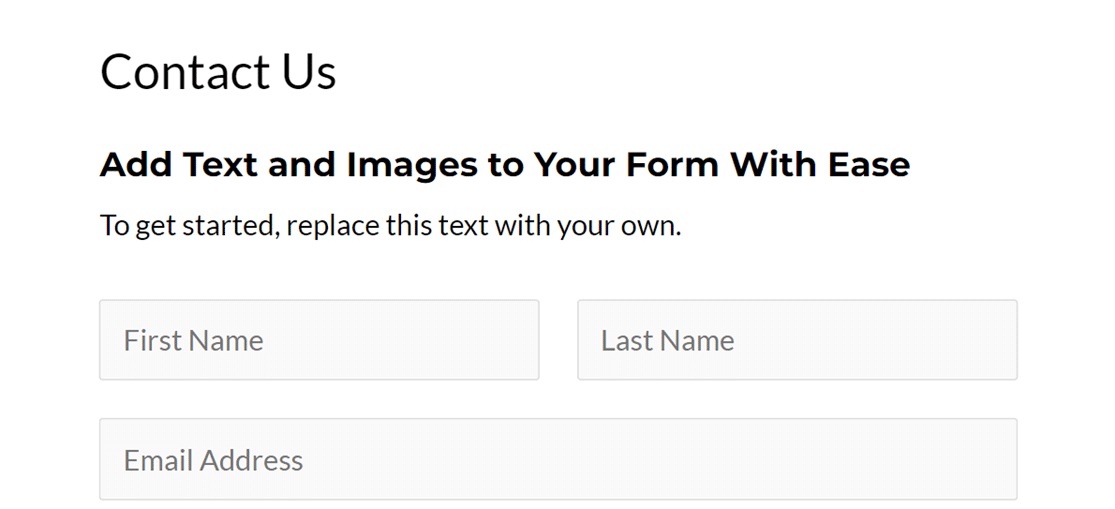
Here’s a preview of how your form looks on the frontend of your site.
Adding a Section Divider
If you have different parts to your form, you might like to add section titles and some descriptions to define each portion.
To do this, look under Fancy Fields in the form builder. Then click on the Section Divider field or drag and drop it into the preview area to add it to your form.
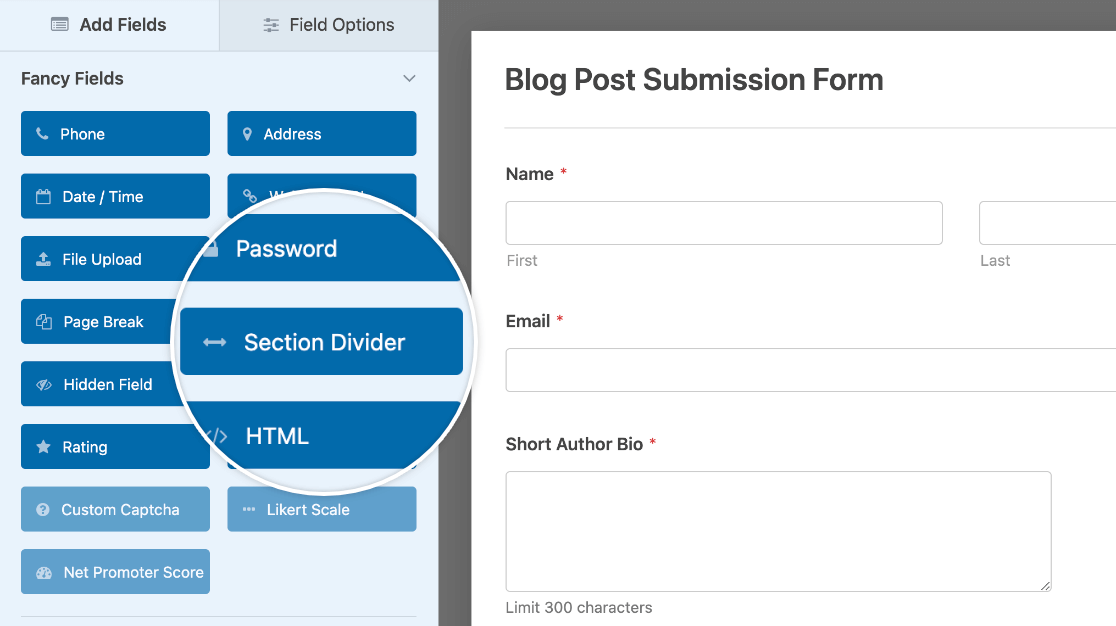
To change the title and description of the Section Divider, click on it in the form builder to open up its field options. From here, you can edit the Label and Description.

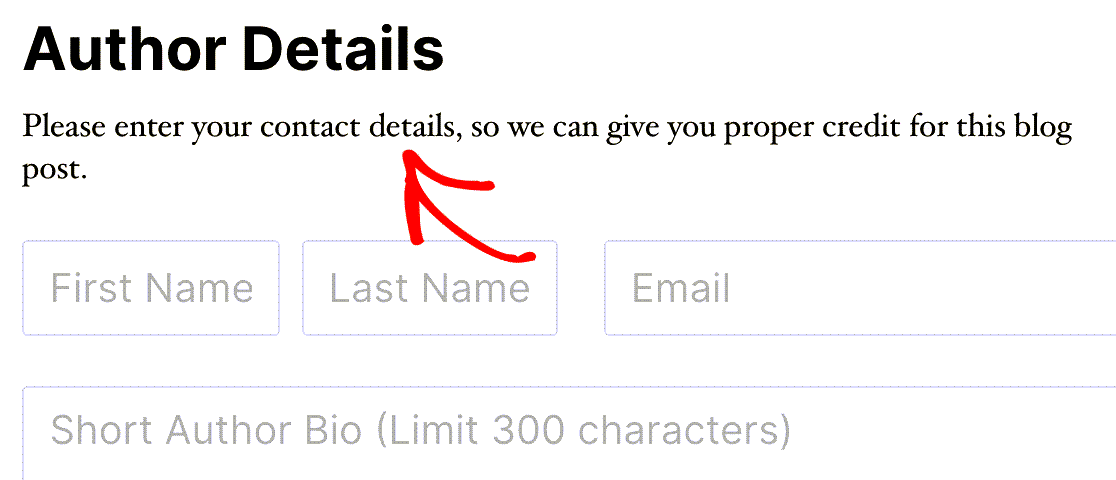
Here’s how the Section Divider field description looks on the frontend:
Adding a Form Page Title (for Multi-Page Forms)
A multi-page form is a great way to organize a large form. Adding a title to each page gives users more information about that part of the form.
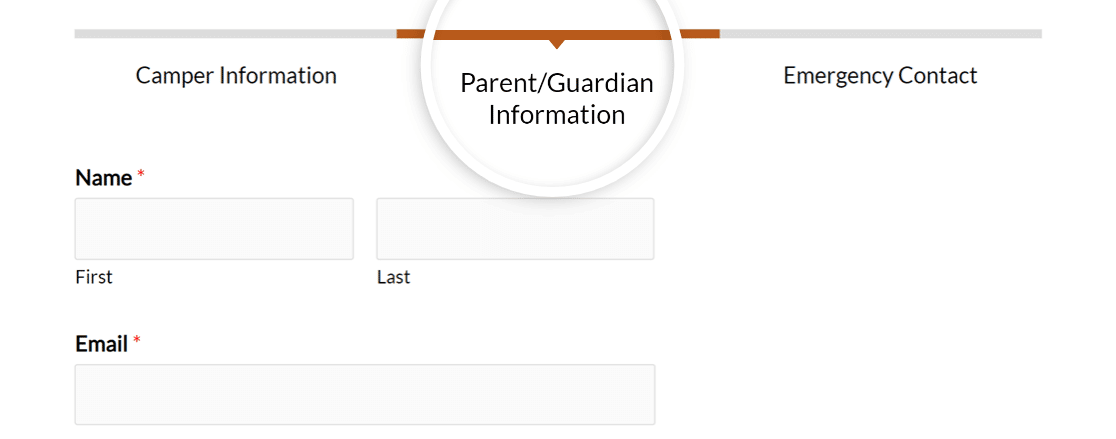
To add page titles, click on the Page Break field in the form builder preview to open up its options. From here, you can edit the Page Title.

Here’s how the page title looks on the frontend when the Connector progress indicator style is selected:
Note: Need more guidance setting up your multi-page form? See our full tutorial on multi-page forms for all the details.
Frequently Asked Questions
These are answers to some top questions about adding extra text and description to forms.
How can I display the form name and description in the Classic Editor?
If you’re using the Classic Editor, you can display the form title and description directly when inserting your form. In the form embed popup, just check the Show form name and Show form description options before clicking Add Form. This will automatically include them in the shortcode.
Or you can also use this shortcode to show your form’s name and description on the frontend:
[wpforms id="123" title="true" description="true"]
Be sure to replace 123 with your actual form ID.
That’s it! Now you know a variety of ways to add text to a form.
Next, would you like to use tooltips to show more information to users? Check out our guide to adding tooltips to your forms for step-by-step instructions.
