


KI-Zusammenfassung
Sie drucken 200 Flyer für Ihre Veranstaltung, verteilen sie in jedem Café und an jedem Tresen in der Stadt und warten dann. Manche Leute werden sich an die URL erinnern, aber die meisten nicht!
Das ist die Lücke, die ein QR-Code schließt, sodass die Person, die Ihren Flyer in der Hand hält, sich nichts merken oder eintippen muss. Sie scannen, Ihr Anmeldeformular öffnet sich und sie sind auf der Liste.
WPForms erstellt das Anmeldeformular und den QR-Code, der es öffnet, am selben Ort, sodass Sie nur ein Plugin und etwa zehn Minuten benötigen.
Erstellen Sie jetzt Ihr Veranstaltungsanmeldeformular! 🙂
Erstellen eines QR-Codes für ein Veranstaltungsregistrierungsformular
Dies in WPForms zu tun, hält den Code und das Element, das er öffnet, am selben Ort, sodass Sie keine Webadresse in einen separaten Generator einfügen und hoffen müssen, dass Sie die richtige kopiert haben.
- Schritt 1: Installieren Sie das WPForms Pro Plugin
- Schritt 2: Erstellen Sie Ihr Veranstaltungsanmeldeformular
- Schritt 3: Platzieren Sie Ihr Anmeldeformular auf einer Seite
- Schritt 4: Richten Sie einen QR-Code auf Ihre Anmeldeseite
- Schritt 5: Laden Sie den Code als SVG herunter und passen Sie seine Größe für den Druck an
- Schritt 6: Sammeln und exportieren Sie Ihre Anmeldungen
Schritt 1: Installieren Sie das WPForms Pro Plugin
WPForms ist ein Drag-and-Drop-Formular-Generator für WordPress mit mehr als 2.100 Vorlagen, darunter fertige für Veranstaltungen jeder Größe. Sie beginnen mit einer Vorlage und passen die Felder an Ihre Veranstaltung an.
Was mir bei Veranstaltungen am besten gefällt, ist, wie wenig zwischen einem leeren Formular und etwas liegt, das man ausdrucken kann. Die Vorlage erledigt die strukturelle Arbeit, und die QR-Einstellung wartet bereits in den eigenen Einstellungen des Formulars auf ein Ziel.
Nun zu den Lizenzen, da dieser Leitfaden einige verschiedene Stufen berührt.
- Lite (kostenlos): Das Registrierungsformular, Zahlungen und ein voll funktionsfähiger QR-Code mit dem WPForms-Logo in der Mitte.
- Basic: Speichert Ihre Registrierungen und bietet Ihnen zahlreiche Exportoptionen, falls dies eine Anforderung ist, zusammen mit Zugriff auf Marketing-Integrationen.
- Pro: Eine ablenkungsfreie Landingpage über Form Pages, Ihr eigenes Logo auf dem Code und Kartenzahlungen ohne zusätzliche WPForms-Gebühren.
- Elite: Authorize.Net, falls dies das von Ihnen verwendete Zahlungs-Gateway ist und Sie dieselbe Lizenz auf mehreren verschiedenen Websites verwenden möchten.
Ich verwende durchgehend Pro, da die Landingpage und die Zahlungsoptionen beide wichtig sind, wenn Sie eine echte Veranstaltung durchführen.
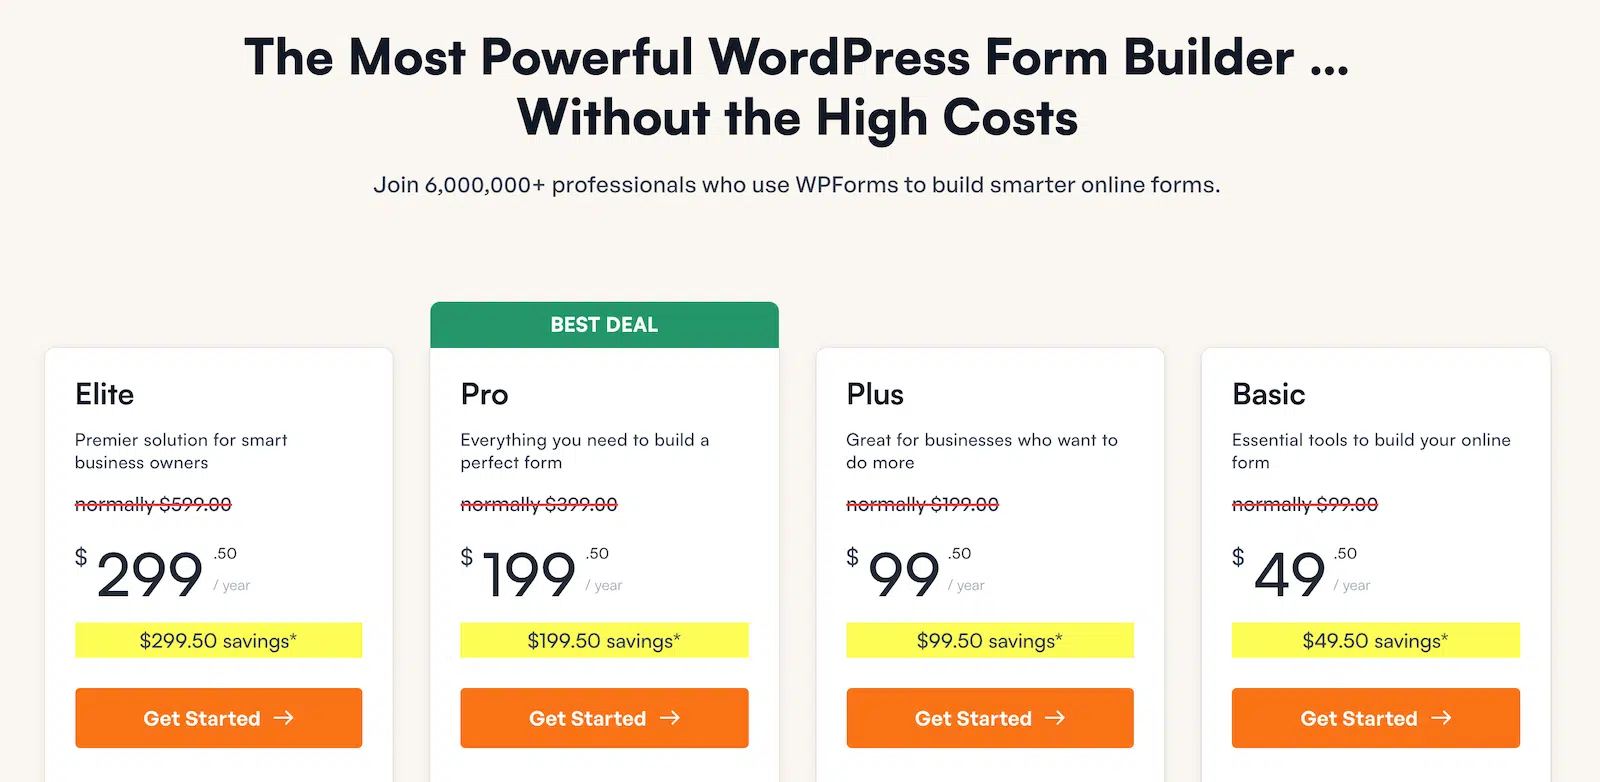
Kaufen Sie zunächst die Pro-Lizenz. Installieren Sie dann WPForms auf Ihrer Website. Wenn Sie Hilfe benötigen, folgen Sie dieser Anleitung, wie Sie ein Plugin zu WordPress hinzufügen.
Jetzt auf WPForms Pro upgraden! :)
Schritt 2: Erstellen Sie Ihr Veranstaltungsanmeldeformular
Die hier ausgewählten Felder sind diejenigen, mit denen Sie am Tag arbeiten werden. Öffnen Sie WPForms » Neu hinzufügen, um ein neues Formular zu erstellen.
Geben Sie im Suchfeld für Vorlagen event ein, und die Bibliothek wird auf die Event-Vorlagen beschränkt.

Fahren Sie mit der Maus über die Vorlage Online Event Registration Form und klicken Sie auf Vorlage verwenden, um sie im Generator zu öffnen.
Die Vorlage enthält bereits die Grundlagen, und von dort aus würde ich alles entfernen, was Sie nicht verwenden, und hinzufügen, was Sie verwenden werden.

Hier sehen Sie, was jedes Feld für Sie tut.
- Teilnehmerinformationen: Wie Sie Leute mit Teilnahmeinformationen und Last-Minute-Änderungen erreichen.
- Tickettyp: Eine Dropdown-Liste, die zu Ihrer Teilnehmerliste wird, sortiert nach dem, wofür sich die Leute angemeldet haben.
- Sitzungs-Kontrollkästchen: Sie sagen Ihnen, wie groß jeder Raum sein muss, bevor Sie ihn buchen.
- Anzahl der Gäste: Ein einfaches Zahlenfeld, das Ihre Catering-Zählung speist.
- Ernährungs- oder Barrierefreiheitsbedürfnisse: Ein offenes Textfeld, damit jemand eine Nussallergie oder einen Rollstuhlplatz angeben kann, an den Sie nicht gedacht haben zu fragen.
Klicken Sie auf das Feld Ticket Type auf der Leinwand, um dessen Einstellungen zu öffnen, und legen Sie dann Ihre Optionen in der Liste Choices fest.

Klicken Sie nun auf das Feld Email Address und aktivieren Sie Required, da eine Registrierung, die Sie nicht nachverfolgen können, Sie nicht weit bringt.

Bedingte Logik und das Feld Date/Time erfordern beide Basic oder höher, und sie werden wichtig, sobald Ihr Event über einen Tag hinausgeht.
Für einen langsameren Durchlauf durch das Formular selbst gibt es eine vollständige Anleitung zum Erstellen eines Event-Registrierungsformulars in WordPress, plus eine Gruppenregistrierungsformular-Version für die Anmeldung in Teams.
Klicken Sie oben rechts auf Save, sobald das Formular richtig aussieht.
Schritt 3: Platzieren Sie Ihr Anmeldeformular auf einer Seite
Ihr QR-Code öffnet eine Seite, und Formulare haben keine eigene Webadresse. Daher benötigt das Formular einen Ort zum Leben, bevor der Code jemanden irgendwohin senden kann.
Während das Formular noch geöffnet ist, klicken Sie im Builder-Header auf Embed.

WPForms fragt, ob Sie eine vorhandene Seite verwenden oder eine neue erstellen möchten. Wählen Sie also Create New Page.
Geben Sie der Seite einen Namen, den ein Besucher erkennen würde, z. B. Event Registration, und klicken Sie dann auf Create Page.

Veröffentlichen Sie die Seite und öffnen Sie sie dann so, wie es ein Besucher tun würde. Dies ist das, was jemand sieht, eine Sekunde nachdem er Ihren Code gescannt hat.

Wenn Sie lieber von der Seiten-Seite aus arbeiten möchten, können Sie Ihr Formular auch mit dem WPForms-Block auf einer Seite einbetten, und die Dokumentation behandelt alle Möglichkeiten, ein Formular anzuzeigen.
Wohin ein QR-Code-Scan führt, ist wichtiger, als es scheint, da jemand, der ein Poster scannt, mit genau einer Absicht ankommt.
Und eine normale Website-Seite übergibt ihm ein Navigationsmenü, einen Cookie-Hinweis und eine Fußzeile voller anderer Dinge zum Anklicken. Eine Seite, die nichts als das Formular enthält, hält diese Absicht auf die Anmeldung gerichtet.
Conversational Forms ist der andere Weg zu einer eigenständigen Adresse, und es ist auch mit Pro erhältlich. Es stellt eine Frage nach der anderen, anstatt das gesamte Formular auf einmal anzuzeigen.
Schritt 4: Richten Sie einen QR-Code auf Ihre Anmeldeseite
Mit einer veröffentlichten Seite dauert die Erstellung des Codes selbst etwa dreißig Sekunden.
Gehen Sie im Formular-Builder zu Settings » General und scrollen Sie zum Ende des Panels. Direkt unter Submit Button Processing Text finden Sie ein Dropdown-Menü QR Code, das auf None eingestellt ist.

Dies ist die integrierte QR-Code-Einstellung von WPForms und funktioniert auf jeder Lizenzstufe. Sie haben zwei Möglichkeiten, sie zu verwenden.
Option A: Richten Sie ihn auf die Seite, auf der sich Ihr Formular befindet
Stellen Sie die Dropdown-Liste QR-Code auf Seite. Eine Dropdown-Liste Zielseite erscheint neben der Code-Vorschau. Wählen Sie Ihre Registrierungsseite aus dieser Liste aus. Beginnen Sie mit der Eingabe im Suchfeld, wenn die Liste lang ist.

Nur veröffentlichte Seiten erscheinen in dieser Liste. Veröffentlichen Sie die Seite also zuerst, wenn sie noch ein Entwurf ist. Und wenn Ihre Website überhaupt keine veröffentlichten Seiten hat, verschwindet die Option Seite aus der Dropdown-Liste QR-Code, sodass nur Keine und Benutzerdefinierte URL übrig bleiben.
Option B: Fügen Sie eine benutzerdefinierte Adresse ein
Stellen Sie stattdessen die Dropdown-Liste QR-Code auf Benutzerdefinierte URL. Ein Feld Ziel-URL erscheint, und Sie geben die vollständige Adresse dort ein.

Ich würde diese Option wählen, wann immer die Möglichkeit besteht, dass sich das Ziel später verschiebt.
Richten Sie den Code auf eine Adresse, die Ihnen gehört und die Sie selbst umleiten können, und Sie können Leute irgendwohin schicken, ohne etwas neu drucken zu müssen. Eine dedizierte Landingpage für ein Formular ist ein guter Kandidat.
Schritt 5: Laden Sie den Code als SVG herunter und passen Sie seine Größe für den Druck an
Das Format, das Sie beim Verlassen wählen, entscheidet, ob Ihr Code das Aufblasen auf ein Banner überlebt. Klicken Sie unter den Zieleinstellungen auf QR-Code generieren.

Ein Spinner läuft, während der Code erstellt wird, und dann erscheint Ihr fertiger Code in der Vorschau. Eine Schaltfläche Herunterladen ersetzt QR-Code generieren, sobald er fertig ist.
Auf einer Website, die HTTPS verwendet, erhalten Sie daneben eine Schaltfläche Kopieren, da Browser das Kopieren in die Zwischenablage nur auf sicheren Seiten zulassen.

Klicken Sie auf Herunterladen und wählen Sie Ihr Format, z. B. PNG oder SVG-Vektor. Im Allgemeinen ist PNG-Bild eine Standard-Bilddatei und die richtige Wahl für eine Website, eine E-Mail oder eine Folie.

Währenddessen ist SVG-Vektor die richtige Wahl für alles, was zum Drucken bestimmt ist, da es sich ohne Qualitätsverlust in jede Größe skalieren lässt und Ihre Datei als wpforms-qr-code gespeichert wird.
Wie groß muss der Code also sein? Die Regel, nach der ich arbeite, ist zehn zu eins, also sollte der gedruckte Code etwa ein Zehntel der Entfernung betragen, aus der die Leute ihn scannen werden.
| Wo er hingehört | Lesen von | Erstellen Sie den Code |
|---|---|---|
| Tischaufsteller, Flyer, Ausweis | Armlänge, 1 bis 2 Fuß | 1 bis 1,5 Zoll (2,5 bis 3,8 cm) |
| Check-in-Schild, A3-Poster | 3 bis 5 Fuß | 3 bis 4 Zoll (8 bis 10 cm) |
| Drei-Fuß-Banner, Wandtafel | 8 bis 10 Fuß | 8 bis 12 Zoll (20 bis 30 cm) |
| Messe-Hintergrund | Ungefähr 16 Fuß (5 m) | Ungefähr 20 Zoll (50 cm) |
Unabhängig von der Entfernung, gehen Sie nicht unter etwa 0,8 Zoll im Quadrat und lassen Sie einen klaren Rand um den Code, damit das Muster Raum zum Atmen hat.
Da der Download ein Vektor ist, deckt eine SVG jede Zeile dieser Tabelle ab. Die gleiche Datei, die sauber auf einem Tischaufsteller gedruckt wird, wird auch sauber auf einem zehn Zoll großen Banner gedruckt, ohne dass dazwischen etwas neu generiert werden muss.
Führen Sie einen Probedruck durch, bevor Sie sich zu einer vollständigen Druckauflage verpflichten. Scannen Sie ihn von dort, wo die Leute tatsächlich stehen werden, anstatt aus sechs Zoll Entfernung an Ihrem Schreibtisch, und überprüfen Sie, ob er die erwartete Registrierungsseite öffnet.
Unsere Dokumentation für QR-Codes behandelt die kleineren Details.
Schritt 6: Sammeln und exportieren Sie Ihre Anmeldungen
Ihr Code wird gedruckt und die Leute scannen ihn, sodass die Registrierungen nun irgendwo landen müssen, wo Sie damit arbeiten können. Gehen Sie zu WPForms » Einträge und wählen Sie Ihr Veranstaltungsformular aus. Jede Registrierung wird hier angezeigt, sobald sie eintrifft.

Klicken Sie in einer beliebigen Zeile auf Anzeigen, um diese Registrierung separat zu öffnen.

Sie erhalten den Tickettyp, die Sitzungsauswahl und alles, was die Person in das offene Feld eingegeben hat, wo dann Ernährungs- und Zugangshinweise erscheinen.
Wenn Sie die Liste auf Papier haben möchten, gehen Sie zu WPForms » Werkzeuge » Exportieren und wählen Sie Ihr Formular aus.

Wählen Sie ein Format und laden Sie es herunter. Da eine CSV-Datei in jeder Tabellenkalkulation geöffnet werden kann, können Sie nach Tickettyp sortieren und die Leute beim Eintreffen abhaken.
Die Speicherung von Einträgen beginnt bei Basic, und Lite speichert Einträge überhaupt nicht. Dies ist also der einzige Teil des Workflows, den die kostenlose Version nicht für Sie erledigen kann. Die Dokumentation behandelt alles, was Ihre Einträge tun können, sobald Sie eine kostenpflichtige Lizenz haben.
Die Abrechnung für Tickets funktioniert über dasselbe Formular, wobei Stripe Pro, Square Pro und PayPal Commerce alle mit Pro geliefert werden und keine WPForms-Gebühren zusätzlich zu Ihrem Zahlungsabwickler anfallen, während Authorize.Net ein Elite-Addon ist.
Es gibt eine vollständige Anleitung zur Verwaltung von Event-Ticketing in WordPress, wenn Sie Plätze verkaufen und nicht nur Namen sammeln. Und das ist alles. Ihr Code ist gedruckt und Ihre Registrierungen landen im Dashboard.
Beginnen Sie noch heute mit dem Sammeln von Event-Registrierungen! :)
FAQs zu QR-Codes für Veranstaltungsanmeldungen
Ein QR-Code für die Event-Registrierung wirft jedes Mal die gleichen Fragen auf, und hier sind die Antworten.
Kann ich kostenlos einen QR-Code für ein Veranstaltungsanmeldeformular erstellen?
Ja, das Formular und ein voll funktionsfähiger Code sind beide in WPForms Lite enthalten, wobei der Code in der Mitte das WPForms-Logo trägt. Das Austauschen gegen Ihr eigenes Logo erfordert Pro.
Der Haken ist die Speicherung, da Lite keine Einträge speichert und Sie Registrierungen sammeln würden, die Sie später nicht mehr lesen können. Basic ist die realistische Untergrenze, wenn Sie am Ende eine brauchbare Liste haben möchten.
Verlinkt der QR-Code direkt zu meinem Formular?
Es öffnet sich eine Seite oder eine Webadresse Ihrer Wahl, und Ihr Formular ist alles, was sich auf dieser Seite befindet.
Formulare erhalten nur über Formularseiten oder Konversationsformulare eine eigene Adresse. Wenn Sie eine davon verwenden, können Sie diese Adresse in das Feld Ziel-URL einfügen.
Wie groß muss ein QR-Code sein, damit die Leute ihn scannen können?
Etwa ein Zehntel der Entfernung, aus der er gescannt wird, mit etwa 0,8 Zoll im Quadrat als absolute Untergrenze. Ein Tischaufsteller, der aus Armlänge gelesen wird, benötigt etwa einen Zoll, während ein Banner, das aus zehn Fuß Entfernung gelesen wird, acht bis zwölf Zoll benötigt. Der Tabellenrückseite in Schritt 5 enthält die gängigen Größen.
Kann ich ändern, wohin der Code zeigt, nachdem ich ihn gedruckt habe?
Nein, das Ziel ist in dem Moment in das Muster eingebrannt, in dem Sie es generieren. Ein neues Ziel bedeutet einen neuen Code und einen Nachdruck von allem, worauf der alte Code erschien.
Der Ausweg besteht darin, Ihren Code auf eine Adresse zu richten, die Sie kontrollieren und später umleiten können. Codes selbst laufen nicht ab, und die Unterscheidung zwischen statisch und dynamisch hängt davon ab, wem die Umleitung in der Mitte gehört.
Kann jeder Teilnehmer seinen eigenen QR-Code für den Check-in erhalten?
Nicht mit dieser Einstellung. WPForms generiert einen gemeinsamen Code, der Ihr Registrierungsformular öffnet, und dieser wird auf Postern, Flyern und Tischaufstellern verwendet.
Persönliche Pässe, die an einer Tür gescannt werden, funktionieren anders. Der Code jedes Teilnehmers wird nach der Registrierung generiert und bei der Ankunft mit einer Liste abgeglichen, was die Aufgabe spezieller Check-in-Software ist.
Kann ich für Veranstaltungs-Tickets auf dem Anmeldeformular Gebühren erheben?
Ja, Stripe Pro, Square Pro und PayPal Commerce sind mit Pro enthalten und fügen keine WPForms-Gebühren zusätzlich zu Ihrem Zahlungsabwickler hinzu, während Authorize.Net ein Elite-Addon ist.
Lite kann auch Stripe und PayPal Core-Zahlungen abwickeln, obwohl WPForms auf dieser Ebene seine eigene Verarbeitungsgebühr erhebt. Es gibt eine Online-Registrierungsformular-Anleitung, die bezahlte Einträge von Anfang bis Ende abdeckt.
Als Nächstes: Gewinnen Sie mehr Leute für Ihre Veranstaltung
Jetzt, wo die Registrierungen eingehen, lohnt es sich zu lesen, wie Sie die Teilnehmerzahl für Ihre nächste Veranstaltung steigern können. Dies behandelt die Kanäle, die dazu neigen, die Plätze am schnellsten zu füllen.
Wenn Sie noch überlegen, wie Sie Registrierungen überhaupt durchführen sollen, haben wir auch Vergleich von Event-Registrierungs-Plugins, das darlegt, wo ein Formular-Builder im Vergleich zu einer vollständigen Event-Plattform steht.
Erstellen Sie noch heute Ihr Event-Registrierungsformular! :)
Bereit, Ihr Formular zu erstellen? Beginnen Sie noch heute mit dem einfachsten WordPress-Formularersteller-Plugin. WPForms Pro enthält viele kostenlose Vorlagen und bietet eine 14-tägige Geld-zurück-Garantie.
Wenn dieser Artikel Ihnen geholfen hat, folgen Sie uns bitte auf Facebook und X (Twitter) für weitere kostenlose WordPress-Tutorials und Anleitungen.





