AI Summary
Do you want to allow users to upload files on your site? The File Upload feature in WPForms allows you to easily collect files and media through your online forms.
This guide will show you how to use the File Upload field in WPForms.
- Creating a File Upload Form
- Allowing File Types for Upload
- Setting the Maximum File Size for Uploads
- Choosing Between the "Modern" vs. "Classic" Styles
- Uploading Multiple Files
- Including File Upload Links in Notifications
- Attaching Files to Form Notification Emails
- Storing Uploaded Files
- Restricting File Access
- Enabling Camera Capture
- Compressing Uploaded Files
- Frequently Asked Questions
Before getting started, you’ll need to make sure that WPForms is installed and activated on your WordPress site. Once you verify your license, either create a new form or edit an existing one.
Creating a File Upload Form
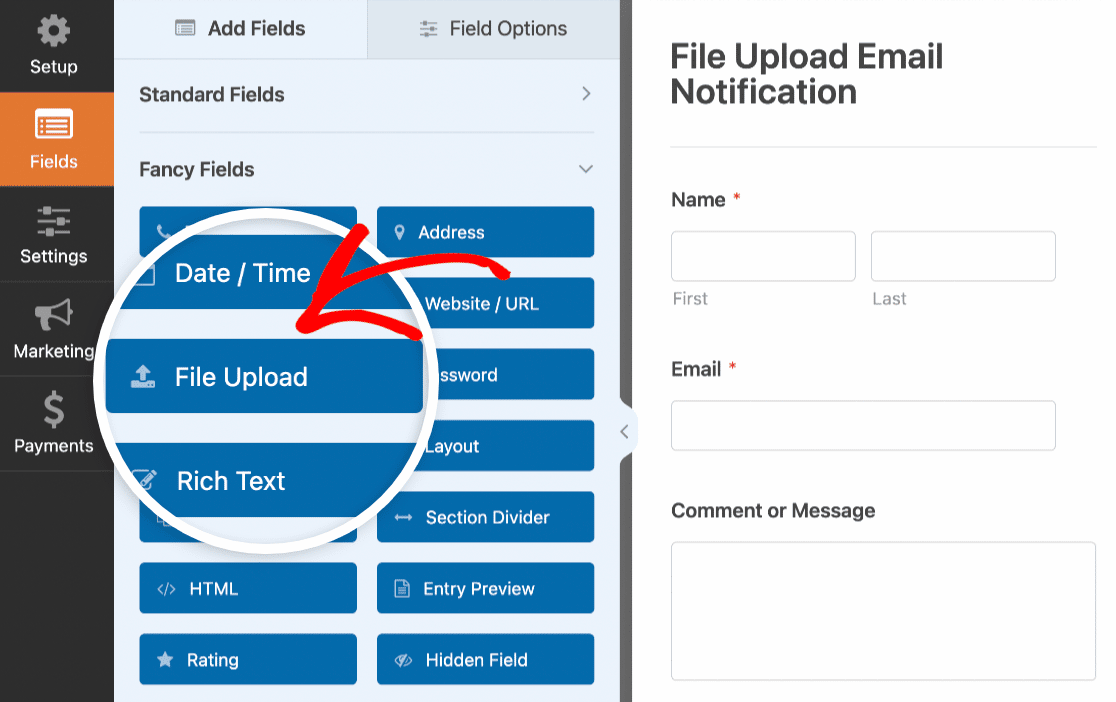
After you’ve opened the form builder, add a File Upload field to your form. You can add fields to your form by clicking on the field name on the left side of the form builder, or by dragging and dropping the field to your desired location in the preview area.
Allowing File Types for Upload
Security is a huge priority for us at WPForms. By default, we only allow uploads of safe file types (the same ones allowed by WordPress core). These are:
- Images like .png, .gif, .jpg
- Documents such as .doc, .xls, .ppt, .pdf
- Audio like .wav, .mp3, .mp4
- Video like .mpg, .mov, .wmv
Adding Allowed File Types
If you’d like your forms to support additional file types, be sure to check out our tutorial on how to allow users to upload additional file types.
Restricting File Types
To restrict which file extensions you’d like to allow for a specific form, click on the File Upload field in the form builder. Then, in the Field Options panel, you can specify the extensions you’d like to allow (separated by commas) in the Allowed File Extensions field.

This will prevent files with any other extensions from being uploaded to your forms.
Setting the Maximum File Size for Uploads
By default, the maximum file size for your forms will be capped at the limit set by your server. To find out the server-defined maximum for your forms, click on the File Upload field in the form builder.
Then, next to the Max File Size setting, hover over the question mark (?) icon to reveal the maximum file size your server can handle.

If you’d like to further limit the maximum file size for your forms, you can do so by specifying a number in the Max File Size field.

Note: If you’d like to increase the maximum upload size for your site, you’ll need to reach out to your hosting provider to find out if it’s possible. For more details, you can check out WPBeginner’s tutorial on increasing the maximum file upload size in WordPress.
Choosing Between the “Modern” vs. “Classic” Styles
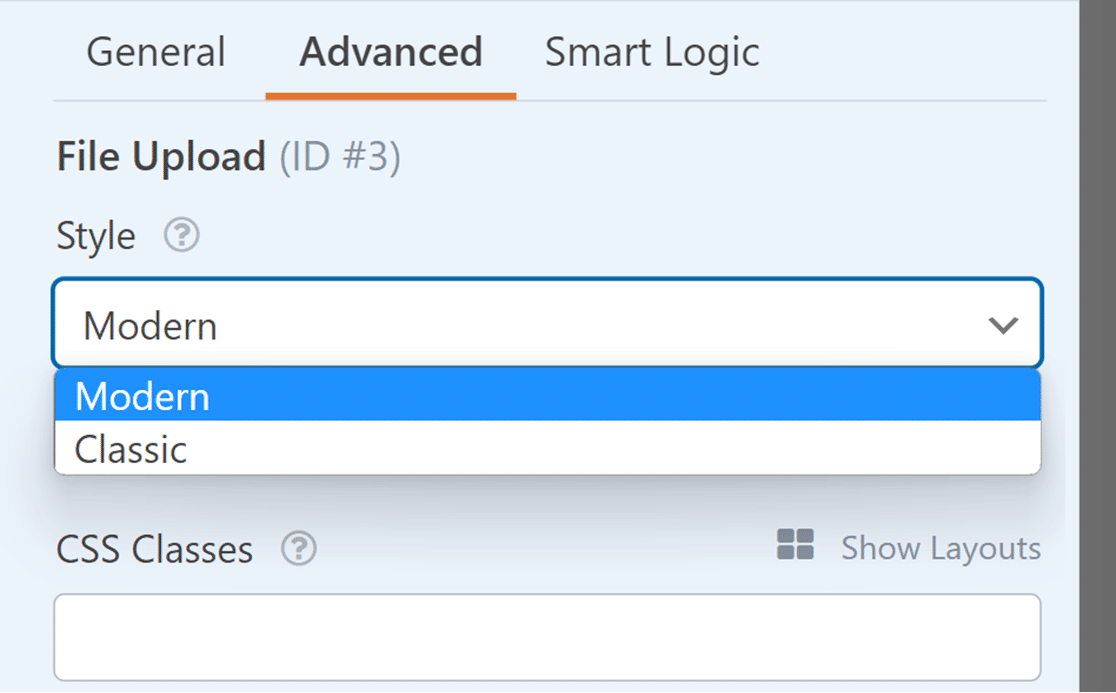
The File Upload field includes two style options that you can choose from: Classic and Modern.
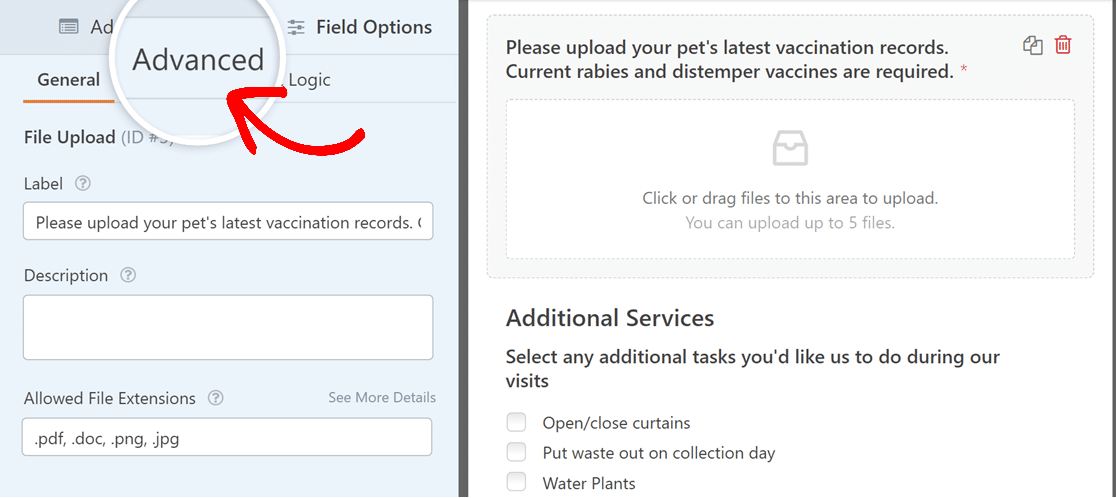
To view these options, you’ll need to open the form builder and click on the File Upload field in the preview area to see its field options. Then, click on the Advanced tab to show additional settings.
The advanced options include a Style dropdown, where you can choose between Modern and Classic.
Modern Style
The File Upload field’s Modern style displays a drag-and-drop box. When a visitor uses your form, they can either click on this field to select files from their device, or they can drag files into the box from their desktop.
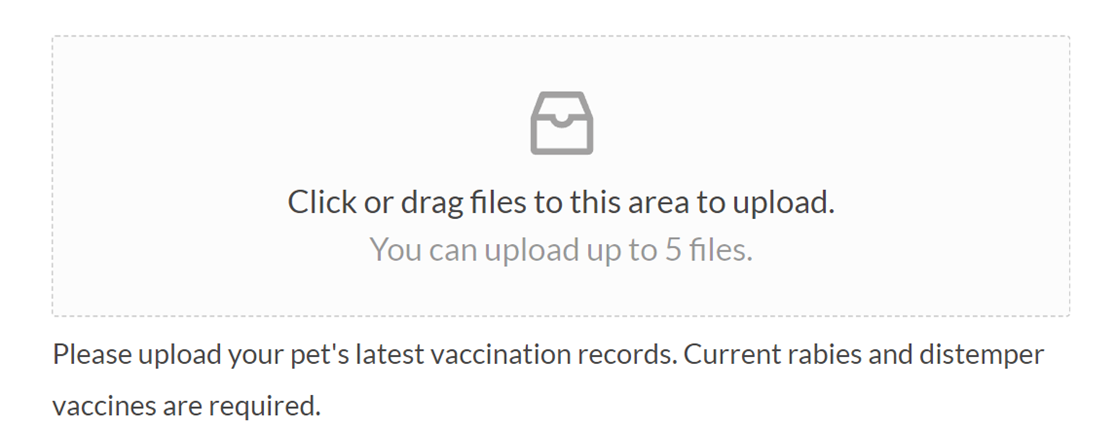
This style also allows users to upload multiple files to a single File Upload field.
The Modern style uses AJAX uploading to process file uploads. This is helpful because uploading files, especially large files, can demand a lot of resources from your site’s hosting server and ultimately result in a delay after your form is submitted.
However, AJAX uploading gets a jumpstart on the upload process to allow your forms to submit faster.
Classic Style
The File Upload field’s Classic style will display a Choose File button. Similar to the Modern style, users can either drag files onto this button or click the button to select files from their devices.

However, the Classic style does not support multiple files to be uploaded to a single File Upload field.
Note: Want to customize the appearance of your File Upload button to better match your company branding? Check out our developer documentation for step-by-step instructions on modifying the button styling for both Modern and Classic upload fields.
Uploading Multiple Files
In order to let your users upload multiple files at once, you’ll need to check that your File Upload field is configured to allow this. To do so, click the File Upload field to open its field options.
Then, in the Advanced tab, set the Style dropdown to Modern if it’s not already.
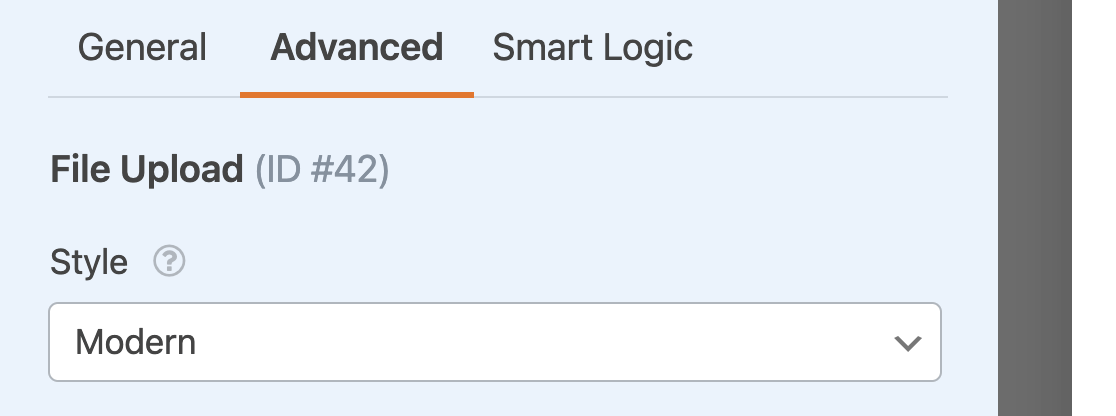
This style is required before you can allow users to upload more than one file to this field.
Return to the General Field Options tab and look for the Max File Number setting. By default, this will be set to 1, but you can increase it as needed.

Note: If you’re unsure whether your site’s hosting environment can properly handle the number of files you’d like to upload, be sure to do some testing before launching your form. You can also consider reaching out to your site’s hosting provider for their advice on uploads.
Including File Upload Links in Notifications
You can use the {all_fields} or {field_id} Smart Tags to include uploaded files in your notification emails.
If you do so, your email notifications will contain links to the uploaded files.
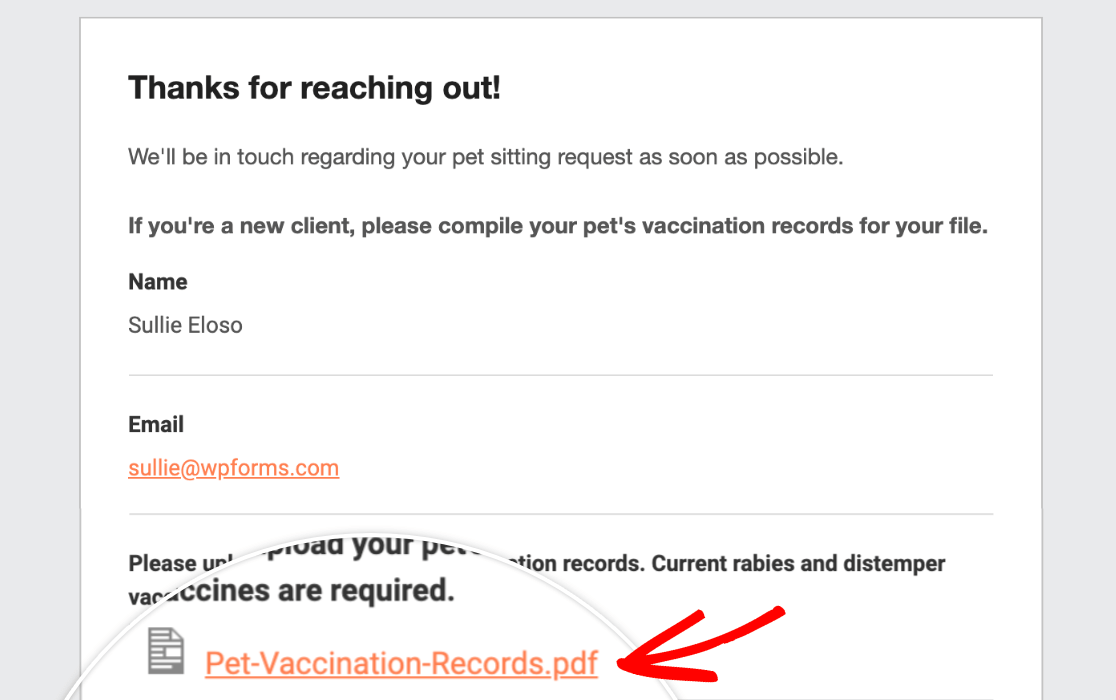
This way you can quickly view or download the file without having to log in to your WordPress dashboard.
Note: Need help setting up your email notifications? See our tutorial on configuring your notifications settings for more guidance.
Attaching Files to Form Notification Emails
WPForms lets you receive the files uploaded through your online form as attachments. These attachments provide an additional layer of backup for your files. This means, even if the files are later deleted from WordPress, you can still access them in your email.
To enable this, you’ll need to go to the Advanced section of the form notification settings and toggle the Enable File Upload Attachments option to the on position.
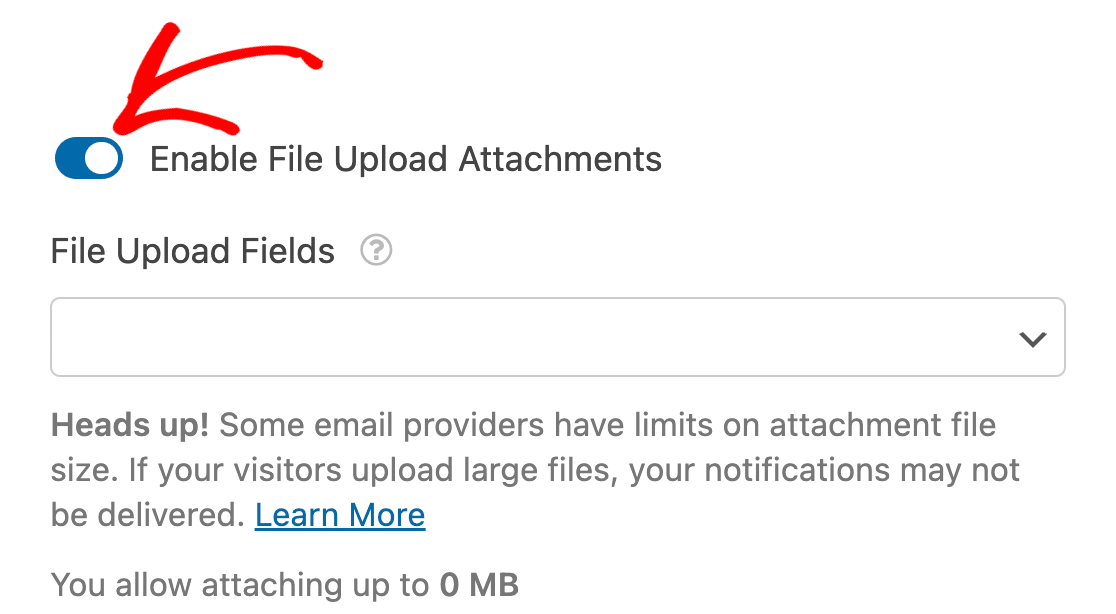
Note: This feature is disabled by default. You’ll need to manually enable it to start receiving file attachments in your notification emails.
To learn more about this feature, refer to our guide on file upload attachments.
Storing Uploaded Files
By default, user-uploaded files are stored in the Uploads directory of your site, inside the WPForms folder.
However, if you’d prefer to upload your files to the WordPress Media Library, navigate to the Advanced tab in the Field Options panel and toggle on the Store file in WordPress Media Library option.
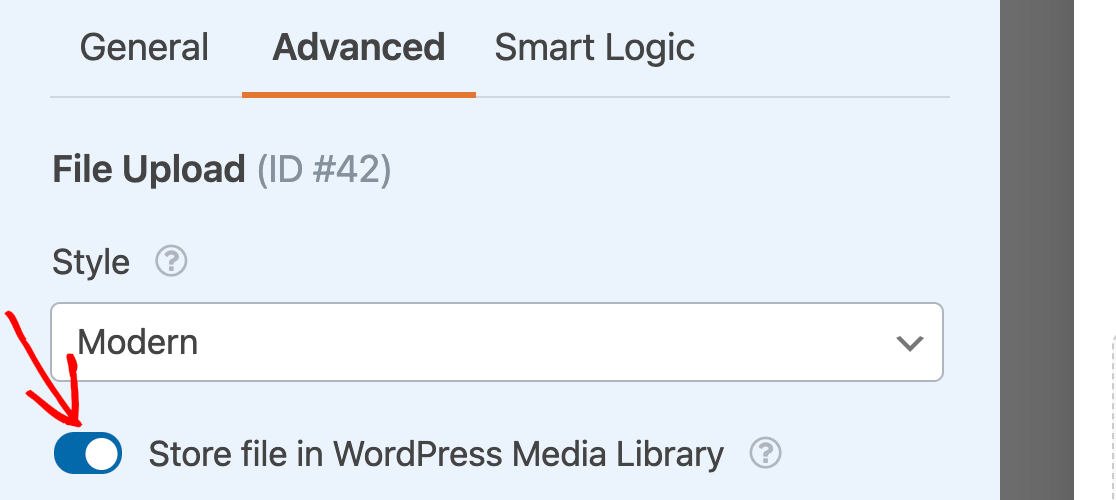
No matter where you store your files, you can always access them in the Entries for your form by clicking the file’s link within an individual entry.
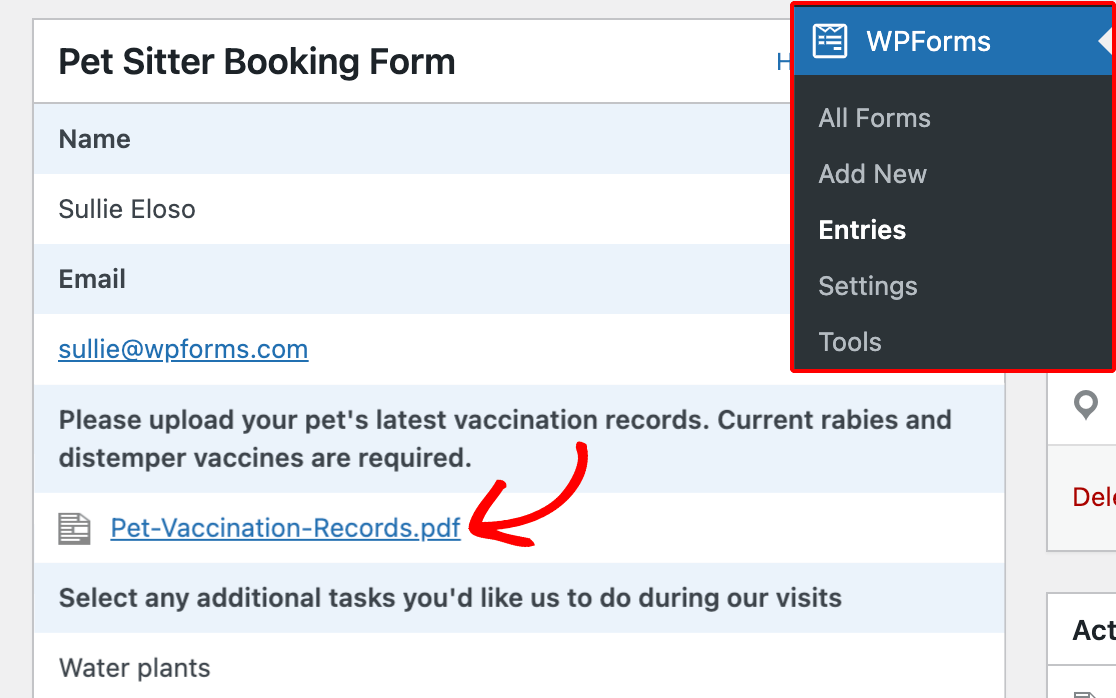
Note: Deleting a form entry also removes any files that were uploaded within that entry. It’s always a good idea to save essential files in a separate location.
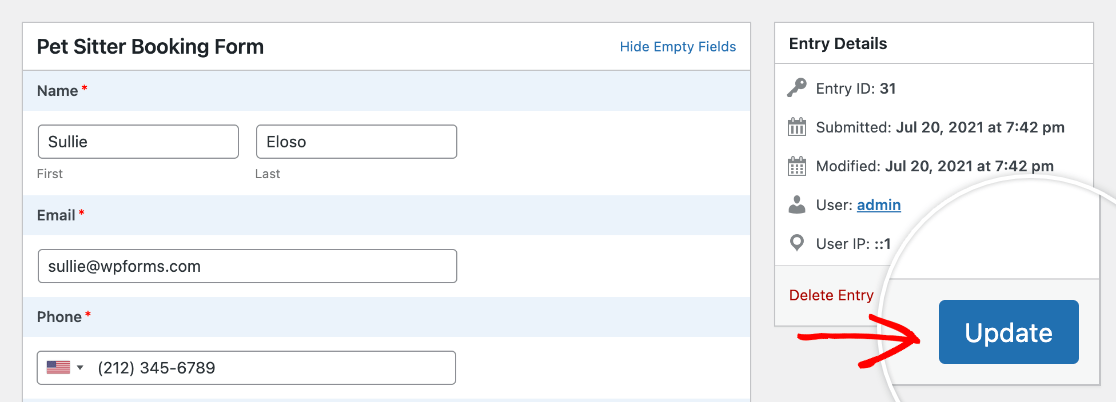
If you’d like, you can also delete an uploaded file from a specific entry by editing the entry. Just click the red trash can icon next to the file’s link.

Note: If you’ve configured your File Upload field to store uploads in the Media Library, you’ll have to delete the file from the Media Library.
After you’ve deleted the files you’d like removed from the entry, be sure to click the Update button to save your changes.
Restricting File Access
The File Upload field allows you to control who can access uploaded files by restricting access to specific WordPress users or adding password protection. To do so, click the File Upload field to open its field options.
Then, in the Advanced tab, toggle on the Enable File Access Restrictions toggle button.
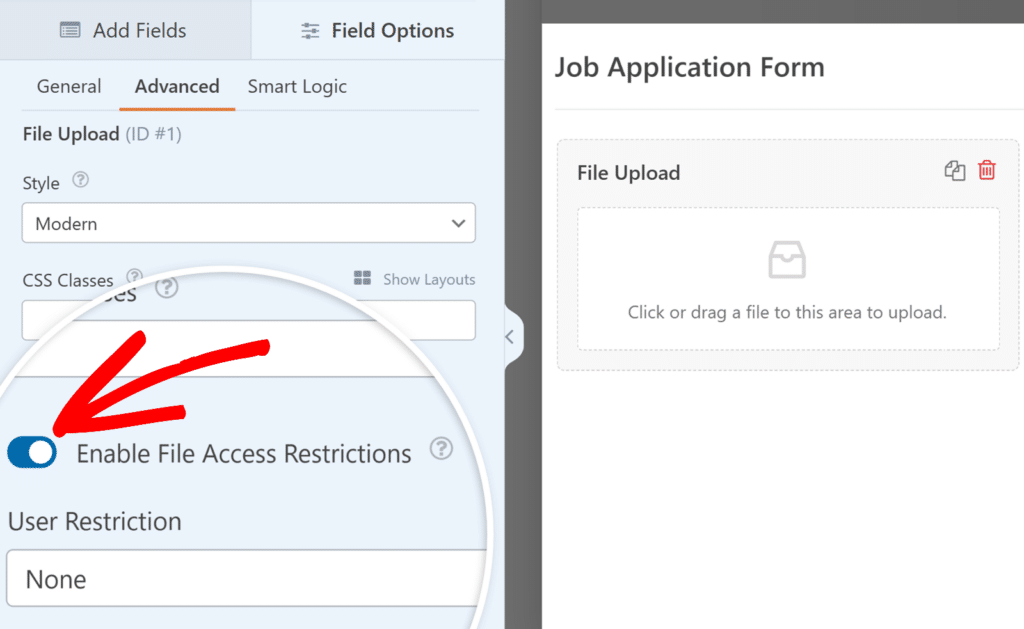
Once enabled, you can choose between user-based restrictions or password protection. For complete details on configuring these settings, check out our guide on how to restrict access to uploaded files.
Enabling Camera Capture
In addition to uploading files from their device, you can also allow users to capture photos or videos directly in the File Upload field.
To enable this option, open the Advanced tab in the Field Options panel and toggle on the Enable Camera setting.
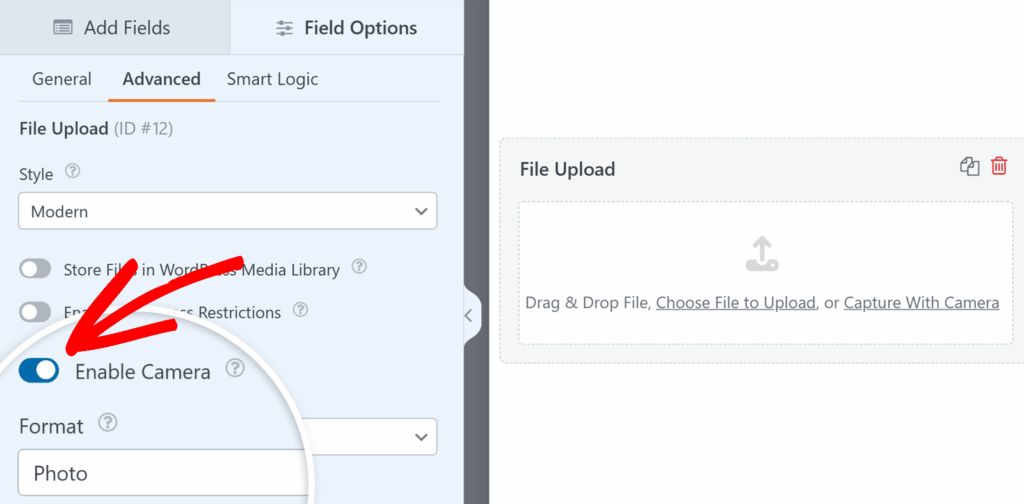
Once enabled, you’ll be able to set the Format (Photo or Video) and adjust the Time Limit if you choose Video.
On the frontend, users will see updated text in the upload field that says, “Drag and drop file, choose file to upload or capture with camera.” They can either upload a file as usual, or click the camera link to take a new photo or record a video.
For complete details on using the camera option, check out our guide on using the Camera field.
Compressing Uploaded Files
WPForms will not compress any files that are uploaded to your site. However, if you choose to store your files in the WordPress Media Library, then WordPress will automatically compress your images.
Note: If you would like to optimize your images before uploading them to your site, then check out WPBeginner’s tutorial on how to easily optimize images to improve your site’s performance.
Frequently Asked Questions
These are some of the most common questions that come up regarding the File Upload field.
I’d like to allow users to upload large files in my form, but it’s not working. What are my options?
When using the Modern style for file uploads, WPForms automatically uploads files in “chunks.” This improves the efficiency of the upload and lets you avoid some limitations set by your server (including server timeouts).
This will help with the majority of large upload issues within a form, but it’s important to note that the maximum size of a file will still be limited by your server through a setting named MAX_FILE_UPLOAD. This means that if your server has a file size limit of 10 MB, you won’t be able to upload a file larger than that.
If you’d like to look into adjusting your server’s file upload size limits, please contact your hosting provider. To learn more, see WPBeginner’s tutorial on increasing the maximum file upload size in WordPress.
Cloudflare users should note that upload limits are determined by plan type. The current limits are as follows:
- Free and Pro: 100 MB
- Business: 200 MB
- Enterprise: 500 MB (contact support for customization)
For more information, please see Cloudflare’s upload size limits.
I’m not uploading a large file, but the file upload process freezes and never finishes. Why could that be?
Misconfigurations in your site’s SSL connection can prevent files from uploading properly.
For example, you may experience this issue if your site loads over an insecure (HTTP) connection, but site assets such as uploaded files load over a secure (HTTPS) connection (or vice versa). This will cause a mixed content error, and prevent files from uploading in your forms.
Your site’s host can easily update your SSL configurations, so be sure to get in touch with them if you run into this error. You may also want to check out WPBeginner’s guide to troubleshooting SSL issues in WordPress.
Why do uploaded files show up as links instead of attachments in notification emails?
File upload attachments is disabled on your form. You’ll need to enable it from the Advanced option of the form notification settings. To learn more, check our guide on enabling file upload attachments.
Attaching files to email notifications is disabled by default because it can often hurt email deliverability. For example, if an email service provider only allows a maximum file size of 10 MB, but a user uploads a file larger than 10 MB, the email won’t be delivered.
Why don’t my file uploads work in the Facebook and Instagram mobile browsers on Android devices?
Some in-app browsers currently don’t support file uploads. The most notable examples of this are Facebook and Instagram browsers.
The good news is, we’ve created a plugin that will fix this issue for our users. You can download the Escape Facebook/Instagram In-App Browsers plugin by clicking the button below:
Download the Escape Facebook/Instagram In-App Browsers Plugin
Once you download the plugin, you’ll just need to install and activate it on your site.
That’s it! You now know how to use the File Upload field in WPForms.
Next, want to learn how to send different notification emails based on how users fill out your form? Check out how to create conditional form notifications in WPForms for a full tutorial.

