Introduction
Would you like to File Upload button styling? Whether you’re using the Modern or Classic style for your uploads, there is always default styling applied.
![]()
With the power of CSS, you can personalize your upload fields to be more specific to your own company branding and in this tutorial, we’re going to show you how! Let’s dive right in!
Creating the form
First, we’ll begin by creating a new form and adding our fields.
If you need any help in creating your form, please check out this useful documentation.
![]()
Using the Modern Style
When you’ve added a File Upload form field, you’ll need to decide if you want to use the Modern or Classic style. In this tutorial, we’ll give you the CSS needed for both.
However, for this section, we’re going to start with styling the Modern style for this field. To set this, select the File Upload on your form and click the Advanced tab. From the Style dropdown, make sure you’ve selected Modern and save your form.
![]()
Adding CSS for Modern Style
When styling for the Modern style file upload, add this CSS to your site. If you need help with how and where to add custom CSS to your site, please review this tutorial.
.dz-message svg {
    display: none;
}

.modern-title::before {
  content: '';
  /*Change the URL below to point to the image you would like to display*/
  background: url(https://myexample-site.com/img/my-new-file-upload-image.svg);
  width: 100px;
  height: 35px;
  background-repeat: no-repeat;
  display: block;
  margin-left: auto;
  margin-right: auto;
}

.wpforms-uploader.dz-clickable {
    min-height: 100px;
}
Please remember to update the CSS above for the background. This URL will need to point to the image you’d like to use.
By adding this CSS, you’re File Upload for the Modern style can now appear more specific to your company branding.
![]()
Using the Classic Style
Just as we did with the Modern style, we can adjust the styling for the Classic style as well.
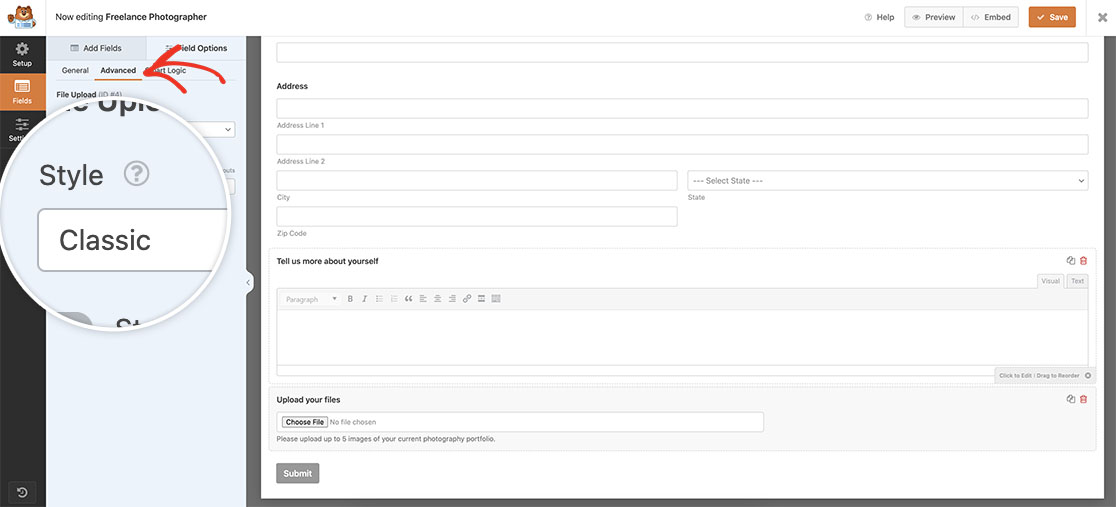
For this section, you’ll need to select Classic from the Style dropdown located on the Advanced tab of the field.

Adding CSS for Classic Style
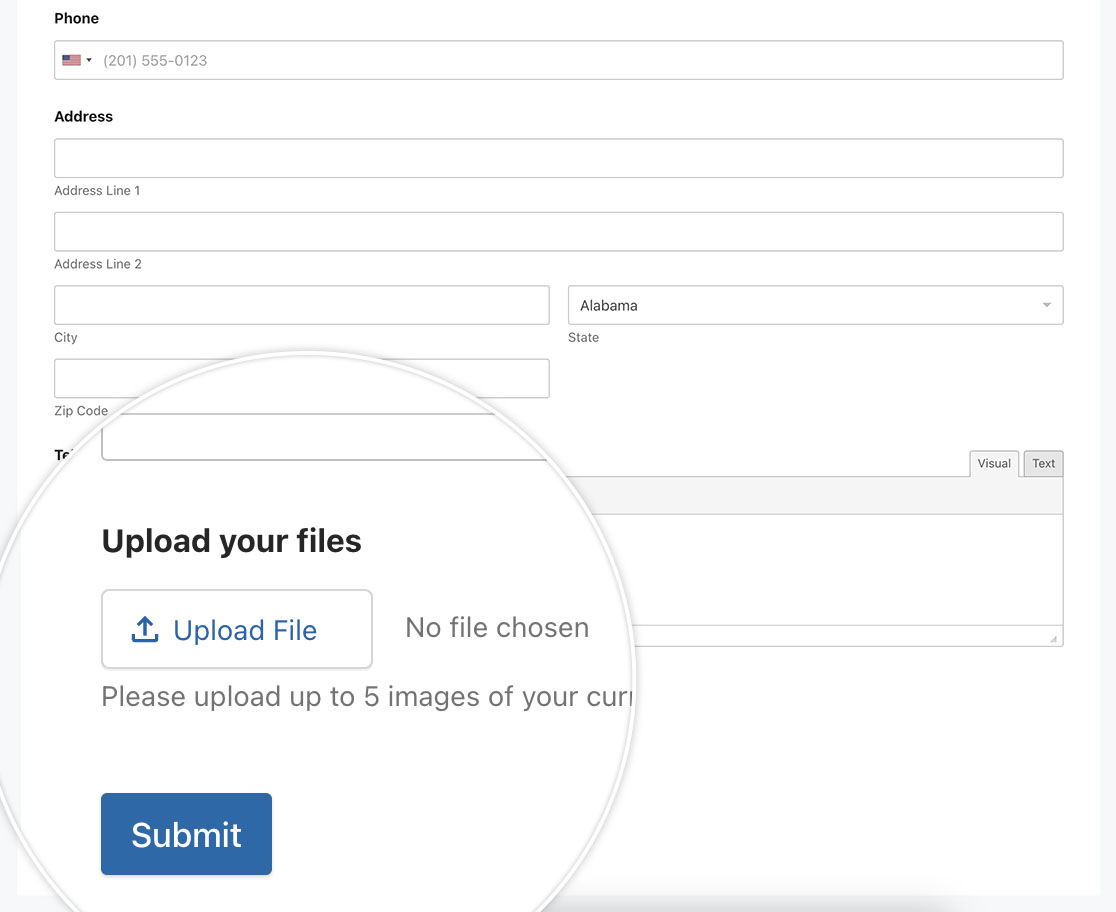
When styling for the Classic style file upload, add this CSS to your site. For any assistance with how and where to add custom CSS to your site, please review this tutorial.
input[type="file"] {
  outline: none !important;
  padding: 4px !important;
  margin: -4px !important;
}

input[type="file"]:focus-within::file-selector-button,
input[type="file"]:focus::file-selector-button {
  outline: 2px solid #0964b0 !important;
  outline-offset: 2px !important;
}

input[type="file"]::before {
  top: 16px !important;
}

input[type="file"]::after {
  top: 14px !important;
}

input[type="file"] {
  position: relative !important;
}

input[type="file"]::file-selector-button {
  width: 136px !important;
  color: transparent !important;
}

input[type="file"]::before {
  position: absolute !important;
  pointer-events: none !important;
  left: 40px !important;
  color: #0964b0 !important;
  content: "Upload File" !important;
}

input[type="file"]::after {
  position: absolute !important;
  pointer-events: none !important;
  left: 16px !important;
  height: 20px !important;
  width: 20px !important;
  content: "" !important;
  background-image: url("data:image/svg+xml,%3Csvg xmlns='http://www.w3.org/2000/svg' viewBox='0 0 24 24' fill='%230964B0'%3E%3Cpath d='M18 15v3H6v-3H4v3c0 1.1.9 2 2 2h12c1.1 0 2-.9 2-2v-3h-2zM7 9l1.41 1.41L11 7.83V16h2V7.83l2.59 2.58L17 9l-5-5-5 5z'/%3E%3C/svg%3E") !important;
}

input[type="file"]::file-selector-button {
  border-radius: 4px !important;
  padding: 0 16px !important;
  height: 40px !important;
  cursor: pointer !important;
  background-color: white !important;
  border: 1px solid rgba(0, 0, 0, 0.16) !important;
  box-shadow: 0px 1px 0px rgba(0, 0, 0, 0.05) !important;
  margin-right: 16px !important;
  transition: background-color 200ms !important;
}

/* hover state */
input[type="file"]::file-selector-button:hover {
  background-color: #f3f4f6 !important;
}

/* active state */
input[type="file"]::file-selector-button:active {
  background-color: #e5e7eb !important;
}
Please note, Firefox does not support ::before and ::after on input elements. When using this CSS in Firefox, no text would appear on the upload button for this browser.

And that’s it! You can now easily update the File Upload button styling. Would you like to designate a specific directory for your file uploads? Take a look at our tutorial on How to Define a Specific Directory For File Uploads.
