AI Summary
Would you like to connect WPForms with n8n to automate your workflows? The n8n addon lets you send your form entries to thousands of apps using n8n’s workflows, so you can automate what happens after someone submits your form.
In this tutorial, we’ll show you how to install and use the n8n addon with WPForms.
Requirements:
- You will need a Pro license level or higher to access the n8n addon
- Ensure that you’ve installed WPForms version 1.9.8.1 or higher to meet the minimum required version for the n8n addon
- You have an n8n account (self hosted or n8n cloud)
Before you get started, be sure WPForms is installed and activated on your WordPress site.
Creating the Workflow in n8n
Start by opening your n8n dashboard and creating a new workflow.
In the workflow editor, click the + icon to add a new node. This opens a panel where you can search for available apps and triggers.

In the search bar, type ‘WPForms’, then select WPForms Trigger from the list.
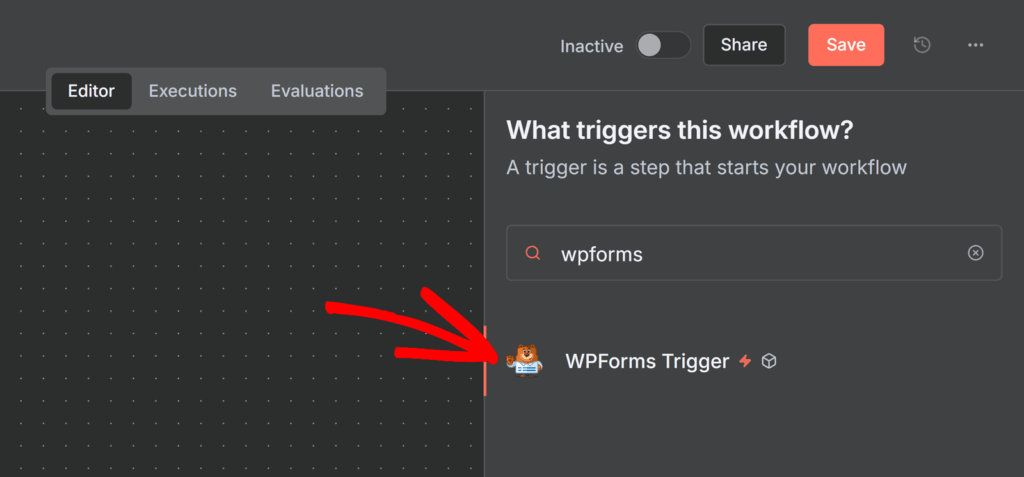
Next, click the Install node option.
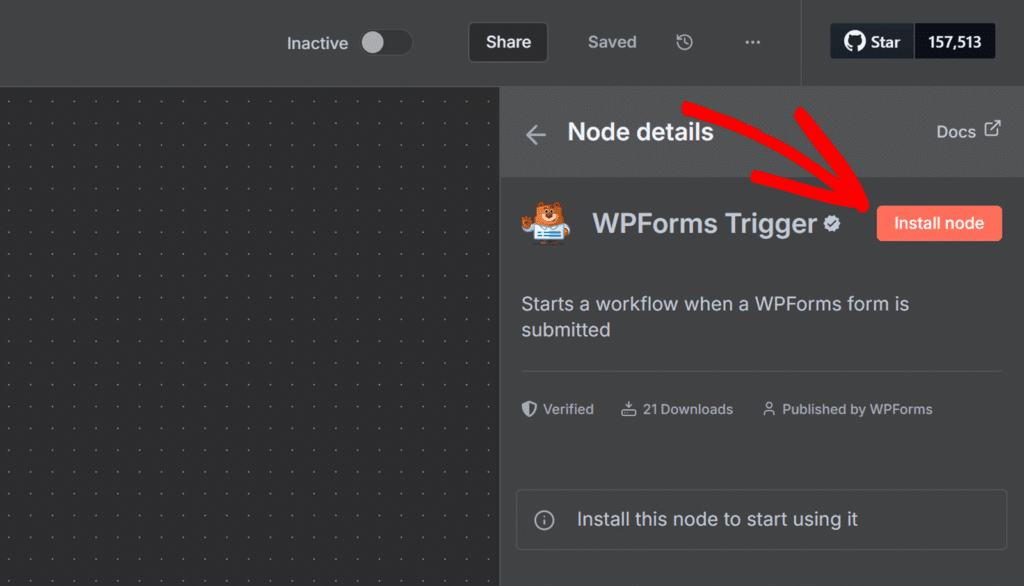
Once the node is installed, click Add to workflow to insert the WPForms Trigger node into your workflow.
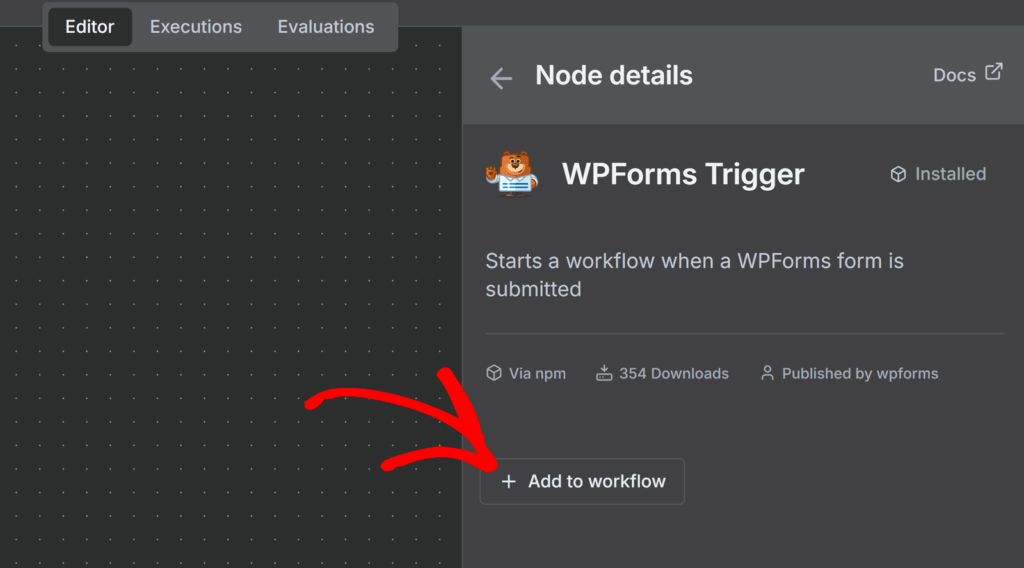
Once added, the WPForms Trigger node window will open. Here, you’ll configure how n8n connects with your form by copying the webhook URL and later adding the secret key from WPForms.
Under the Parameters tab, expand the Webhook URLs section, then open the Production URL tab to view the live webhook address that will receive form data.
Click the URL shown to copy it.
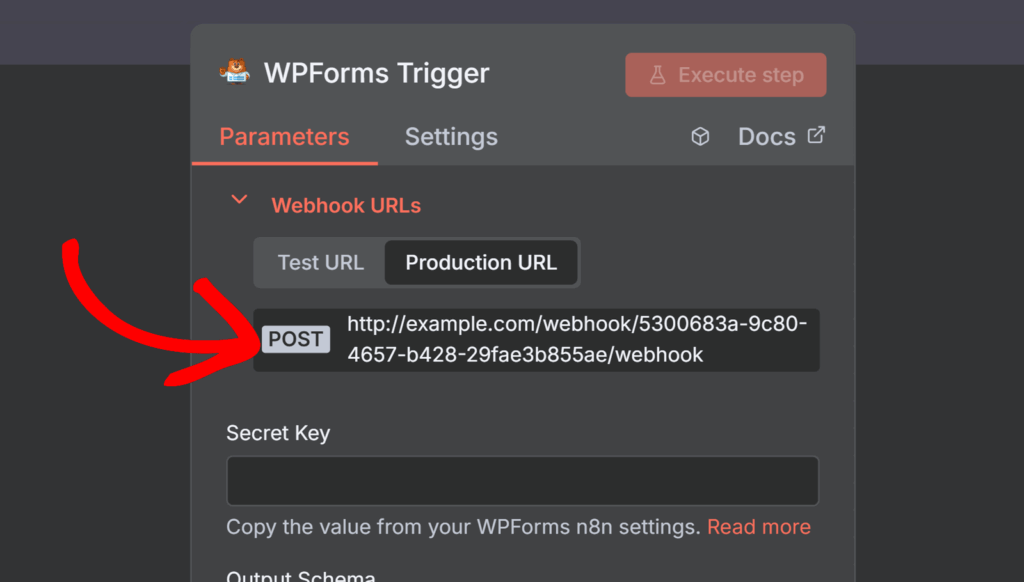
Keep this tab open for now, as you’ll need this webhook URL when setting up the connection in the WPForms form builder next.
Connecting WPForms to n8n
Now that your n8n workflow is ready to receive form data, it’s time to set up the integration in WPForms.
Start by creating a new form or editing an existing one. Once you’re in the form builder, go to Marketing » n8n and click the Enable n8n Integration toggle to turn it on.
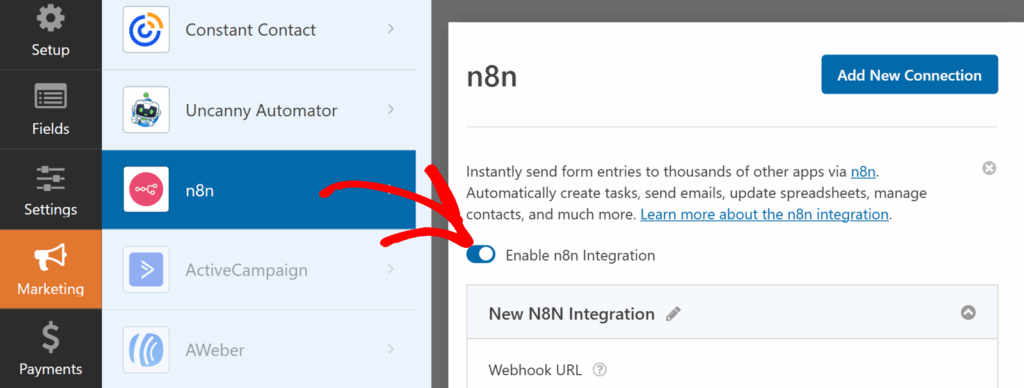
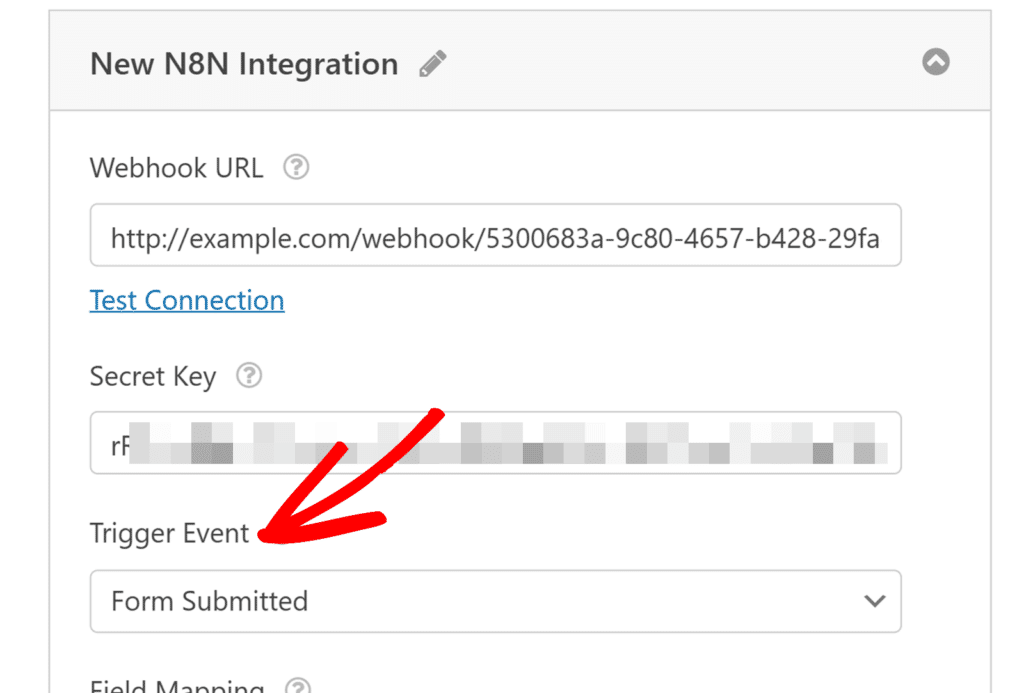
Once enabled, you’ll see new settings appear for your n8n connection, including the Webhook URL, Secret Key, Trigger Event, and Field Mapping options.
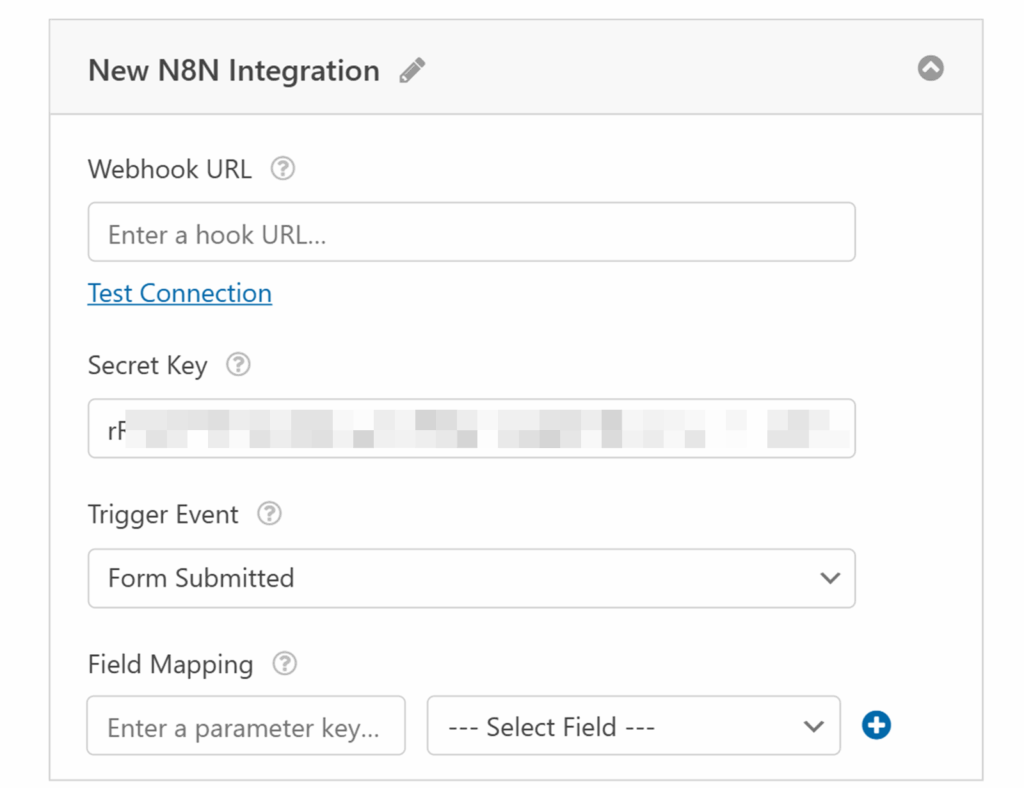
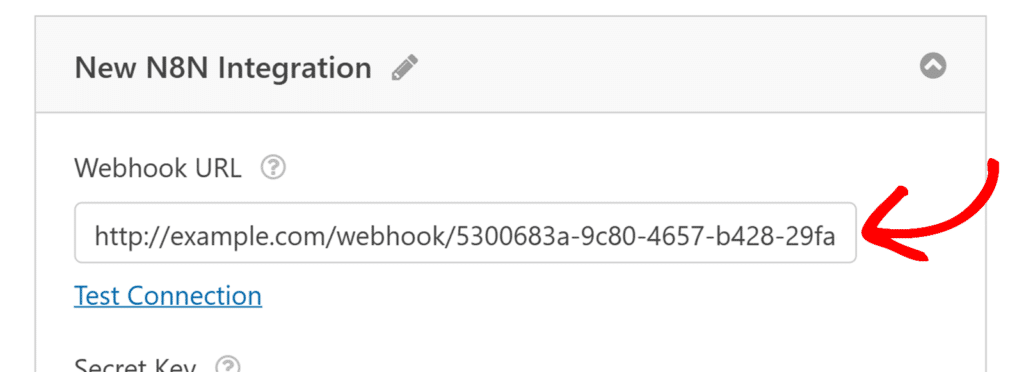
In the Webhook URL field, paste the Production URL you copied earlier from the WPForms Trigger node in n8n.
Next, copy the Secret Key from WPForms.
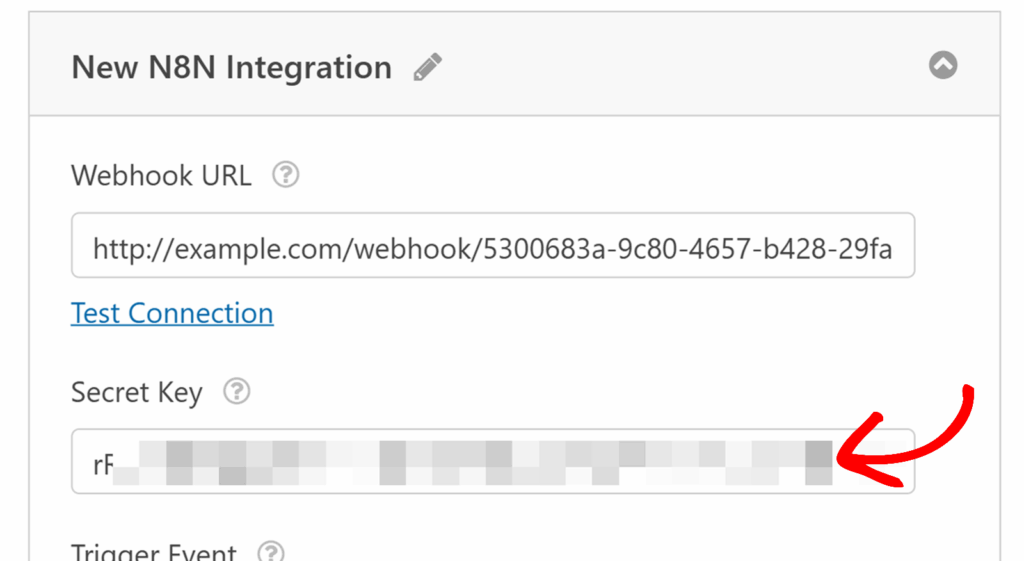
Then, head back over to your workflow in n8n and paste it into the Secret Key field in the WPForms Trigger node.
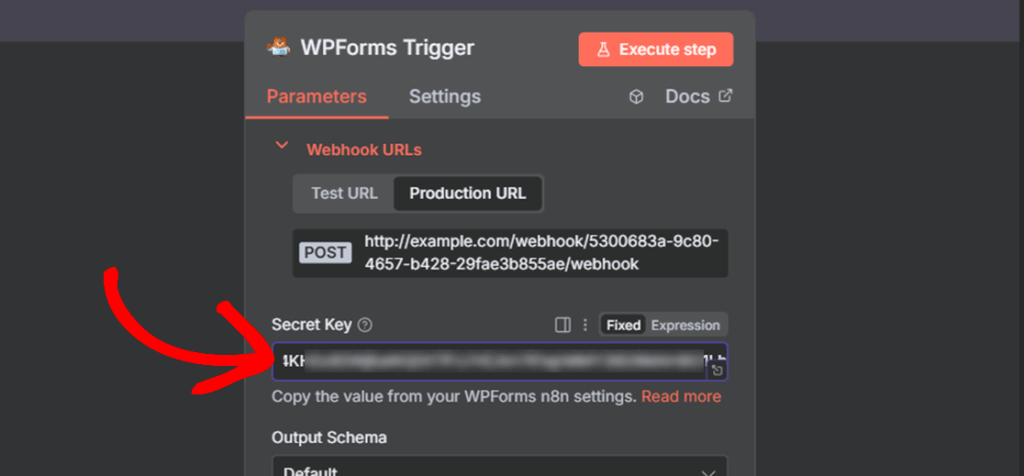
Once done, close the WPForms Trigger popup and toggle the Active switch in the top-right corner to activate your workflow.

Setting Up Trigger Events
Now that your workflow in n8n is active, return to the WPForms form builder to finish setting up your integration and customize how and when your form interacts with n8n.
The Trigger Event dropdown in the form builder lets you decide when to trigger the workflow. You can choose from the following options:
- Form Submitted – Runs the workflow each time a user submits your form.
- Entry Marked as Spam – Runs the workflow when a submission is flagged as spam.
- Payment Processed – Runs the workflow after a successful payment is completed.
Field Mappings
Below the trigger event settings, you’ll see the Field Mapping section. Here, you can specify which form data to send to n8n.
To set this up, enter a parameter key, which is the label n8n will use to identify the data. Then select the corresponding form field from the dropdown beside it.
For example, to send the user’s email address, you’ll need to enter email as the parameter key and select your form’s Email field from the list.

You can continue adding more field mappings by clicking the blue + button.
When you’re finished, don’t forget to click Save in the form builder to apply your changes.
Frequently Asked Questions
Here are some common questions about using the n8n addon with WPForms.
Can I disable entry storage when using the n8n addon?
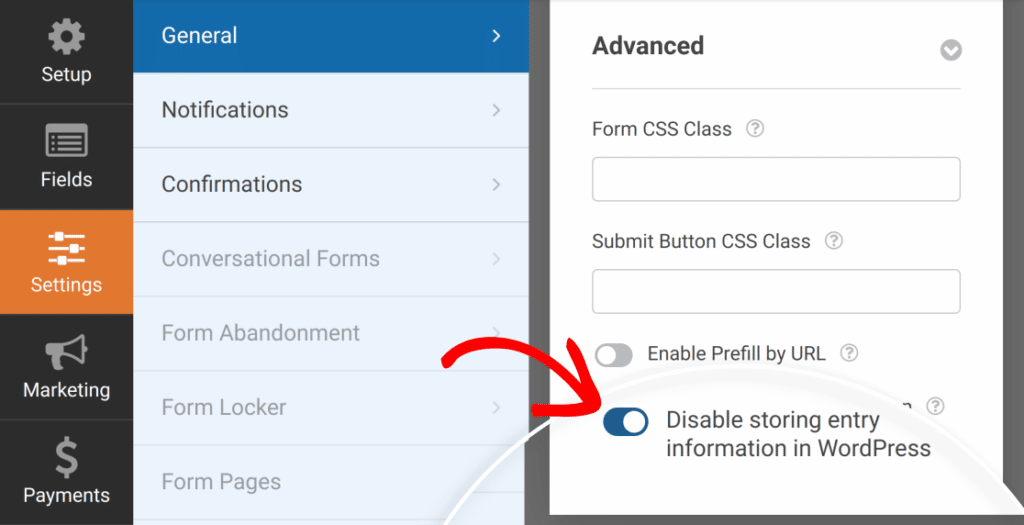
Yes. If you’d like to prevent WPForms from storing form entries in your site’s database, go to Settings » General in the form builder, then open the Advanced section and enable the Disable storing entry information in WordPress option.
What if I delete the WPForms node in n8n?
If the WPForms node in your n8n workflow is deleted or removed, your form submissions will no longer trigger the workflow. To fix this, add a new WPForms Trigger node to your workflow, copy its new Production URL, and update the Webhook URL in your WPForms form builder. Once updated, reactivate the workflow in n8n to restore the connection.
That’s it! You’ve successfully connected WPForms with n8n.
Next, would you like to learn more about what you can do with WPForms entries? Be sure to check out our complete guide to entries for details on all of the available options and tools.
