AI Summary
Would you like to create your own custom form templates? Converting your form into a custom template allows you to reuse the form as a building block for creating other forms on your site, which can be a huge time saver.
This tutorial will show you how to create your own custom form templates from a new or existing form.
Before you get started, make sure WPForms is installed and activated on your site.
Creating a Form to Use as a Template
To begin, you’ll need a form that will later be converted into a custom template. Start by creating a new form or editing an existing one to access the form builder. This could be any type of web form, from a simple contact form to a complex purchase order form.
On the Setup page, enter the name of your template in the Name Your Form field.

This title will be visible in the template library once you add your custom template to it, so make sure it’s something descriptive but not too long.
Adding and Customizing Fields
In the form builder, click on the field(s) you’d like to add to the form. Alternatively, you can drag and drop the field to the preview area. This is where you’ll build out your online form with all the necessary fields.

Clicking on any field in the preview area will open its Field Options panel where you can further customize the field.

Configuring Form Settings
If you’d like, you can also customize your form template’s settings like notifications and confirmations. All changes to your settings will carry over when you convert this form into a custom template.
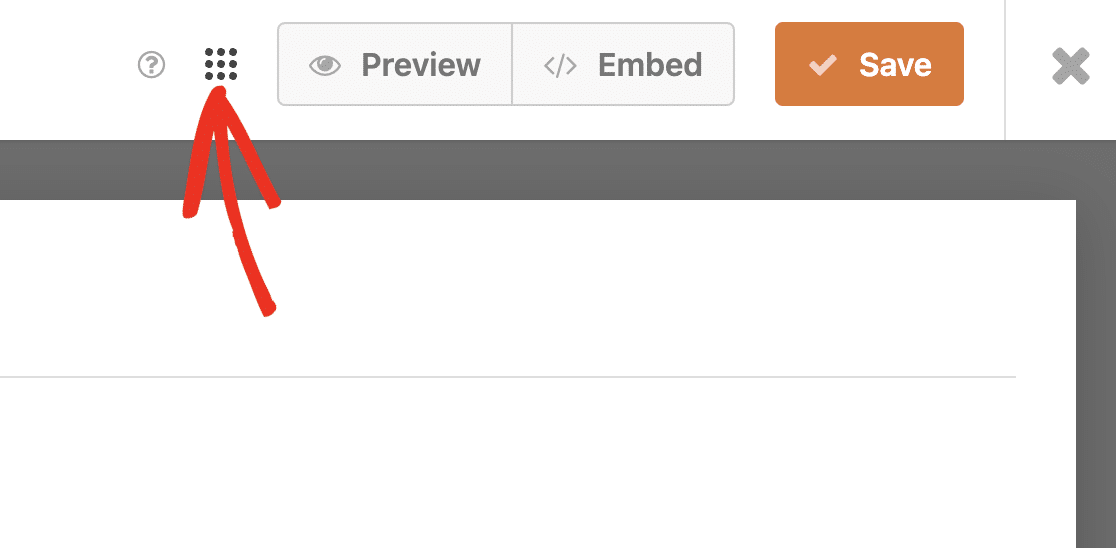
Converting Your Form Into a Custom Template
After adding the fields to your form and configuring the form’s settings, proceed to create your form template. To do so, click on the Menu icon just before the Preview button.
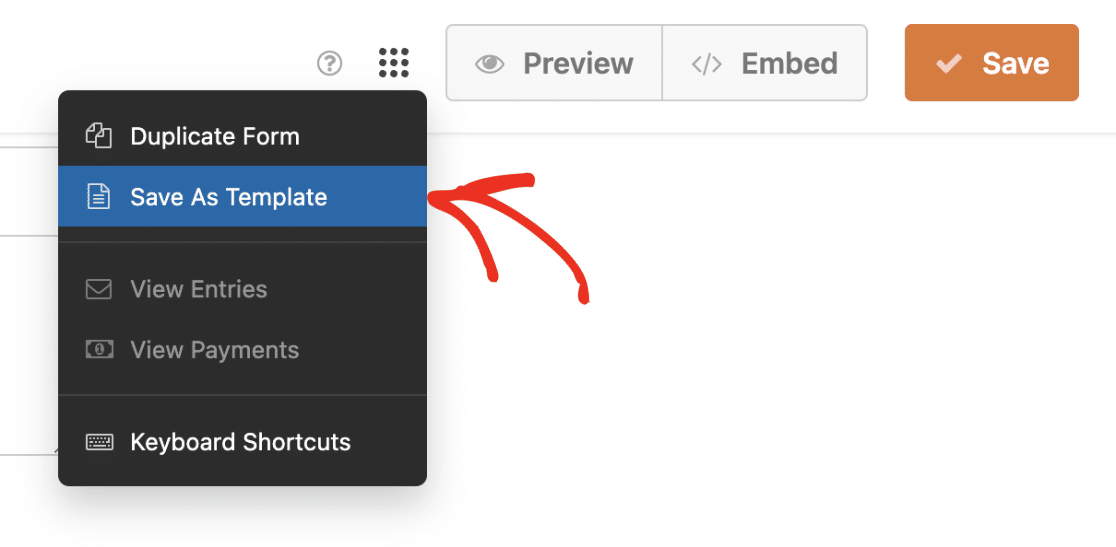
Next, select the Save As Template button to create your template.
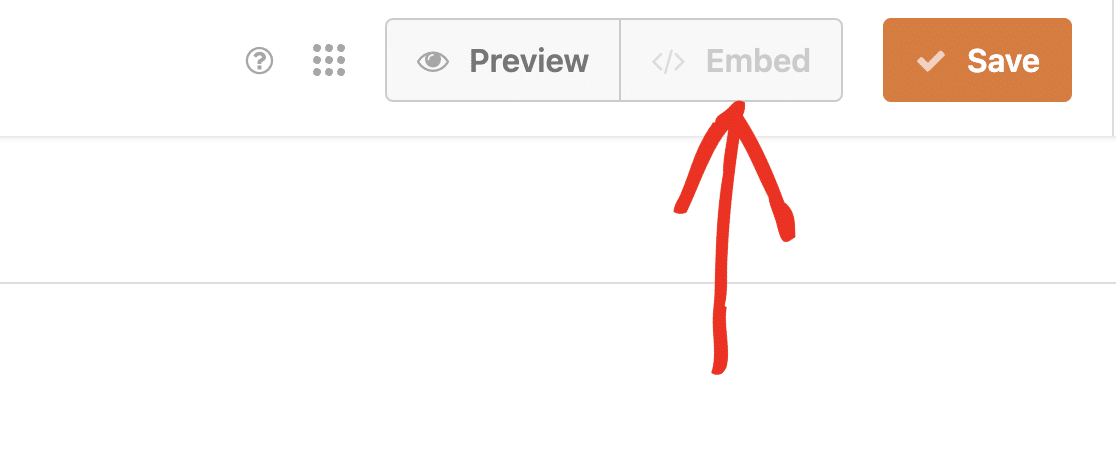
Once the process is completed, you’ll see a TEMPLATE tag next to the form’s name, indicating that the form is now a template.

The Embed button will also be disabled. This means you won’t be able to display this custom template on your site’s frontend.
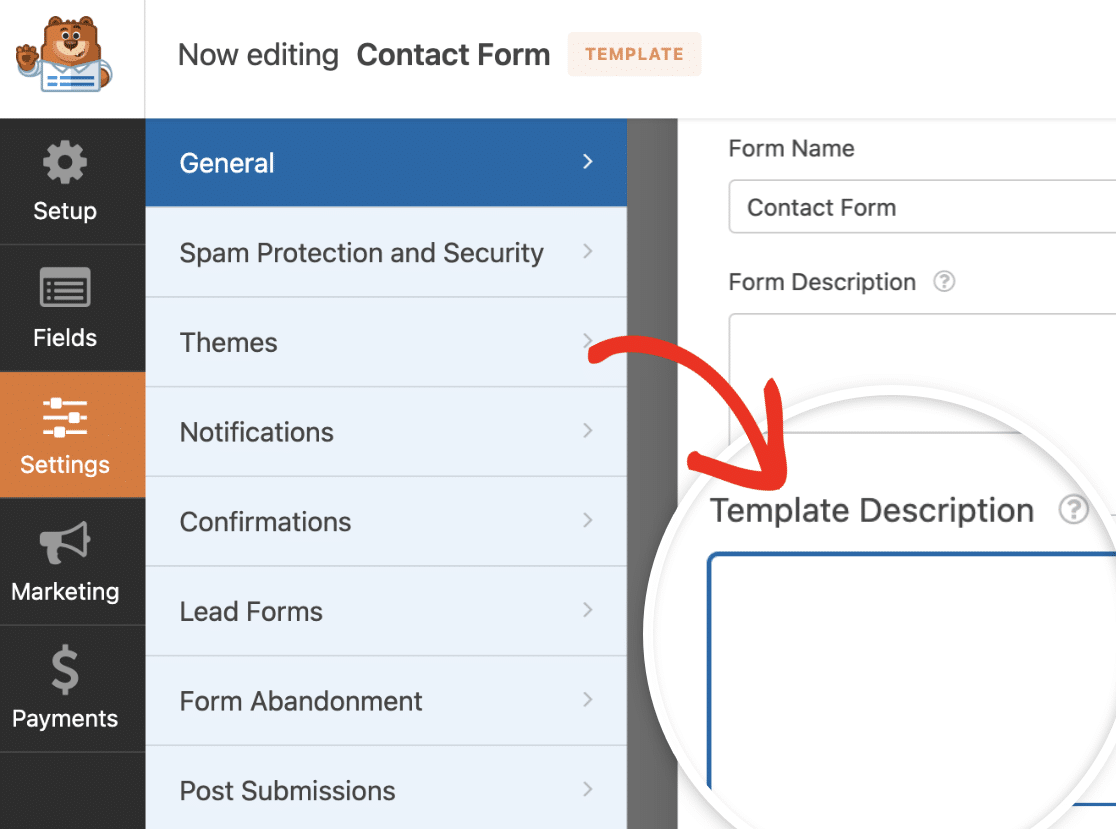
If you’d like, you can add a brief description to your template. This can be helpful to give a brief overview of the intended use case for the custom template, such as “Purchase Order Form Template” or “General Order Form Layout”.
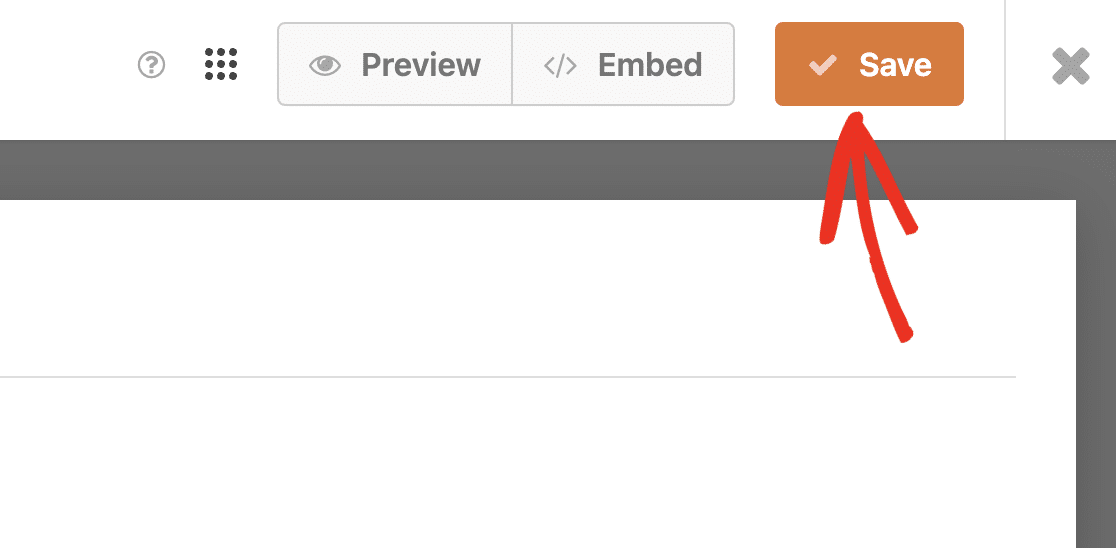
To add a description, go to Settings » General in the form builder. Then, scroll down and locate the Template Description field. Here, you’ll need to add a brief description for your custom template.
After updating the custom template, be sure to click the Save button to update your changes.
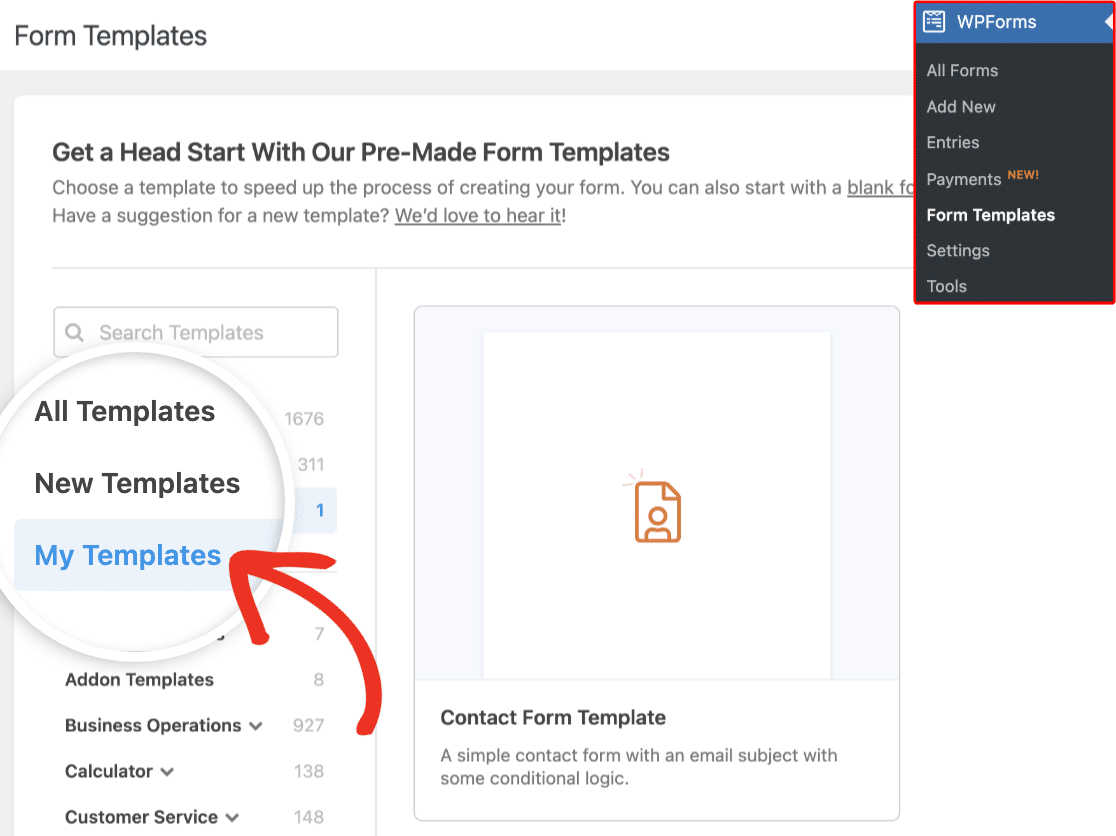
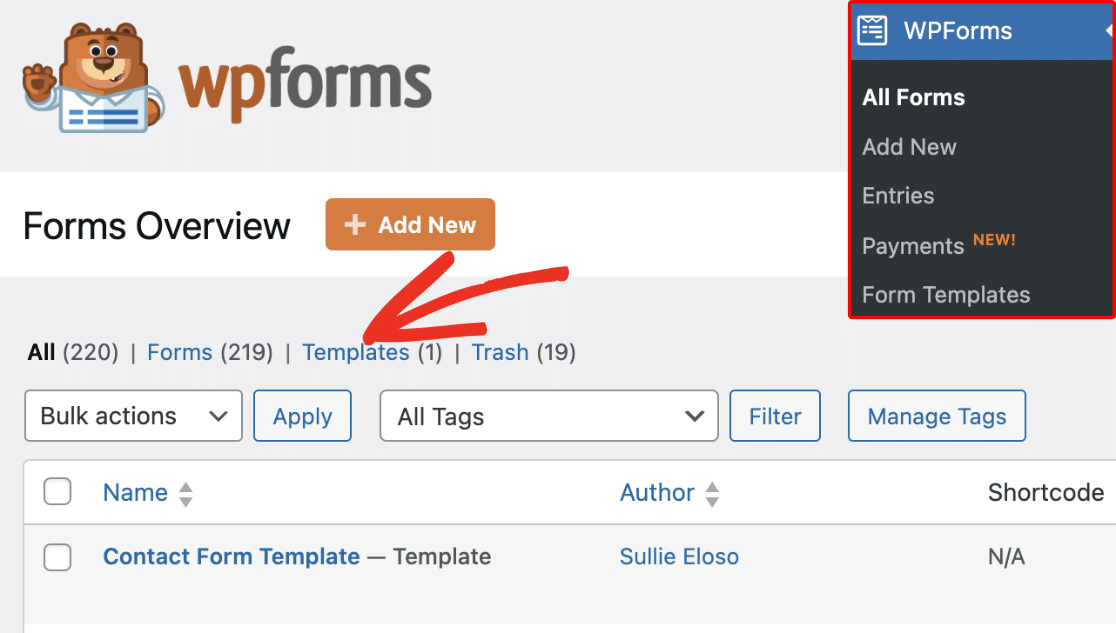
Accessing Your Custom Templates
To access custom templates you’ve created on your site, go to WPForms » Form Templates. After that, select the My Templates sidebar menu.
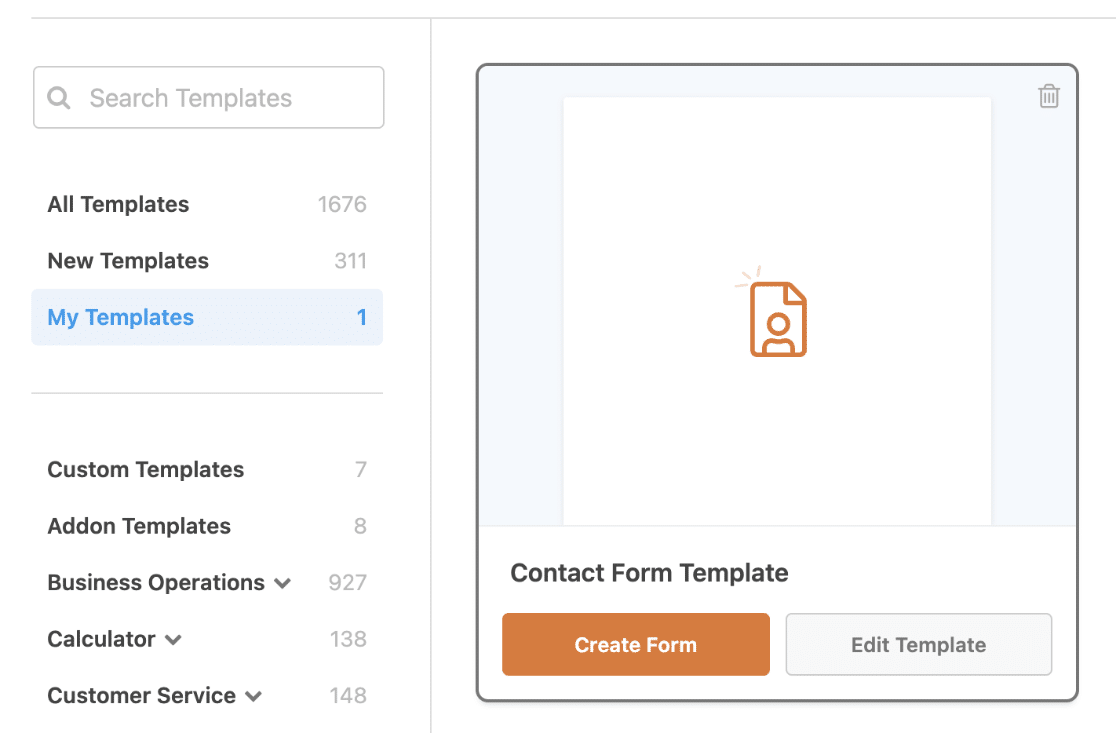
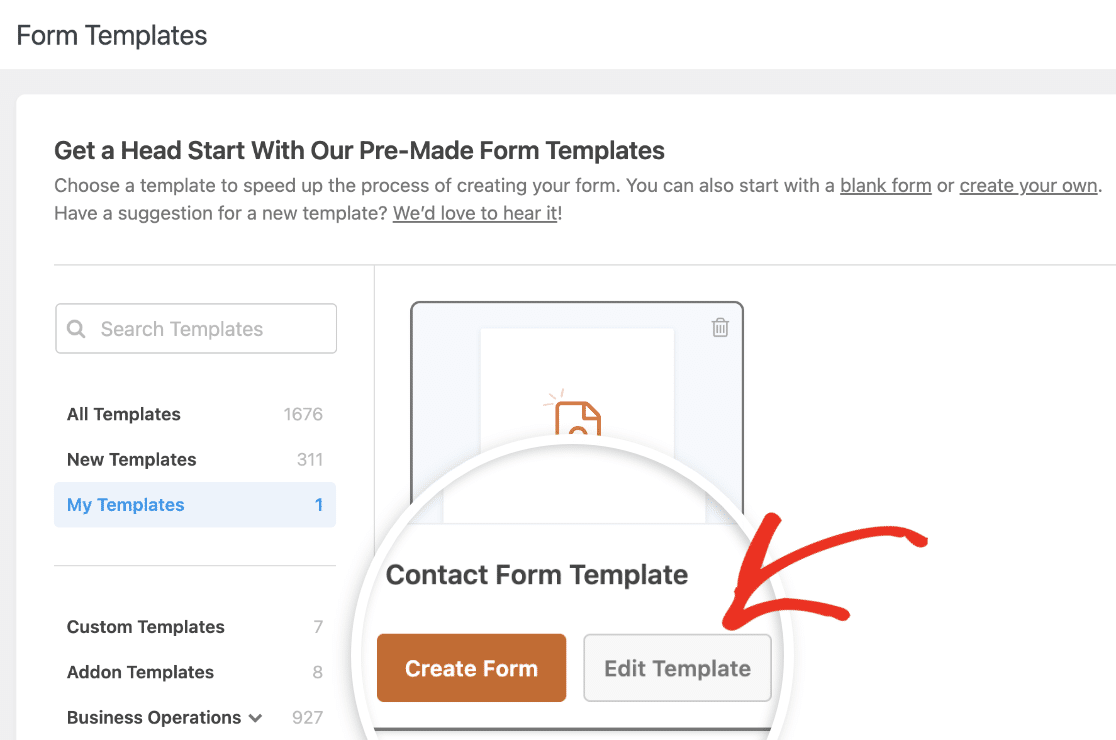
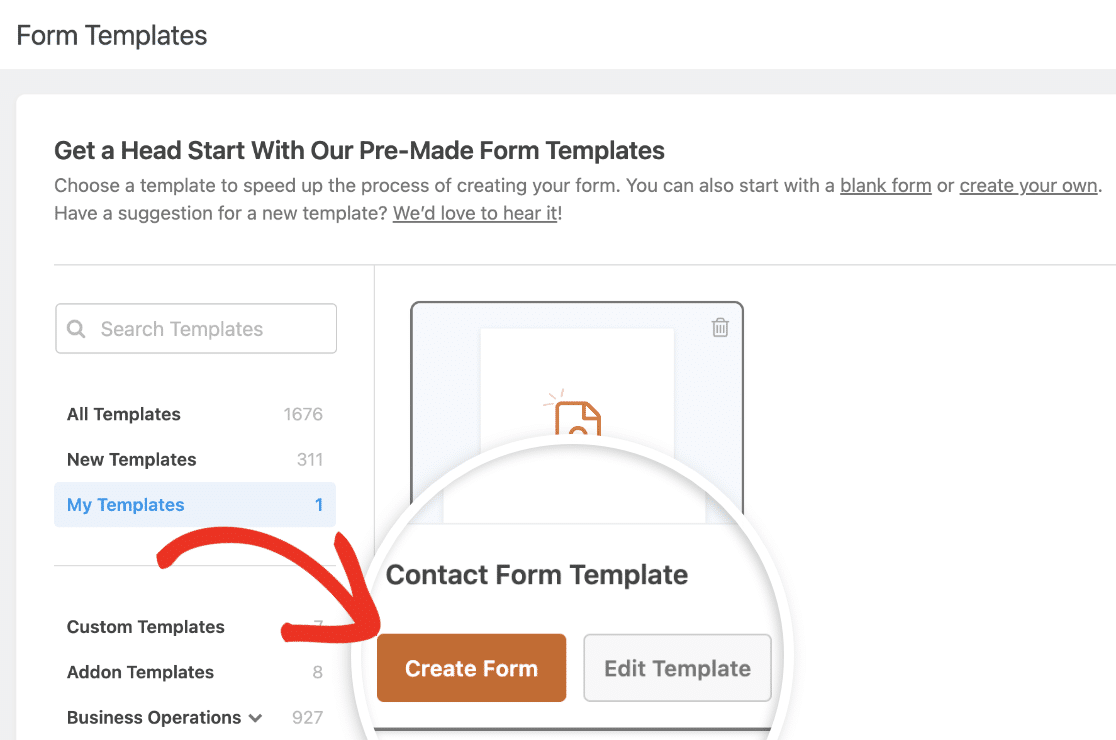
You’ll see a grid containing all the custom templates you’ve created. When you hover over an individual custom template, you’ll see options to either use, edit, or delete the template.
Alternatively, you can see the custom templates you’ve created by going to WPForms » All Forms. Forms that have been converted into a custom template will have a Template label next to the form’s name.
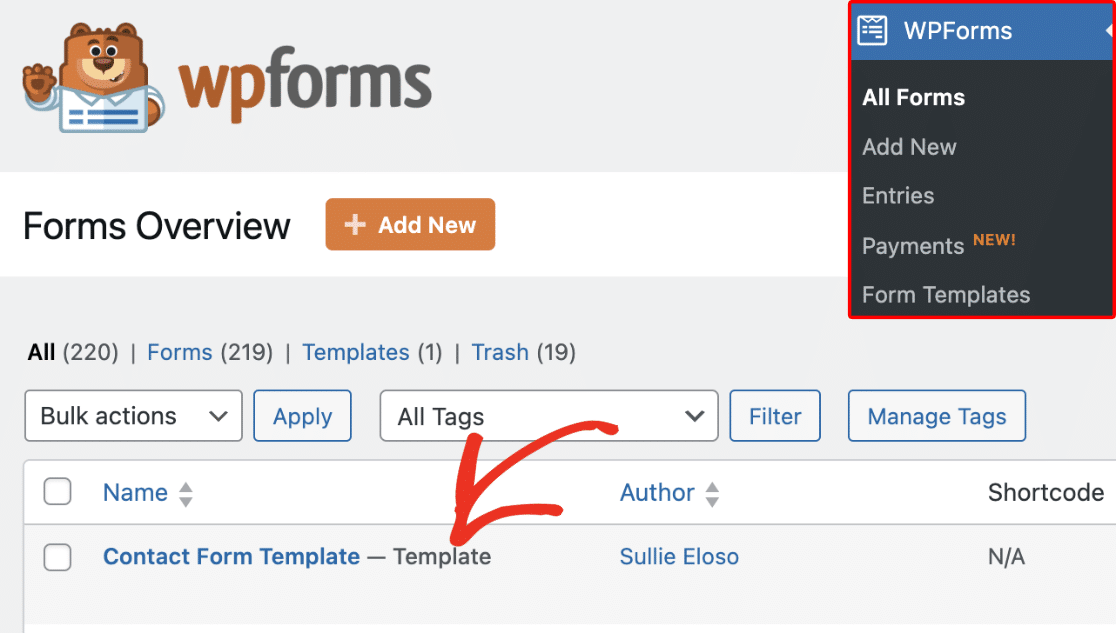
If you’d like to only show custom form templates on the forms overview page, select the Templates link to filter the list.
Editing Custom Form Templates
To edit a custom template, hover over the template and select the Edit Template button.
You’ll be directed to the form builder, where you can update the template’s fields and settings. Any changes you make here will apply to the custom template.
Using a Custom Form Template
To use a custom template, hover over the template name and select Create Form.
This would direct you to the form builder with all the fields from the custom template included in the new form. You can update the form or simply save and display it on your site.
Deleting a Custom Form Template
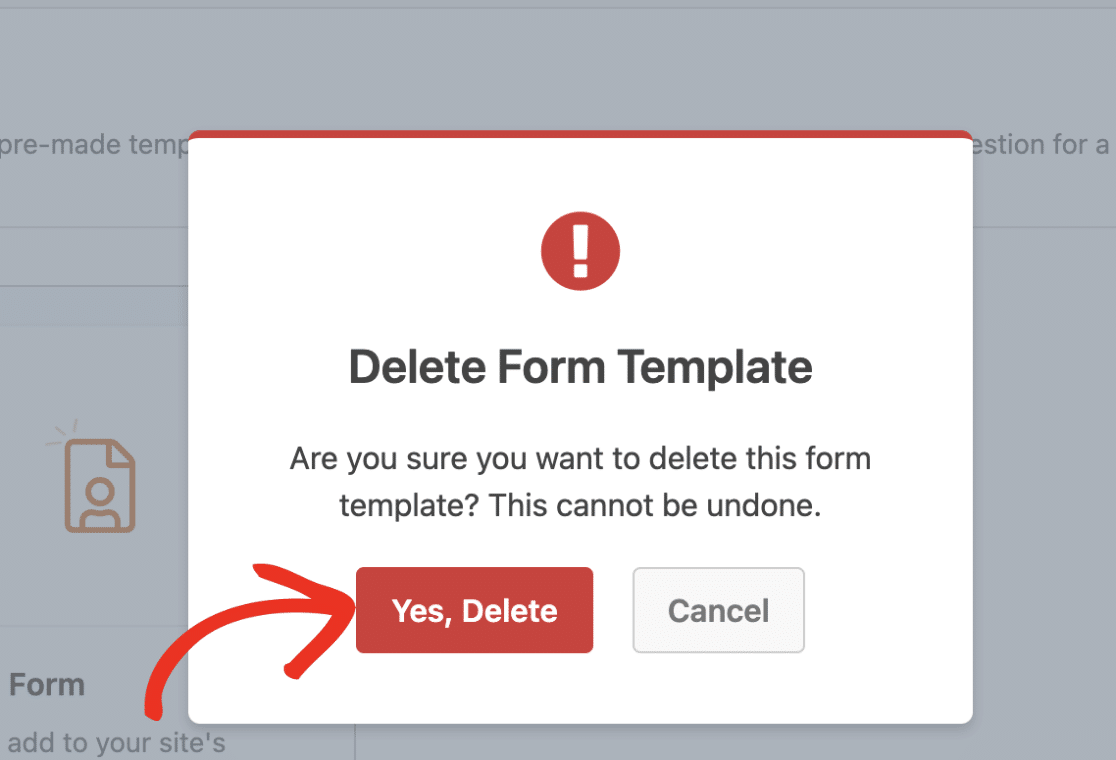
If you’d like to delete a custom form template you’ve created, hover over the template name and select the Delete icon.
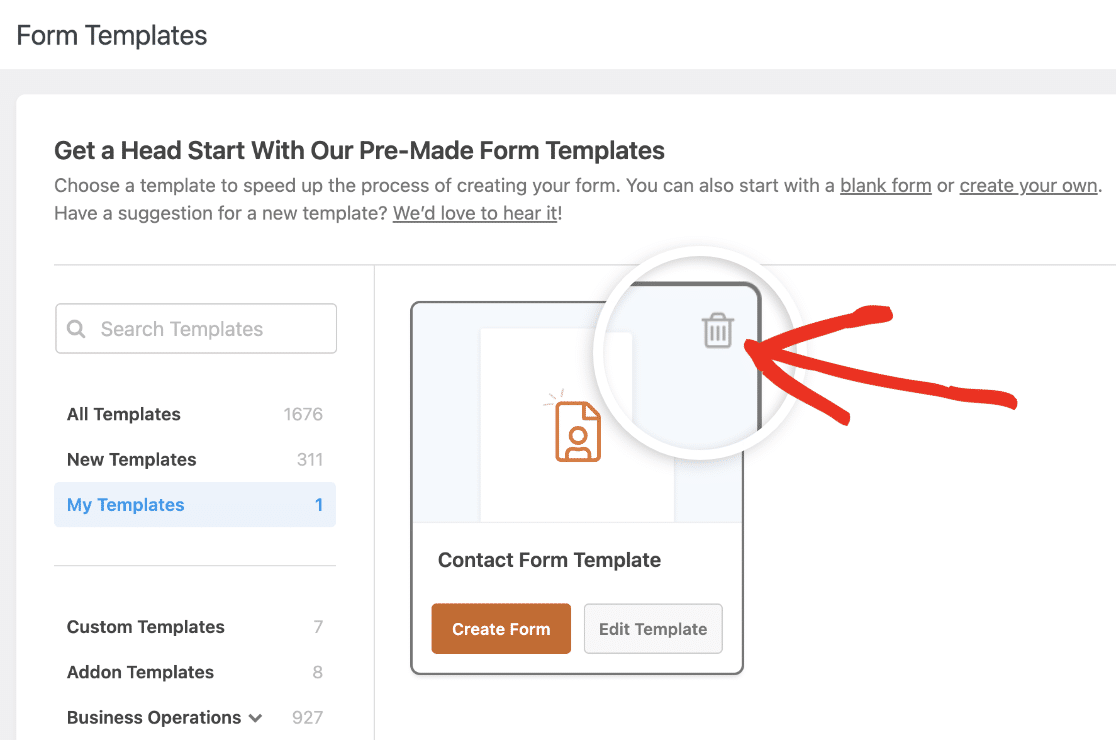
In the confirmation overlay that appears, click the Yes, Delete button to delete your custom template.
Frequently Asked Questions
These are answers to some of the top questions about creating a custom form template in WPForms.
Can I test the form template to ensure it’s working properly?
Yes. Although you won’t be able to embed a custom form template on your site, you can still test it using the Preview link in the form builder.

You can verify that the form looks and works as you expect and also submit entries.
Note: Entries submitted through a custom form template are temporarily stored and are automatically deleted after 24 hours.
What happens to form settings when converting to a custom template?
All form settings, including notifications and confirmations, are carried over when converting a form into a custom template.
Can I embed a custom template directly on my website?
No, custom templates cannot be embedded directly. They must first be used to create a new form, which can then be embedded.
Will deleting a custom template affect forms created from it?
No, deleting a custom template doesn’t affect forms that were already created using that template.
That’s it! Now you know how to easily create a reusable custom form template in WPForms.
Next, would you like to learn about the available templates in WPForms? Check out our guide on using form templates for more details.