AI Summary
Would you like to automatically send form entries from WPForms to Airtable? The Airtable addon makes it easy to connect your forms to Airtable and send form data directly into your Airtable bases and tables.
In this tutorial, we’ll show you how to install and use the Airtable addon with WPForms.
Requirements:
- You will need an Elite license level or higher to access the Airtable addon
- Ensure that you’ve installed WPForms version 1.9.8.2 or higher to meet the minimum required version for the Airtable addon
Before you get started, be sure WPForms is installed and activated on your WordPress site, and that you’ve verified your license. Then, go ahead and install and activate the Airtable addon.
Connecting WPForms to Airtable
Once the Airtable addon is installed and activated, you’ll need to connect your Airtable account to WPForms.
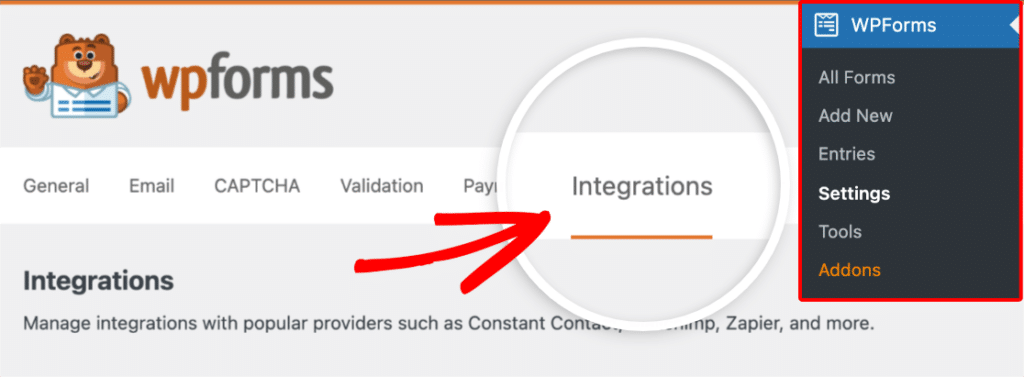
To do this, go to WPForms » Settings and click on the Integrations tab.
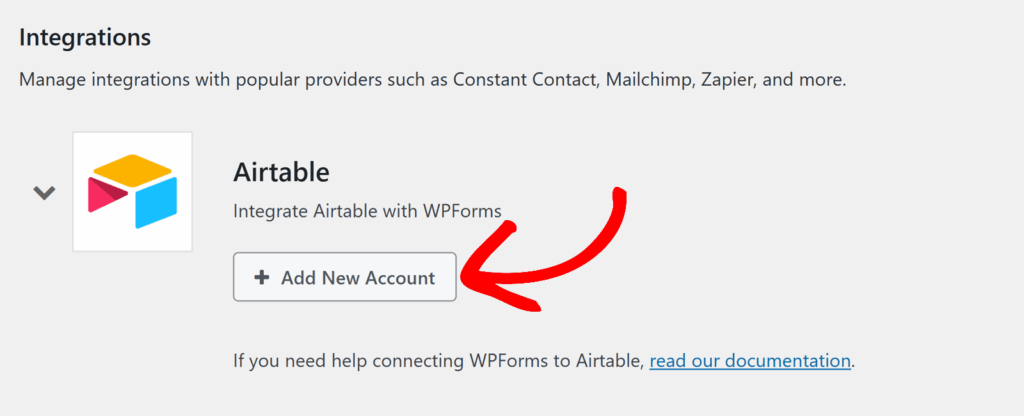
Next, click on the Airtable integration to expand its settings, then click the Add New Account button.
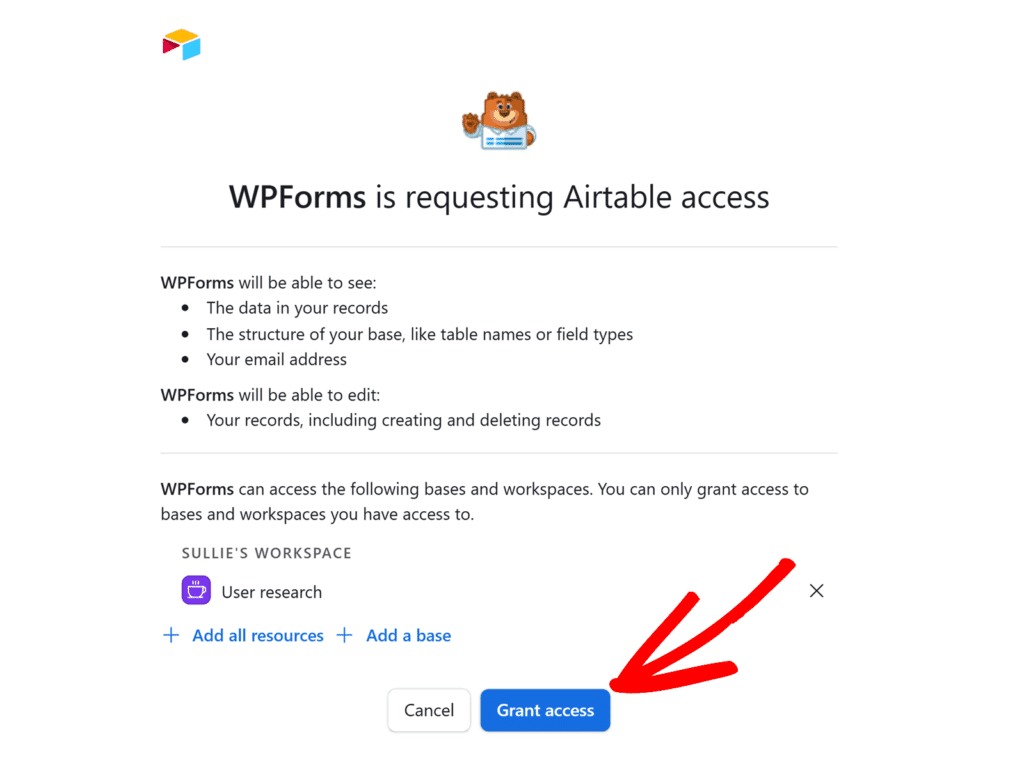
This will open an Airtable permissions screen where WPForms requests access to your account.
On this screen, you can choose how you’d like to share access. Click + Add all resources to give WPForms access to all your current and future bases across all workspaces, or click + Add a base to select specific bases manually. You can also include multiple bases or workspaces before proceeding.
Once you’ve selected your preferred option, click the Grant access button to continue.
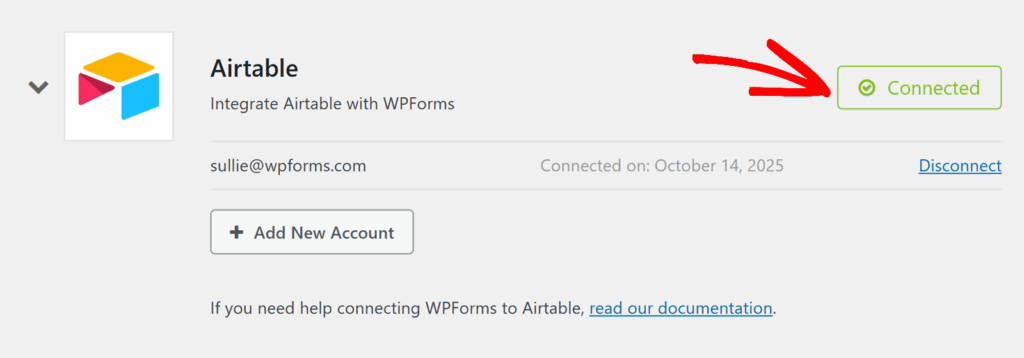
After granting access, you’ll be redirected back to WPForms » Settings » Integrations, where you should now see a green Connected status next to Airtable.
Adding an Airtable Integration to Your Form
After connecting your Airtable account, you’re ready to link it to a form. This will allow WPForms to automatically send new form entries to the Airtable base and table you select.
To get started, create a new form or edit an existing one to open the form builder.
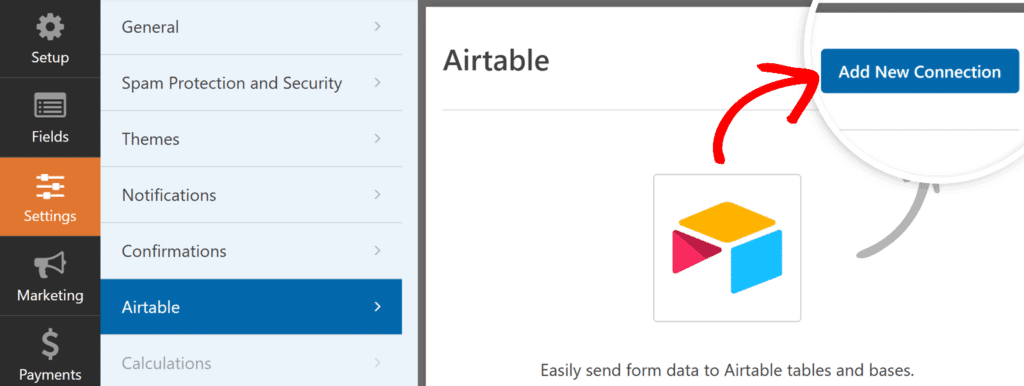
Once you’ve accessed the form builder, go to Settings » Airtable and click the Add New Connection button.
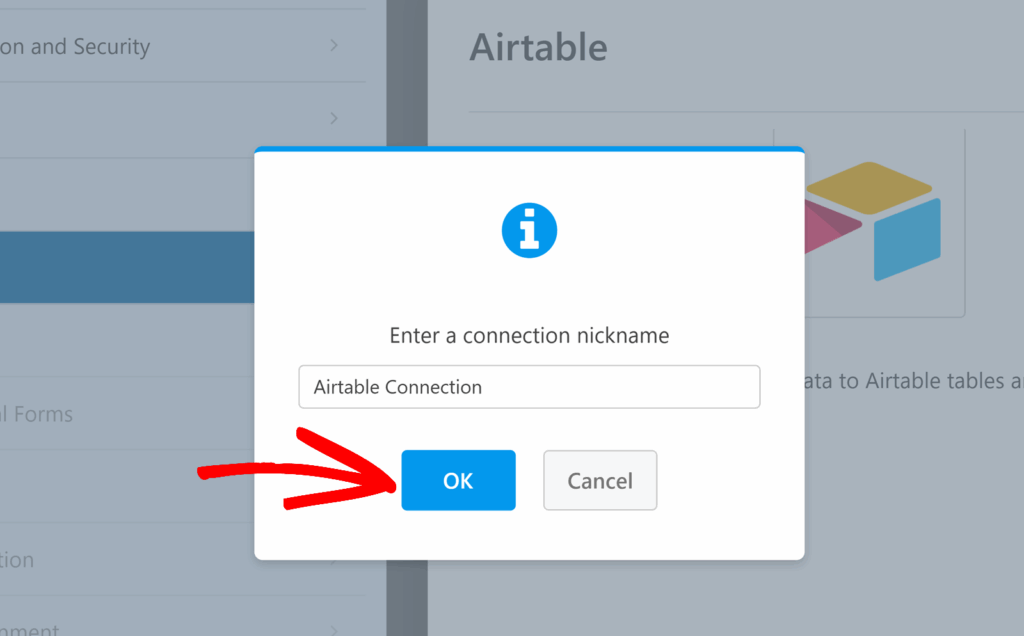
A popup will appear asking you to enter a connection nickname. This is for your internal reference only and won’t be visible to users. After entering the nickname, click OK.
Once you’ve added your connection, the Airtable settings will appear.
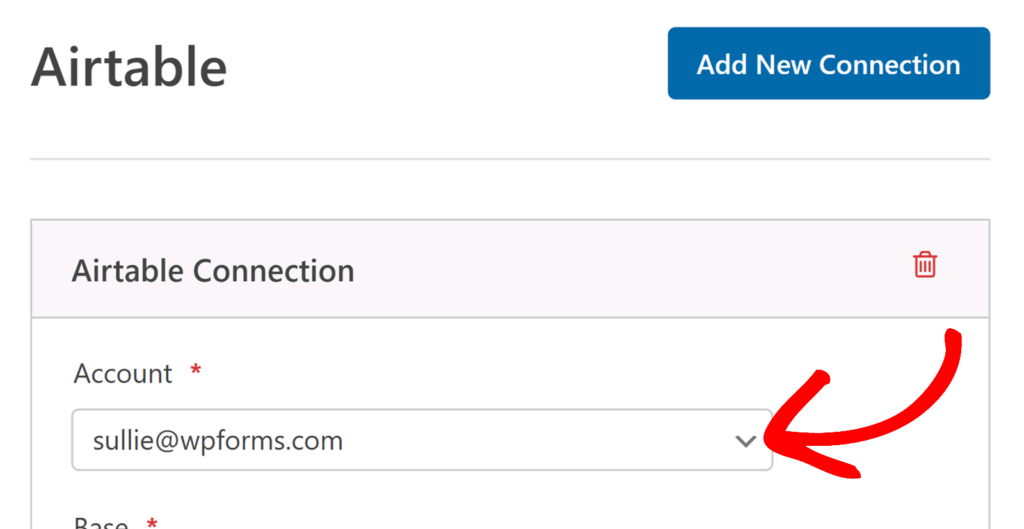
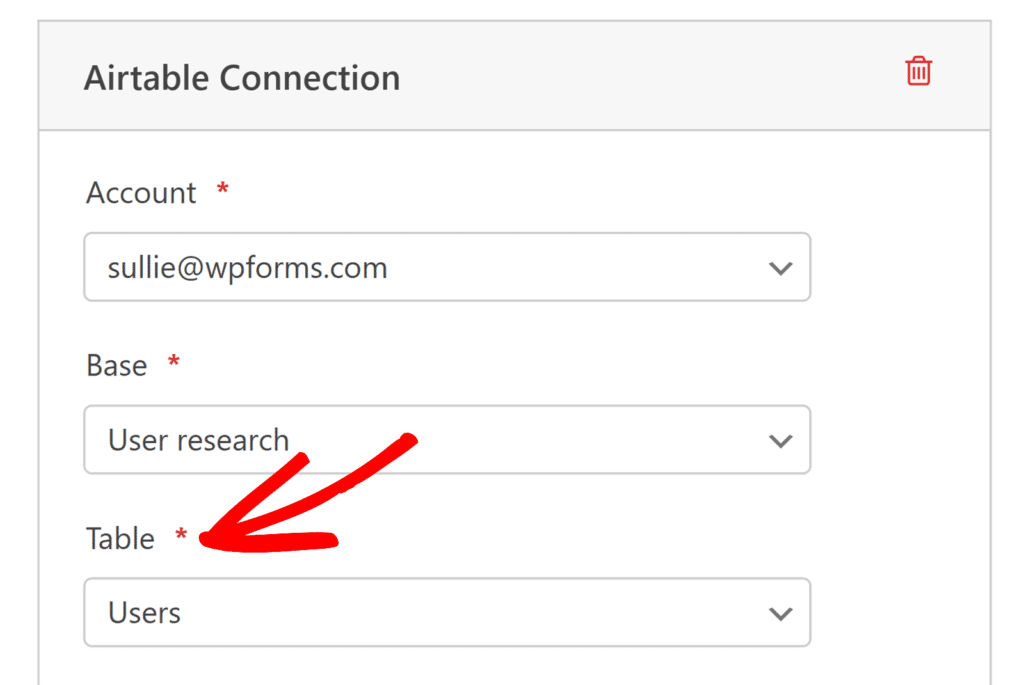
Under Account, select the Airtable account you connected earlier from the dropdown.
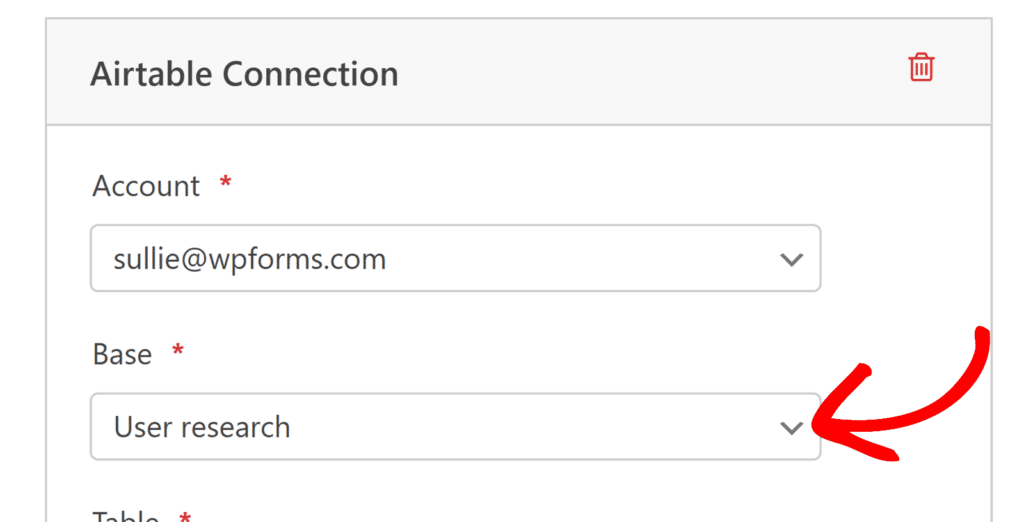
Once an account is selected, a Base dropdown will appear. Use this to select the Airtable base where your form entries will be stored.
After you’ve chosen a base, a Table dropdown will appear below it. Use this dropdown to select the specific table inside your base where new records will be created whenever someone submits your form.
Mapping Fields to Airtable
After selecting your base and table, you’ll see a Custom Fields section appear. Here, you can map Airtable fields to the corresponding form fields in WPForms.
In the Custom Field Name column, select the Airtable field (column) you’d like to send data to. In the Form Field Value column, choose the WPForms field that will provide the data for that Airtable field.
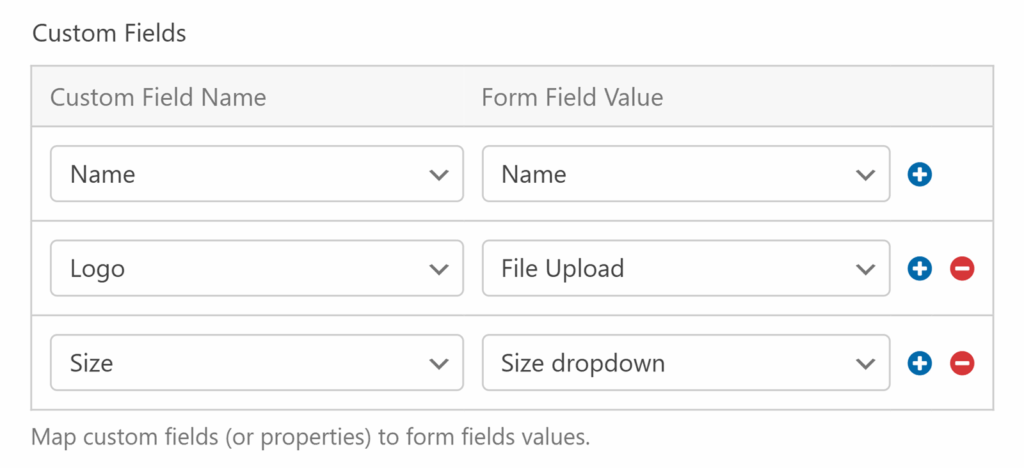
Click the blue plus (+) button to add more mappings as needed until all the Airtable fields you’d like to fill are connected to your WPForms fields.
Each time the form is submitted, a new record will be created in your selected table, and the mapped fields will populate the corresponding columns automatically.
Be sure to save your form once your mappings are complete.
Setting Up Conditional Logic (Optional)
Conditional logic allows you to control when your Airtable integration runs based on the user’s selections in your form.
For example, you might only want to send form data to Airtable if a user selects a specific option in a dropdown or checks a particular box. This can be helpful if you only want to store certain types of submissions or route specific forms to different bases or tables.
To set this up, toggle on the Enable Conditional Logic option and create your rule.
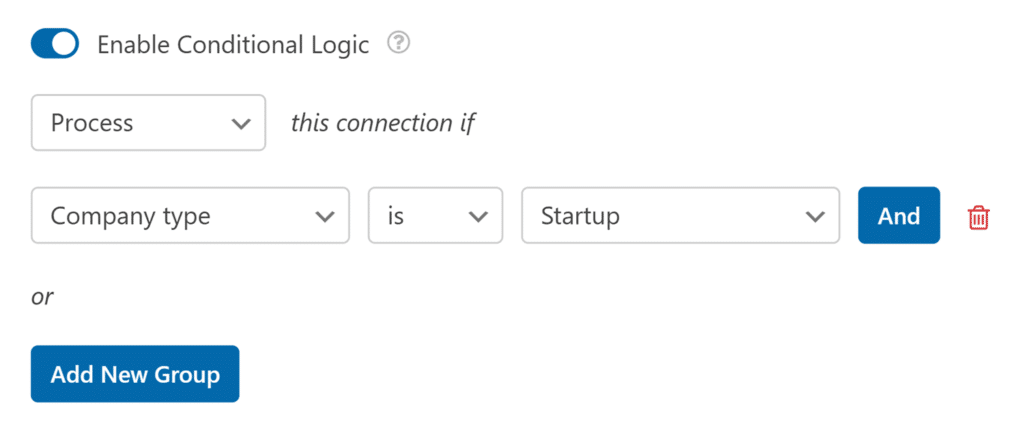
Once you’ve configured your condition, WPForms will only send data to Airtable when the rule is met.
Frequently Asked Questions
Below, we’ve covered some of the top questions we receive about integrating Airtable with WPForms.
Why can’t I select a form field when mapping to an Airtable field?
If your Airtable field appears in the Custom Field Name dropdown but there are no options available in the Form Field Value dropdown, it means there isn’t a compatible WPForms field in your form.
For instance, if you’re trying to map an Airtable Single select field but your form doesn’t include a Dropdown, Checkboxes, or Multiple Choice field, the mapping option will remain empty. WPForms only displays fields that are compatible with the selected Airtable field type.
To fix this, add a corresponding field type to your form that matches the Airtable column you’re trying to map. Once you add the correct field, it will appear automatically in the Form Field Value dropdown.
Why is the Base dropdown empty or disabled when I connect Airtable?
If the Base dropdown is grayed out or does not list any options after you select your Airtable account, it usually means that no bases have been created in that Airtable account yet.
The Airtable addon can only list and connect to bases that already exist. Before you set up the integration in WPForms, please log in to Airtable and create at least one base in the workspace you plan to use.
For detailed steps, you can follow Airtable’s own guide on how to create a base. Once your base is created, return to the WPForms form builder and open Settings » Airtable again. The Base dropdown should then show your new base so you can select it and continue the setup.
That’s it! You now know how to connect WPForms to Airtable and automatically send your form entries to Airtable bases and tables.
Next, you might want to learn how to let users upload files or images through your forms. Check out our tutorials on using the File Upload field or the Camera field for step-by-step instructions.
