AI Summary
Introduction
Ever wanted to create a form that’s super smart with conditional email recipients based on a selection from your form? Well, you’re in luck!
With WPForms, you can set up conditional logic notifications that you can read about more in this article. As well as even going a step further by setting up multiple notifications, which is pretty cool and you can learn about it in this documentation.
But hold on, in this tutorial, we’re about to make your life even easier. We’ll show you a nifty trick that lets you set up conditional recipients with just a single line of code. Yep, you read that right! It’s going to save you time and make your forms even more intelligent. Let’s dive right in! 🚀
Adding the snippet
Typically, we’d kick things off by creating a brand-new form. But today, we’re going to take a slightly different route and start by adding just a single line of code to our website.
If you’re not sure about the ins and outs of adding code snippets to your site, don’t worry. Check out this handy guide for some step-by-step assistance.
/**
 * Create conditional email recipients with a single line of code.
 *
 * @link https://wpforms.com/developers/how-to-create-conditional-email-recipients/
 */

add_filter( 'wpforms_fields_show_options_setting', '__return_true' );
This snippet’s magic lies in its ability to let Checkbox, Dropdown, or Multiple Choice fields hold not one, but two distinct values for each selection. It’s like having a visible value and a hidden one working behind the scenes. This neat trick will be incredibly useful when it’s time to decide which recipient should get that email notification.
Creating the form
Now, let’s get down to the fun part – creating the form! If you’re new to form creation and could use some guidance, feel free to check out this documentation.
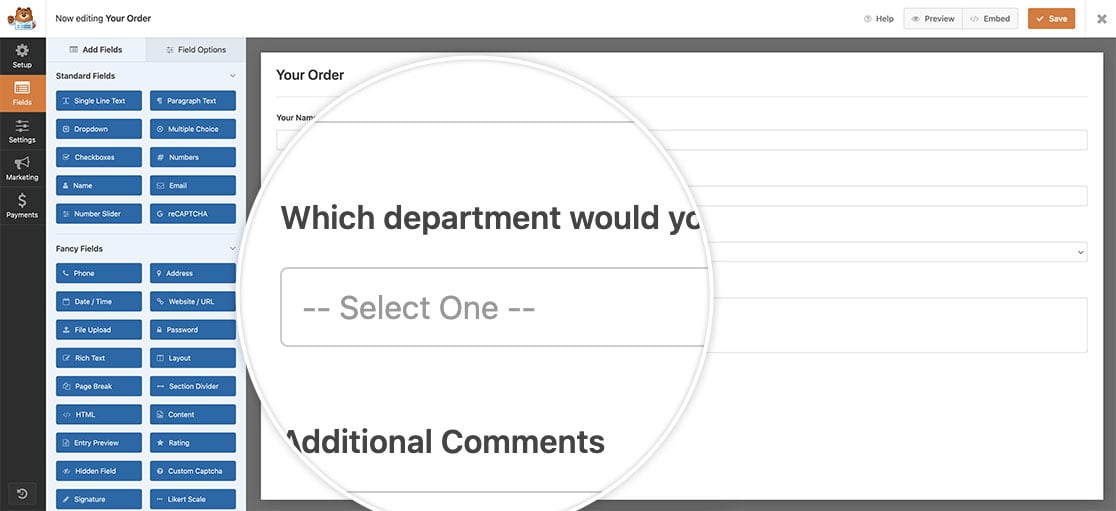
For this tutorial, we’re rolling up our sleeves to craft a versatile form that covers a range of topics: sales, account management, customer support, and even a catch-all “other” option for those who aren’t quite sure which category fits their question. To make this possible, we’re going to introduce a Dropdown field into our form. This will allow our visitors to easily select the topic that best suits their specific inquiry.

Enabling Field Values
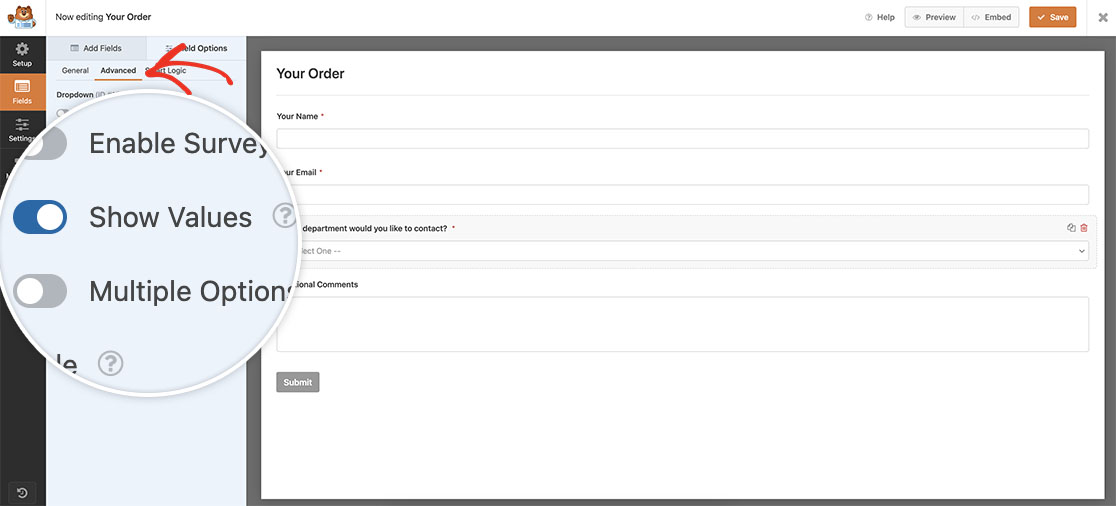
After you’ve configured your Dropdown field labels, navigate to the Advanced tab. Here, you’ll find the option to activate Show Values.

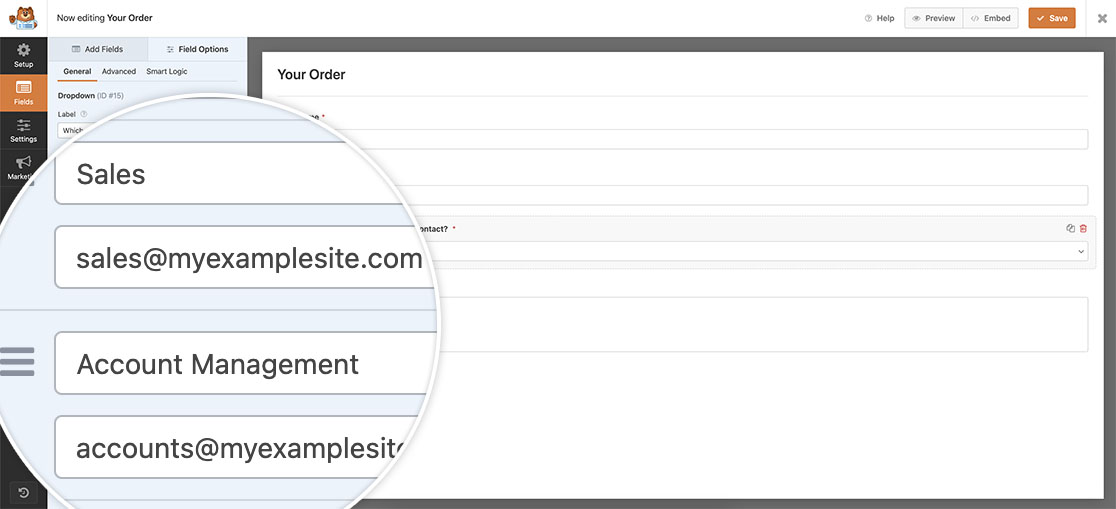
Once you’ve enabled Show Values, return to the General tab. You’ll now notice an additional space below the options. This is where we’ll input the email addresses associated with each specific department.

Setting the email notification
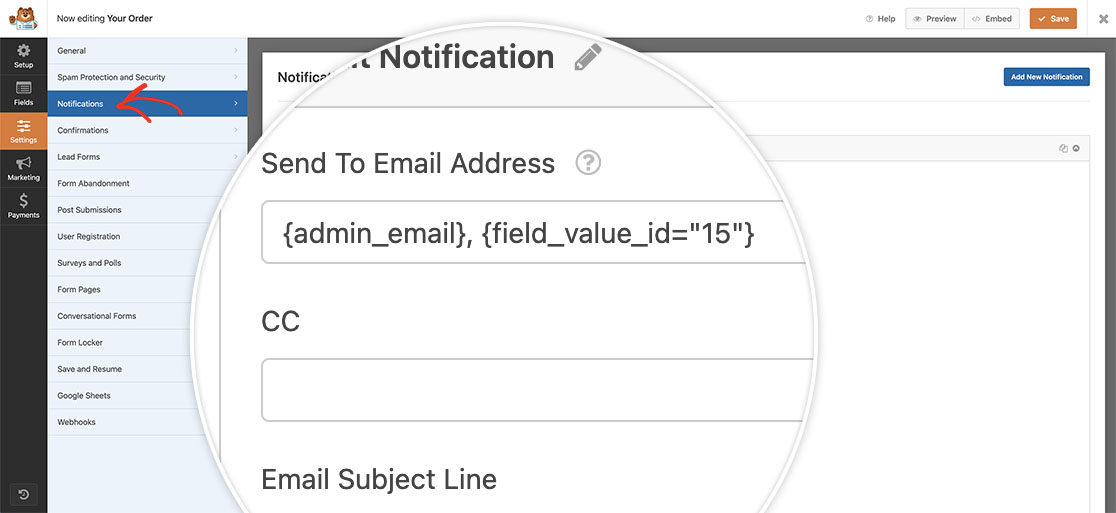
To set up our conditional email recipients, we’ll need to adjust the email notification settings for the Send To Email Address field. To do this, go to your Settings and choose Notifications.
In the Send To Email Address section, we’ll keep the original Smart Tag {admin_email} intact because we still want the site admin to receive the email notification. However, we’re also going to incorporate a Smart Tag to dynamically fetch the email address associated with the correct department.
For multiple notifications, separate email addresses with a comma.
To include the field value email address, you’ll need to be aware of the field ID for your Dropdown field. For the purposes of this tutorial, our Dropdown field has an ID of 15. So, after the comma, you’ll append {field_value_id="15"}. By incorporating this tag at this point, you’re effectively associating the appropriate email address with the relevant department for the email notification.
Please remember that you’ll need to update the 15 to match your own field ID for your Dropdown field. If you’re not sure what your field ID is and where to find it, please checkout this guide for further details.

And that’s all you need to enable conditional email recipients without having to create multiple notifications! Now when the user selects which department they want to reach out to, an email address will auto-populate and deliver to the correct email address assigned through field values.
Would you like to also store these field values inside an entry? Take a look at our tutorial on How to Store Field Values in the WPForms Entry.
Related
Filter Reference: wpforms_fields_show_options_setting
