AI Summary
Interested in setting up a post-review form? You’ve probably encountered these on various websites after reading an article. They come in diverse formats, from straightforward text prompts like “Did you find this post useful?” to intuitive thumbs-up or thumbs-down icons that allow you to express your feedback.
In this tutorial, we’ll guide you through creating a feedback form that will appear at the end of your posts, enabling you to collect valuable insights from your readers regarding your content.
Creating the Form
To begin, we’ll create a new form with a simple Yes or No question. We’ll add a hidden field that captures the page title so that in our entries, we’ll know what post they were reading when leaving their review.
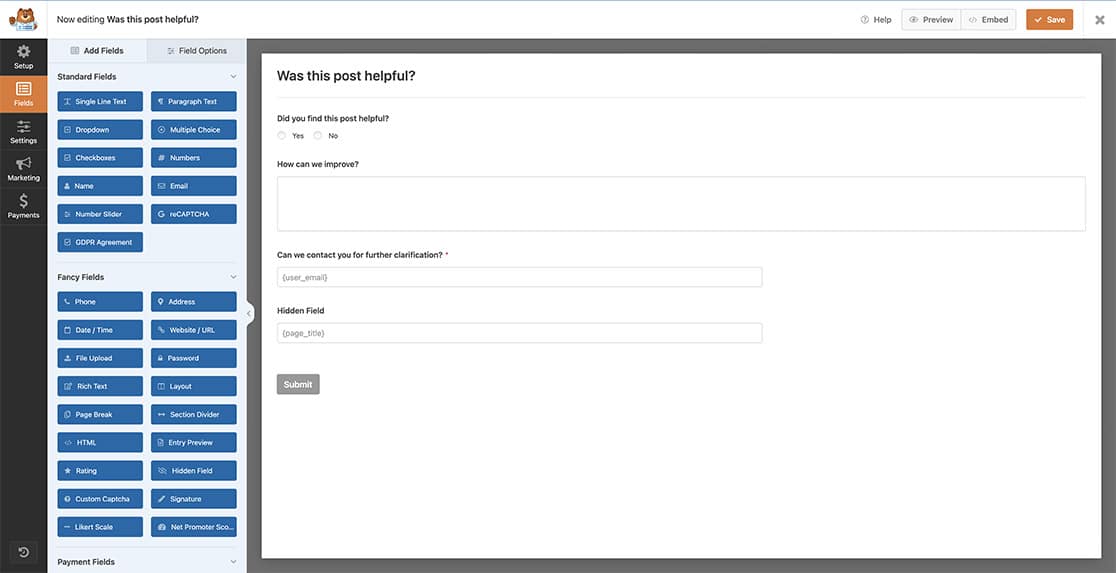
If you need help creating your form, please check out this article.
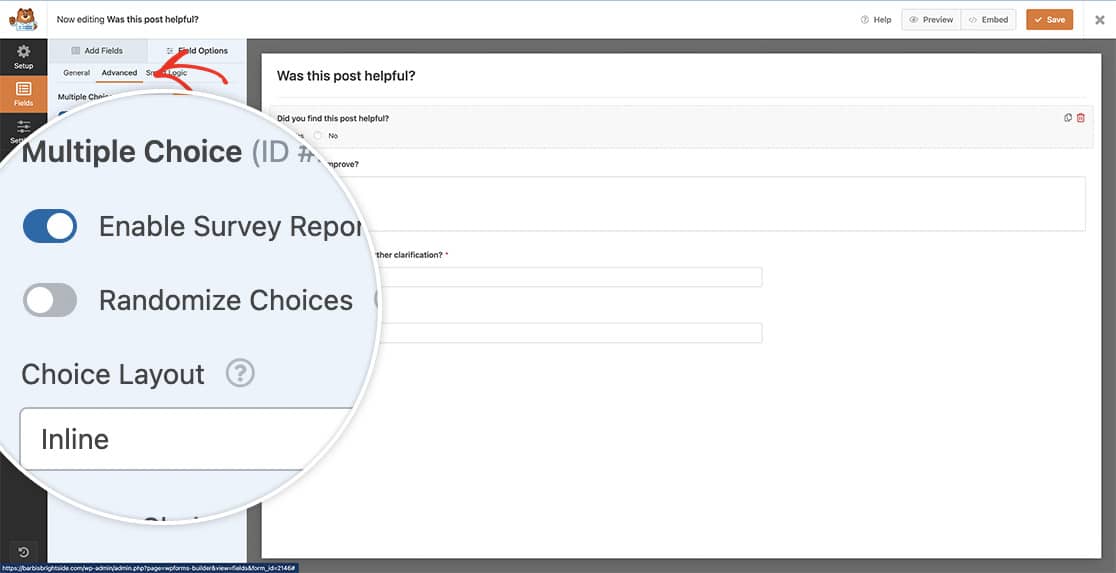
For our Yes/No question, we’ve also clicked the Enabled Survey Reporting so that it’s easier to go into the form and filter the results, view by date range, etc.
Setting the Conditional Logic for the Fields
For the purpose of this documentation, if the reader clicks the No, we’ll want to gather additional information, such as how we can improve.
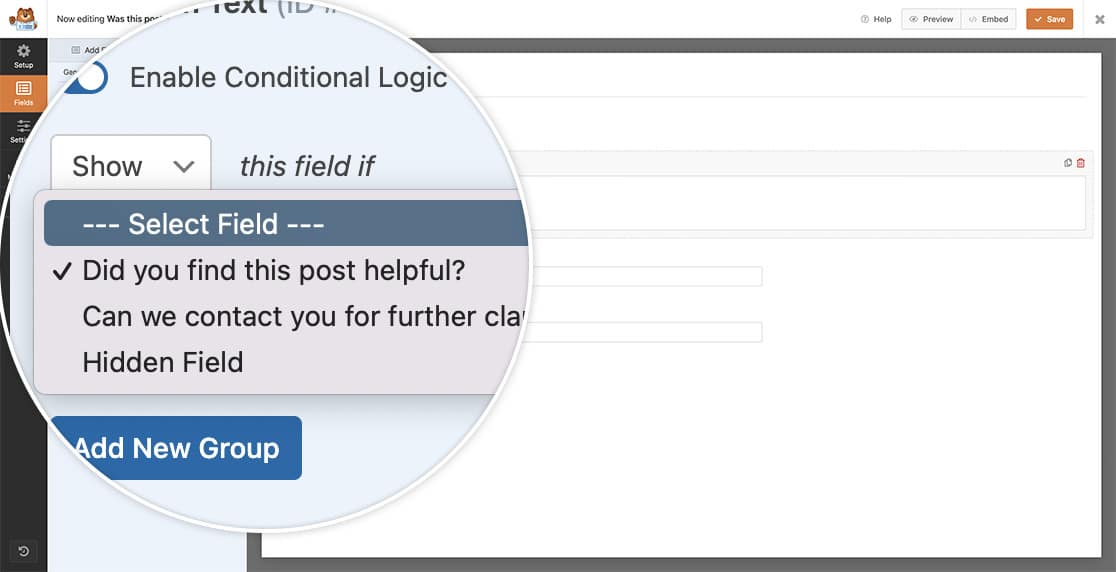
To do this, we’ll have the Paragraph Text field use conditional logic that if No is selected, two extra fields will be displayed. The Paragraph Text field to gather additional comments as well as the Email field, which will not be a required field but will allow the user to leave us their email address just in case we would want to reach out and gain further knowledge on how we can improve their experience.
To set the conditional logic, click the Paragraph Text field and on the Advanced tab. Then, toggle the Enable Conditional Logic option to the on position.
Once this is enabled, you want to Show the Paragraph Text field if the reader selected No when answering the question on Did you find this post helpful?.
Adding Conditional Logic to the Notifications
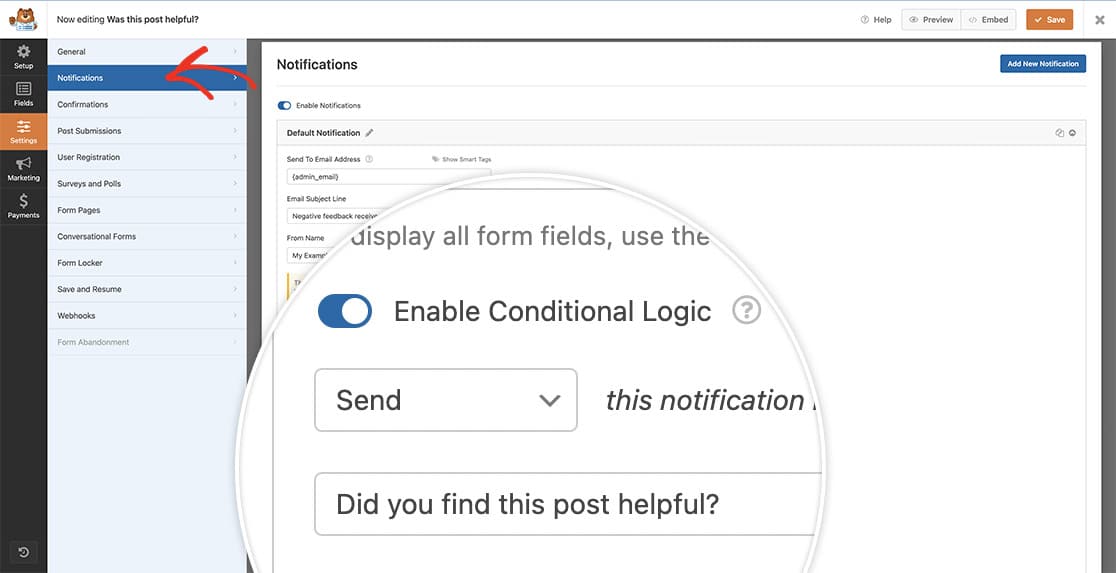
This step is entirely optional when configuring your post-review form. You can choose to send an email notification only when the feedback is negative. For instance, you might prefer to receive notifications only when readers don’t find your post helpful.
If you want to add this step, click Settings inside the form builder. Next, navigate to the Notifications tab. At the bottom of the notification, toggle on the Enable Conditional Logic option and set your condition to only send the notification if they selected No.
Adding the Form to Your Pages
There are several ways to display your form on your site. For our demo, we’ve just added our form at the bottom of every post on our site using the WPForms block.
Now, when a reader finishes an article on our site, they’ll see our form and be able to provide that useful feedback.
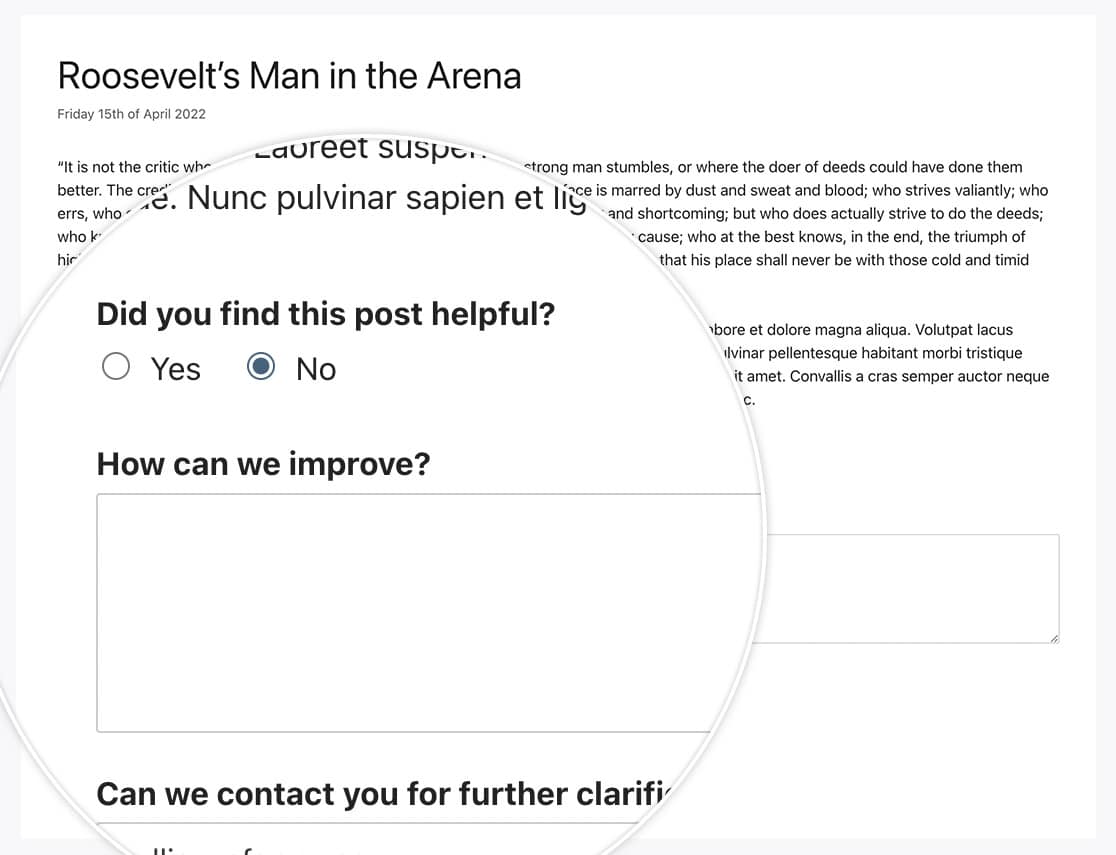
Note: For more details on how to add a form to a page, please see our tutorial on displaying forms in WordPress.
Frequently Asked Questions
Below, we’ve answered some of the top questions we see about adding a feedback form to your WordPress posts/pages.
Q: How can I use thumbs up and down for my form?
A: You can easily change the text to icons by using Image or Icon Choices for your form instead of text. For example, a check mark or cross icon uploaded for your yes/no, a thumbs up or down, or even just a happy and sad face using a font-based icon for emojis. There are loads of different ways to customize these types of forms.
For further information, please see our tutorials on using Icon Choices and Image Choices.
That’s it! You now know how to create a post-review form using WPForms.
Next, would you like to add some animation to your form when it is submitted? See our tutorial on how to add falling snow animation to confirmation messages.
