Introduction
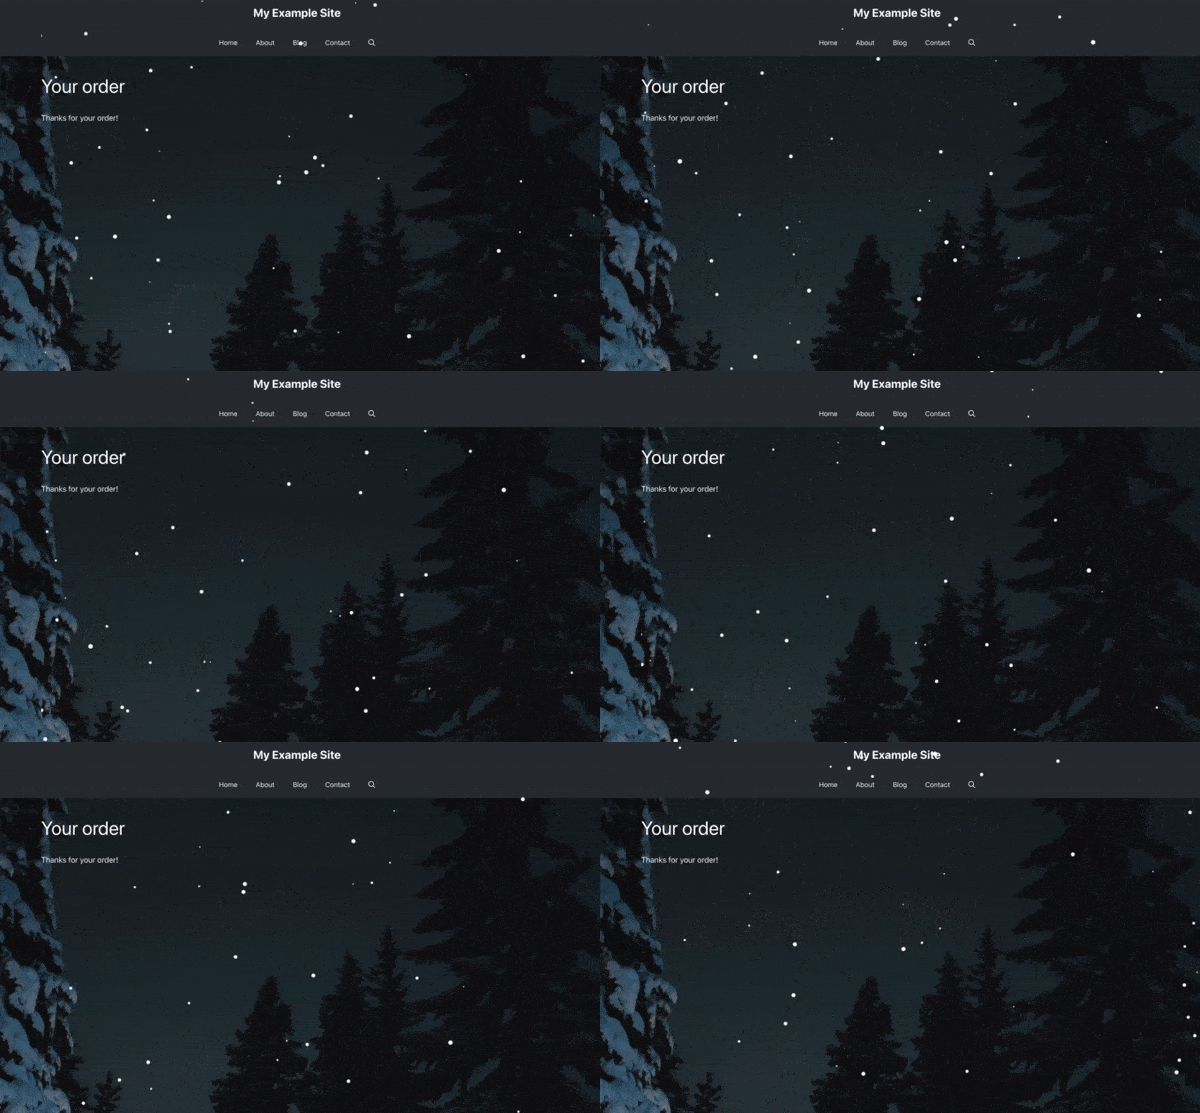
Would you like to add a falling snow animation to your confirmation message? You can easily add some animation to the confirmation message that would have more of an interactive effect using PHP and JavaScript. In this tutorial, we’ll break down each step on how to achieve this.
Creating your form
First, you’ll need to create your form. For the purpose of this tutorial, we’ve created an order form. Once the order is complete, a confirmation message will be displayed that our falling snow animation will appear on.
If you need any help in creating your form, please visit this documentation.
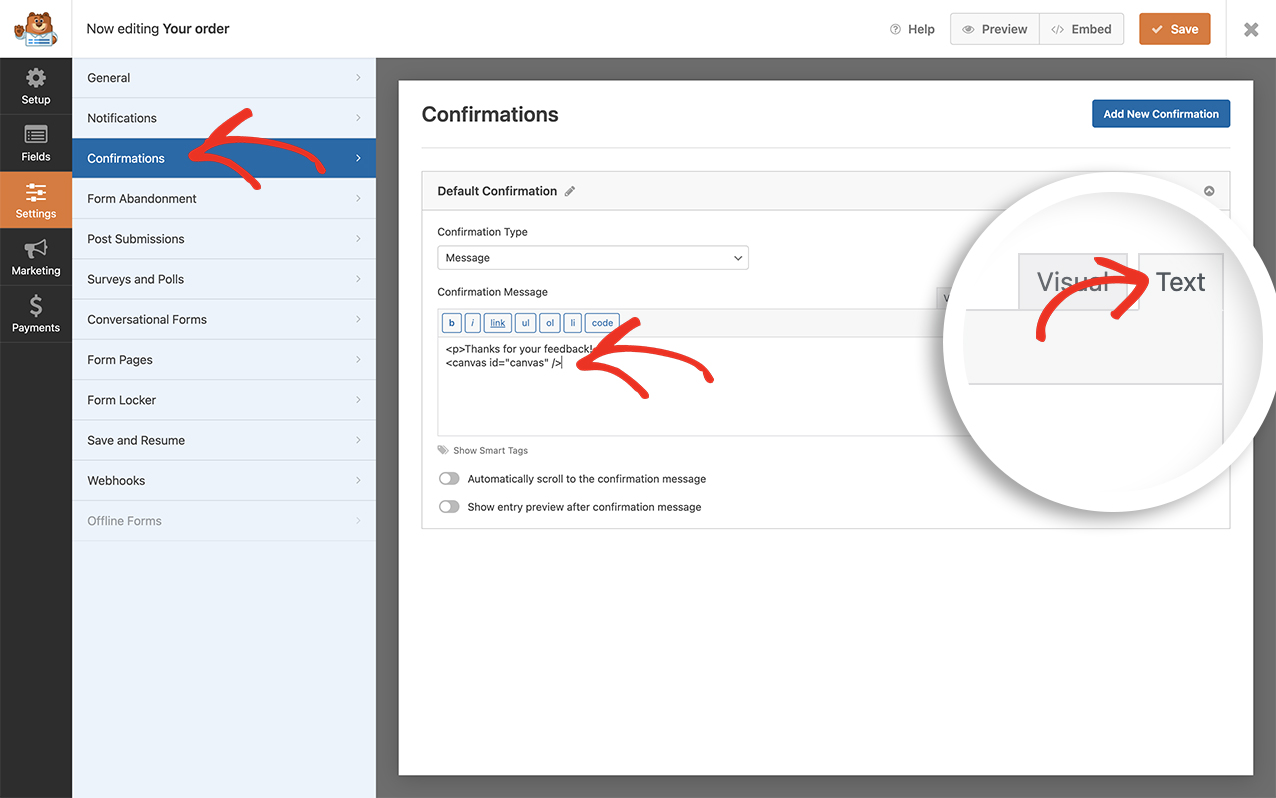
Once you’ve added your fields, click on the Settings tab and then click Confirmations. Inside the Confirmation Message window, we’re going to add an HTML canvas element that has an ID of canvas so that we can target exactly where the confetti will fall.
Once inside the Confirmations tab, remember to click the Text tab on the message box. You’ll need to do this in order to add pure HTML into this message area.

Simply add <canvas id="canvas" />
Adding this canvas element and ID means that we can control where this snow will appear. We only want it to show in the confirmation message so we’re adding an element that we can specifically target in our code snippet.
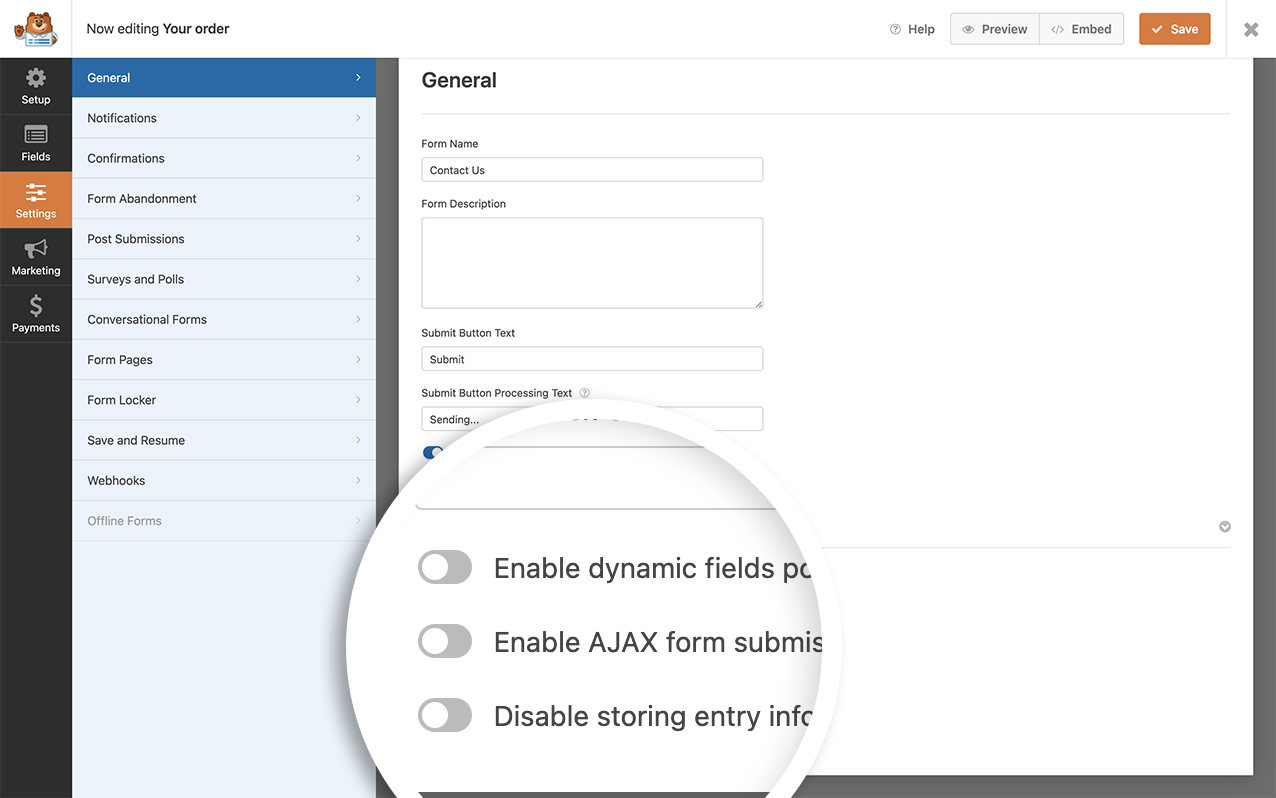
This snippet only runs on non-AJAX forms. You’d need to turn off your AJAX settings inside the form builder. To disable this setting go to the Settings tab inside the form builder and under the Advanced setting, disable the Enable AJAX form submission setting.

Adding the CSS for the canvas wrapper
We need to also add some custom CSS for the <canvas id="canvas" /> wrapper. If you need any help in how and where to add custom CSS, please check out this tutorial. Simply copy and paste this CSS to your site.
canvas#canvas {
    position: absolute;
    top: 0;
    left: 0;
}
Adding the code snippet to create the snow
Now it’s time to add the code snippet that will make the magic happen. For any assistance in adding a snippet to your site, please see this tutorial.
/**
 * Add falling snow to the canvas element on the confirmation message
 *
 * @link  https://wpforms.com/developers/how-to-add-falling-snow-animation-to-your-confirmation-message/
 */

function wpf_dev_winter_scene_animation() {
?>

<script type="text/javascript">
    //If the canvas ID does not exist on the page, this script will not run

    if (document.querySelector( '#canvas' ) !== null) {
//canvas init
	var canvas = document.getElementById( "canvas" );
	var ctx = canvas.getContext( "2d" );

	//canvas dimensions
	var W = window.innerWidth;
	var H = window.innerHeight;
	canvas.width = W;
	canvas.height = H;

	//snowflake particles
	var mp = 50; //max particles
	var particles = [];
	for(var i = 0; i < mp; i++)
	{
		particles.push({
			x: Math.random()*W, //x-coordinate
			y: Math.random()*H, //y-coordinate
			r: Math.random()*4+1, //radius
			d: Math.random()*mp //density
		})
	}

	//Lets draw the flakes
	function draw()
	{
		ctx.clearRect(0, 0, W, H);

		ctx.fillStyle = "white";
		ctx.beginPath();
		for(var i = 0; i < mp; i++)
		{
			var p = particles[i];
			ctx.moveTo(p.x, p.y);
			ctx.arc(p.x, p.y, p.r, 0, Math.PI*2, true);
		}
		ctx.fill();
		update();
	}

	//Function to move the snowflakes
	//angle will be an ongoing incremental flag. Sin and Cos functions will be applied to it to create vertical and horizontal movements of the flakes
	var angle = 0;
	function update()
	{
		angle += 0.01;
		for(var i = 0; i < mp; i++)
		{
			var p = particles[i];
			//Updating X and Y coordinates
			//We will add 1 to the cos function to prevent negative values which will lead flakes to move upwards
			//Every particle has its own density which can be used to make the downward movement different for each flake
			//Lets make it more random by adding in the radius
			p.y += Math.cos(angle+p.d) + 1 + p.r/2;
			p.x += Math.sin(angle) * 2;

			//Sending flakes back from the top when it exits
			//Lets make it a bit more organic and let flakes enter from the left and right also.
			if(p.x > W+5 || p.x < -5 || p.y > H)
			{
				if(i%3 > 0) //66.67% of the flakes
				{
					particles[i] = {x: Math.random()*W, y: -10, r: p.r, d: p.d};
				}
				else
				{
					//If the flake is exitting from the right
					if(Math.sin(angle) > 0)
					{
						//Enter from the left
						particles[i] = {x: -5, y: Math.random()*H, r: p.r, d: p.d};
					}
					else
					{
						//Enter from the right
						particles[i] = {x: W+5, y: Math.random()*H, r: p.r, d: p.d};
					}
				}
			}
		}
	}

	//animation loop
	setInterval(draw, 25);

    }
</script>

<?php
}
add_action( 'wpforms_wp_footer_end', 'wpf_dev_winter_scene_animation', 1);

And that’s all you need! You’ve now successfully added a falling snow animation to your confirmation message. Would you like to add some confetti instead? Check out our tutorial on How to Add Confetti Animation to Confirmation Message.
Related
Action Reference: wpforms_wp_footer_end
