AI Summary
Would you like to delete entries for a specific form? This can be especially helpful if you have a lot of entries, and they take up more than one page on the Entries screen.
In this tutorial, we’ll cover how to store unwanted form entries in the trash as well as the steps to permanently delete all entries for a specific form.
Accessing Form Entries
To get started, you’ll need to go to WPForms » All Forms in the WordPress admin menu. From there, you can hover over a form title and click Entries.
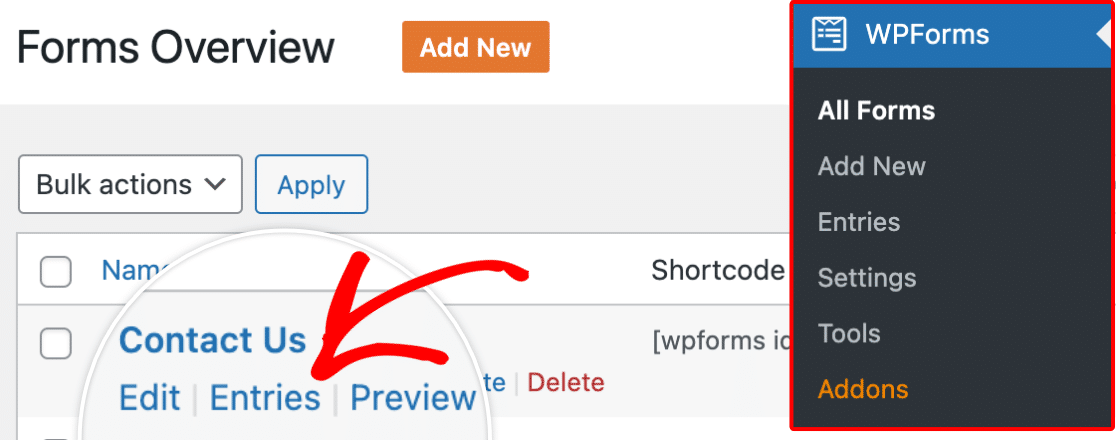
This will take you to the Entries page for that specific form.
Next, we’ll cover how to add unwanted form entries to the trash, which is the first step to deleting them.
Adding Form Entries to the Trash
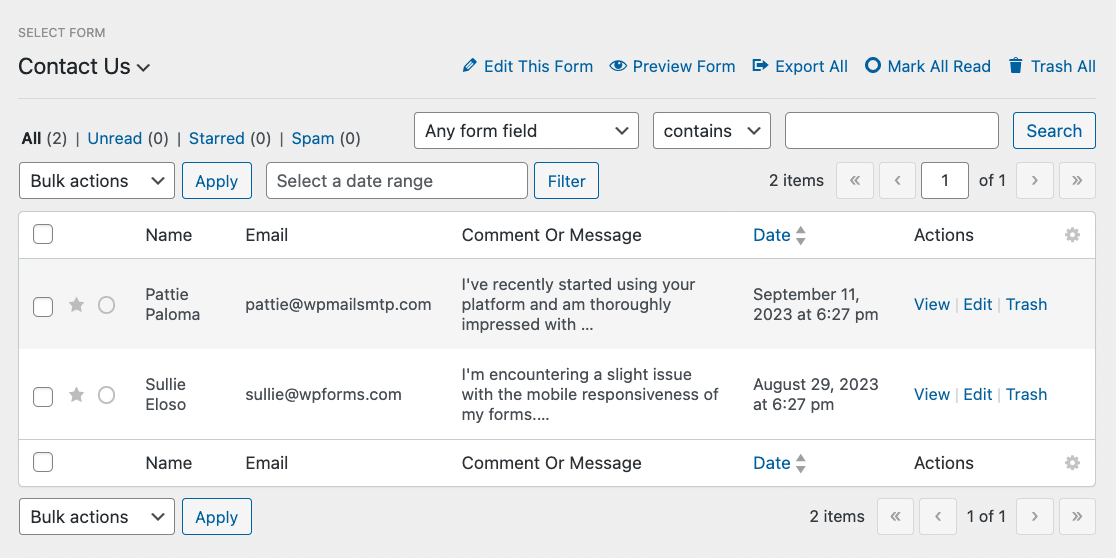
From the Entries page, you can remove entries from your site by adding them to the trash. In the following sections, we’ll cover various ways you can do this.
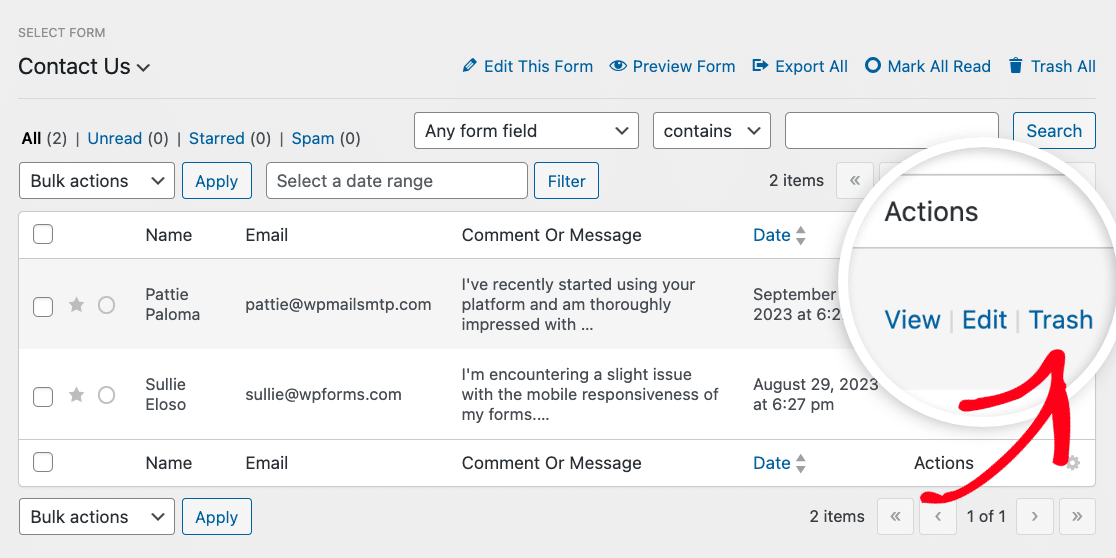
Trashing a Single Entry
To add a single entry to the trash, hover over the entry and click the Trash option.
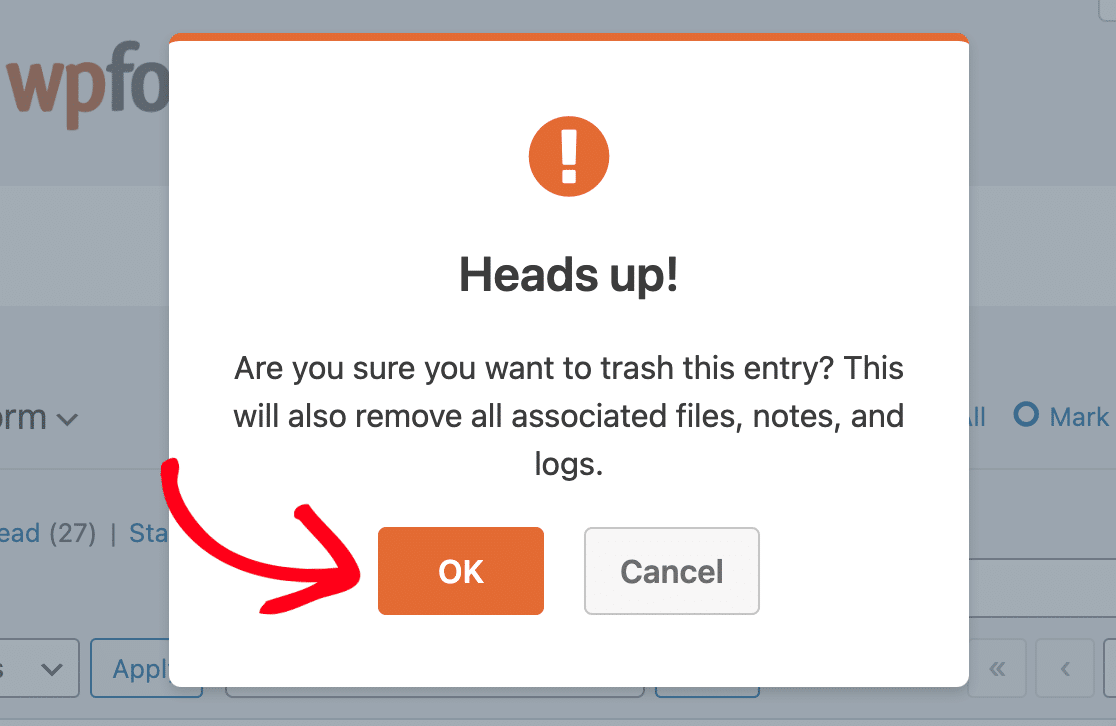
A confirmation modal will then pop up prompting you to verify the action. To proceed, go ahead and click the OK button.
Your form entry should now be successfully added to the trash.
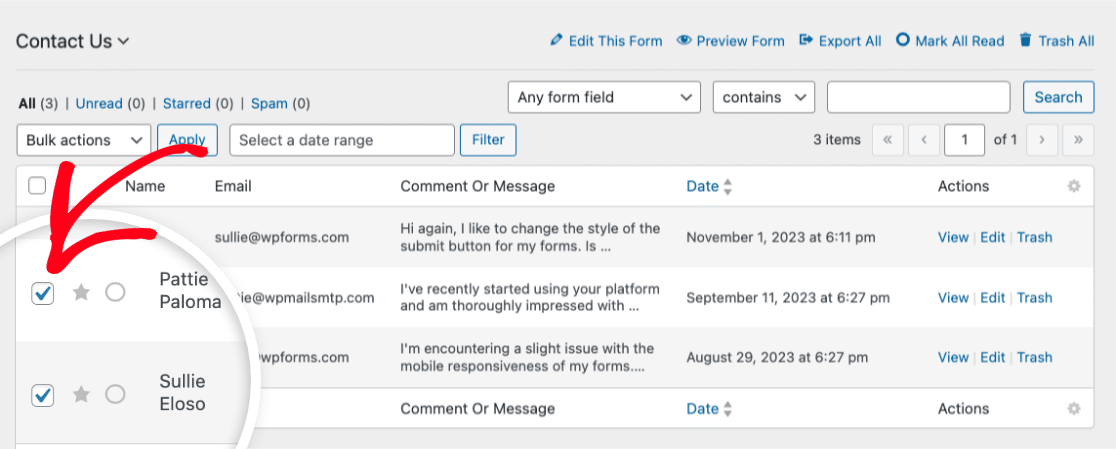
Trashing Multiple Entries
If you’d like to add multiple form entries to the trash at once, check the box next to each entry you’d like to add.
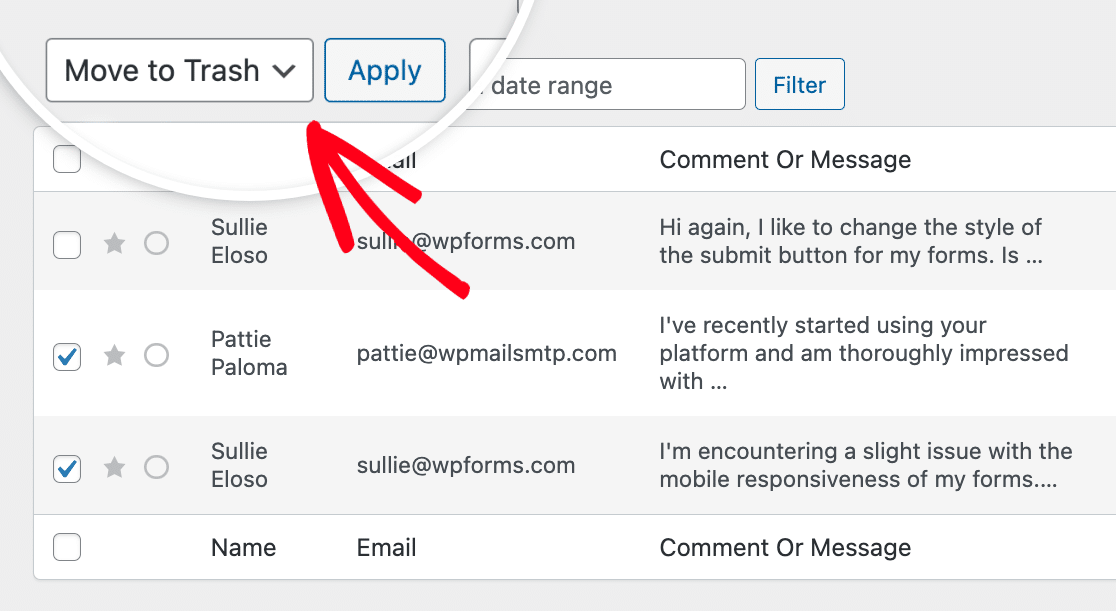
Once you’ve chosen the form entries you’d like to add to the trash, select the Move to Trash option from the Bulk actions dropdown and then click the Apply button.
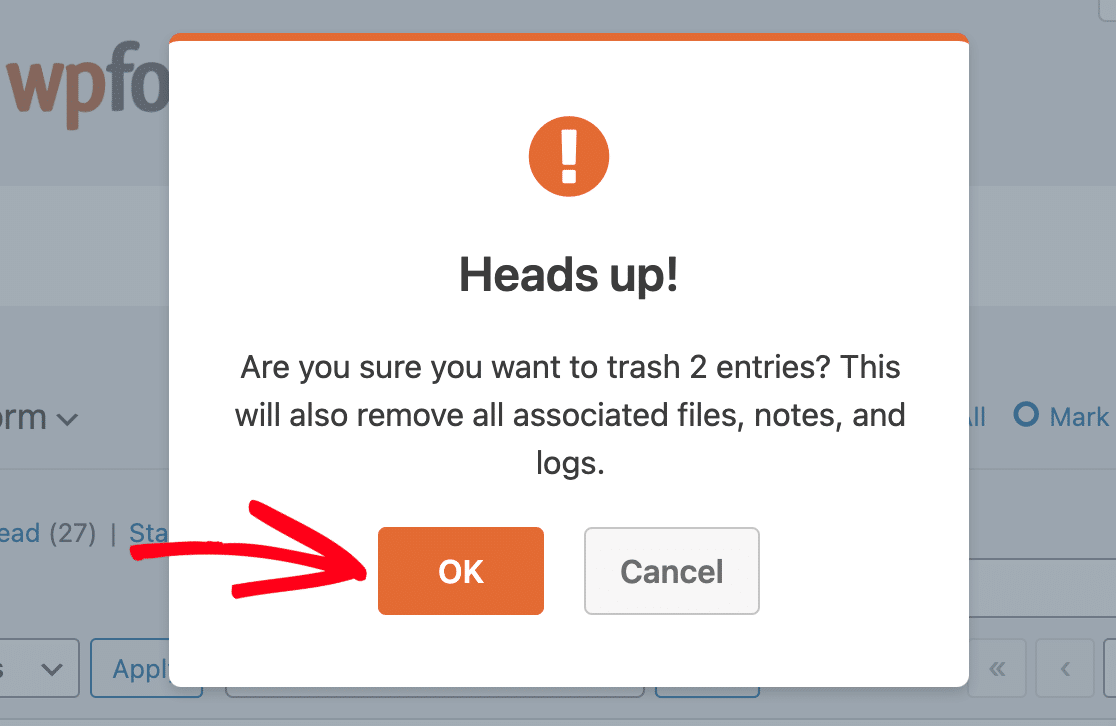
A confirmation modal will pop up asking you to verify the action. Go ahead and click the OK button to confirm.
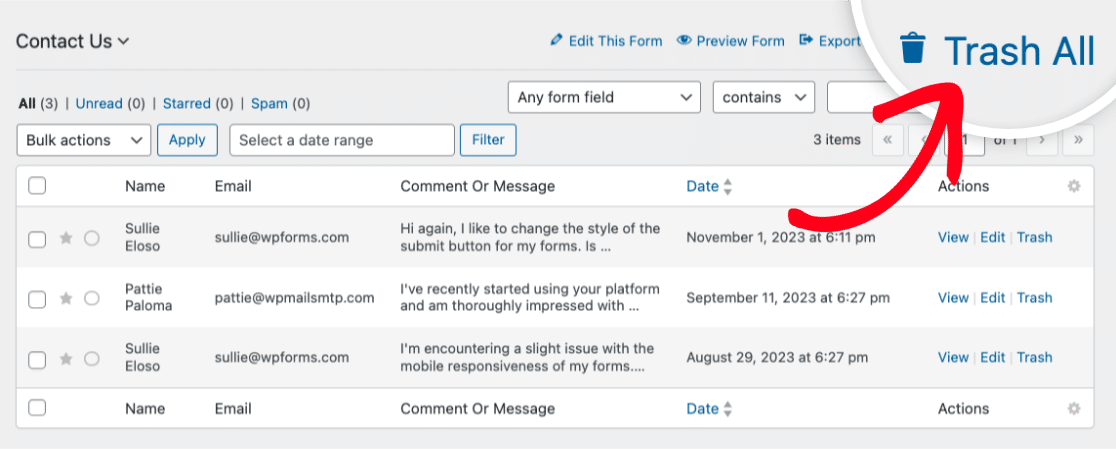
Trashing All Entries
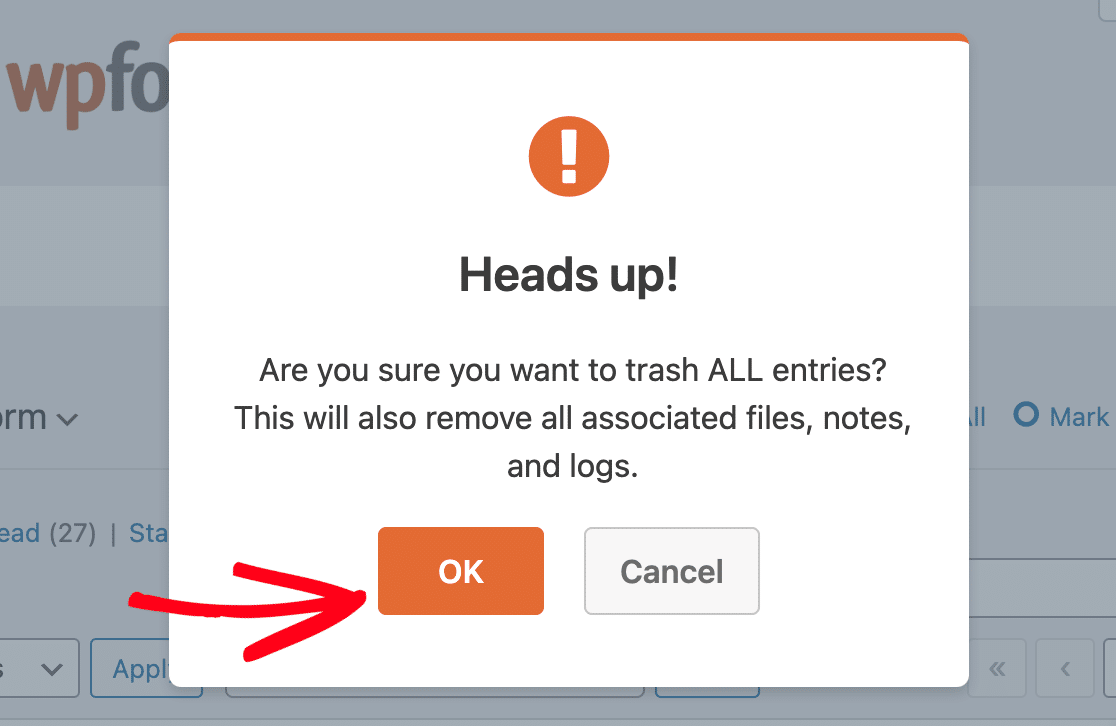
If you’d like to trash all the entries for a specific form, click Trash All.
You’ll then see a modal window asking you to confirm the action. Click OK to proceed to move all the entries to the trash.
Viewing Your Trashed Entries
Once you’ve added entries to the trash, you can view them by clicking on the Trash link.
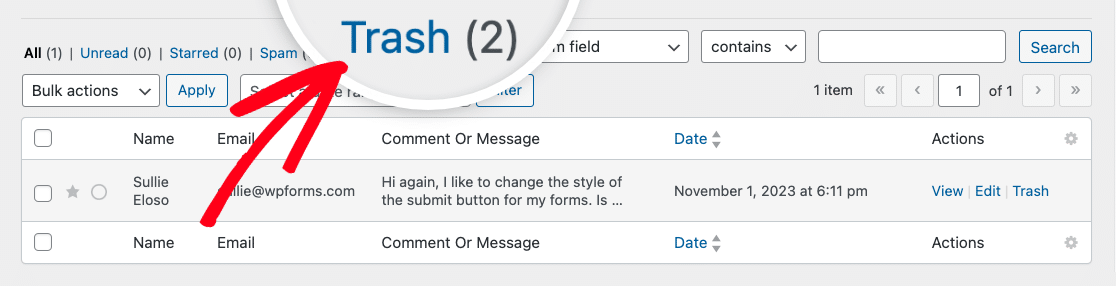
This will take you to the trash screen where you can view the entries that are currently in the trash.
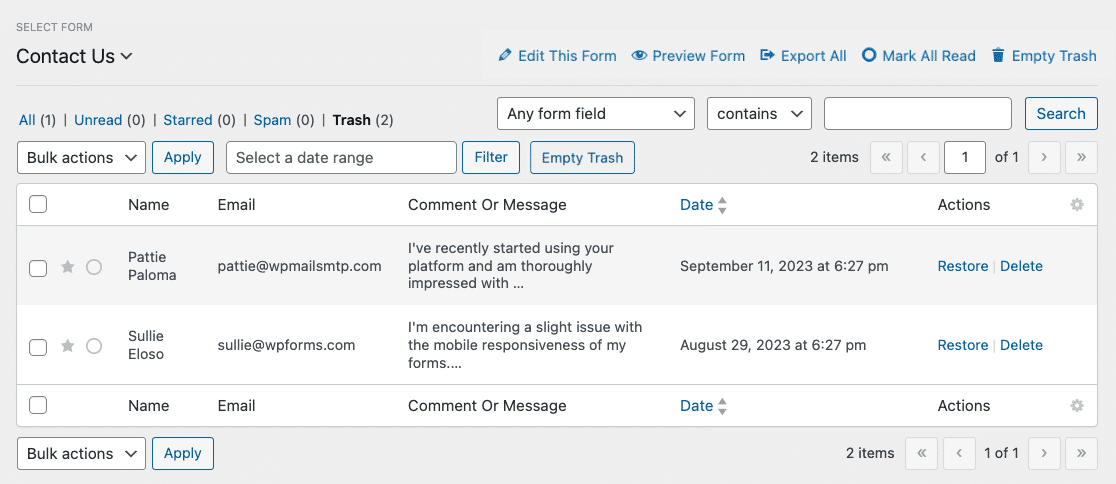
From here, you’ll have the option to restore or permanently delete your trashed entries. We’ll cover both of these options below.
Restoring Trashed Form Entries
Restoring a form entry removes it from the trash and adds it back to the Entries page.
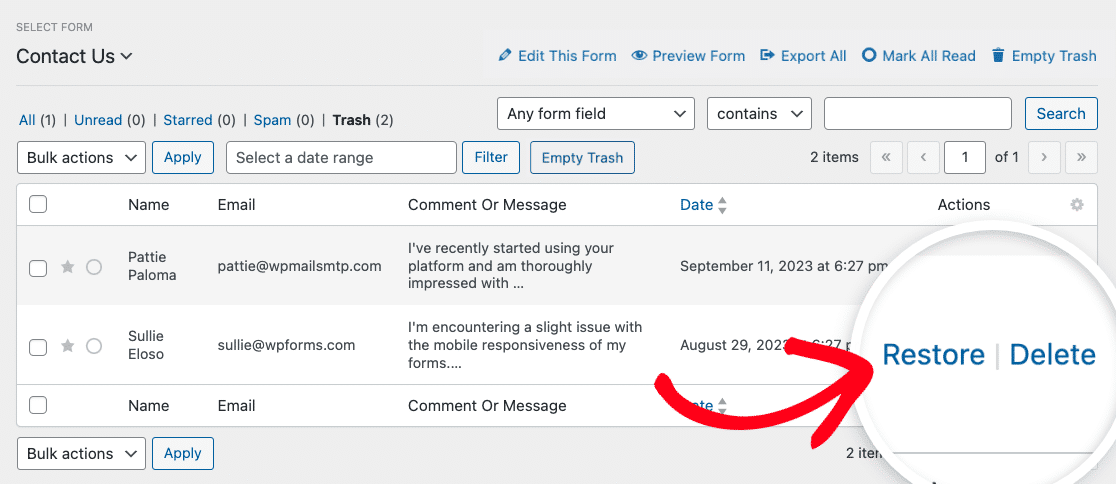
To restore an entry, hover over it and click the Restore option.
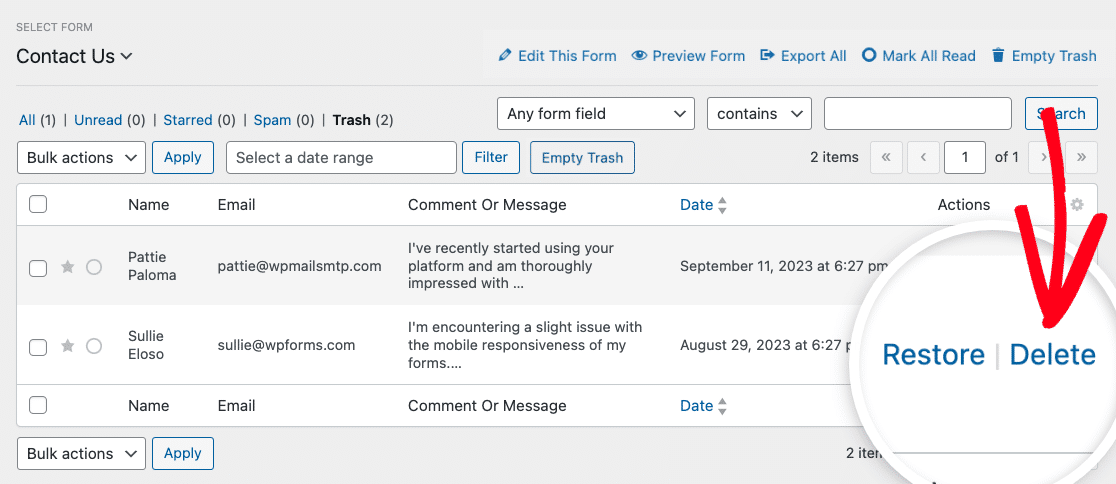
Permanently Deleting Form Entries
From the Trash screen, you have the option to permanently delete entries by hovering over a specific entry and clicking the Delete option.
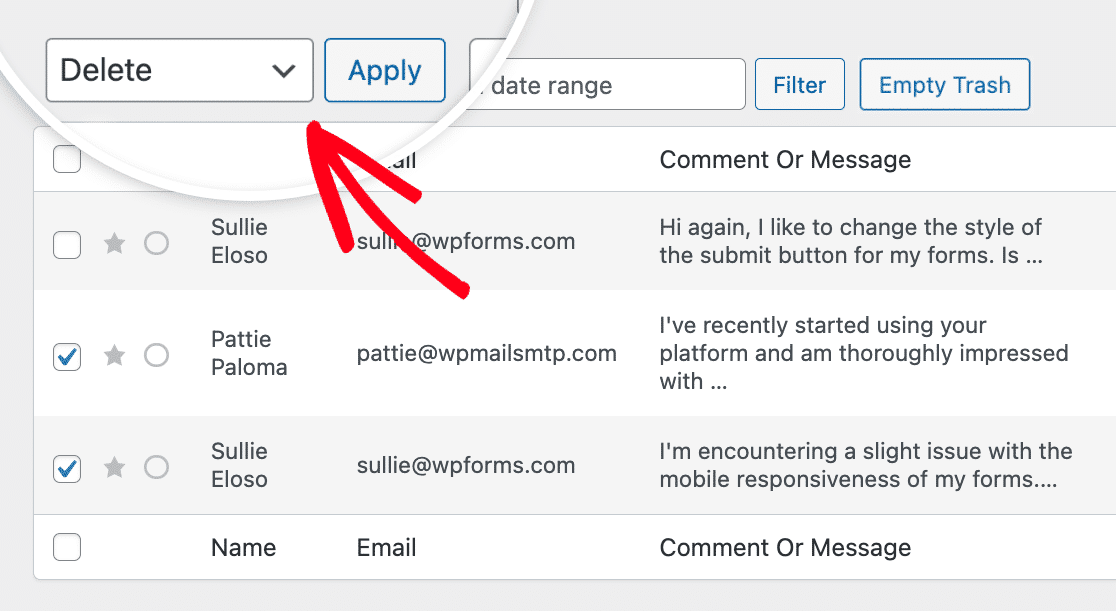
If you’d like to permanently delete multiple trashed entries at once, check the box next to each entry you’d like to delete. Then, select Delete from the Bulk actions dropdown and click Apply.
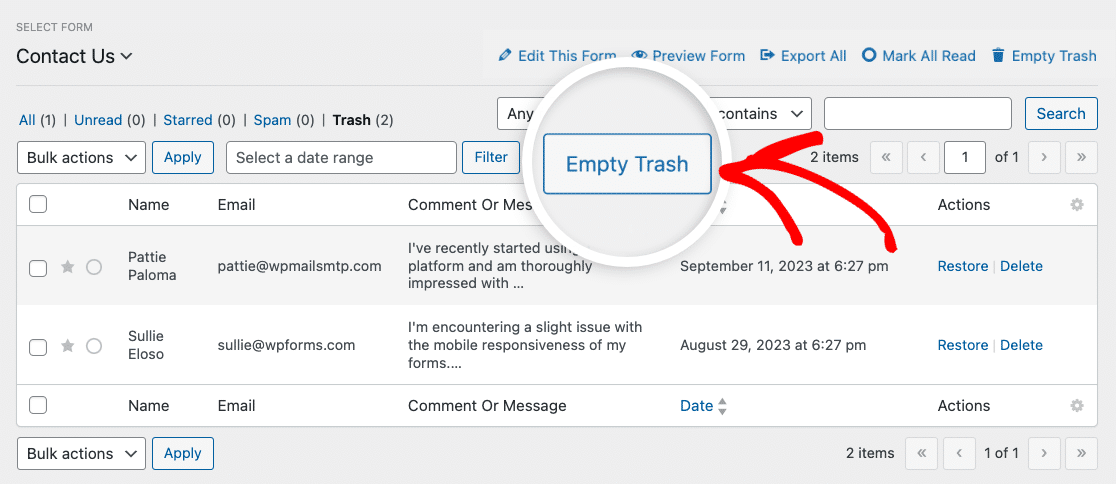
To delete all trashed entries at once, simply click the Empty Trash button.
After using one of these methods, you’ll be asked to confirm if you’re sure you’d like to delete the specific entries for this form.
Note: Permanently deleting entries will remove them entirely from your site’s database. It’s recommended that you create a backup of your site’s database before proceeding.
Automatically Deleting Older Entries
If you want to automatically remove old entries instead of deleting them manually, WPForms includes a built-in option for purging entries after a set number of days. This is helpful for reducing stored data and managing retention requirements.
To enable this setting, open the form you want to update and go to Settings » General and scroll down to the Advanced section. Then turn on Purge Entries Automatically and enter the number of days you want to retain entries before they’re deleted.

That’s it! You can now delete entries for a form with just a few clicks.
Would you like to export entries as a CSV or XLSX file before deleting them from your site? Check out our tutorial on creating CSV and XLSX exports of entry data.