Would you like to create custom profile sections that appear under guest post content? With the Post Submissions addon, you can create professional author profiles that automatically display below each guest post.
This guide will show you how to set up profile pages using WPForms and WordPress custom fields.
Setting up the Form
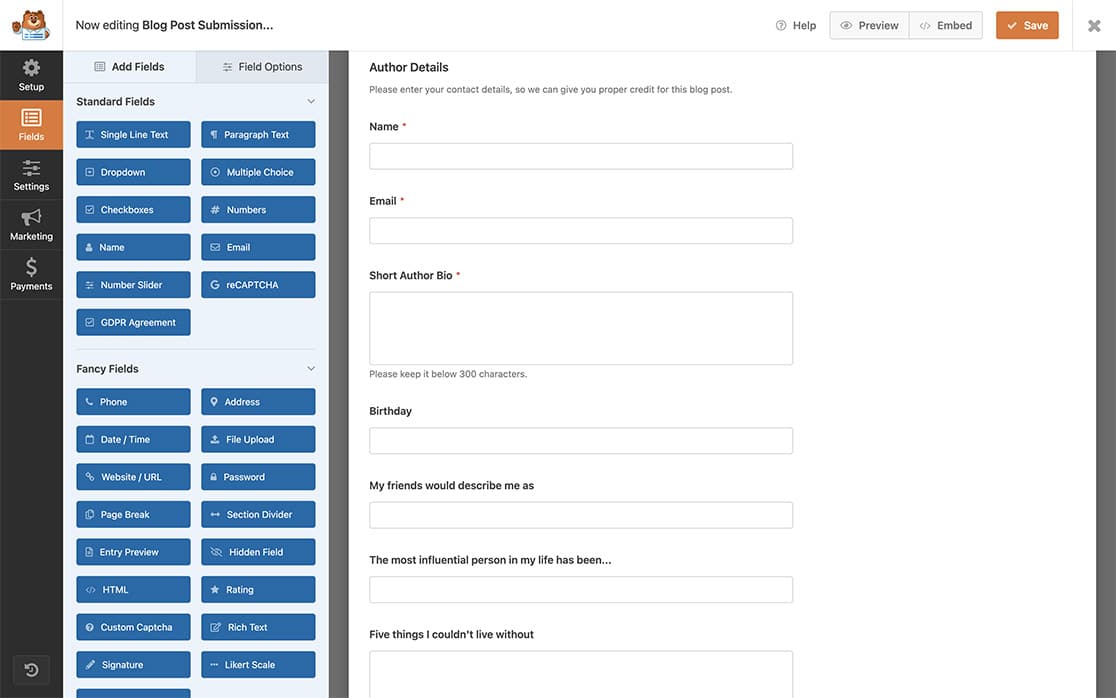
To begin, you’ll need to create a new form or edit an existing one with the Post Submissions addon activated. This form will collect the profile information that appears beneath each guest post.
Add essential fields to your form such as Name (Single Line Text), Birthday (Date), Personal Description (Paragraph Text), Influences (Paragraph Text), and Must-Have Items (Paragraph Text).
Make note of each field’s ID as you’ll need these when adding the code snippet. If you need help finding field IDs, check our guide on how to find form and field IDs.
Creating WordPress Custom Fields
Before beginning to build your form, you’ll need to figure out what custom fields you want in your WordPress posts. To create custom fields in WordPress, please review this tutorial.
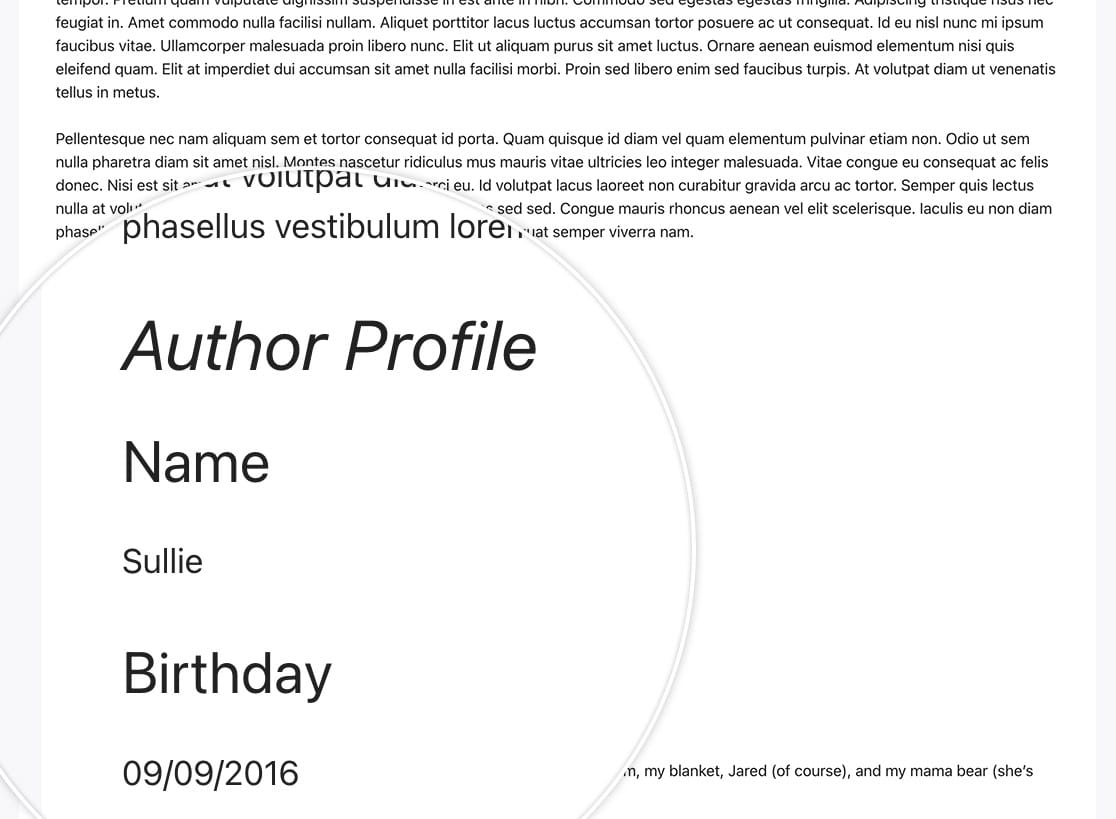
For this tutorial, we’re going to be adding a profile section that includes the name of the author, their birthday, and some other personal but fun facts about the author. This information would appear beneath the post on each guest post submission accepted.

Mapping Form Fields to Custom Fields
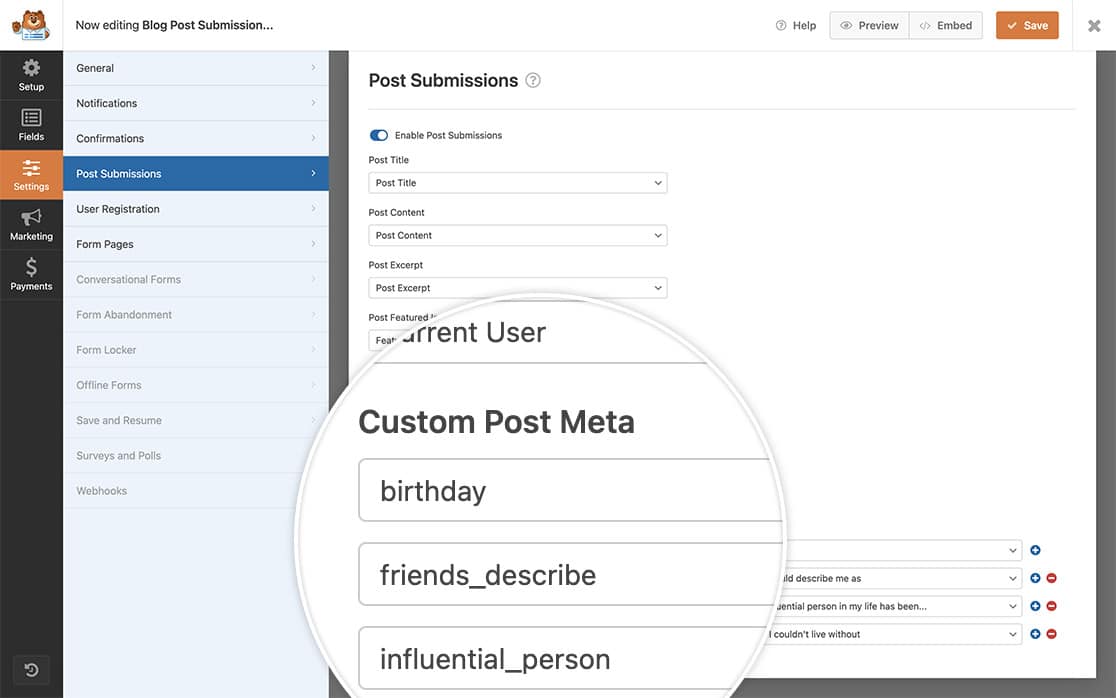
Navigate to Settings » Post Submissions in your form builder. In the Custom Post Meta section, enter your custom field name (such as “birthday”) and select the corresponding form field from the dropdown (such as “Birthday”). Continue this process for each custom field you created.

Adding the Code Snippet
The following code snippet will create the profile section below each guest post submission:
If you’re not sure where or how to add snippets to your site, please review this guide on adding custom JavaScript of PHP code.
Please note that you will need to change the form ID and field ID(s) to match what you have in your form. For assistance with finding the correct form and field IDs, check out this guide on finding form and field IDs.
By adding this snippet above, you’ll be automatically adding to each guest post submission the user profile section that would appear directly beneath the post.
And that’s all you need to create a profile page section using the Post Submissions addon.

Would you like to be able to exclude certain posts and pages from your post submission forms? Take a look at our article on How to Exclude Posts, Pages or Categories From Dynamic Choices.
Frequently Asked Questions
Q: Why is my HTML being stripped out?
A: This is because in the snippet, we’re calling upon esc_html to display what was entered. This means a lot of HTML spans or divs used for formatting is stripped away. If you need to allow HTML in these fields, use wp_kses_post instead.
