AI Summary
Would you like to configure Stripe webhooks via the Developer menu on your Stripe dashboard? Stripe recently launched a new Workbench tool to manage integrations with third-party plugins like WPForms.
This tutorial will cover the steps to set up Stripe webhooks for WPForms through the Developer dashboard in Stripe.
Creating a Webhook Endpoint in Stripe
First, you’ll need to enable Stripe Webhooks from your WPForms settings page. Please see our tutorial for more details. After enabling Stripe Webhooks, you can then proceed to your Stripe account to create the Webhook endpoint.
In the new tab or window you’ve opened, log in to your Stripe account and open your Stripe dashboard.
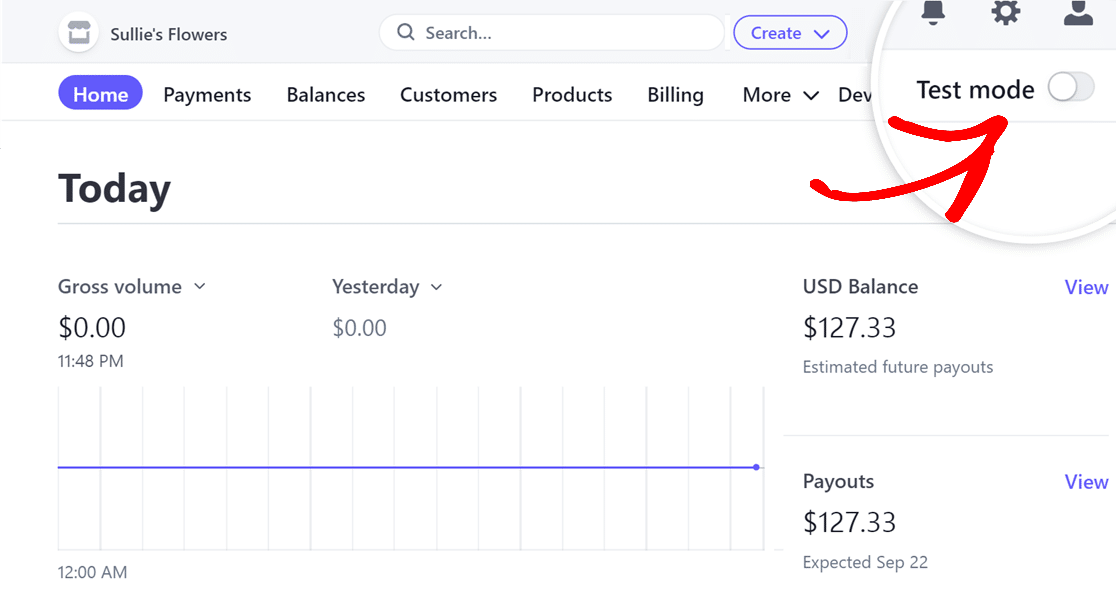
When you log in to your Stripe account, you’ll find a Test mode toggle button in the top-right corner of the page. Ensure this toggle aligns with your site’s mode: if your site is in Test Mode, set the toggle to ON, and if your site is in Live Mode, make sure it’s switched OFF.
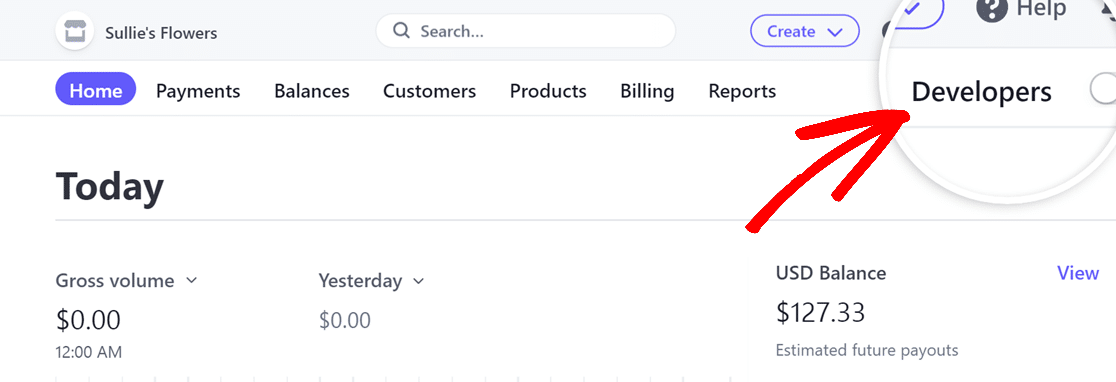
Next, click on the Developers option located at the top-right corner of the page.
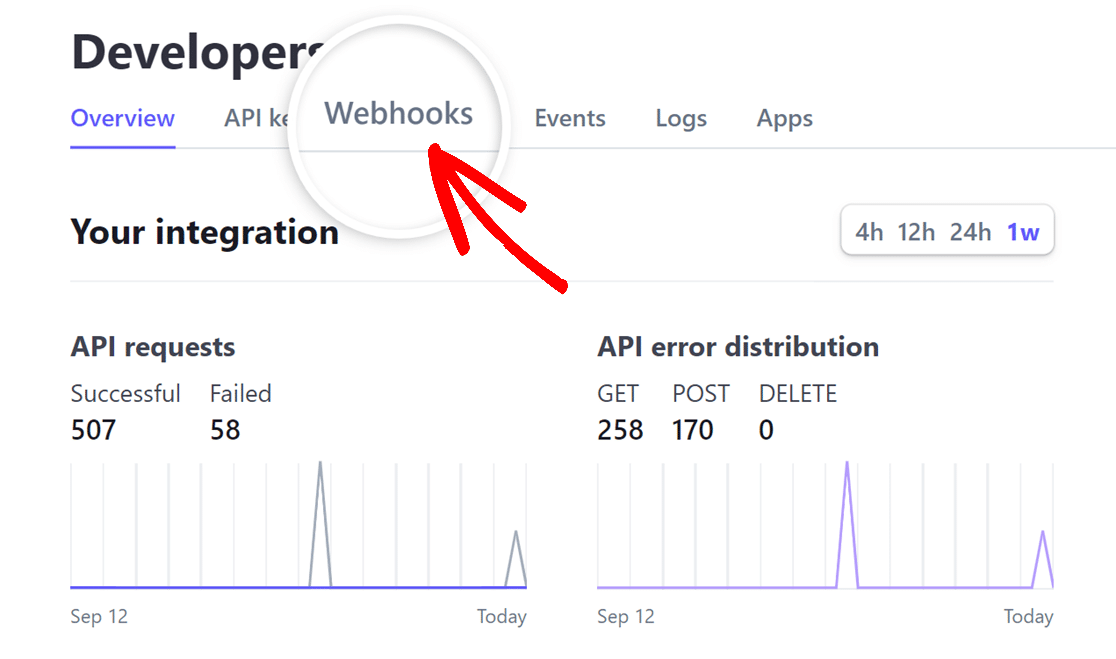
Once the Developers page has opened, click on the Webhooks tab next.
In the Webhooks tab, click on the Add an endpoint button to create a new webhook endpoint.
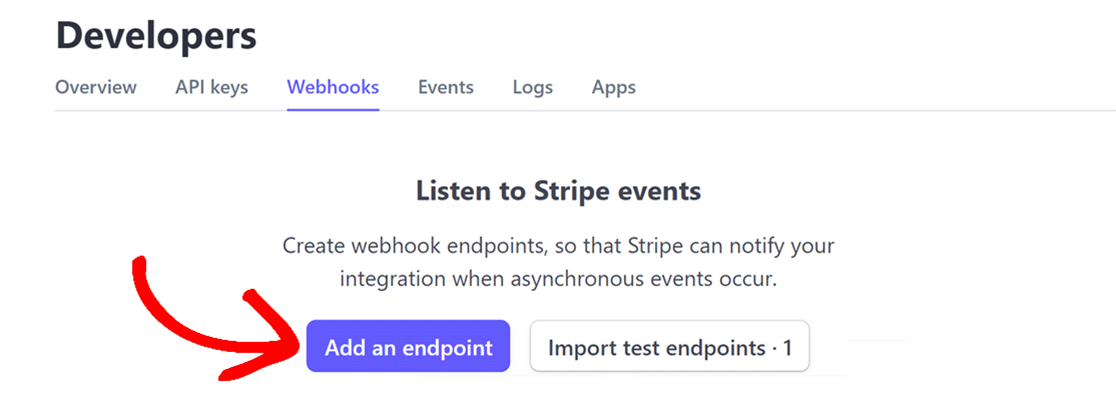
This opens a Listen to Stripe events page where you’ll need to enter details to configure your webhook.
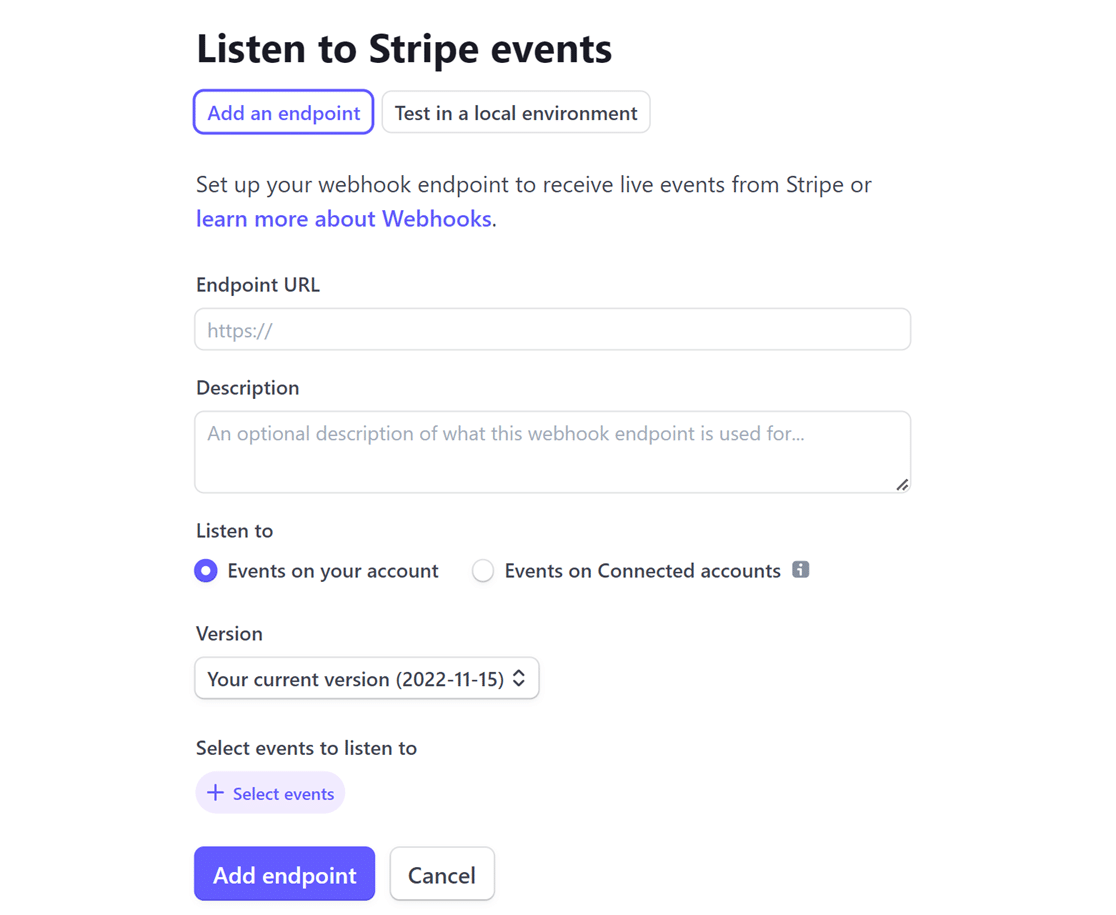
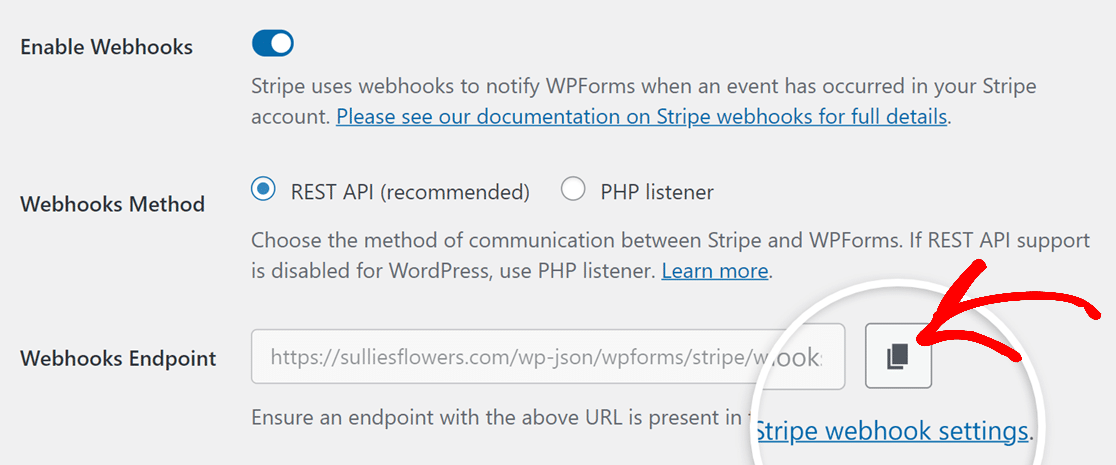
First, navigate back to the WPForms settings in your WordPress site. Once there, you’ll need to copy the Webhooks Endpoint by clicking the copy icon.
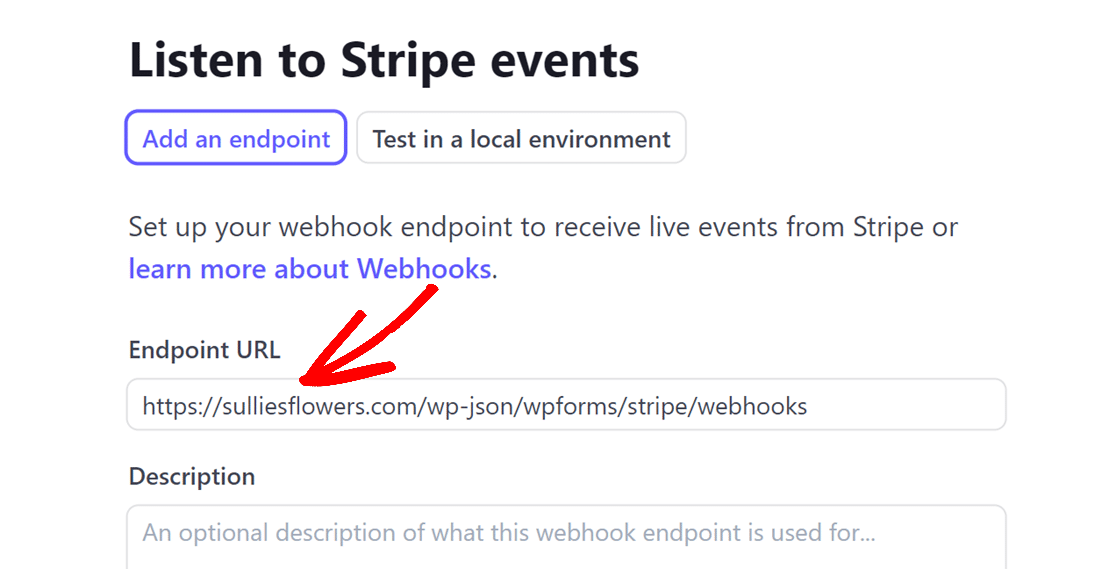
Once you’ve copied the Webhooks Endpoint, switch over to your Stripe account and paste the Webhooks Endpoint into the Endpoint URL field.
Next, while the Description field is optional, we recommend entering WPForms to easily identify the webhook’s purpose.
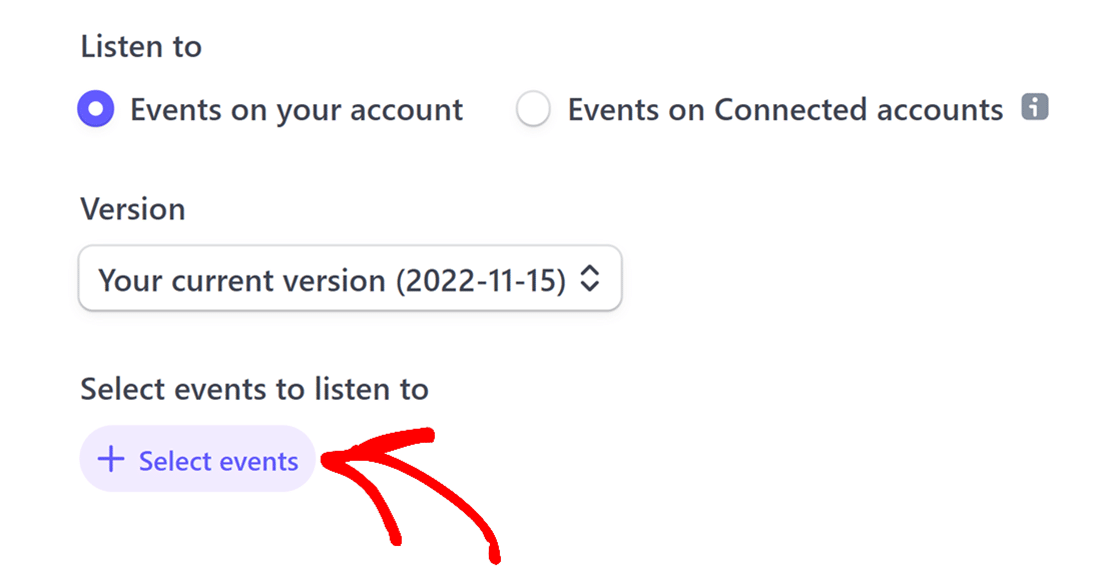
Then, you’ll come across the Listen to and Version options. Leave them as is and click on the + Select events button.
In the overlay that opens, check the Select all events checkbox to ensure your Stripe account sends all events.
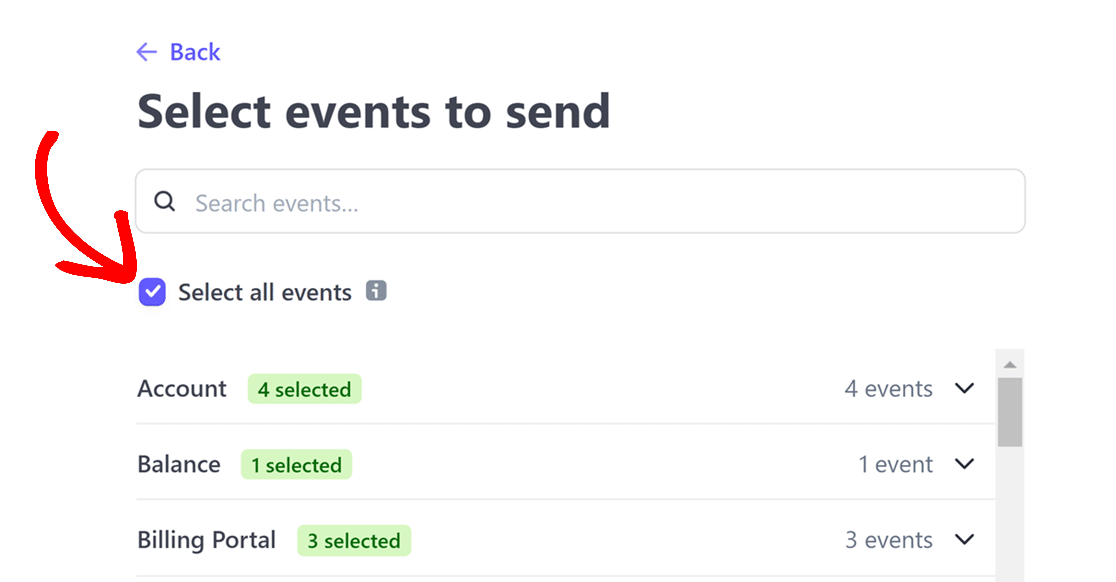
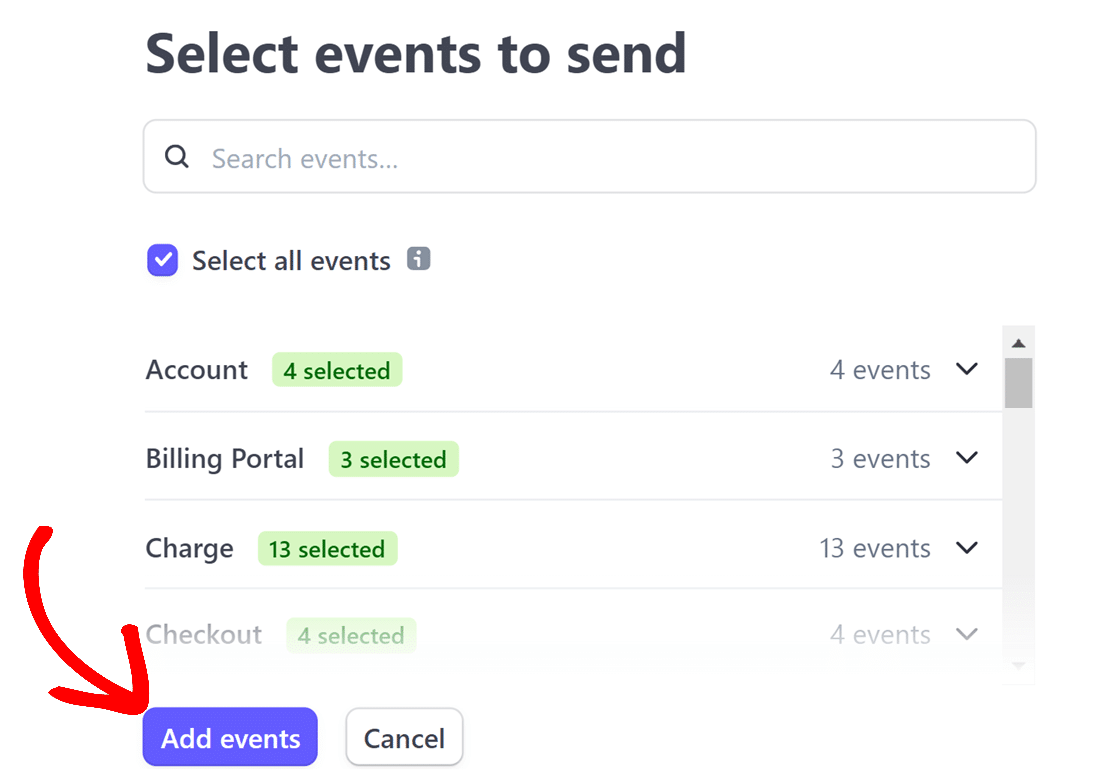
After checking the Select all events checkbox, click the Add events button to finalize your event selection.
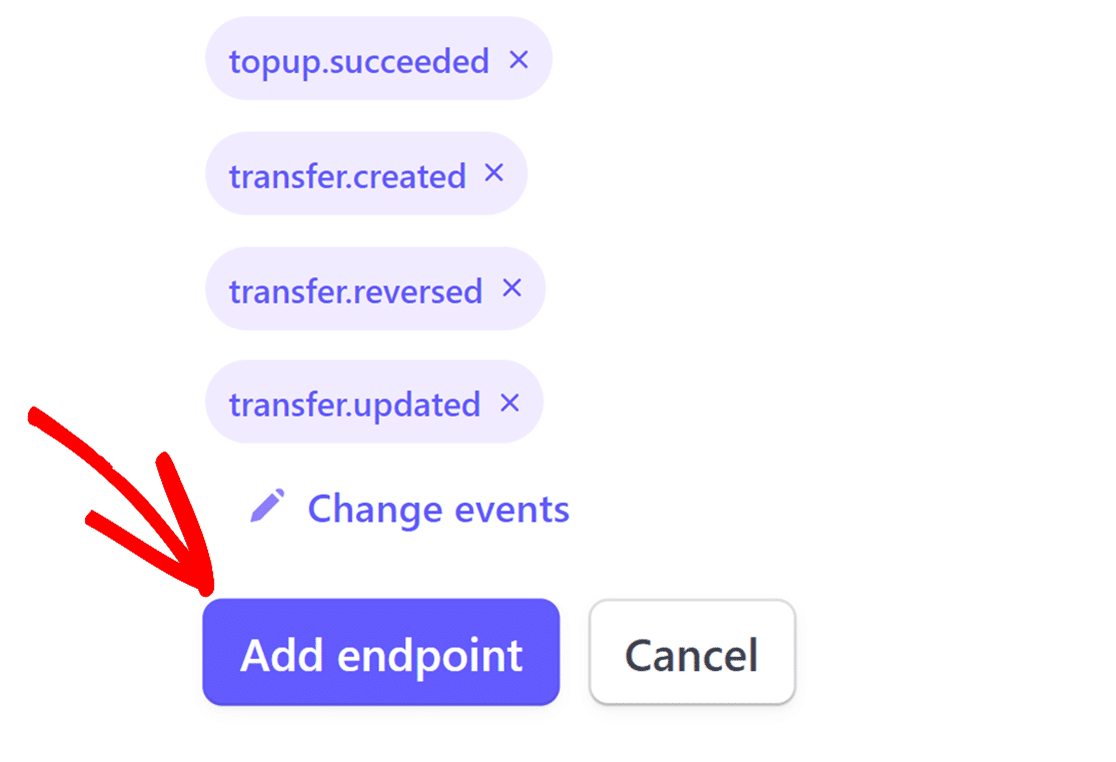
Once done, click the Add endpoint button after scrolling down to the bottom of the page.
Retrieving Endpoint ID and Signing Secret
Once you’ve set up the webhook, Stripe will navigate you to its dedicated page. Here, you’ll be able to copy both the webhook’s ID and the Signing secret.
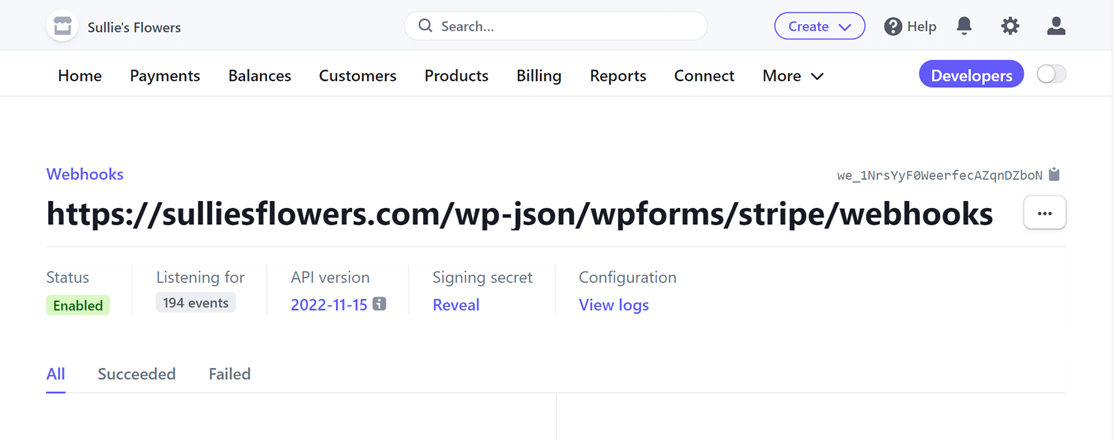
Find the webhook’s ID displayed on the top-right of the page. Simply click on it to copy.
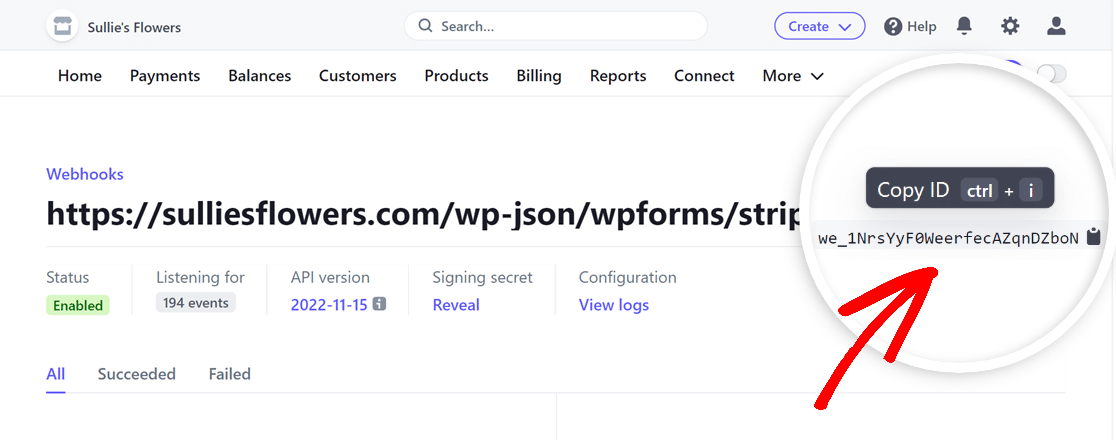
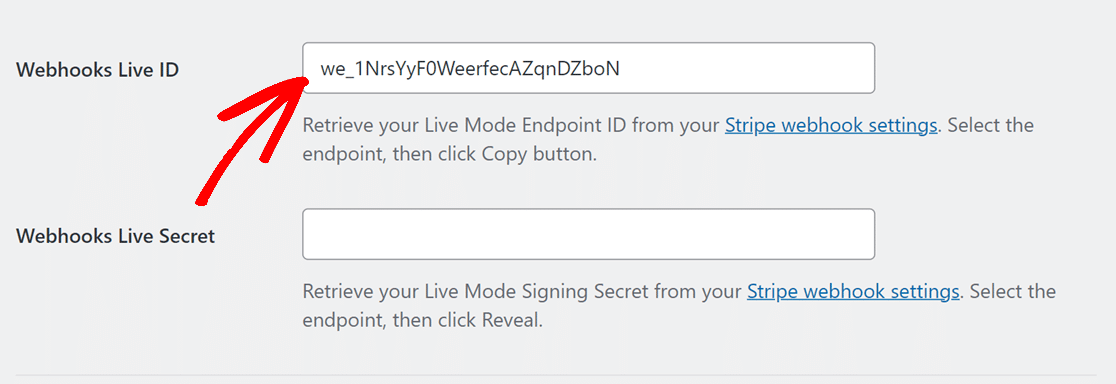
After copying the webhook ID, return to your WPForms settings and paste it into the Webhooks Live ID field.
Next, head back to your Stripe account and, under the Signing secret heading, click on Reveal.

After revealing the Signing secret, copy its value and paste it into the Webhooks Live Secret field within your WPForms settings.

Once your keys are in place, click on the Save Settings button.
After setting up Stripe webhooks with WPForms, your payment statuses will sync in real time between WPForms and Stripe. This also allows you to manage refunds and renew subscriptions directly from WPForms, without frequently accessing the Stripe dashboard. If you wish to view specific events triggered by the webhook, visit the webhooks page in your Stripe dashboard.
For more details on refunds, renewals, and understanding payment statuses, refer to our guide on viewing and managing form payments.
That’s it! Now you know how to set up Stripe webhooks with WPForms.
Next, would you like to begin accepting payment on your WordPress site? Be sure to check out our tutorial on creating a payment form in WPForms.
