AI Summary
Would you like to allow users to customize their form submissions? The Rich Text field provides a flexible way for users to format text and images before submitting their online forms.
This tutorial will show you all you need to know to get started with the Rich Text field in WPForms.
Before getting started, you’ll first need to make sure WPForms is installed and activated on your WordPress site and that you’ve verified your license. Then, you can create a new form or edit an existing one to access the form builder.
Adding a Rich Text Field to Your Form
Since the Rich Text field is an advanced feature, you’ll find it under Fancy Fields in the form builder.
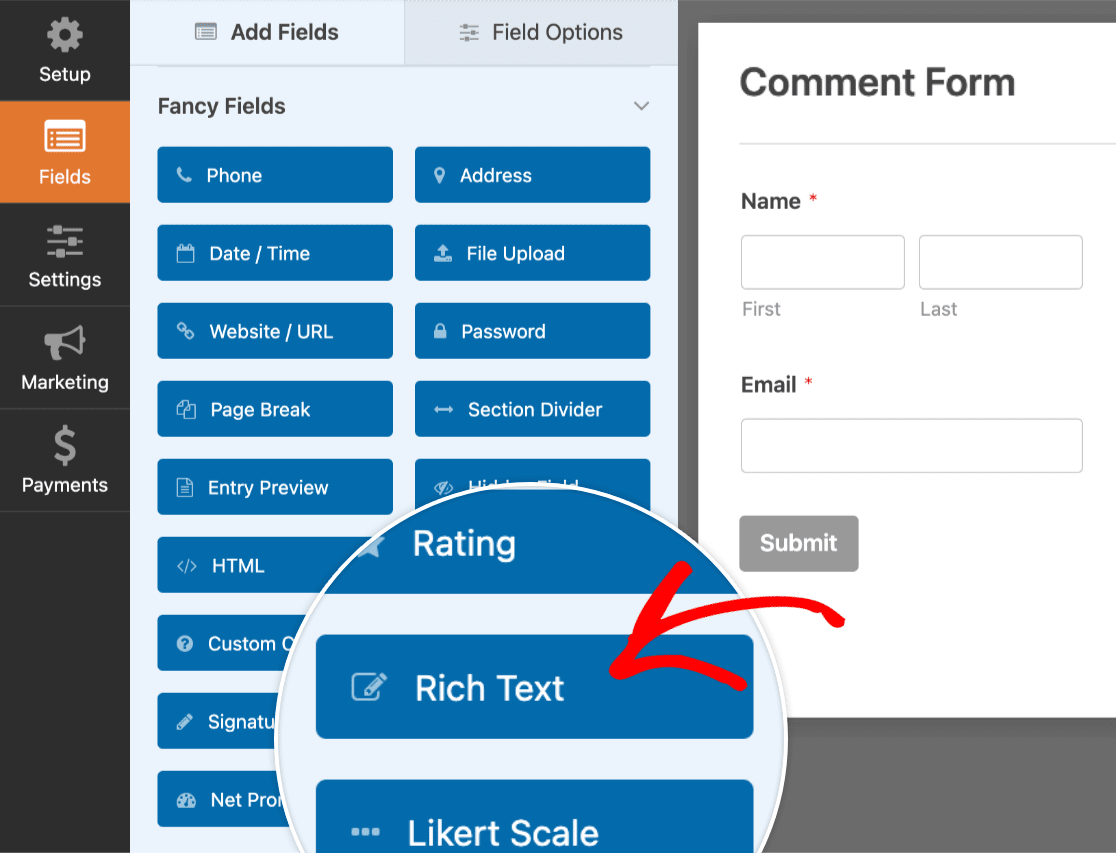
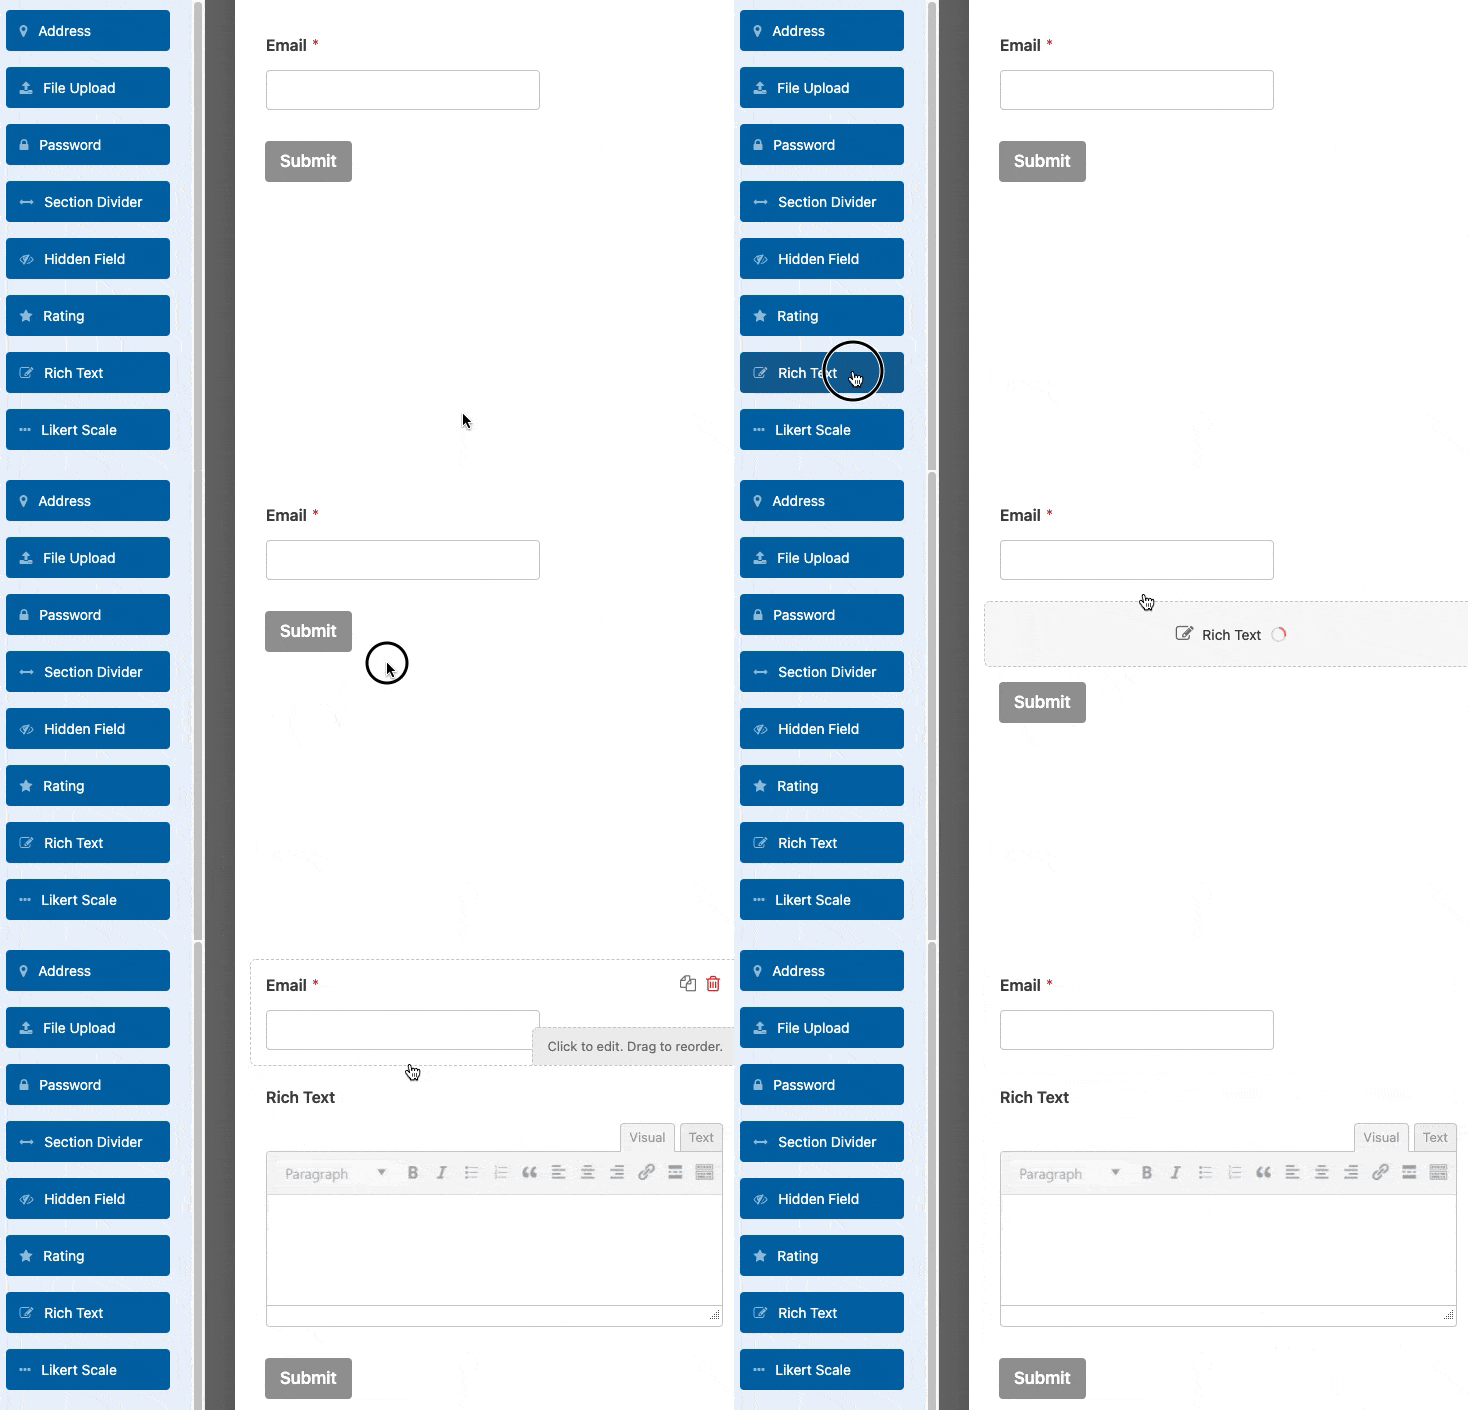
To add the Rich Text field to your form, click on it or drag and drop it into the preview area.
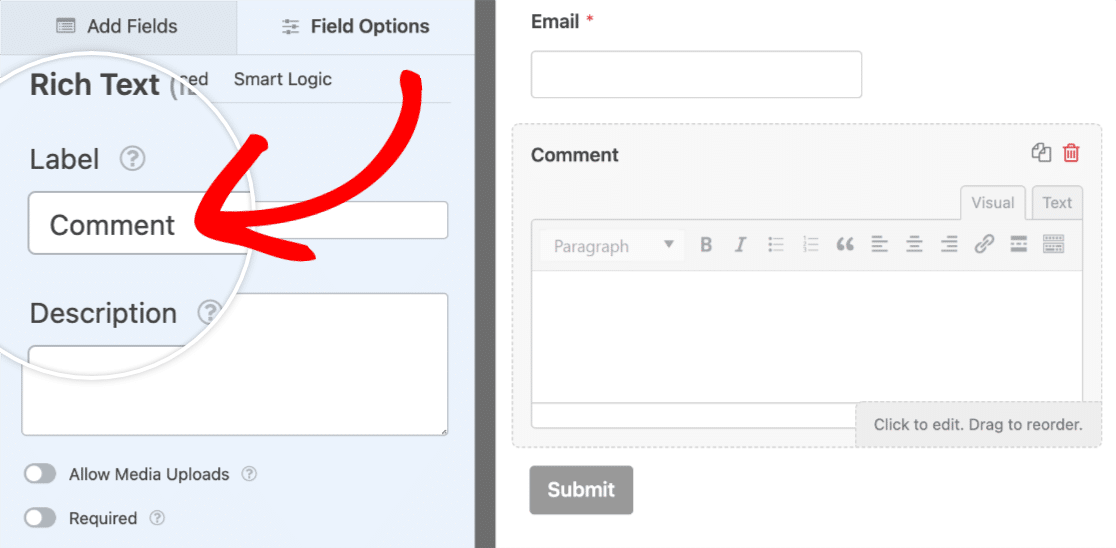
Next, feel free to change the field’s label by entering whatever text you’d like in the Label field.
Enabling Advanced Options
To access the Rich Text field’s advanced options, navigate to the Advanced tab in the Field Options panel.
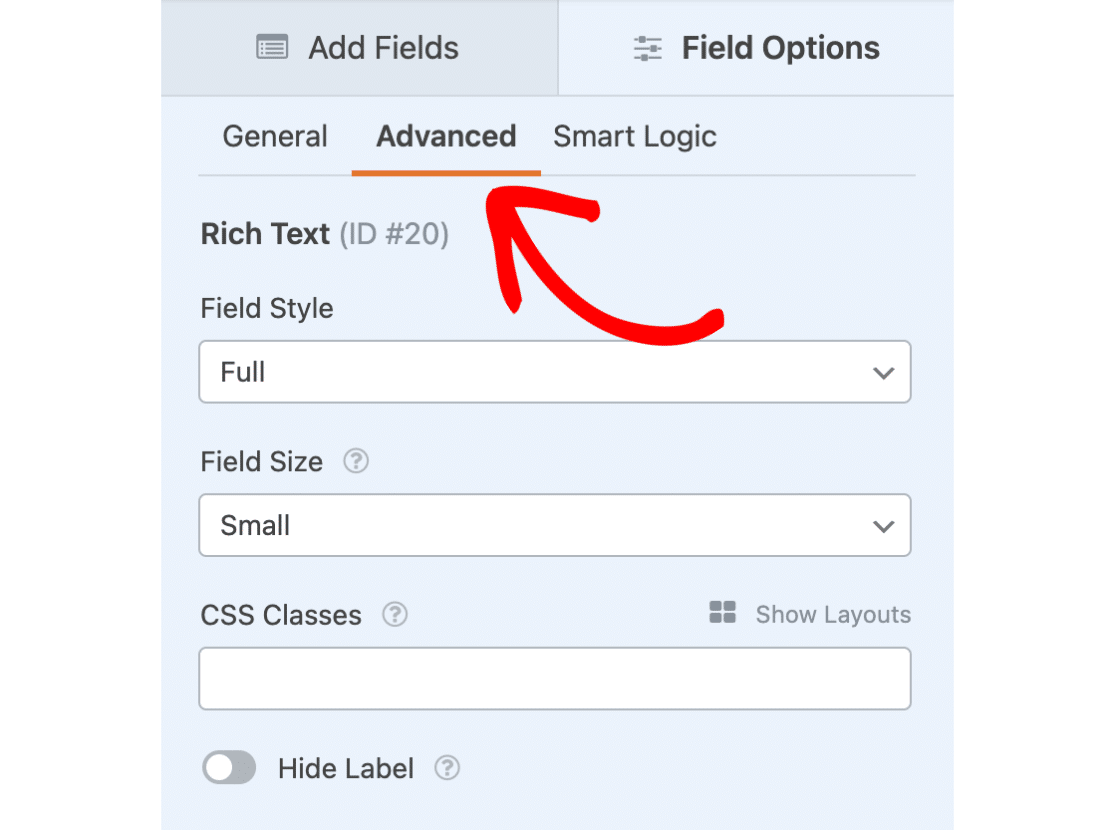
Next, we’ll go over two of the more notable advanced options: Field Style and Field Size.
Field Style
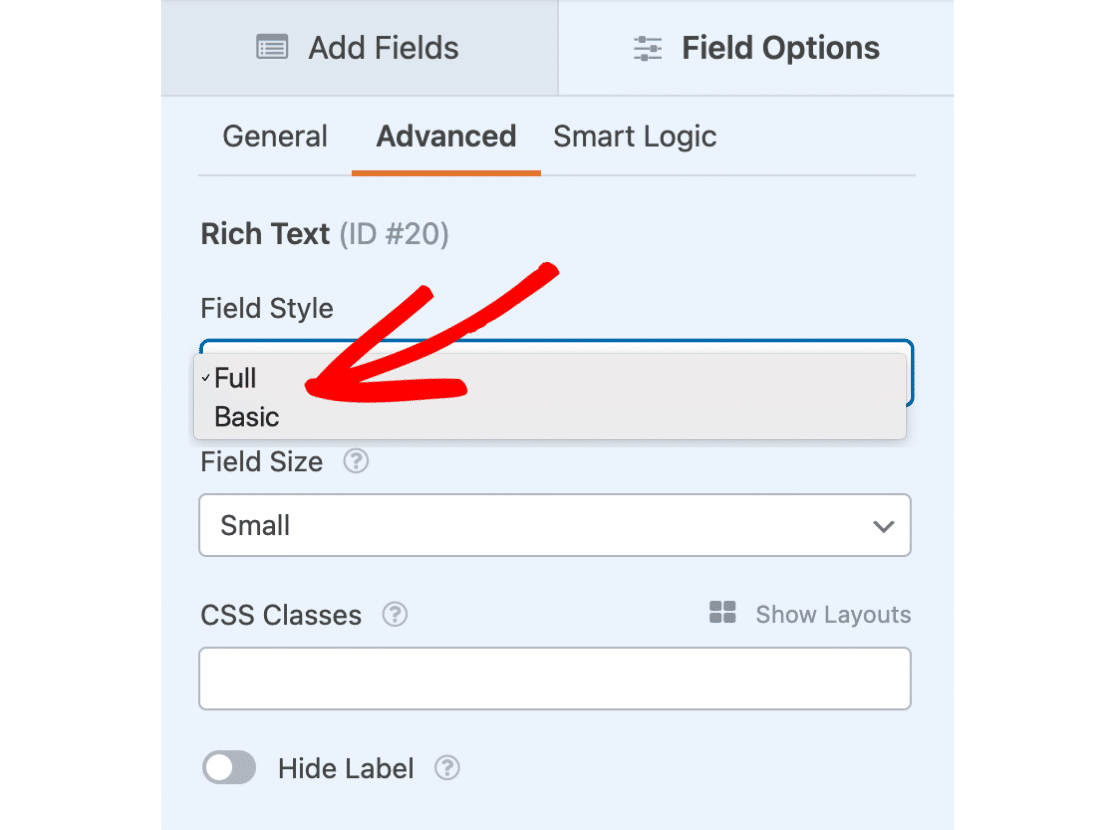
The Rich Text field includes two style options that you can choose from: Basic and Full.
Basic Field Style
The Basic field style is pretty straightforward, as it includes a simple toolbar with minimal features.
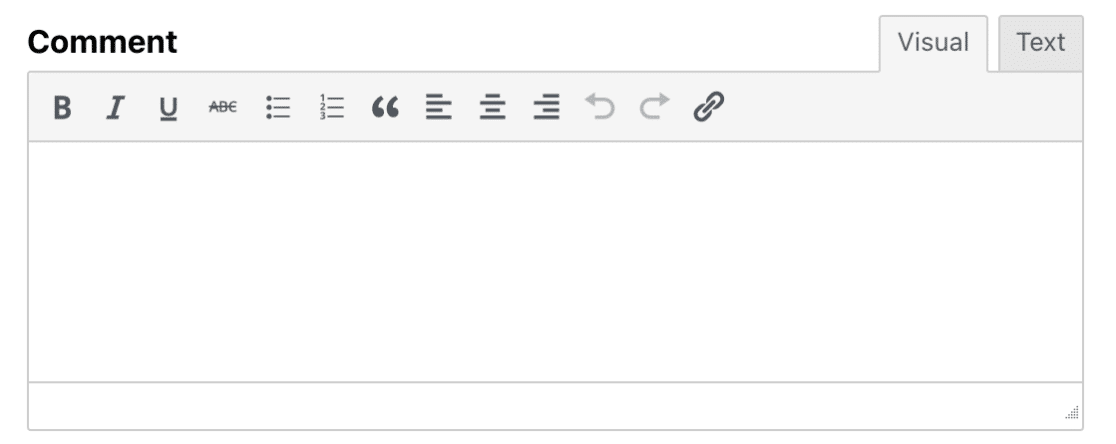
Here is a list of the toolbar options for the Basic style:
- Bold
- Italic
- Underline
- Strikethrough
- Bulleted list
- Numbered list
- Blockquote
- Align left
- Align center
- Align right
- Undo
- Redo
- Insert/edit link
Full Field Style
The Full field style includes everything that is available with the Basic field style, and much more. To display the additional options, click the Toolbar Toggle icon.
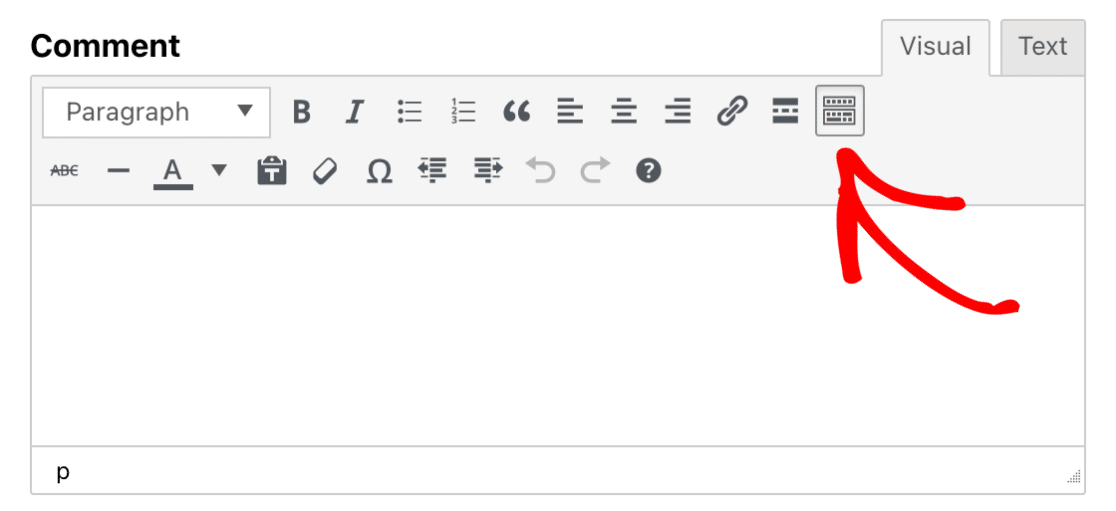
Here is a list of additional options that become available when you select the Full field style:
- Insert Read More tag
- Horizontal line
- Text color
- Paste as text
- Clear formatting
- Special character
- Decrease indent
- Increase indent
- Keyboard Shortcuts
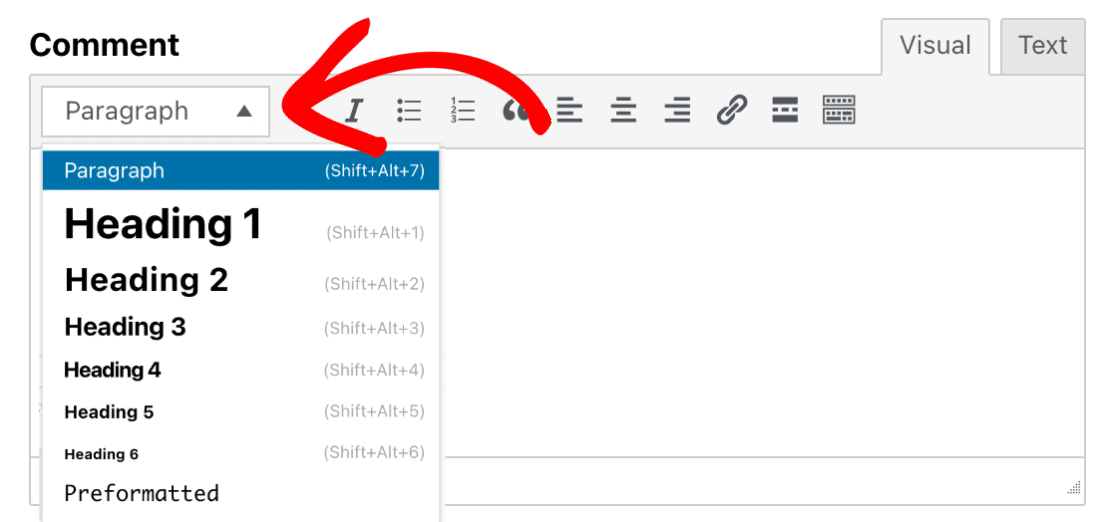
Additionally, users will be able to select a range of text formats from the dropdown located in the top-left corner.
Note: To manage the length of content users can submit, you can set a character limit for the Rich Text field. See our developer documentation for a guide on how to implement this restriction.
Field Size
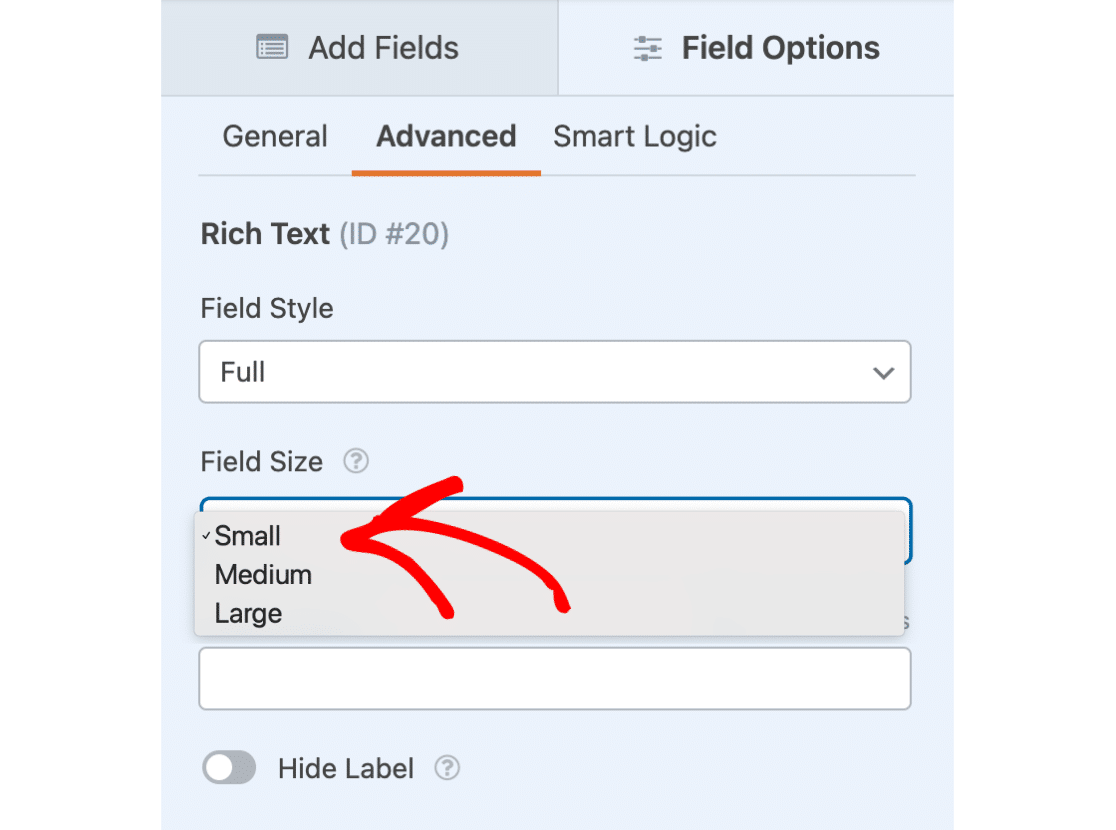
There are three field sizes you can choose from: Small, Medium, or Large. Each different field size will determine the height of the Rich Text field.
To choose the field size for your Rich Text field, click on the dropdown menu labeled Field Size.
Note: WordPress is dropping support for Internet Explorer 11. For users with Internet Explorer 11, the feature to add media within the Rich Text field may not work as expected on the frontend.
Allowing Media Uploads
The Rich Text field provides the option for users to upload image files. Here is a list of all image types that can be uploaded through the Rich Text field:
- .jpg, .jpeg, .jpe
- .gif
- .png
- .bmp
- .tiff, .tif
- .webp
- .ico
- .heic
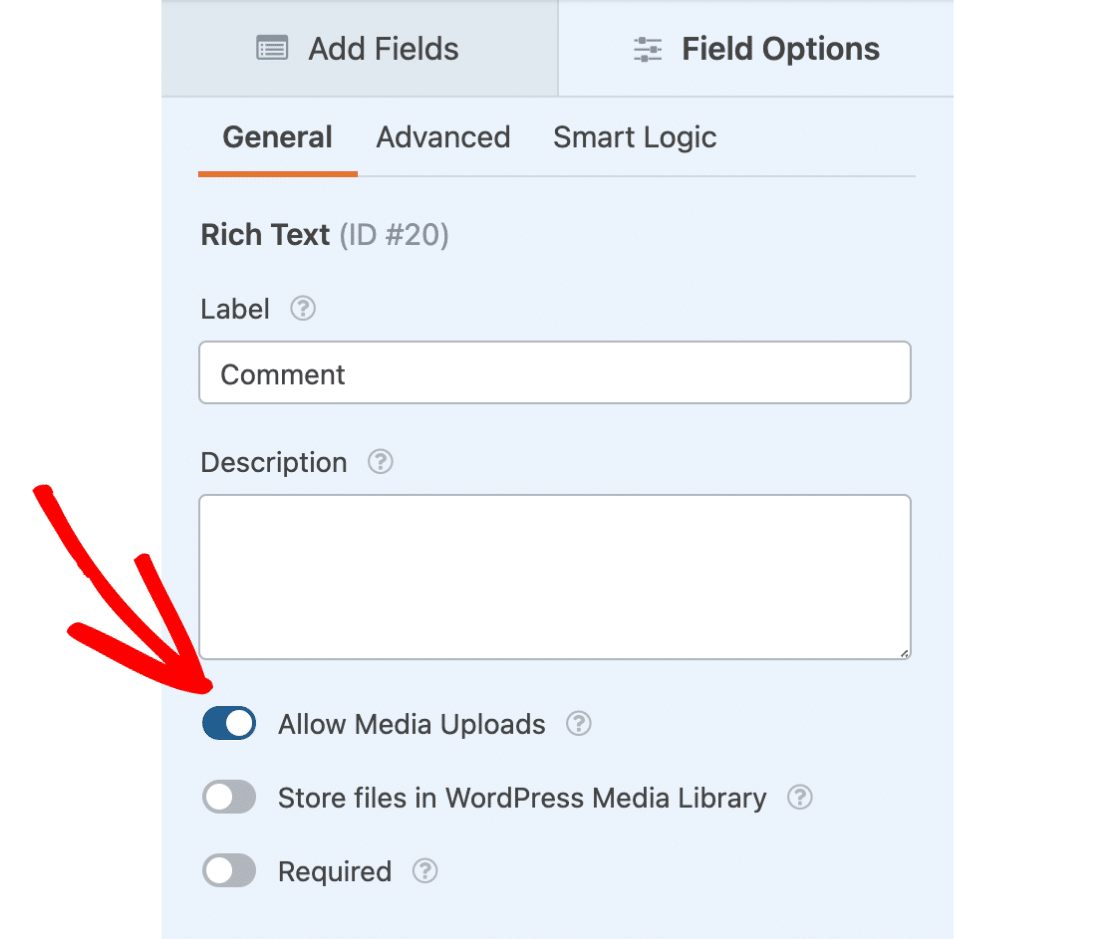
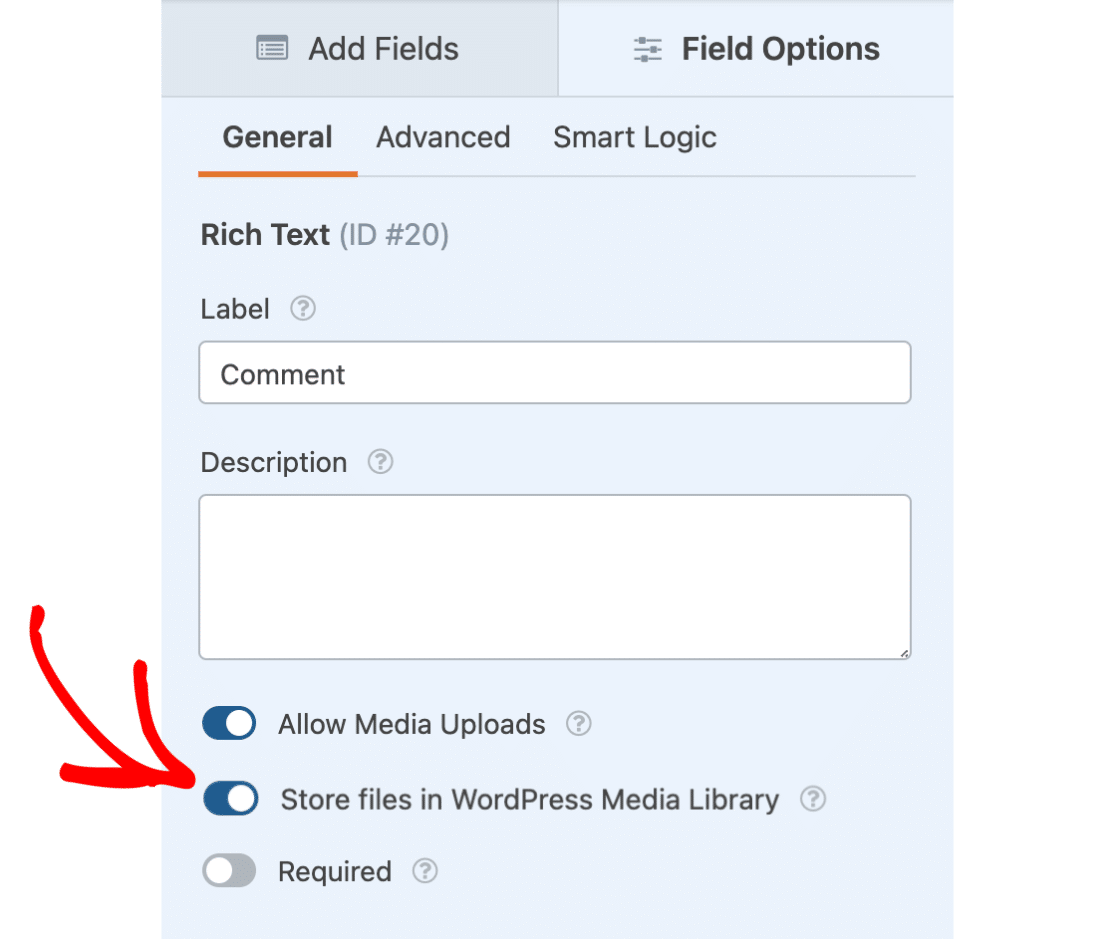
To enable this option, navigate to the General tab in the Field Options panel. Then, select Allow Media Uploads.
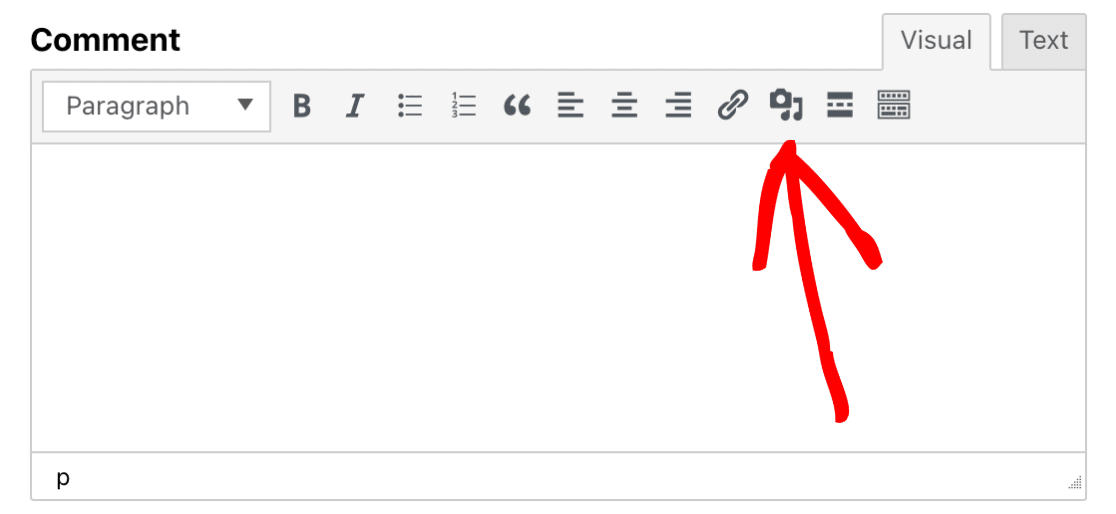
Once enabled, you’ll now see a media icon appear in the Rich Text field toolbar. By clicking this icon, users can upload their image files.
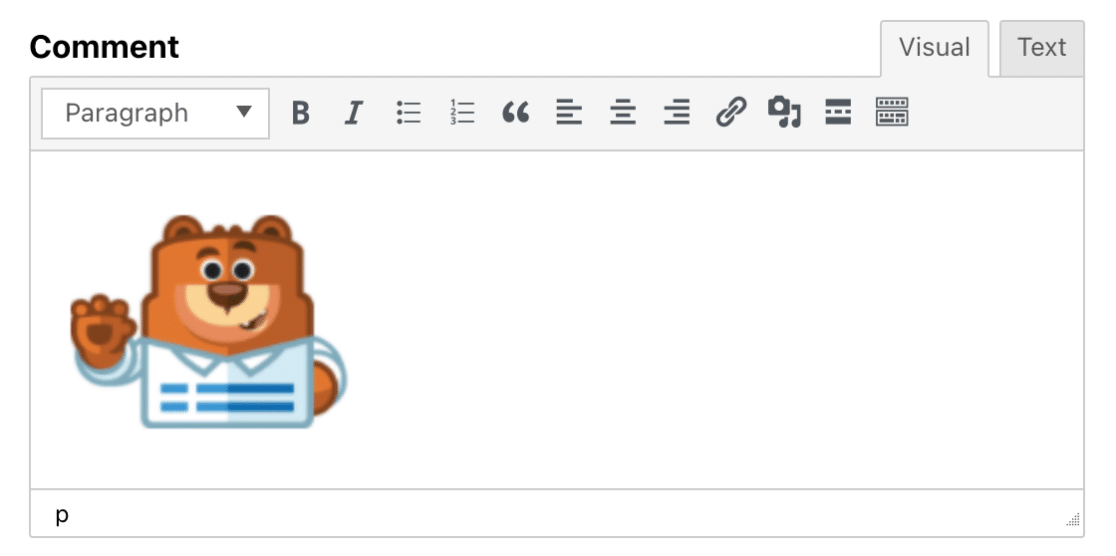
Here is how our Rich Text field might look with an uploaded image:
By default, user-uploaded files are stored in the Uploads directory of your site, inside the WPForms folder.
However, if you’d prefer to automatically store the uploaded files in the WordPress Media Library, select Store files in WordPress Media Library.
Using the Rich Text Field
When interacting with the Rich Text field on the frontend of your site, users will be able to switch between two different modes:
- Visual: Images and text will be displayed directly in the text editor.
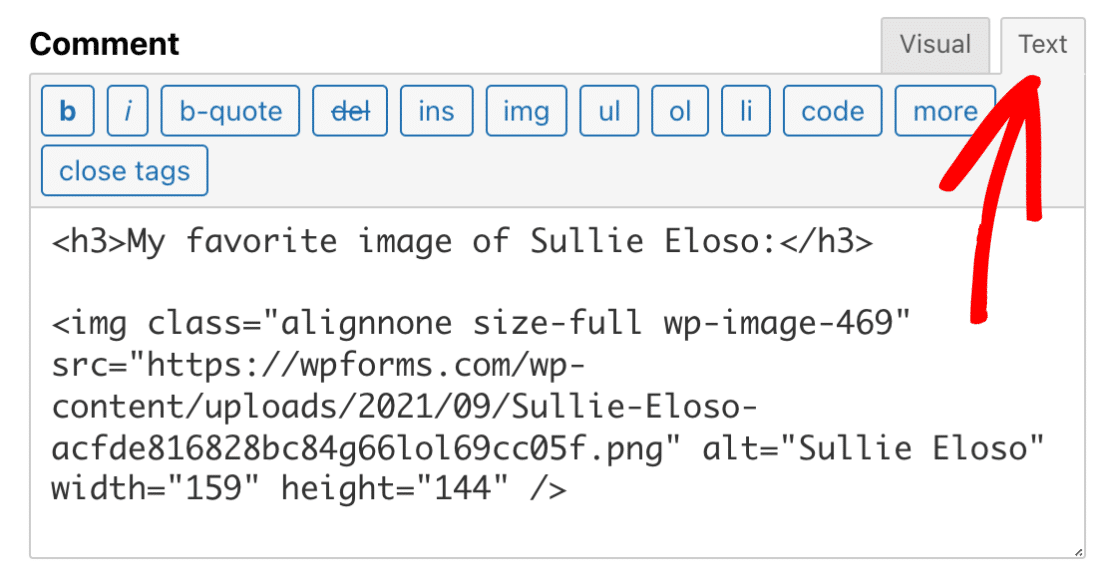
- Text: Images and text will be displayed in HTML.
By default, the Rich Text field will start in Visual mode. However, you can switch between the different modes by selecting the Visual or Text tab in the top-right corner.
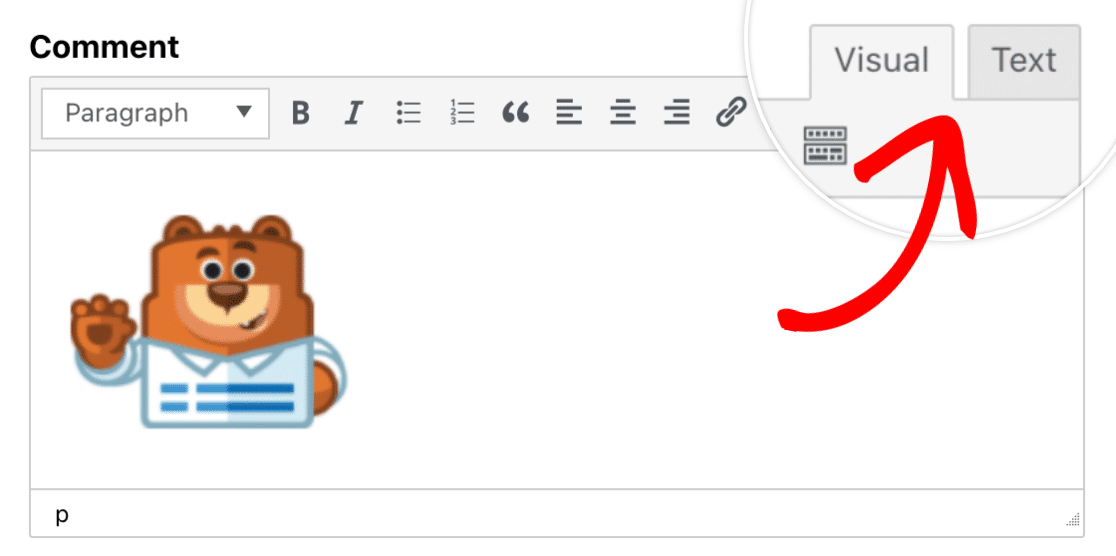
Now, let’s add some text to the Rich Text field so we can see the difference between the two modes.
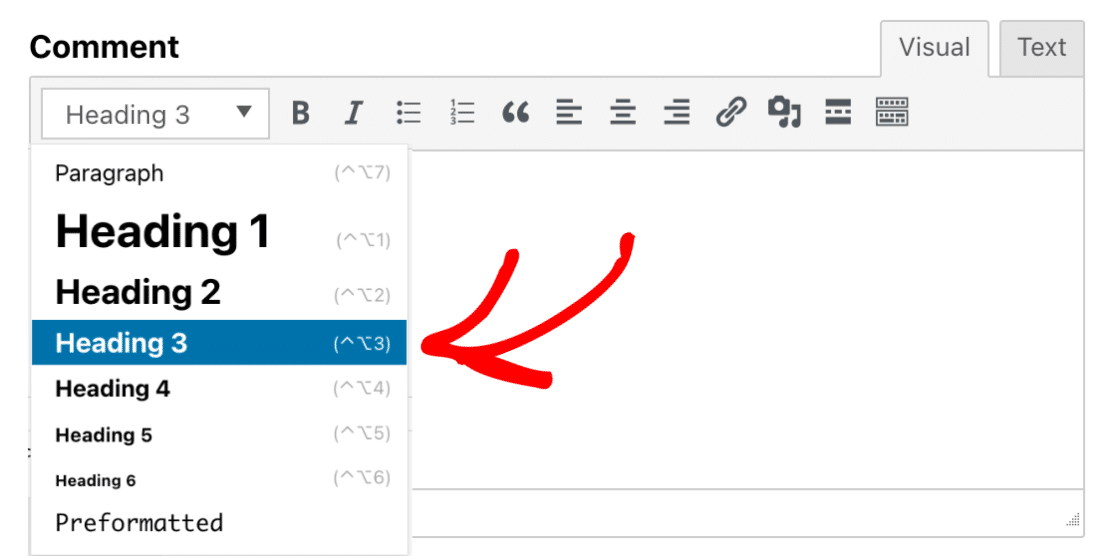
First, we’ll add a heading by clicking on the dropdown in the top-left corner and selecting Heading 3.
Then, we’ll type in some text above our image.
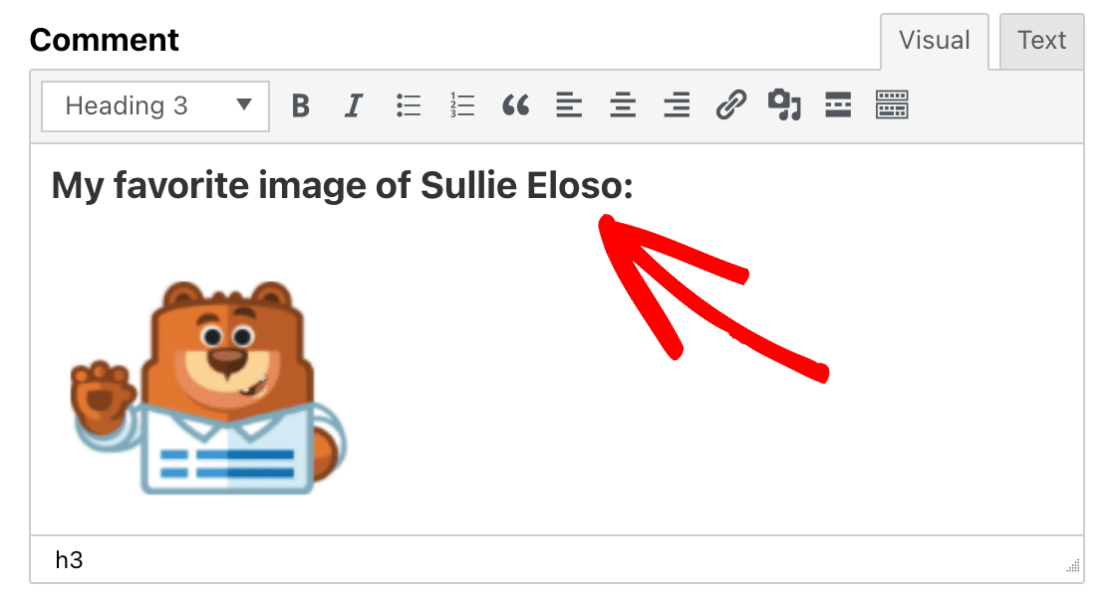
Now, to see how our content looks in Text mode, click on the Text tab. Here you will see the content displayed in HTML.
Embedding External Files
If you are using our Post Submission addon, you may want to allow users to embed external files, such as YouTube videos, Spotify podcasts, etc, when submitting their posts.
For example, a user may use the iframe embed code from YouTube to embed a video on the Rich Text field. Technically, this would show the video embedded in the Rich Text field.
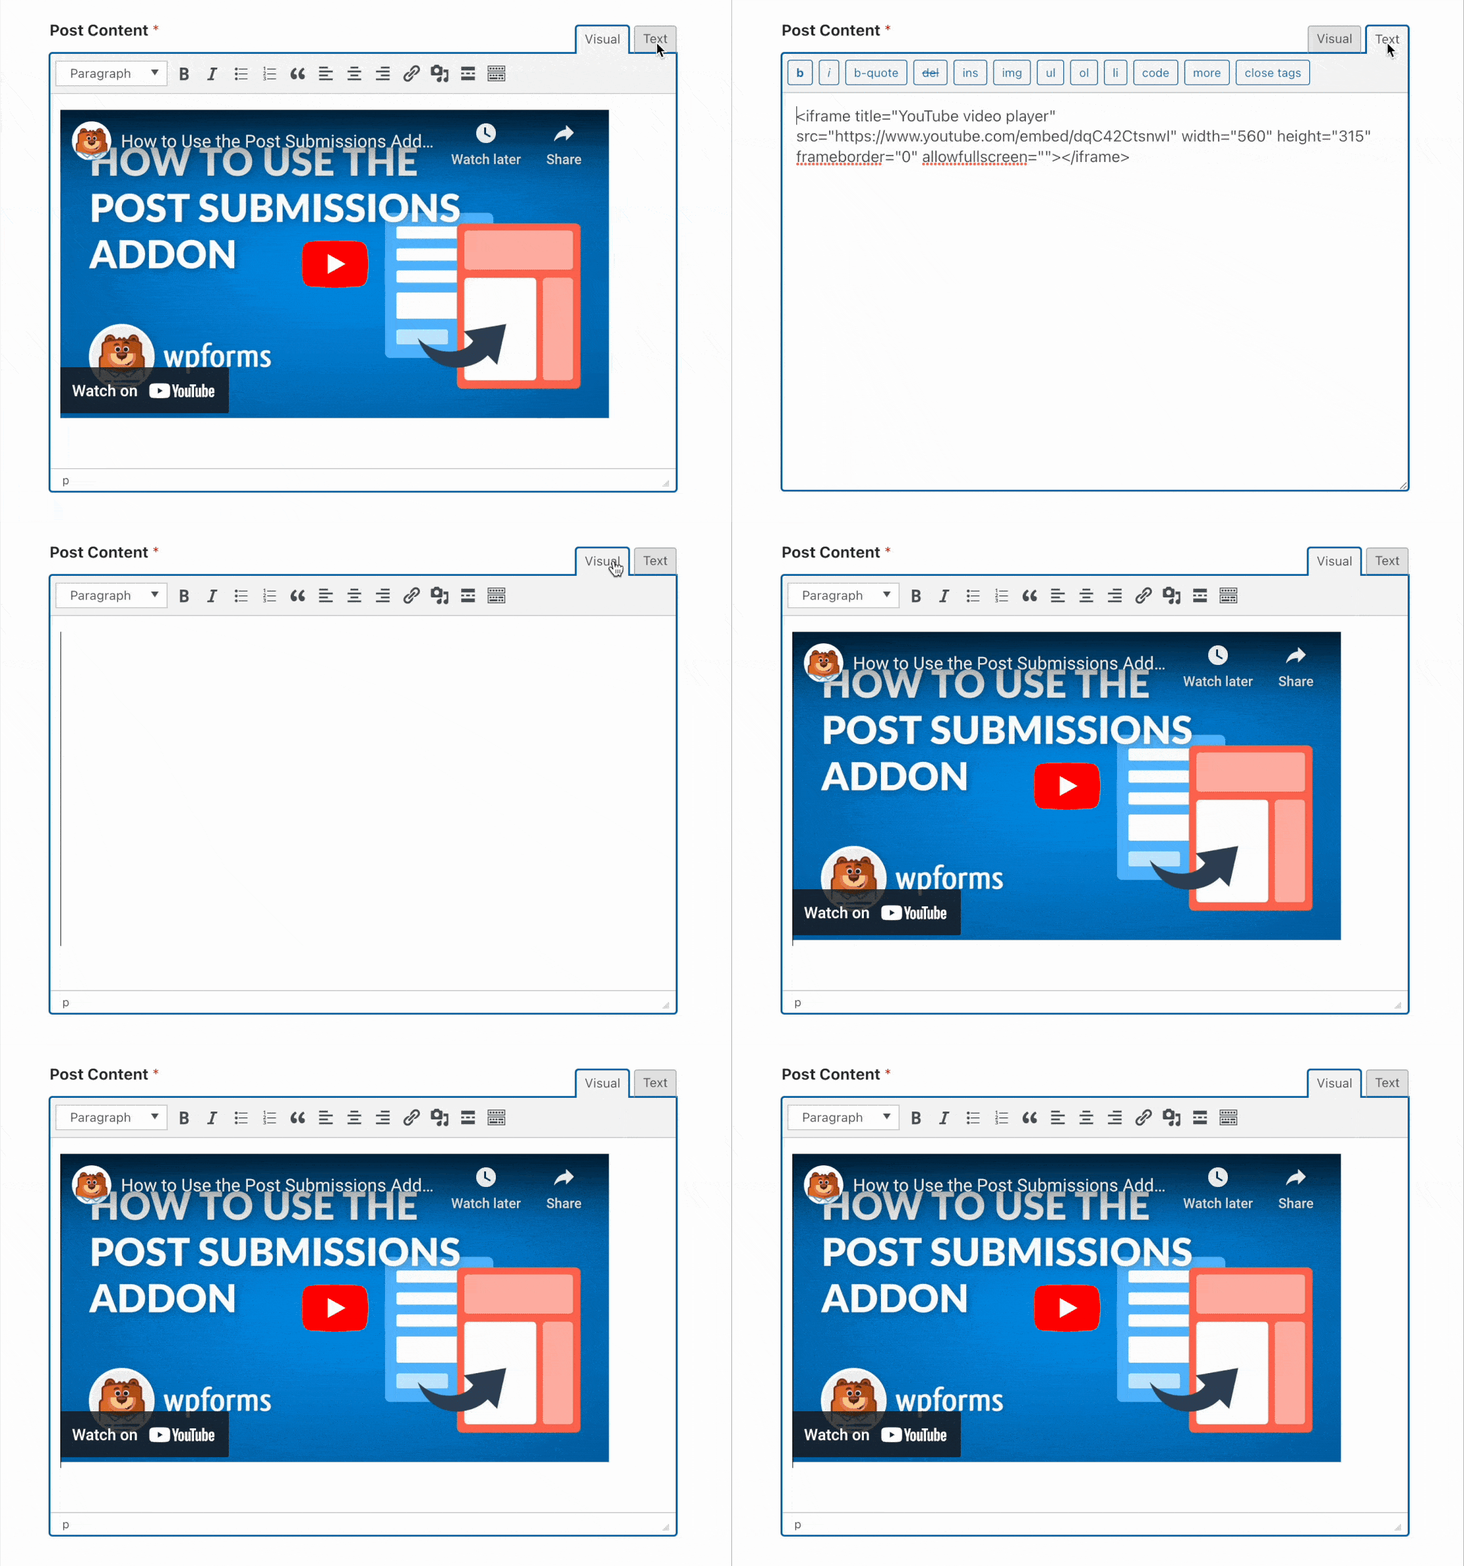
However, WPForms will sanitize and clean out the embed code after the user submits the form. We implement this security measure to protect our users from attackers using code to exploit website weaknesses.
If you want to embed videos to posts submitted through the Post Submission addon, simply paste the video link directly into the Rich Text field. WordPress takes care of adding the embed code and displaying the embedded file on your frontend using oEmbeds.
Note: Please see WordPress’ official documentation for a list of sites that support oEmbed.
That’s it! Now you have some ideas of how to use the Rich Text field in WPForms.
Next, would you like your visitors to be able to post content to your site without accessing your WordPress dashboard? Be sure to check out our guide on how to install and use the Post Submissions addon.
