AI Summary
Would you like to add your WordPress forms to an Elementor popup? If you’re already running Elementor Pro on your site, then you may want to use its built-in popup tool to display a form.
This tutorial will show you how to set up and use an Elementor popup with WPForms.
In This Article

Requirements: The Elementor popup builder is only available with Elementor Pro.
If you do not have Elementor Pro but would still like to create a popup form, check out our guide on creating a contact form popup.
Before you get started, make sure to install and activate WPForms on your WordPress site and verify your license key.
Creating a Popup
To create a new popup with Elementor, you’ll need to go to Templates » Popups in the sidebar of your WordPress admin area. Then click the green Add New Popup button.
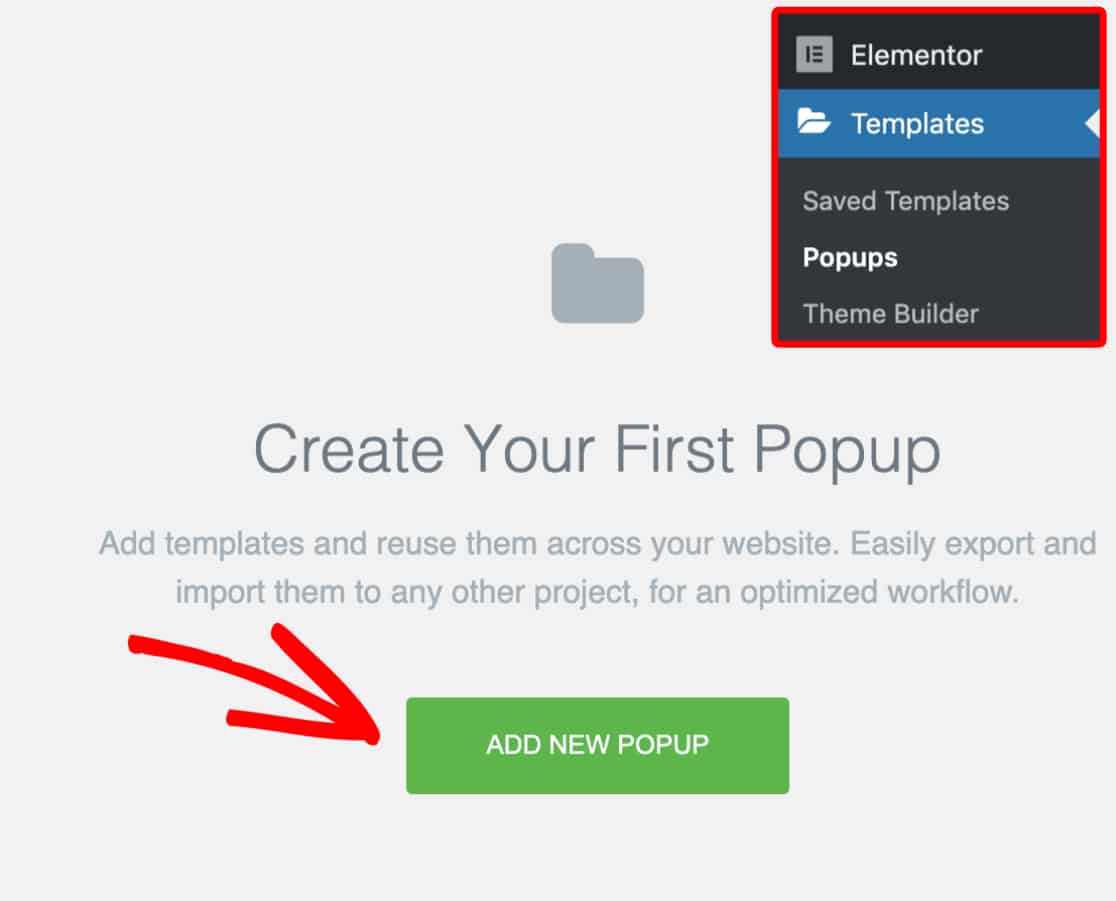
This will open up an overlay that will let you name your popup. For our example, we’ll name our template Contact Us.
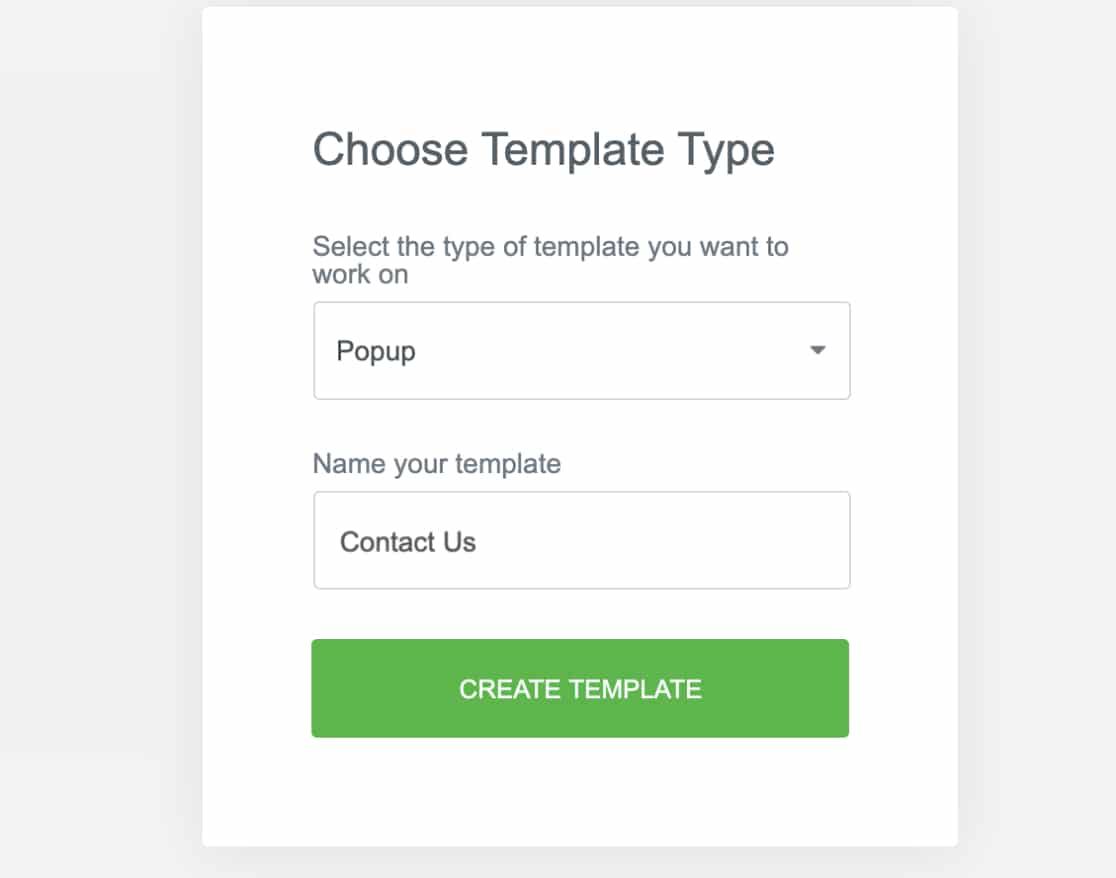
Then click the green Create Template button.
Embedding Your Form
Next, you’ll see another overlay with Elementor’s template library, where you can choose a pre-made template for your popup.
For this example, we’ll click the X button to exit the template library and manually build our popup from scratch.
From the main template builder, search the widgets in the left sidebar for the WPForms widget. Then click and drag it into the builder.
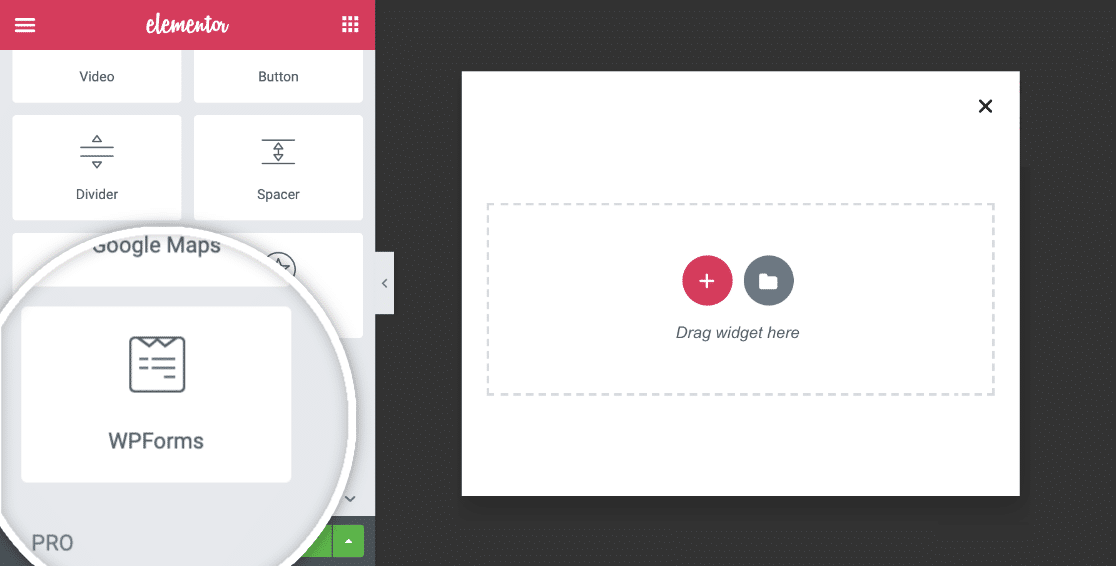
Once you’ve added the WPForms widget to your popup, you can embed an existing form in it or create a new one.
Embedding an Existing Form
In the WPForms Elementor widget, you’ll see a dropdown menu where you can select the name of the existing form you’d like to embed.

If you want to make any changes to this form, you can do so right from the popup builder by clicking on the Edit the selected form link in the sidebar.

This will open a popup with the WPForms form builder so you can edit and save the changes to your form.

Creating a New Form
If you want to build a new form for your popup, click the + New Form button in the lefthand panel.

This will open a popup with the WPForms form builder, where you can name your form, select a template, and start customizing it.

Make sure to save your form before closing the builder. If you decide you want to go back and make changes to your new form, click the Edit the selected form link in the lefthand sidebar to reopen the form builder.
Note: If you need help building your form, take a look at our guide on how to create your first form. Also, check out our Multi-page Elementor form template if you’d like to use a prebuilt form template.
Customizing Your Form
Once you’ve added a form to your popup, you can also tweak its appearance to match your website’s look and feel from the Style tab of Elementor’s builder.

The Style tab allows you to adjust the style of the form fields, labels, and buttons without needing any CSS knowledge.
To learn more, check out our guide on customizing your forms.
Turning on AJAX Form Submission
Whether you add an existing form to your popup or create a new one, it’s a good idea to check that AJAX form submission is enabled. This will prevent your popup from closing after submission and from hiding the form’s confirmation message.
AJAX submission is enabled by default for all new forms. However, you can double-check that this option is turned on by clicking on the Edit the selected form link in the sidebar of the popup builder and going to Settings » General in the form builder.
Then, in the Advanced section, make sure the Enable AJAX Form Submission setting is toggled on.

Save your changes before you close the form builder.
Enabling Prevent Closing on Overlay
After you’ve chosen and embedded your form, you’ll need to configure an option for your popup to prevent your form from closing out if it includes a File Upload or Date/Time field.
Click the gear icon in the bottom Elementor menu bar to open the popup’s settings. In the Advanced tab, turn on the Prevent Closing on Overlay option.

Once you’re done setting up your popup, click the Publish button in the bottom left corner of the screen.

Configuring Popup Settings
Before Elementor publishes your popup, you’ll need to configure the settings for Conditions, Triggers, and Advanced Rules. These options will appear when you click the Publish button in the popup builder.
For this example, we’ll set the conditions to show our popup on our entire site.
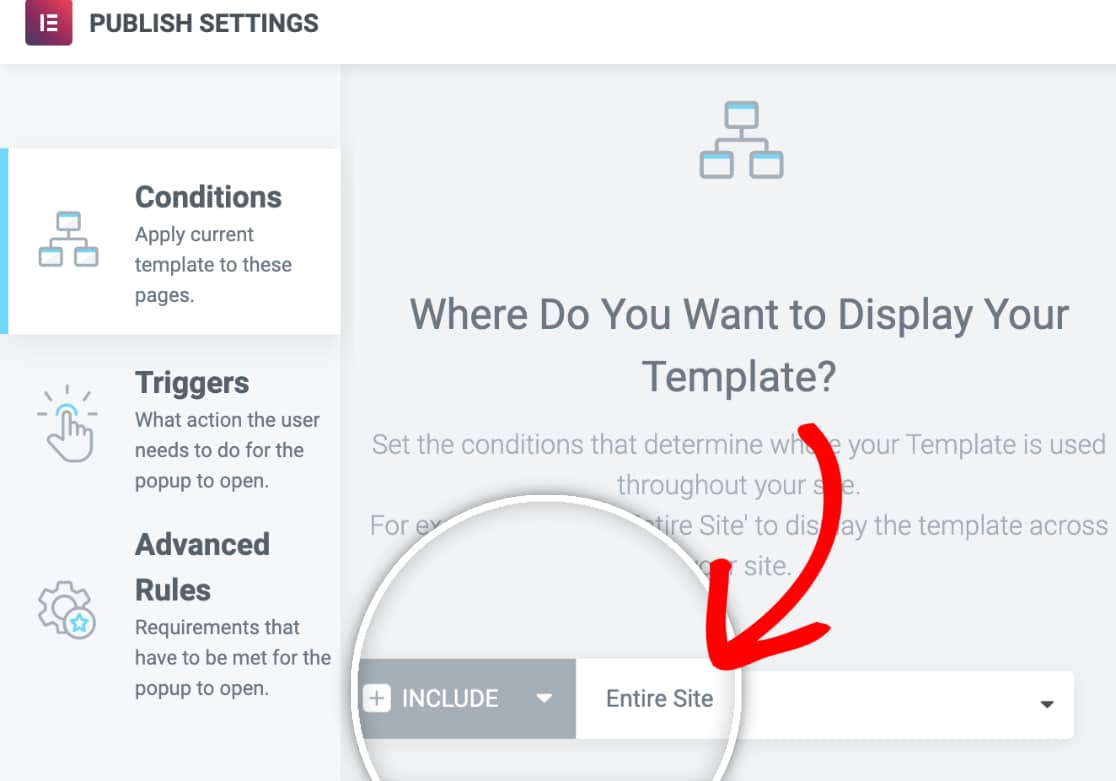
We’ll also set the popup’s trigger to the On Page Load setting.
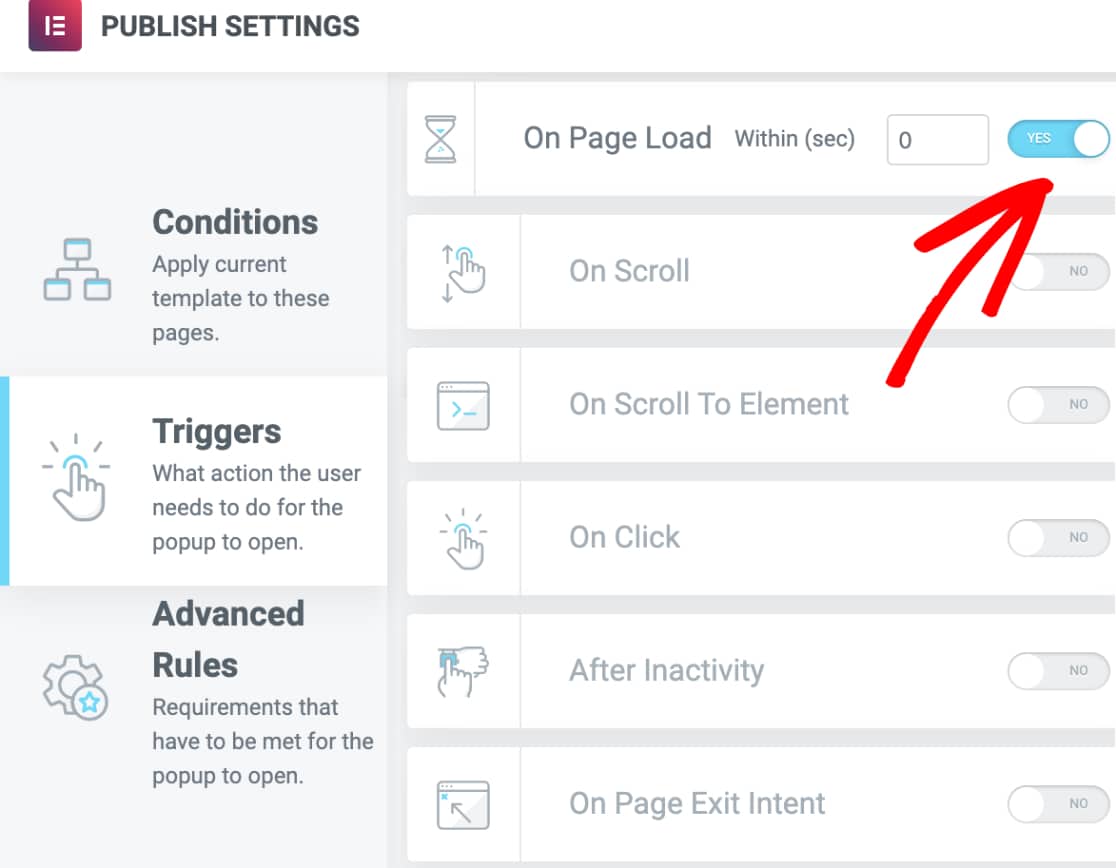
This way, our users will see our popup no matter which page they visit, as soon as it loads.
We won’t add any advanced rules to our example. Once you’re done configuring your popup’s settings, click the Save & Close button.

Note: If you’d like to know more about what each popup setting does, check out Elementor’s complete documentation.
Your popup will then be published. You can visit the frontend of your site to view it.
That’s it! You can now add your WordPress form to an Elementor popup.
Next, would you like to learn how to capture leads, even when users don’t fully finish your forms? Be sure to check out our guide to our Form Abandonment addon.