Are you ready to level up your form analytics game? With the sunsetting of standard Universal Analytics properties on July 1, 2023, it’s time to embrace Google Analytics 4 (GA4), the next-generation measurement solution from Google. In this comprehensive guide, we’ll walk you through the process of setting up GA4 and using Google Tag Manager (GTM) to track form submissions effectively.
If you’re interested in getting your analytics without having to mess with code or snippets and would like to see your reports easily in your WordPress dashboard, we strongly recommend reading through this article for an easier way to retrieve your analytics.
Setting up Google Analytics 4
For the purpose of our documentation, this will be a first time setup for Google Analytics. For this reason, we’ll be following Google’s documentation on setting up and using Google Analytics 4.
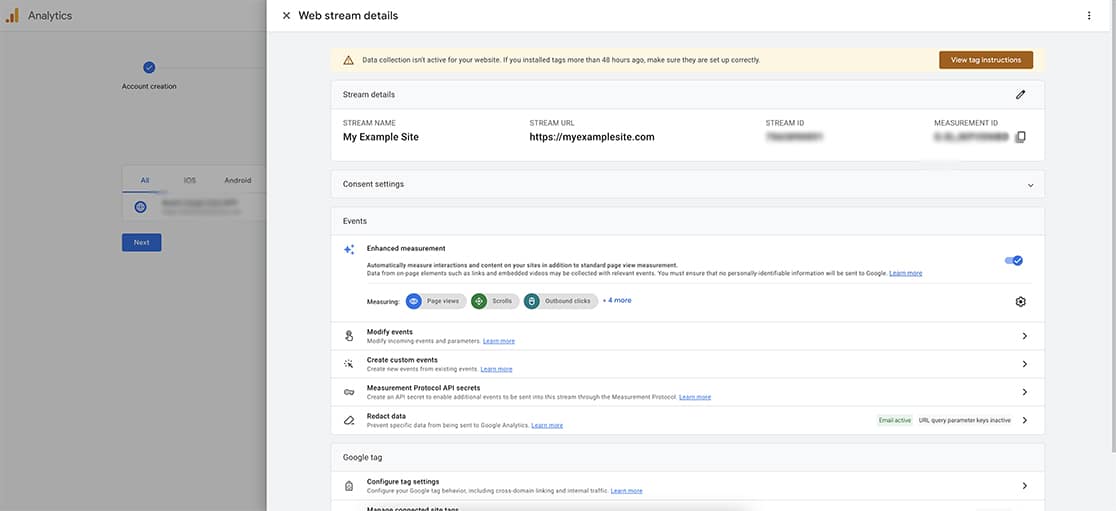
However, if you’re making the switch from Universal Analytics, the GA4 Setup Assistant is your best friend. This handy tool automates the process of creating your Measurement ID and Data Stream, ensuring a seamless transition to the new platform.
After running through Google’s setup instructions, we’ll be asked to copy and paste some code to our site pages so that tracking can begin.
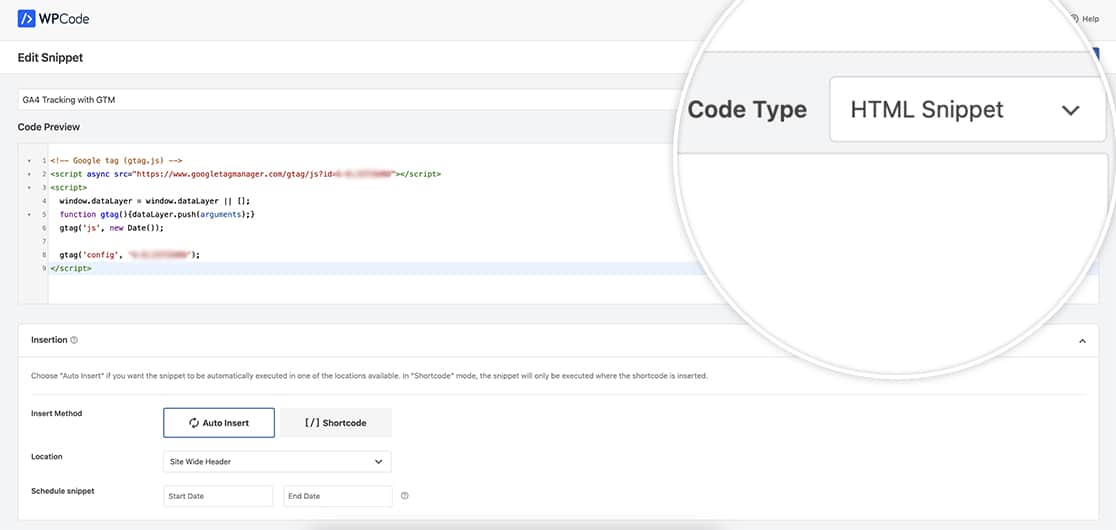
For adding this code to our site, we’re going to use the WPCode – Insert Headers and Footers plugin. Once you’ve installed and activated the plugin, just follow their on screen instructions for adding a Add Your Custom Code (New Snippet) to your site. The Code Type will be HTML Snippet and the Location should be set to Site Wide Header.
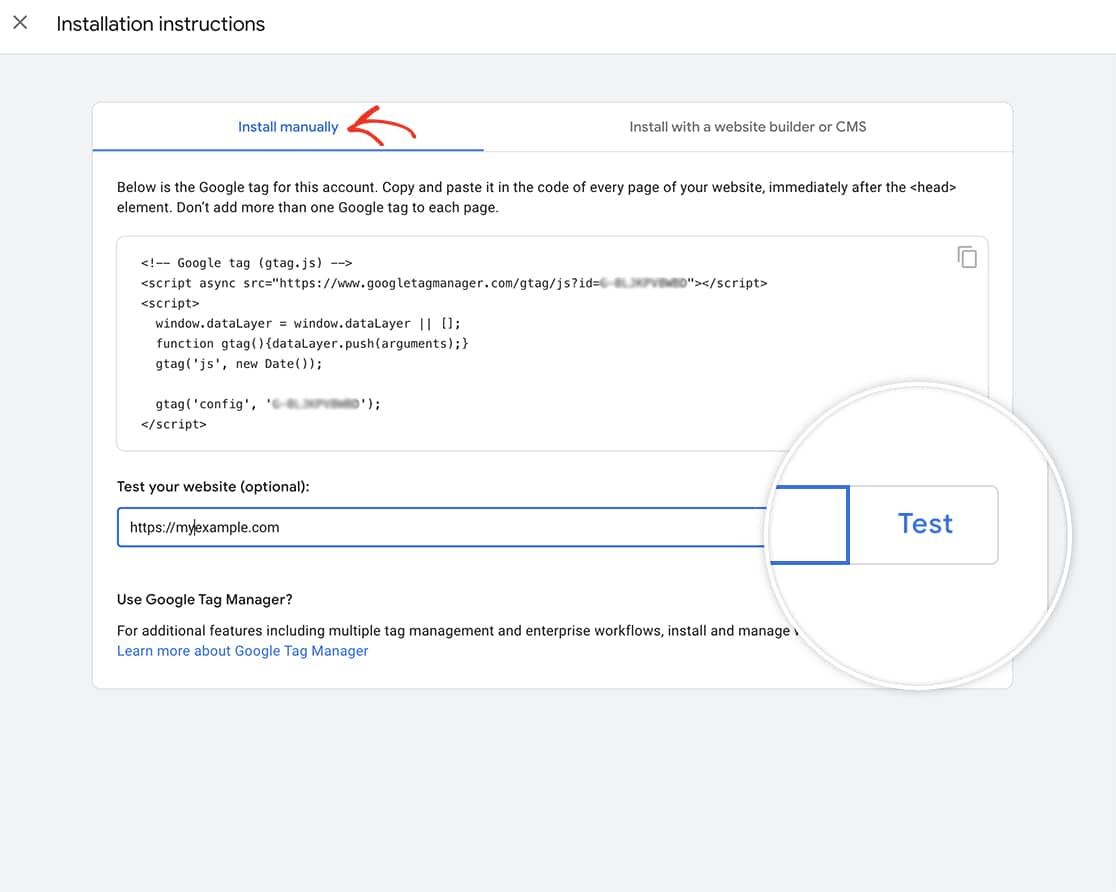
Once you’ve copied this snippet over, you can then test through Google to make sure it’s receiving information. However, please remember that when setting up analytics for the first time, it could take 24-48 hours before you start seeing data being reported back to Google.
Now we can stop here and we will start receiving data in 24-48 hours. However, for our tutorial, we want to use GTM so that we can target specific form submissions on our website.
Take note of the G number that you see in the script Google has given you. This is your Measurement ID number and will be needed in a later step.
Using Google Tag Manager
Next up, let’s dive into the world of Google Tag Manager (GTM) and unleash its power to track form submissions like a pro.
Inside the Google’s Tag Manager, since this is our first time setting these up, we’ll need to begin by creating an account in GTM.
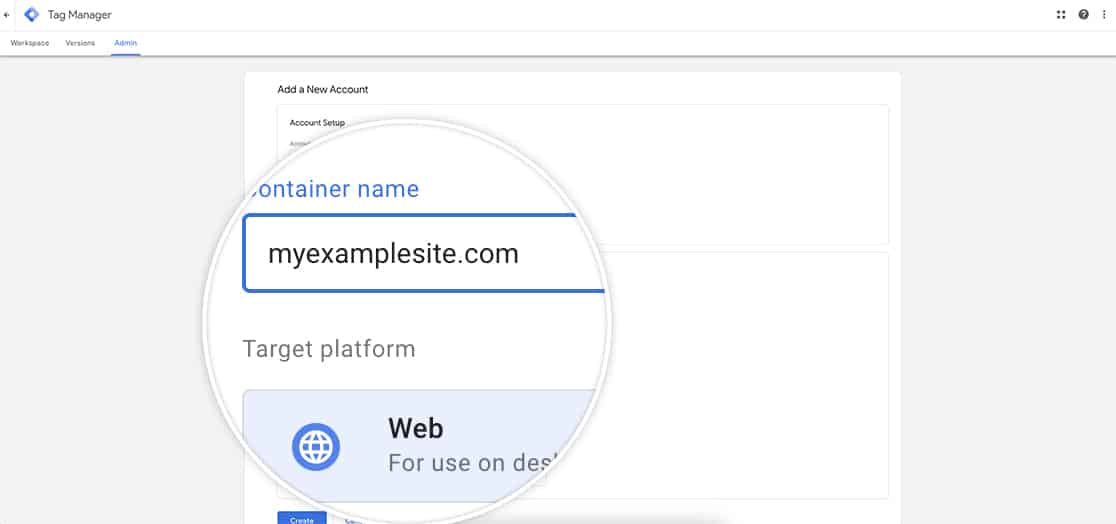
For further information on setting up GTM, please check out this tutorial.
Once you’ve set up your account for GTM, you’ll be asked to copy two snippets to your site. Once again, we’re going to use the WPCode plugin to add our scripts to the site.
One of the scripts will be added to the header of your site.
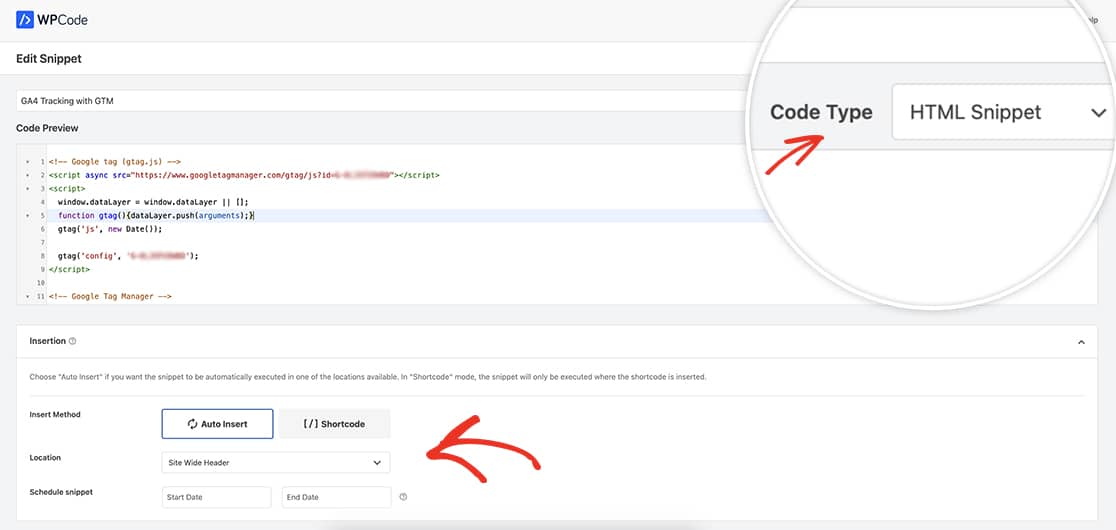
The second script will need to be added just after the opening body tag.
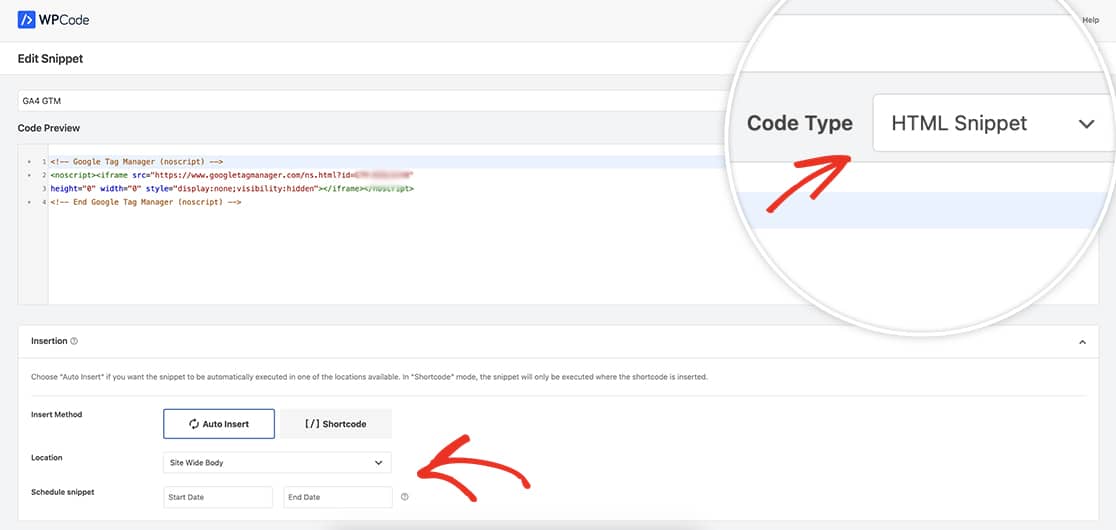
Once you’ve copied these snippets over, you’ll be able to click the Test button to be sure that Google can read the information.
Creating the Trigger
The first step is to create a trigger that will activate when the confirmation message appears after a successful form submission.
To achieve this, from the GTM dashboard, click Triggers and New.
You’ll be asked to name the Trigger and then choose the trigger type. Since we want to capture form submissions for a particular form, we’re going to use the User Engagement Element Visibility. This way when the container for the confirmation message is displayed on the page, that is when this trigger will fire.
Once you’ve selected this, you’ll be presented with a dropdown where you can select an ID for the Selection Method or a CSS Selector. We’re going to select CSS and then enter .wpforms-confirmation-container-full.
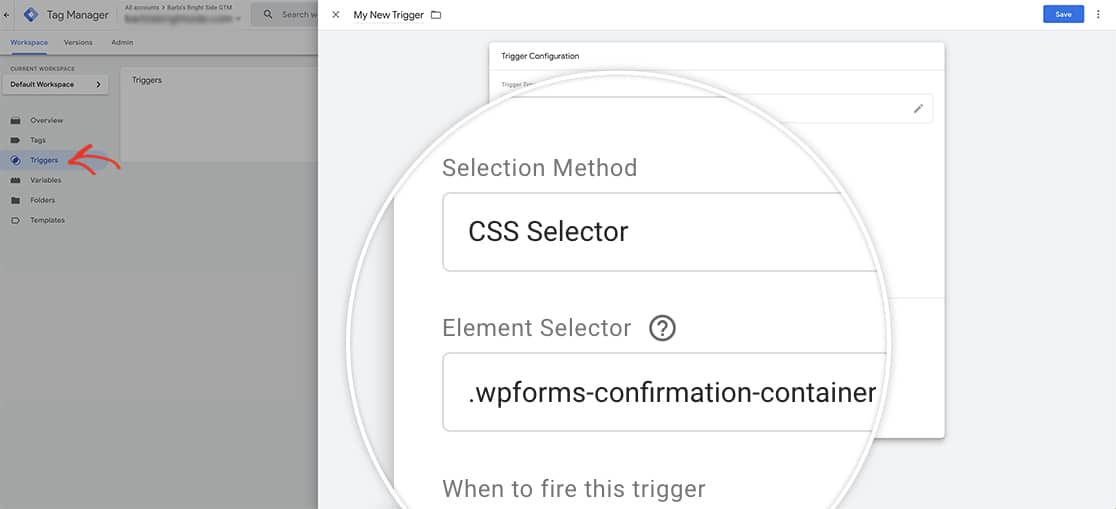
We recommend setting the trigger to activate when the CSS class name is detected on the page. This ensures compatibility with forms that utilize AJAX for submission. By setting the trigger to 1% visibility and enabling “Observe DOM changes,” you’ll guarantee that the trigger fires reliably under all circumstances.
For more information on how to create a trigger, please read Google’s article on this for further step-by-step information.
Adding the tag
With the trigger in place, it’s time to create the event tag using your Measurement ID.
To achieve this, from the Tag Manager dashboard, select Tag and then click New. As before you’ll need to give your tag a name that makes sense to you and then click in the box for Tag Configuration.
For the tag type, you’ll select Google Analytics, then select Google Analytics: GA4 Event.
The MEASUREMENT ID number is required to complete this connection. You’ll need to copy and paste this number that you were given when you set up your initial analytics.
The MEASUREMENT ID number begins with a G and replaces the UA number you used previously on Google Universal Analytics. If you need help locating the MEASUREMENT ID number, please check out this documentation.
Once you’ve entered the ID number, you’ll need to give your event a name that you’ll use to track your submissions.
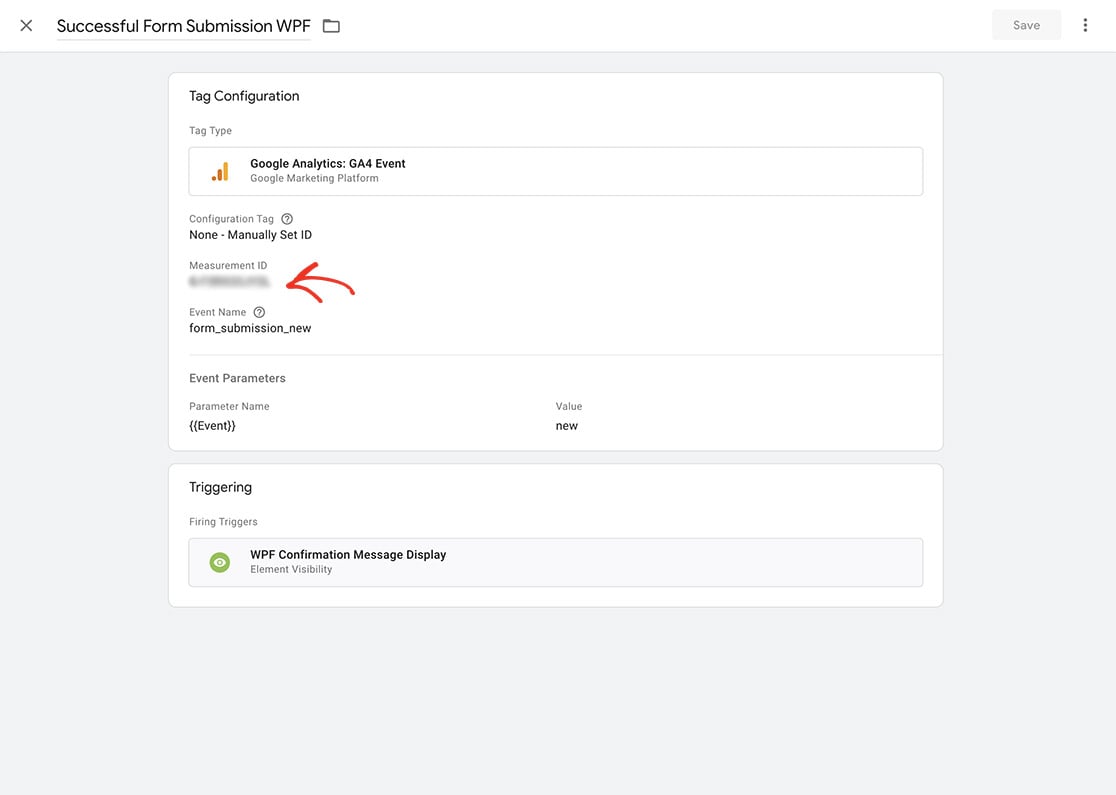
Google has recommended event names that are already pre-programmed to accept certain parameters. For a complete list of Gooogle Event recommendations, you can check out this article.
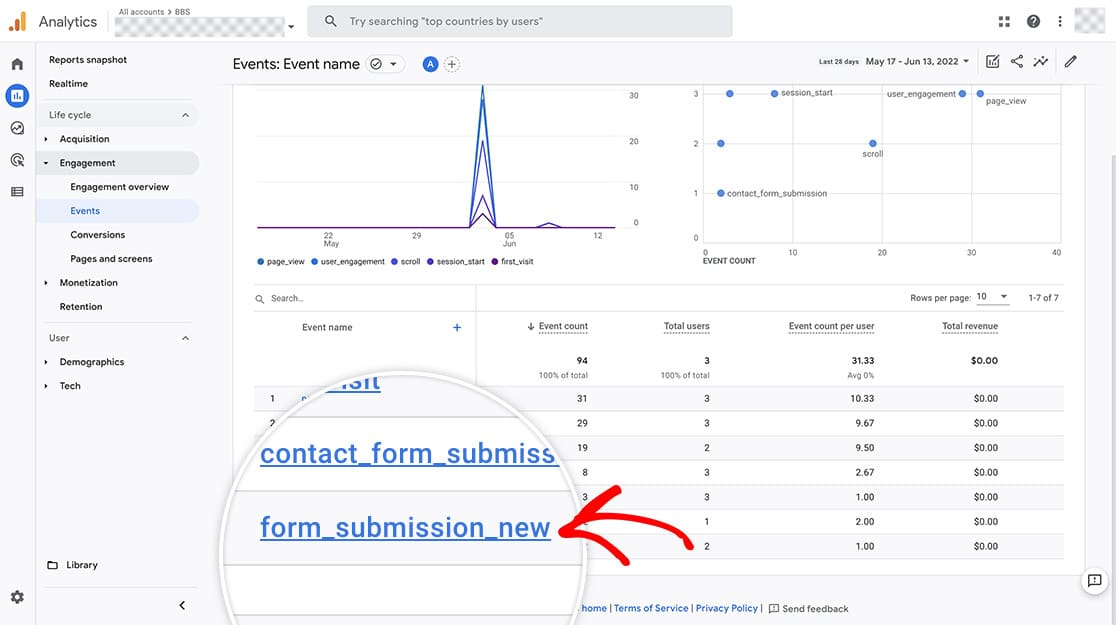
Once all the pieces are in place, your events reporting will begin capturing all form submissions that display the confirmation message after submission. Please be aware it can take 24-48 hours before you’ll start seeing your event capturing and recording the information.
FAQ
Q: Will this record all WPForms submissions
A: If you are displaying the confirmation message on form submit, yes. This tutorial will record all form submissions.
Q: How do I track if I have a Thank You page?
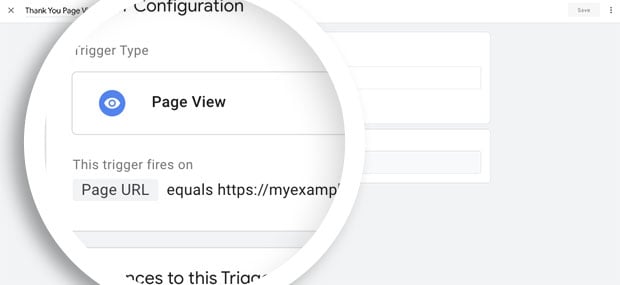
A: If you are using the WPForms Redirect on your Confirmations tab, you can set your trigger up to use Page View instead of the CSS Selector. And there you can enter the URL for your Thank You page.
