


Riassunto AI
Hai appena pubblicato un annuncio di lavoro e le candidature stanno già arrivando nella tua casella di posta. I curriculum arrivano come allegati, le lettere di presentazione vengono incollate nelle email e i buoni candidati sono facili da perdere di vista.
Non è necessario acquistare una piattaforma di assunzione separata per risolvere il problema. Puoi creare un sistema di monitoraggio dei candidati direttamente sul sito WordPress che già gestisci.
Crea subito il tuo sistema di gestione dei candidati! 🙂
Come creare un sistema di gestione dei candidati in WordPress
Se stai assumendo, vuoi che ogni candidatura, curriculum e fase del candidato sia in un unico posto invece che sparso nella tua casella di posta. Questo è ciò che ti offre un sistema di gestione dei candidati, e si riduce a tre componenti.
- Hai bisogno di un modulo per raccogliere le candidature, un posto affidabile dove archiviare i curriculum e un database che tenga traccia della posizione di ogni persona.
- WPForms e un database connesso possono coprire tutti e tre, e il modulo di candidatura rimane sul tuo sito web, dove puoi persino utilizzare Analytics per monitorare visualizzazioni, interazioni, conversioni e altro ancora!
- I candidati lo compilano nella tua pagina carriere invece di essere reindirizzati a una bacheca di lavoro generica, così mantieni il controllo sui campi, sul branding e sulla destinazione dei dati.
- Passaggio 1: Installa il plugin WPForms Elite
- Passaggio 2: Crea il tuo modulo di candidatura
- Passaggio 3: Configura il campo di caricamento curriculum
- Passaggio 4: Notifica al tuo team di assunzione quando qualcuno si candida
- Passaggio 5: Salva automaticamente i curriculum nel cloud
- Passaggio 6: Gestisci i candidati dalla tua dashboard di WordPress
- Trasforma le tue candidature in una pipeline di assunzione in Airtable
- Airtable, Notion o un CRM per la tua pipeline di assunzione
Passaggio 1: Installa il plugin WPForms Elite
WPForms è un costruttore di moduli drag-and-drop, quindi puoi creare un modulo di candidatura completo senza toccare una riga di codice. Viene fornito con oltre 2.100 modelli di moduli, inclusa una disposizione di moduli di candidatura già pronta da cui puoi partire.
Ciò che mi piace di più nell'usare WPForms per le assunzioni è il controllo che ti dà sui dati. Il modulo di candidatura si trova sulla tua pagina carriere e ogni curriculum e invio va esattamente dove lo invii.
Per la pipeline completa in questa guida, in cui le candidature vengono sincronizzate automaticamente in qualsiasi CRM di tua scelta, avrai bisogno di WPForms Elite. Se desideri solo il modulo di candidatura con caricamento curriculum e notifiche via email, WPForms Basic o superiore farà al caso tuo.
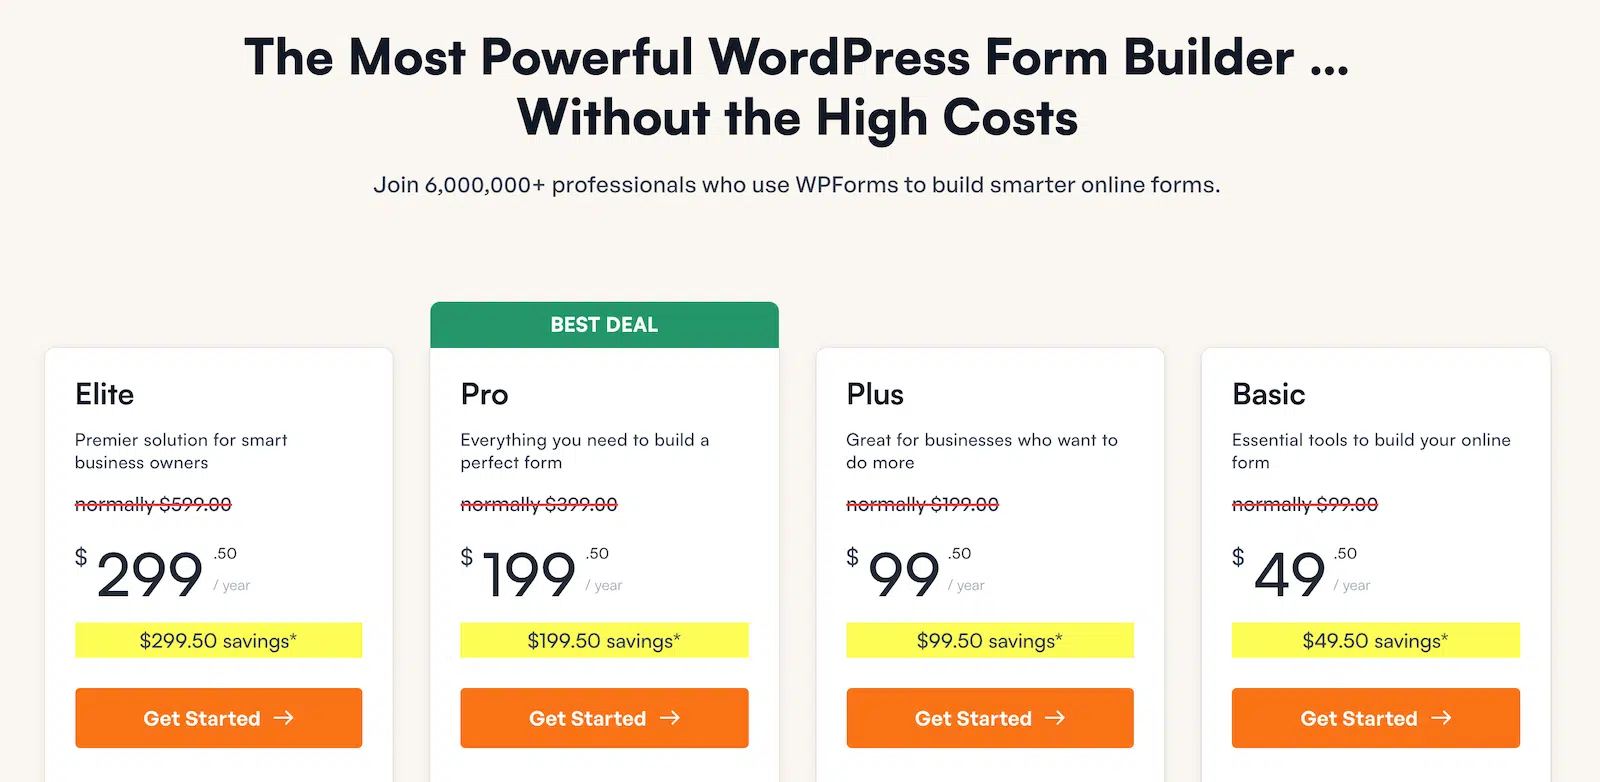
Per iniziare, acquista la licenza Elite. Quindi installa WPForms sul tuo sito web. Se hai bisogno di aiuto, segui queste istruzioni su come aggiungere un plugin a WordPress.
Ottieni subito WPForms Elite! :)
Passaggio 2: Crea il tuo modulo di candidatura
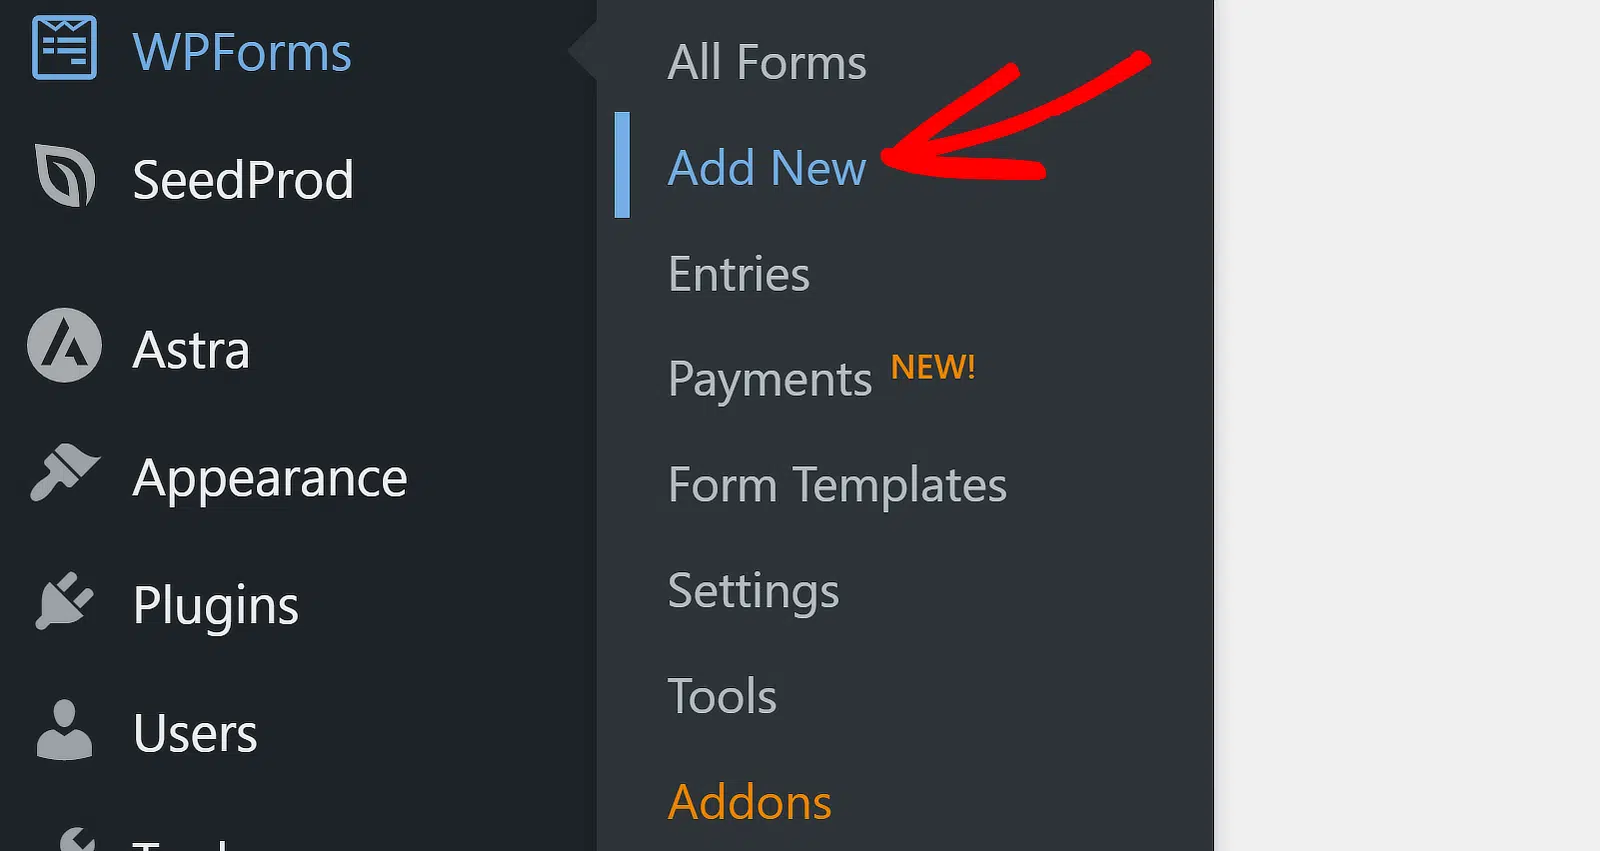
Apri WPForms » Aggiungi nuovo, dagli un nome come Modulo di candidatura, e scegli il modello di modulo di candidatura predefinito o inizia da un modulo vuoto e aggiungi tu stesso i campi.
Come minimo, desideri i campi Nome, Email e Telefono in modo da poter raggiungere ogni candidato. Il tuo costruttore di moduli dovrebbe apparire più o meno così una volta che questi campi sono stati inseriti.

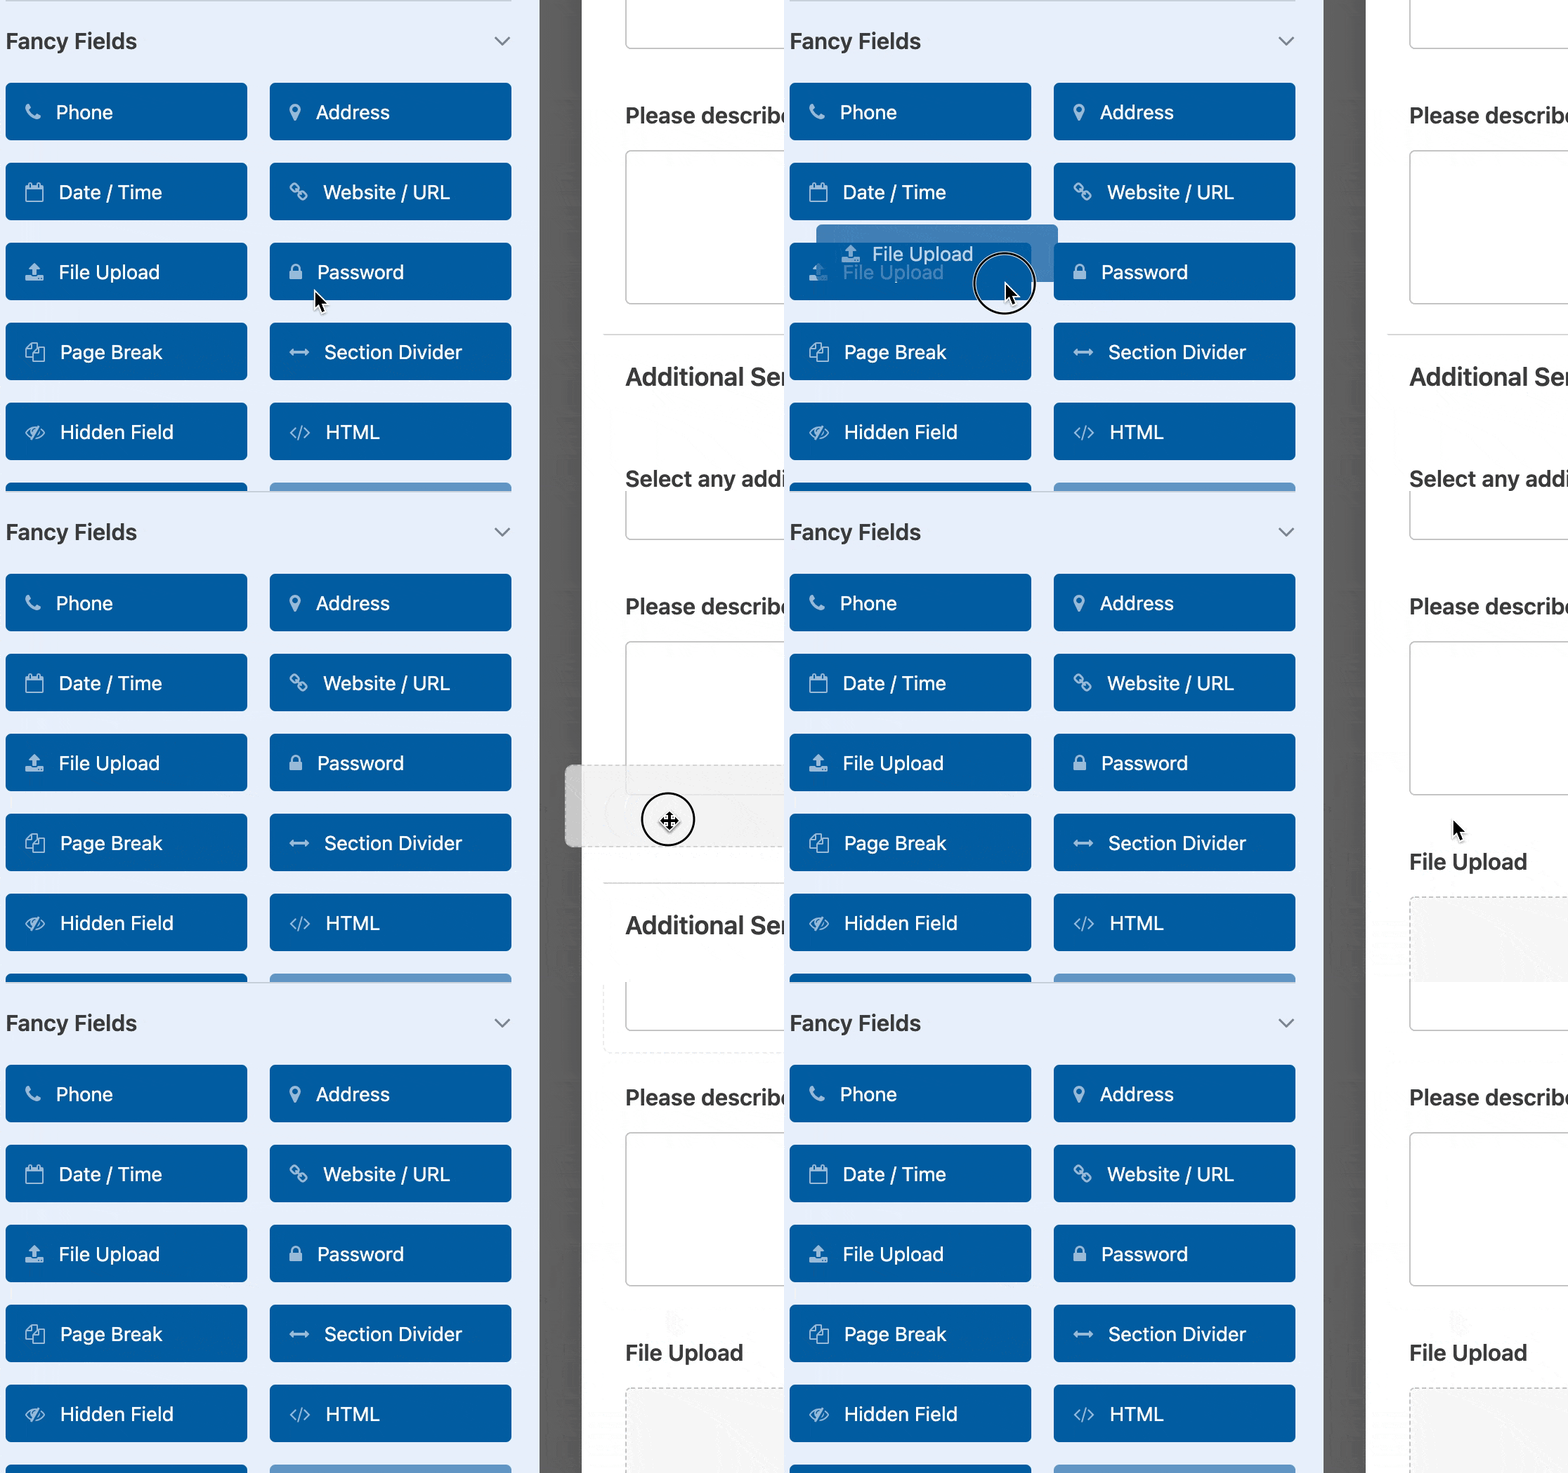
Il curriculum è la parte più importante di ogni candidatura, quindi nel pannello Aggiungi campi, trova il campo Caricamento file nel gruppo Campi avanzati e trascinalo sul tuo modulo.
I candidati dovrebbero anche dirti quale ruolo desiderano, quindi fai clic sul menu a discesa Posizione per cui ci si candida ed elenca i tuoi ruoli aperti sotto Scelte invece di lasciare che li digitino.

Ora salva il modulo e il lato di acquisizione del tuo ATS è pronto per raccogliere le candidature.
Passaggio 3: Configura il campo di caricamento curriculum
Il campo Caricamento file funziona subito, ma alcune impostazioni lo rendono pronto per la ripresa. Fai clic sul campo per aprire le sue opzioni e inizia nella scheda Generale.
Imposta Estensioni file consentite su pdf, doc, docx in modo che i candidati possano inviare solo file di documenti, non immagini o video casuali.

Se desideri che le persone alleghino una lettera di presentazione insieme al curriculum, aumenta Caricamenti file massimi in modo che il campo accetti più di un file.
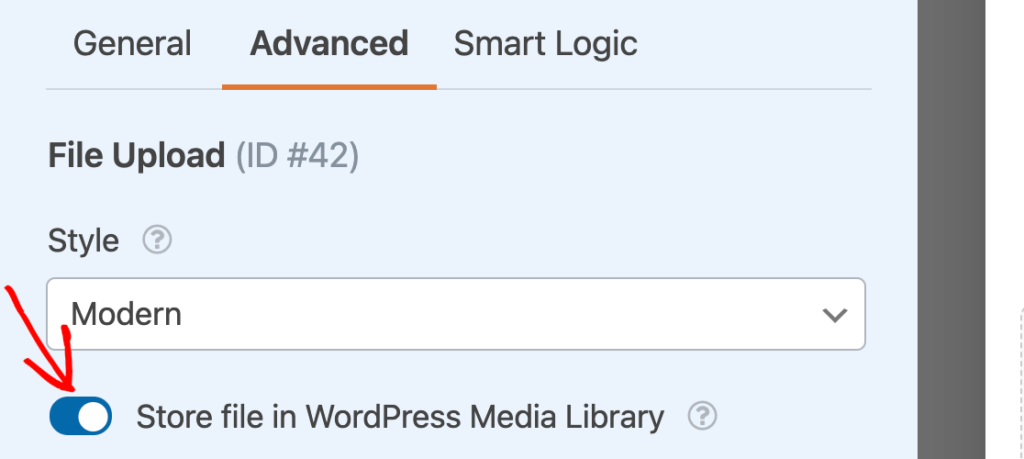
Successivamente, apri la scheda Avanzate. Imposta Stile su Moderno per una casella di trascinamento pulita, quindi attiva Archivia file nella libreria multimediale di WordPress.
Quest'ultima impostazione è importante, perché conserva ogni curriculum sul tuo sito anche se in seguito elimini la voce da cui proviene.
I curriculum contengono dati personali, quindi vale la pena proteggerli. Ancora nella scheda Avanzate, attiva Abilita restrizioni accesso ai file in modo che solo gli utenti connessi al tuo sito possano aprire i file caricati.

Passaggio 4: Notifica al tuo team di assunzione quando qualcuno si candida
Una candidatura è utile solo se la persona giusta la vede rapidamente. WPForms può inviare un'email al tuo team di assunzione nel momento in cui qualcuno si candida, in modo che nessuna sottomissione rimanga inosservata per giorni.
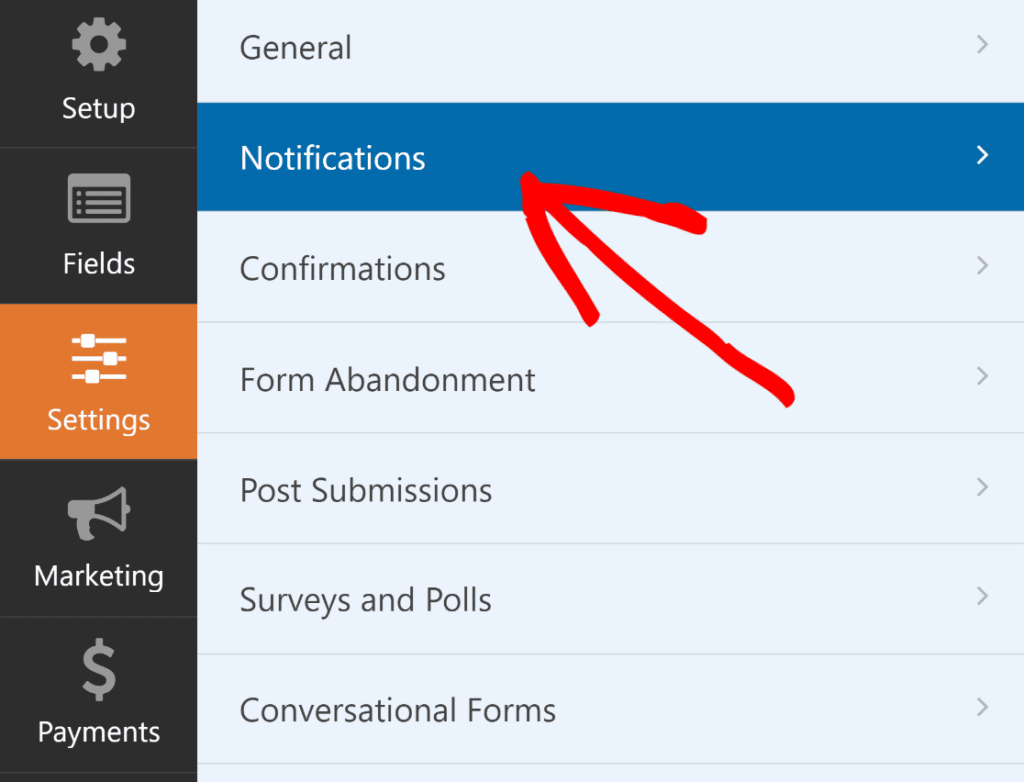
Apri Impostazioni » Notifiche nell'editor del modulo, quindi imposta Invia a indirizzo email a chi si occupa delle assunzioni, che si tratti di te, di un responsabile o di una casella di posta condivisa.

Dai alla notifica una riga dell'oggetto chiara come Nuova candidatura per il ruolo di Coordinatore Marketing, utilizzando un tag intelligente per la posizione, in modo che la tua casella di posta rimanga ordinata all'apertura.
Il Messaggio email utilizza già il tag intelligente {all_fields}, che include un link al curriculum caricato, in modo che il tuo team riceva il file con ogni candidatura.
Per perfezionare ciò che mostra l'email, fai clic sull'icona Mostra tag intelligenti accanto al messaggio e scegli i singoli campi.

Se ruoli diversi vanno a responsabili diversi, aggiungi una seconda notifica e attiva la logica condizionale in modo che ognuna venga attivata solo per la posizione corrispondente.
Un candidato per il design non finisce mai nella casella di posta del responsabile delle vendite. Aiuta anche a rassicurare i candidati che la loro sottomissione è arrivata, quindi vai su Impostazioni » Conferme e scrivi un breve messaggio di ringraziamento che appare nel momento in cui inviano la candidatura.

Puoi mantenere i candidati sulla stessa pagina con quel messaggio o reindirizzarli a una pagina di ringraziamento dedicata, che è un buon posto per spiegare cosa succede dopo nel tuo processo di assunzione.
Passaggio 5: Salva automaticamente i curriculum nel cloud
Puoi archiviare i curriculum nella tua Libreria multimediale, ma una cartella cloud condivisa è più facile da consultare insieme per un team di assunzione.
Chiunque tu inviti può aprire il curriculum di un candidato senza accedere a WordPress, il che è importante quando un responsabile o un intervistatore ha bisogno di esaminare rapidamente qualcuno.
Il componente aggiuntivo Google Drive invia ogni curriculum caricato direttamente in una cartella a tua scelta. Apri WPForms » Impostazioni » Integrazioni per collegare il tuo account, dove troverai anche le altre connessioni cloud e CRM.

Collegare Google Drive richiede un accesso e un'approvazione, quindi il tuo account risulterà connesso. Apri il modulo, vai alle sue impostazioni Google Drive e indirizza i curriculum caricati a una cartella.
Puoi persino salvare i caricamenti direttamente su Google Drive in sottocartelle nominate in base a ogni posizione con tag intelligenti, in modo che ogni ruolo ottenga automaticamente il proprio set di curriculum.

Se preferisci non conservare affatto copie sul tuo server, attiva l'opzione per eliminare i file locali dopo il caricamento, e ogni curriculum vivrà solo su Drive.
E se un file non dovesse mai sincronizzarsi, la voce conserva un'azione di ricaricamento in modo da poterla inviare nuovamente senza chiedere al candidato di ricandidarsi.
Passaggio 6: Gestisci i candidati dalla tua dashboard di WordPress
Ogni invio viene salvato all'interno di WordPress, così puoi esaminare i candidati senza lasciare la tua dashboard. La gestione delle voci è inclusa in WPForms Basic e versioni superiori.
Apri WPForms » Voci e scegli il tuo Modulo di Candidatura per Lavoro per vedere tutti coloro che si sono candidati.

L'elenco delle voci è dove avviene un primo passaggio di smistamento, poiché puoi cercare per nome o email, filtrare per data e contrassegnare le candidature che meritano un'ulteriore valutazione.
Segnare le voci come lette ti aiuta anche a distinguere le nuove candidature da quelle che hai già esaminato. Fai clic su qualsiasi riga per aprire una singola candidatura e leggere l'invio completo, dai dettagli di contatto alla lettera di presentazione.

Ogni modulo ha anche la sua pagina di analisi, quindi se non ricevi abbastanza candidature, puoi sempre approfondire i dati per vedere cosa sta succedendo.

Una tabella campo per campo mostra interazioni, tempo trascorso, errori e abbandoni per ogni campo. Abbinala al componente aggiuntivo Abbandono Modulo per acquisire le voci parziali di quei visitatori.

Per ulteriori informazioni su come utilizzare il monitoraggio delle prestazioni dei moduli integrato, consulta questa documentazione sull'utilizzo delle analisi di WPForms.
Ora, questo ti fornisce un registro funzionante di ogni candidato, ma è ancora un elenco piuttosto che una pipeline.
Per vedere a colpo d'occhio chi è in attesa di una chiamata di screening e chi ha ricevuto un'offerta, hai bisogno di fasi, il che significa collegare il tuo modulo a un database.
Trasforma le tue candidature in una pipeline di assunzione in Airtable
Per spostare i candidati attraverso fasi come screening, colloquio e offerta, puoi inviare automaticamente ogni candidatura ad Airtable con il componente aggiuntivo Airtable, che fa parte di WPForms Elite.
Inizia collegando il tuo account. Vai su WPForms » Impostazioni » Integrazioni, fai clic su Airtable e scegli Aggiungi Nuovo Account.

WPForms ti invia a una schermata di autorizzazione di Airtable dove approvi l'accesso e selezioni quali basi condividere, quindi fai clic su Concedi accesso per completare. Puoi seguire la guida ufficiale di configurazione di Airtable se rimani bloccato sulla connessione.
Prima di mappare qualsiasi cosa, accedi ad Airtable e crea la base e la tabella in cui desideri che le applicazioni vengano inserite, poiché il componente aggiuntivo può connettersi solo a basi già esistenti.

Aggiungi colonne per i dettagli che raccogli, come nome, email, telefono e posizione, oltre a una colonna di testo o URL in cui conserverai il link al curriculum.
Tornato nel generatore di moduli, apri Impostazioni » Airtable e fai clic su Aggiungi nuova connessione. Scegli il tuo account, la base e la tabella, quindi mappa ogni colonna di Airtable al campo WPForms corrispondente.
D'ora in poi, ogni applicazione creerà un nuovo record nella tua tabella. Puoi saperne di più sulla connessione nella pagina del componente aggiuntivo Airtable.

Ora puoi farlo sembrare una vera pipeline aggiungendo una colonna Stato in Airtable come selezione singola, con opzioni come Nuovo, Screening, Colloquio, Offerta e Assunto, quindi passando la tabella a una vista Kanban.
Ogni candidato diventa una scheda che puoi trascinare da una fase all'altra, e puoi impostare automazioni Airtable per inviare un'email al tuo team ogni volta che una scheda si sposta.
Un onesto avvertimento si applica ai curriculum, poiché il componente aggiuntivo Airtable di WPForms sincronizza i dati dei tuoi campi modulo in record ma non allega il file del curriculum stesso.
Conserva il curriculum nella tua Libreria multimediale o nella cartella di Google Drive dai passaggi precedenti, quindi archivia il link del file in una colonna in modo che sia a un clic di distanza da ogni scheda del candidato.
Airtable, Notion o un CRM per la tua pipeline di assunzione
Airtable è la mia raccomandazione predefinita, ma non è l'unico database che funziona. La scelta giusta dipende dal tuo budget e da dove il tuo team lavora già.
| Strumento | Ideale per | Livello minimo di WPForms | Perché è adatto |
|---|---|---|---|
| Airtable | La maggior parte dei piccoli team che desiderano una pipeline visiva | Elite | Viste Kanban, griglia e calendario con fasi drag-and-drop |
| Notion | Team che vivono già in Notion, o con un budget più limitato | Plus | Un modo conveniente per sincronizzare le candidature in un database che puoi trasformare in una bacheca |
| HubSpot, Pipedrive o Zoho CRM | Team che gestiscono già un CRM | Elite | Tratta i candidati come trattative, accanto alle tue altre pipeline |
| Google Fogli | Un elenco rapido e senza fronzoli di candidati | Pro | Un semplice foglio di calcolo che tutti nel team conoscono già |
Se il tuo team lavora in Notion, puoi sincronizzare le candidature in Notion invece e creare un modulo connesso a Notion allo stesso modo.
E se paghi già per un CRM, invia i candidati direttamente lì. WPForms Elite si connette a Pipedrive, ti consente di inviare candidati in HubSpot e funziona anche con Zoho CRM.
Per la maggior parte dei piccoli team che assumono regolarmente, Airtable offre la pipeline più chiara con il minor sforzo di configurazione. Scegli lo strumento che il tuo team aprirà effettivamente ogni giorno, poiché è quello in cui vivrà il tuo processo di assunzione.
FAQ sulla creazione di un sistema di tracciamento dei candidati in WordPress
Alcune domande sorgono ripetutamente quando si crea un sistema di tracciamento dei candidati in WordPress, e di solito si concentrano su strumenti, costi e su ciò che è possibile fare senza codice. Ecco le risposte che i team di assunzione pongono più spesso prima di iniziare a costruire.
È possibile utilizzare WordPress come sistema di tracciamento dei candidati?
Sì, WordPress funziona bene come sistema di tracciamento dei candidati una volta che si abbina un modulo di creazione con un database. WPForms raccoglie le candidature e memorizza i curriculum, mentre uno strumento collegato come Airtable o Notion traccia ogni candidato attraverso le fasi di assunzione. Ottieni un ATS basato su strumenti che già utilizzi, senza pagare per una piattaforma di assunzione dedicata.
È necessario sapere come programmare per creare un ATS in WordPress?
Non è necessario scrivere alcun codice. WPForms è un costruttore drag-and-drop, quindi crei il modulo di candidatura aggiungendo campi visivamente. Collegare un database come Airtable si riduce ad autorizzare il tuo account e mappare i campi, senza coinvolgere codice in alcun punto.
Di quale licenza WPForms ho bisogno per un sistema di tracciamento dei candidati?
Dipende da quanto vuoi spingerti. Il modulo di candidatura con caricamento di curriculum e notifiche via email funziona su WPForms Basic e versioni superiori. Salvare i curriculum su Google Drive richiede Pro, la sincronizzazione con Notion richiede Plus e il collegamento ad Airtable o a un CRM come HubSpot richiede Elite.
I candidati possono caricare curriculum e lettere di presentazione nel modulo?
I candidati possono allegare sia un curriculum che una lettera di presentazione. Il campo Caricamento file accetta documenti e puoi limitarlo a formati adatti ai curriculum come pdf, doc e docx. Aumenta il Numero massimo di file e un singolo campo accetterà più file contemporaneamente.
È meglio Airtable o Notion per una pipeline di assunzione?
Airtable è la scelta migliore se desideri una pipeline visiva, poiché le sue viste Kanban e griglia rendono semplice trascinare i candidati tra le fasi. Notion è una buona opzione se il tuo team ci lavora già o se desideri un'opzione a basso costo, e può contenere gli stessi dati dei candidati in un layout a schede.
Come sposto i candidati attraverso le fasi di assunzione?
Aggiungi un campo Stato alla tua base Airtable come selezione singola con le tue fasi, quindi passa a una vista Kanban. Ogni candidatura diventa una scheda e la trascini da una colonna all'altra man mano che il candidato progredisce.
Quali tipi di file dovrebbe accettare un campo di caricamento curriculum?
Attieniti a formati di documento come pdf, doc e docx in modo da ricevere curriculum leggibili anziché immagini o altri file. Puoi impostarlo in Estensioni file consentite, e la nostra guida completa al campo Caricamento file copre ogni opzione in dettaglio.
Posso collegare il modulo a un CRM come HubSpot o Pipedrive invece?
WPForms Elite si collega a HubSpot, Pipedrive, Zoho CRM e Salesforce, in modo da poter trattare i candidati come contatti o opportunità all'interno di un CRM che già utilizzi. La configurazione rispecchia il flusso di Airtable, in cui autorizzi l'account e quindi mappi i tuoi campi del modulo ai campi del CRM.
Successivamente, invia ogni invio del modulo dove lavora il tuo team
Una volta che la tua pipeline di assunzione è attiva, lo stesso approccio funziona per qualsiasi modulo sul tuo sito. Puoi instradare richieste di contatto, moduli di preventivo e iscrizioni a eventi negli strumenti che il tuo team controlla quotidianamente, in modo che nulla rimanga dimenticato in una casella di posta.
Dai un'occhiata a come creare un modulo Airtable personalizzato per altre parti della tua attività, o invia le voci a Google Sheets quando ti basta un semplice foglio di calcolo.
Inizia Oggi a Raccogliere Candidature! 🙂
Pronto a creare il tuo modulo? Inizia oggi stesso con il plugin per la creazione di moduli WordPress più semplice. WPForms Pro include molti modelli gratuiti e offre una garanzia di rimborso di 14 giorni.
Se questo articolo ti è stato utile, seguici su Facebook e X (Twitter) per altri tutorial e guide gratuite su WordPress.





