AI Summary
Want to receive a notification whenever a user submits a form on your website? WPForms allows you to easily set up notifications and automatically send out emails containing the information a user submits through your WordPress forms.
This guide will walk you through the steps to set up a basic form notification email.
Before getting started, you’ll first need to make sure WPForms is installed and activated on your WordPress site. Then you can create a new form or edit an existing one to access the form builder.
What Are Form Notifications?
Form notifications are automated emails sent out when a user submits a form on your website. These form notifications typically include the information a user submitted through your form and can be received by both the site administrator and the user who completed the form.
Utilizing form notifications is a great way to instantly track user submissions and engage with your site visitors in a timely manner.
Accessing Form Notification Settings
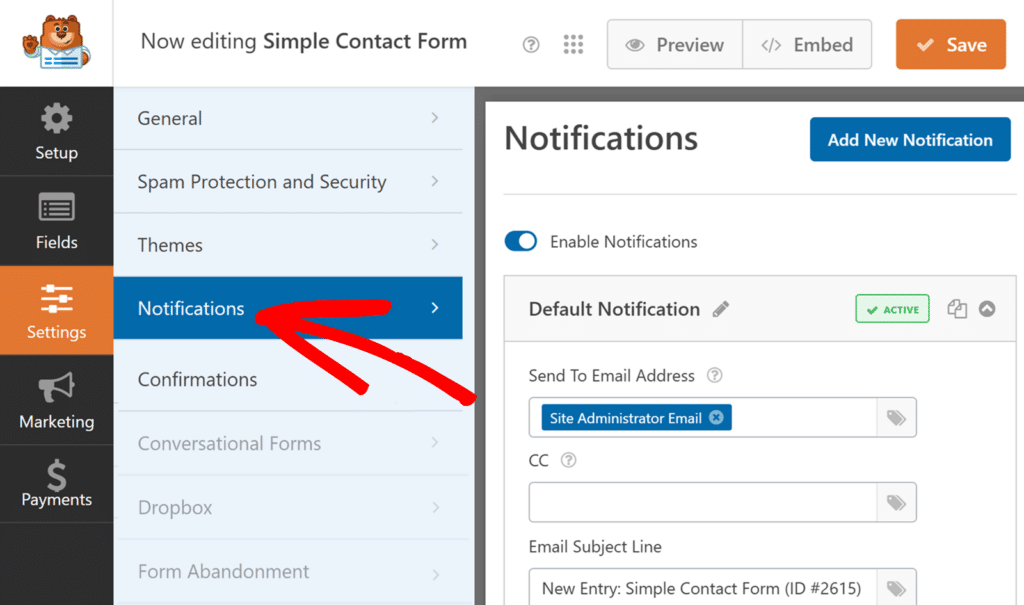
From the form builder, go to Settings » Notifications to access your form’s notification settings.
Enabling Form Notifications
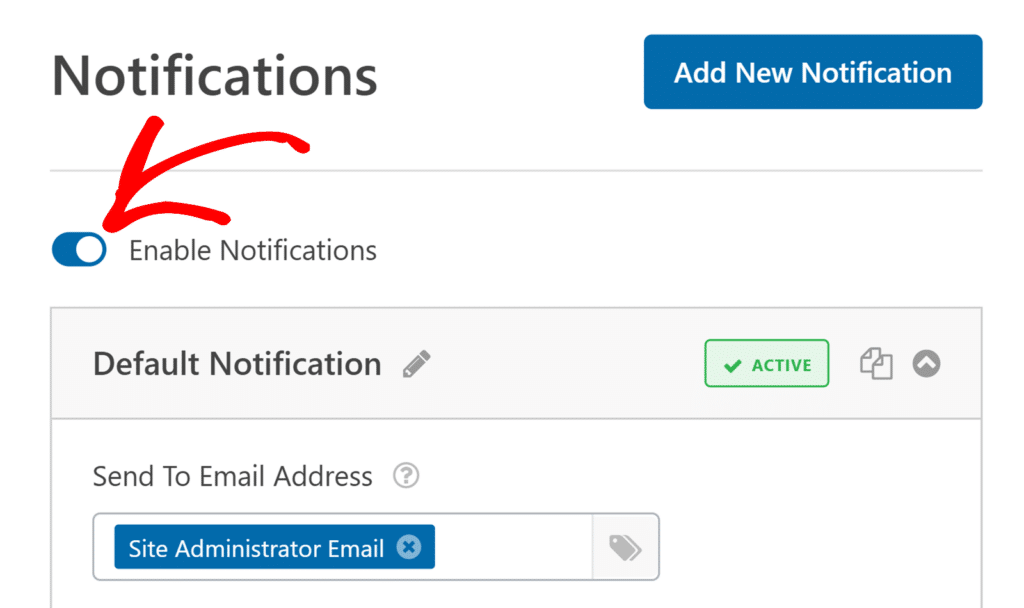
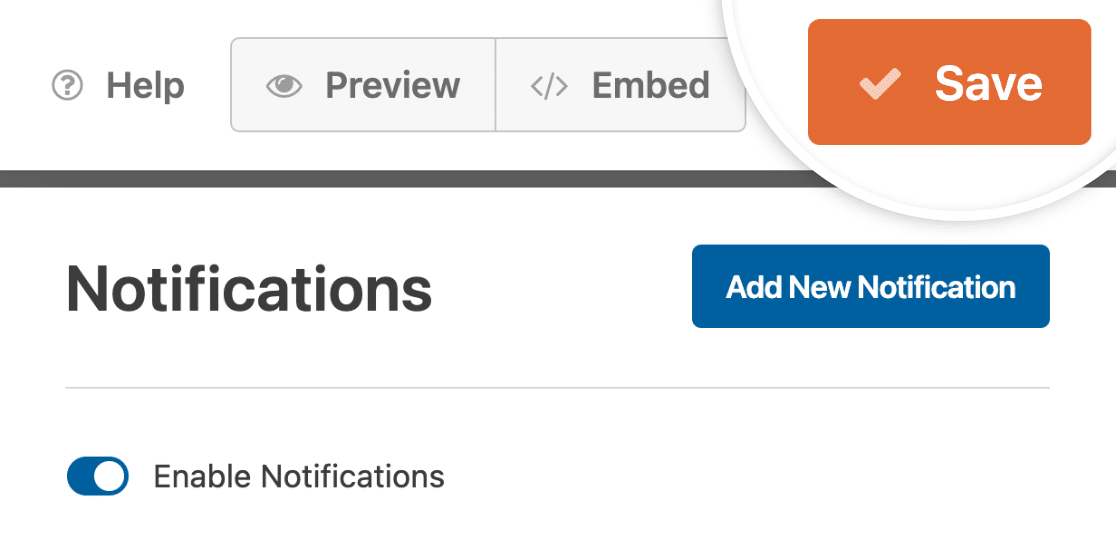
By default, notifications are enabled for your form. However, we recommend double-checking that they’re enabled by ensuring the Enable Notifications option is toggled to the on position.
Each notification also includes a status button labeled ACTIVE. Clicking this button will deactivate that specific notification, and the label will change to INACTIVE. You can click it again at any time to reactivate it.
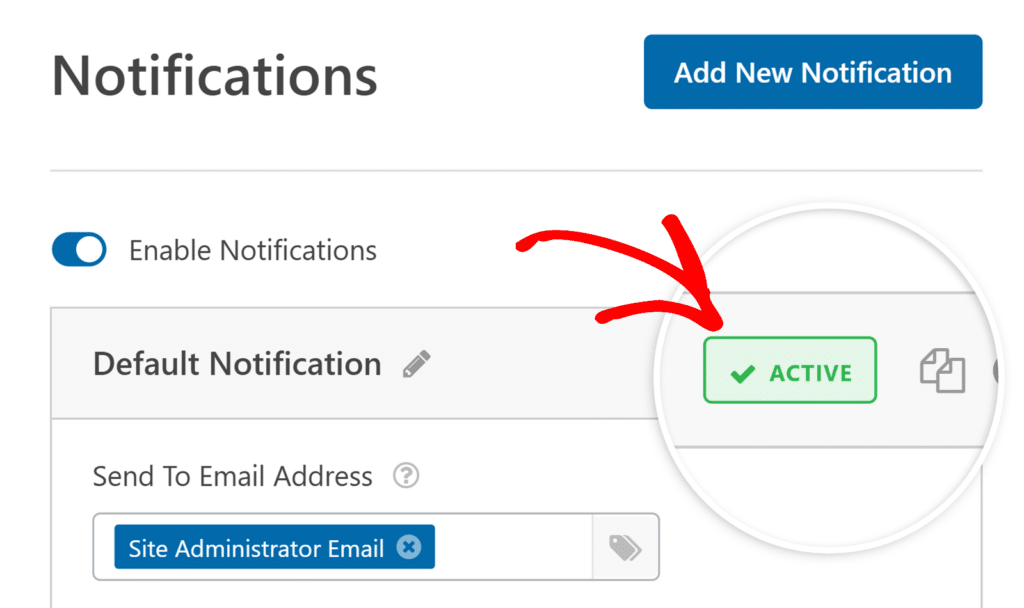
This makes it easy to set up multiple notifications and only enable the ones you need at a given time.
Adding a New Notification
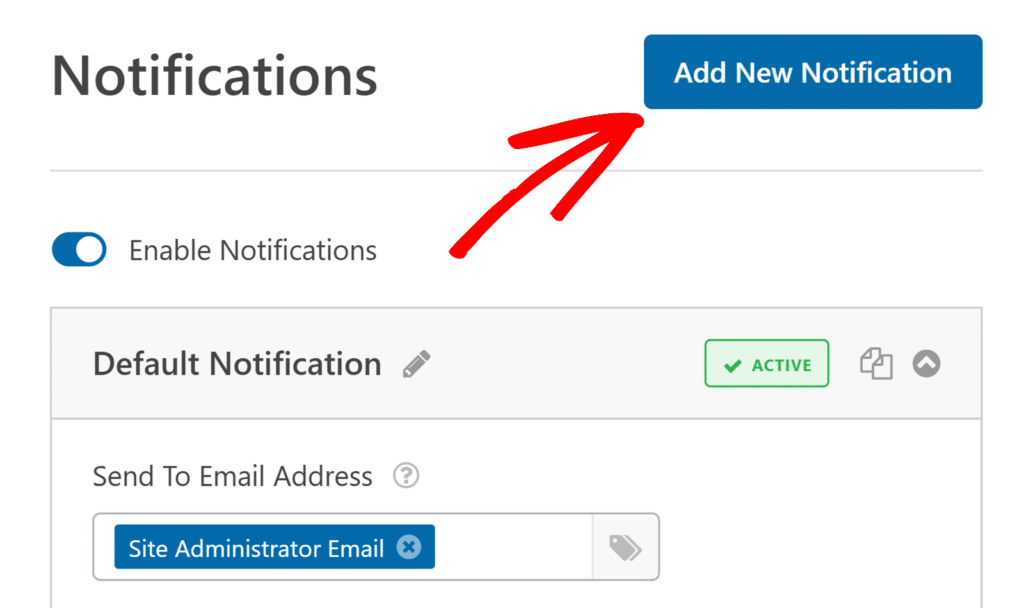
WPForms provides a default notification for you. However, to guide you through the process from start to finish, go ahead and create a new notification by clicking on the Add New Notification button.
In the overlay that appears, add a name for your new notification. This name is for internal use only, and won’t be visible to people filling out your form. Go ahead and click the OK button after you’ve added a name.
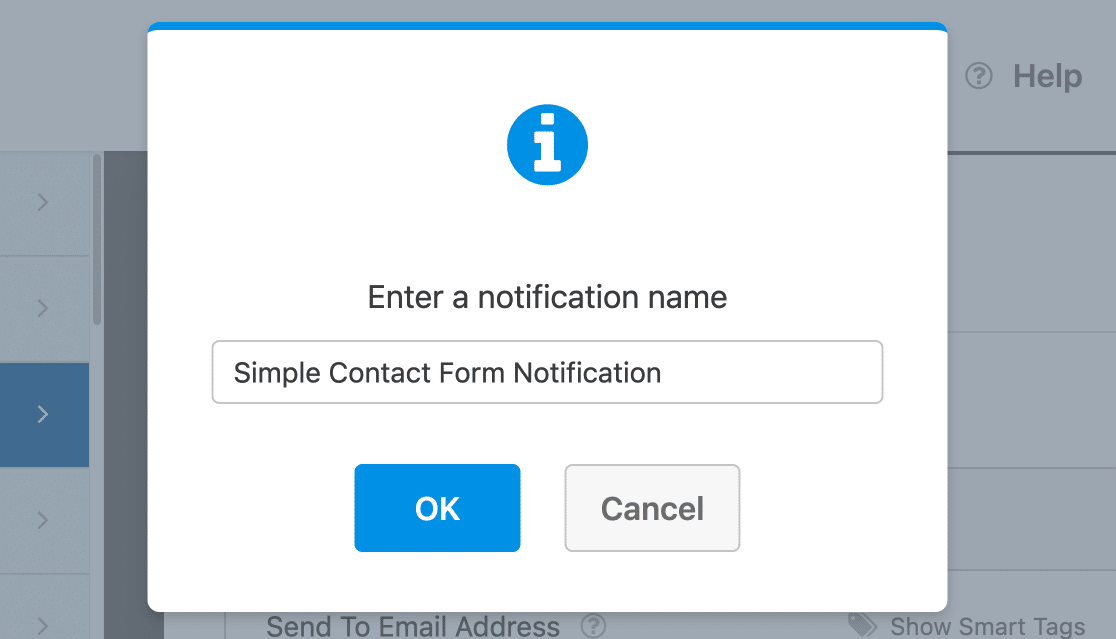
Setting Up a Basic Form Notification Email
Next, you’ll need to fill out several fields to complete your form notification setup. We’ll cover how to set up each option in the following sections.
Note: Please be careful while configuring your notification settings. A minor error, such as an incorrect email address or typo, could result in your notification emails being marked as spam or not reaching your inbox at all. Always double-check your settings before saving your form.
Send To Email Address

This is the email address that your form notification will be sent to when a user submits your form.
By default, this field is pre-populated with the {admin_email} (Site Administrator Email) Smart Tag, meaning that the notifications will be sent to your WordPress site’s administrator.
If you’d like, you can replace the default email address with a different valid email address.
If you want to send the notification to multiple email addresses, simply add a comma between each email address.

Email Subject Line

This is the subject of the notification email.
The default email subject will read “New Entry” followed by the name of the form. Feel free to change it to whatever text you prefer, but keep in mind that this text will be visible to whoever receives the email.
From Name

This is the name that the email will appear to be sent from, which is your website’s domain name by default. For example, if your website is example.com, the email will appear to be sent from example.com.
You can change this to whatever name you’d like, but we recommend using a name that won’t be confusing to the email recipient.
From Email

This is the email address that your emails are sent from, which is one of the most important parts of your notification settings.
By default, this field is pre-populated with the {admin_email} (Site Administrator Email) Smart Tag, meaning that the notifications will be sent from your site’s administrator email address.
You can change the From Email address, but the email address you use must meet the following criteria:
- It must be valid: The From Email should be an existing, functional email address capable of sending and receiving messages. If an invalid or non-existent email address is used, your notifications may be marked as spam.
- It should match your domain: The From Email should correspond to your website’s domain. For example, if your site is www.example.com a suitable From Email address would be something like [email protected]. By using an email address at your domain, you reduce the likelihood of your notification emails being treated as spam.
- Only use one email address: Notifications can only be sent from a single email address, just like emails sent from any other service provider. If you add more than one email address, your notification likely won’t be delivered.
- Avoid using free email service providers: Free email service providers (such as Gmail, Yahoo, and Hotmail) shouldn’t be used as your From Email, as some email servers often treat emails sent from these providers as spam.
- Avoid using the form submitter’s email address: The email of the person who submitted your form should not be used as the From Email. This practice can lead to confusion and potentially result in your notifications being flagged as phishing attempts, as it appears you’re sending emails from an address you don’t own. This can severely damage your domain’s reputation, resulting in poor email deliverability.
- Compliance with SMTP settings: If you’re using an SMTP plugin, like WP Mail SMTP, the From Email must comply with your SMTP settings. Most SMTP services require you to use a From Email that matches the email address used in your SMTP settings.
You may see the warning: ‘The current From Email does not match your website domain name’ below the From Email field.
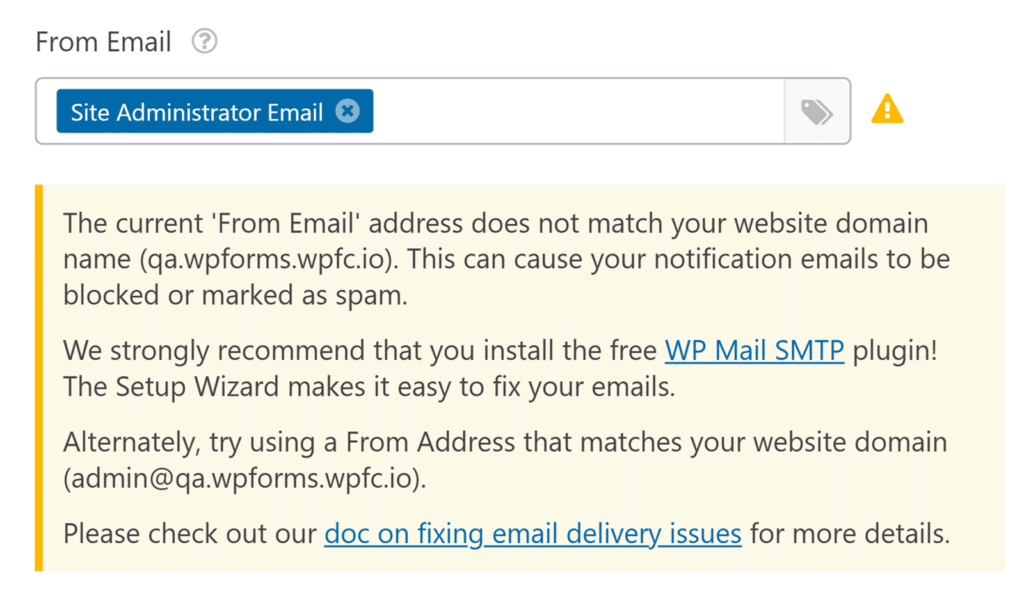
This means your site’s admin email address or the From Email you entered is on a different domain, such as @gmail.com.
Notification emails from your site may still be delivered if the From Email doesn’t match your site’s domain. However, some email service providers flag emails coming from a different domain as spam and may block them from being delivered entirely.
Note: To improve email deliverability, we highly recommend setting up WP Mail SMTP, especially if you plan to use a From Email address that doesn’t match your site’s domain.
Reply-To Email Address

This is the email address that will receive any replies to the notification email that’s sent.
If you’ve set the From Email to your own email address, it may be useful to set the Reply-To Email Address to a Smart Tag that pulls the user’s email from the form submission (as seen in the screenshot above).
That way, if you have questions about a user’s form submission, you can simply reply to the notification email to get in touch with them.
Or, if you’re sending a notification email to your users, you could make the reply-to email your own email address so they can easily reach out to you.
If you leave this field empty, the Reply-To Email Address will default to the From Email.
Note: There can only be one Reply-To Email Address. If you’d like to use the reply-all functionality to reply to multiple email addresses, be sure to add a CC field.[
Email Message
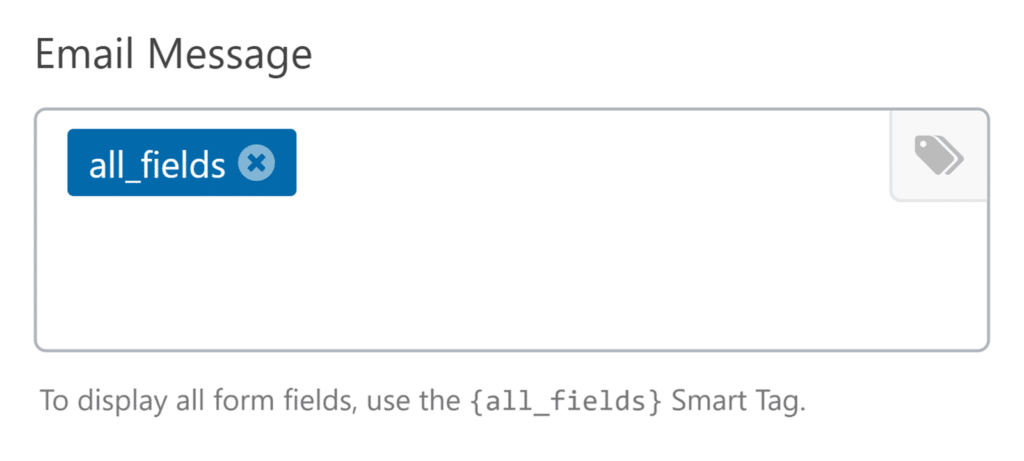
This is the content that’s included in the body of your form notification email.
By default, the Email Message field will contain the {all_fields} Smart Tag, which displays all user-entered fields (plus Hidden Fields) and their labels.
If you’d like to customize the notification email’s content further, you can add additional text, Smart Tags, and even add HTML or inline CSS directly into the Email Message field.
Finally, be sure to save your notification settings by clicking the Save button.
Note: Want to send out more than one notification when your form is submitted? Be sure to check out our guide to sending multiple form notifications to learn how.
Testing Notification Emails
Once your notifications settings are configured, we recommend trying them out. Testing your forms is super useful because it allows you to share in the user experience. It also provides an opportunity to make sure everything looks and works exactly as you’d like.
For all the details on testing notification emails, as well as other aspects of your forms, please check out our pre-launch checklist and form testing tutorial.
Troubleshooting Notification Emails
If you’re not receiving notification emails, it’s typically due to issues in the notification settings or the need for an SMTP setup. Here’s a straightforward checklist to help you address these common problems:
- Make sure all email addresses in your notification settings are correct.
- Check that the From Email and Send To Email Address are different. Some email clients might flag your emails as spam if both addresses are the same.
- Consider configuring an SMTP plugin for improved email deliverability.
For more detailed guidance, check out our guide on troubleshooting form notifications.
Frequently Asked Questions
Here, we’ll discuss some of the most common questions we receive about email notifications in WPForms.
Can I configure my notifications to send only if certain conditions are met?
Absolutely! With any paid license, you can set up conditional notifications for your forms. For more details on how to do this, be sure to check out our guide on how to create conditional form notifications.
How can I include non-input fields like Page Break, Section Divider, and HTML fields in my WPForms notifications?
To include non-input fields like Page Break, Section Divider, and HTML fields in your WPForms email notifications, you can add a custom PHP snippet to your site. The necessary code snippet for this feature is available in the WPForms code snippets library.
For more information on how to set this up, refer to our developer documentation.
That’s it! Now you know how to set up a basic notification email for your forms.
Be sure to explore our other tutorials on form notifications to learn how you can get the most out of them.

