AI Summary
Want to show users previews of their entries before or after they submit your form? Our Entry Preview field lets you easily add a preview page to any form on your site. Plus, our form confirmations settings enable you to display entry previews in your confirmations, too.
This guide will show you how to use the Entry Preview field and confirmations setting in WPForms.
In This Article
Before you dive into the tutorial below, make sure WPForms is installed and activated on your WordPress site. Then you can create a new form or edit an existing one to open the form builder and access the Entry Preview field.
Adding an Entry Preview Field to Your Form
First, you’ll need to add an Entry Preview field to your form. This field is only available with a paid license, so you’ll find it under Fancy Fields in the form builder.
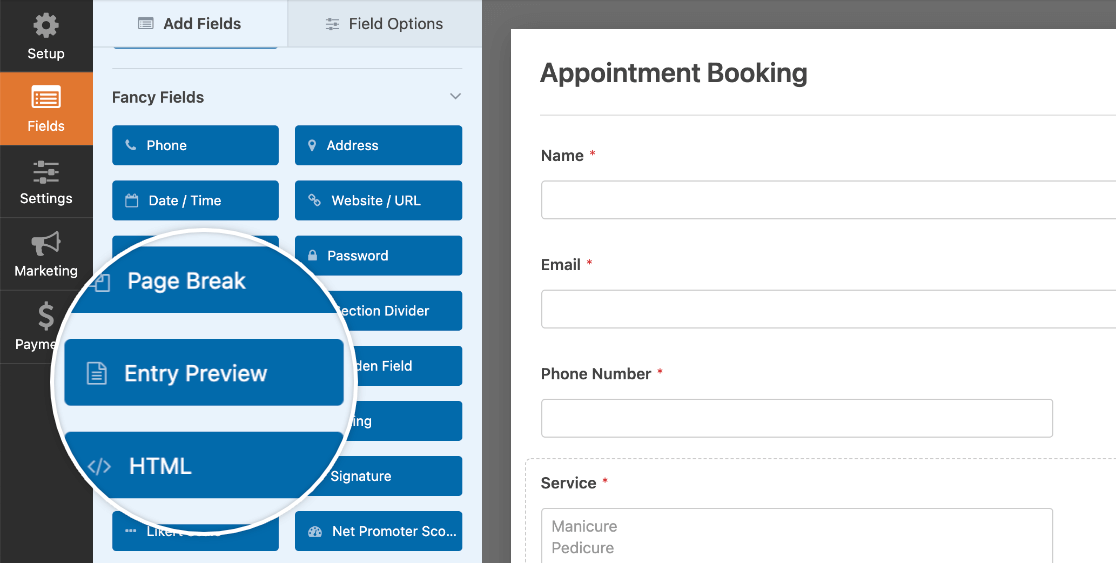
Click on Entry Preview or drag and drop it into the preview area to add it to your form.
Adding an Entry Preview field to your form will also automatically add a Page Break field and split your form into multiple pages.
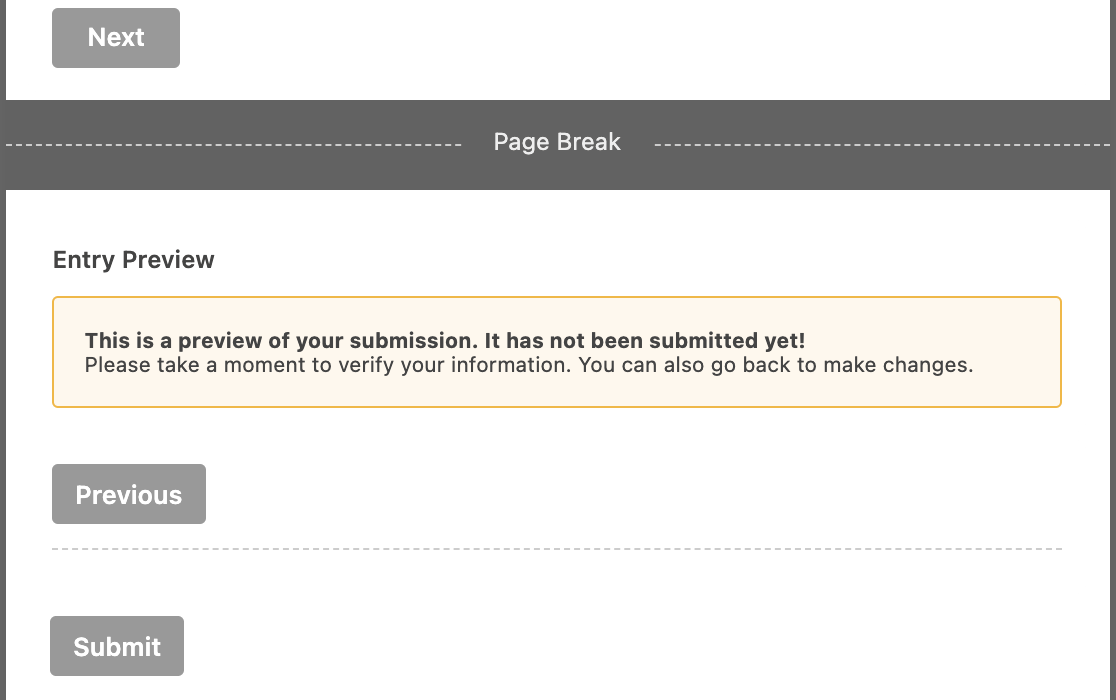
Note: For details on the options available for page breaks in WPForms, please see our tutorial on multi-page forms.
The Entry Preview field requires a multi-page form to work, and you cannot remove the Page Break field it adds to your form unless you first remove the Entry Preview field.
In most cases, we recommend placing the entry preview at the end of your form so users will see the preview only after they’ve filled out all of the fields.
Note: Although you can add more fields to your form after the Entry Preview field, it will only display data from preceding form pages.
For example, if you place an Entry Preview field on the second page of a 3-page form, it will only show the user’s input and selections from the fields on the first page of the form.
Customizing Your Entry Preview Field
Next, click on the Entry Preview field in the preview area of the form builder to open its field options.
Here, you can use the Display Preview Notice toggle to show or hide an additional message before the entry preview.
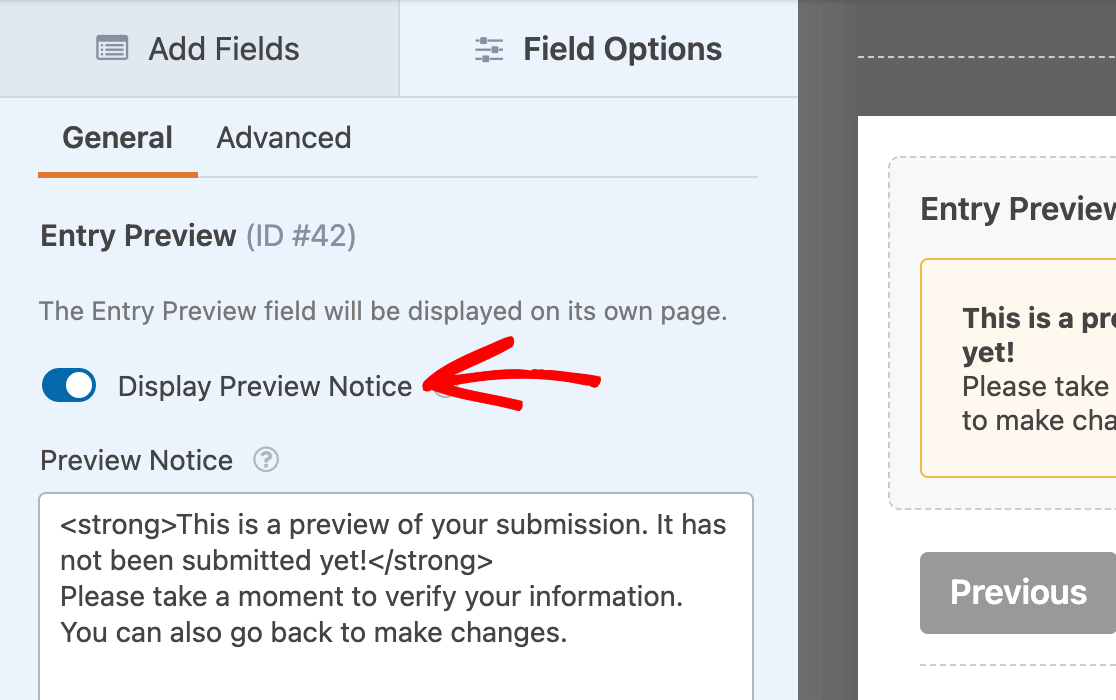
You may also customize the notice that will appear above the entry preview when this form is published on your site.
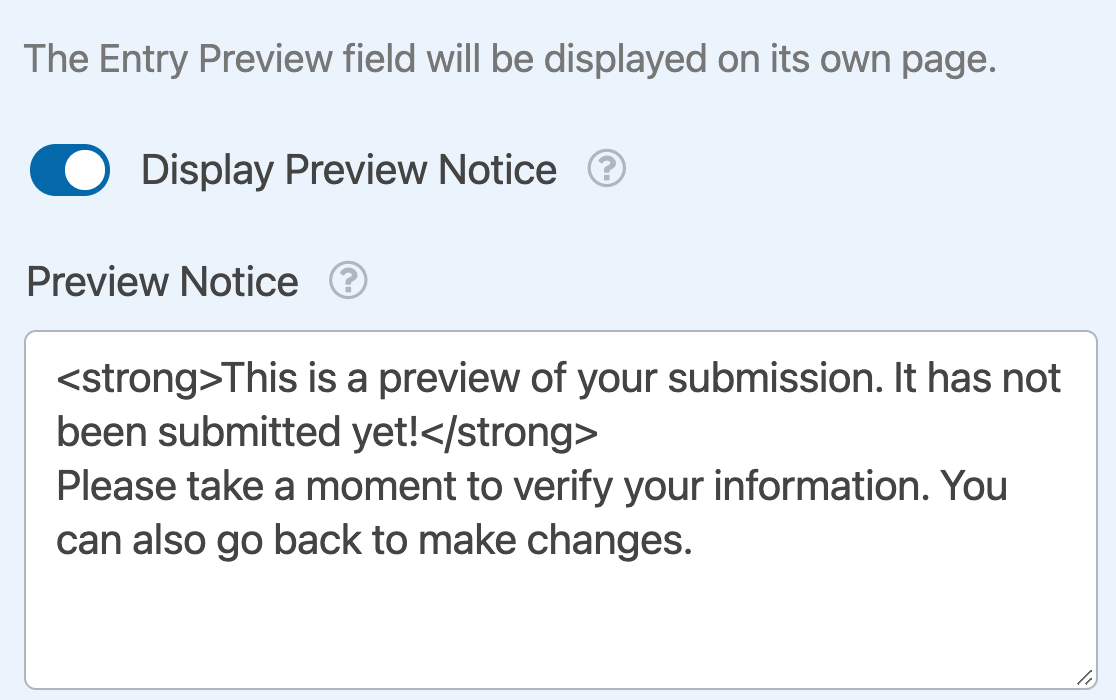
This field accepts text as well as HTML tags.
Choosing an Entry Preview Style
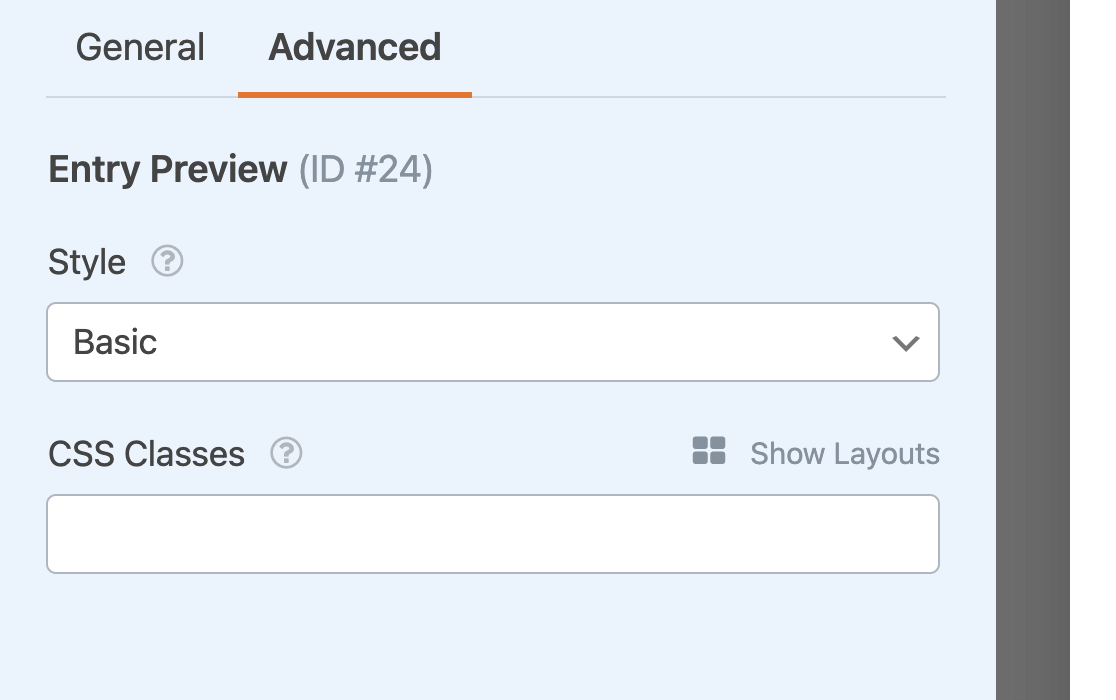
In the Advanced field options tab, you can select from 4 different styles for your form’s entry preview: Basic, Compact, Table, or Table, Compact.
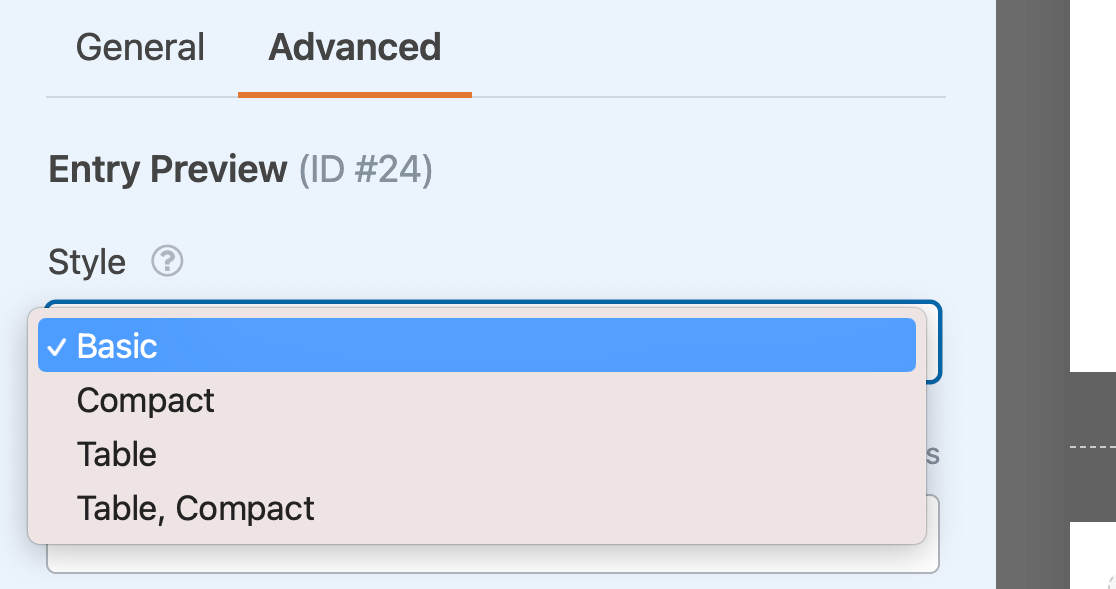
All of these options show the same information, just in different layouts.
The Basic Entry Preview Style
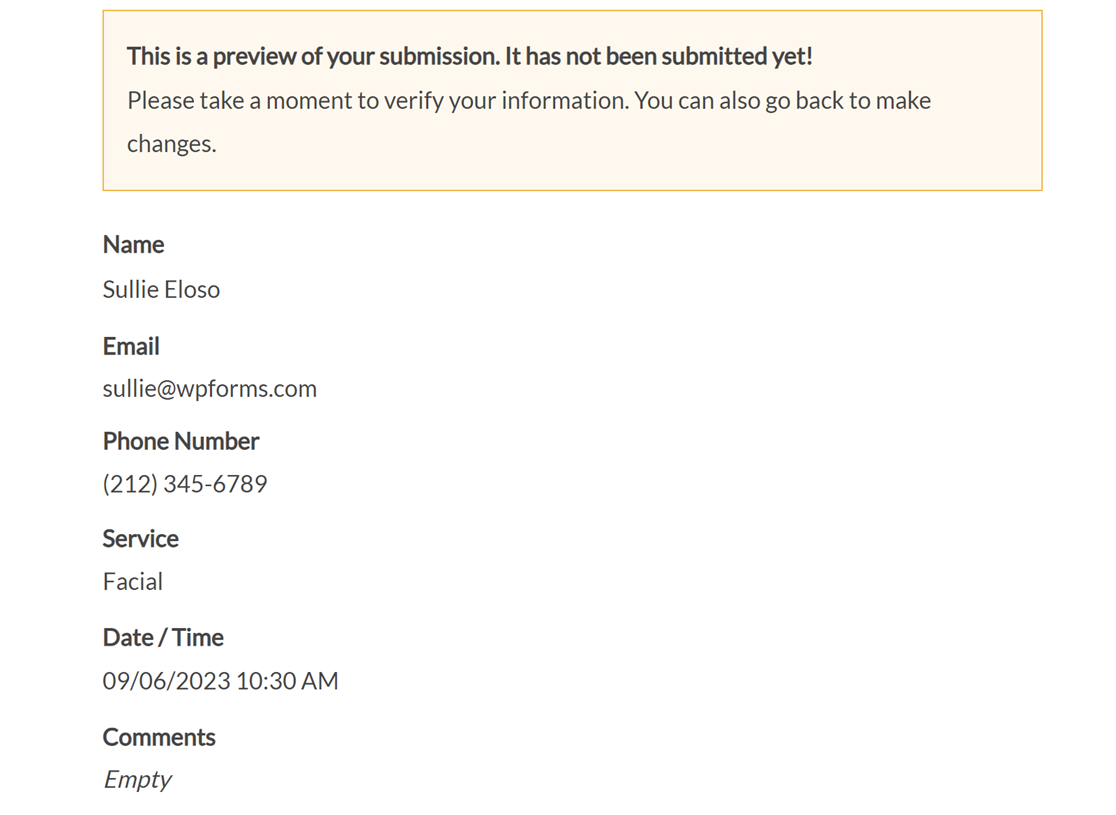
The Basic Entry Preview style is a simple list of field labels followed by the user’s input or selections. Here’s an example of how this style appears on the frontend.
The Compact Entry Preview Style
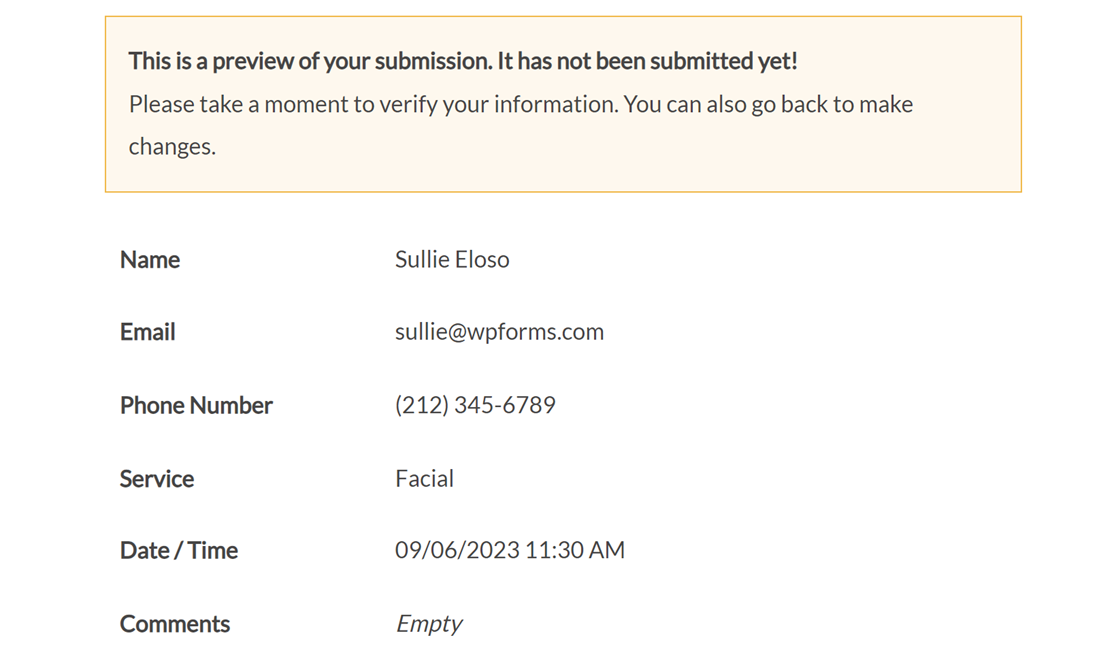
The Compact style uses text just like the Basic style but places the field labels and the user’s input in separate columns so they take up less space on the page.
Note: Want to learn about more ways to condense your forms? See our tutorial on multi-column layouts.
The Table Entry Preview Style
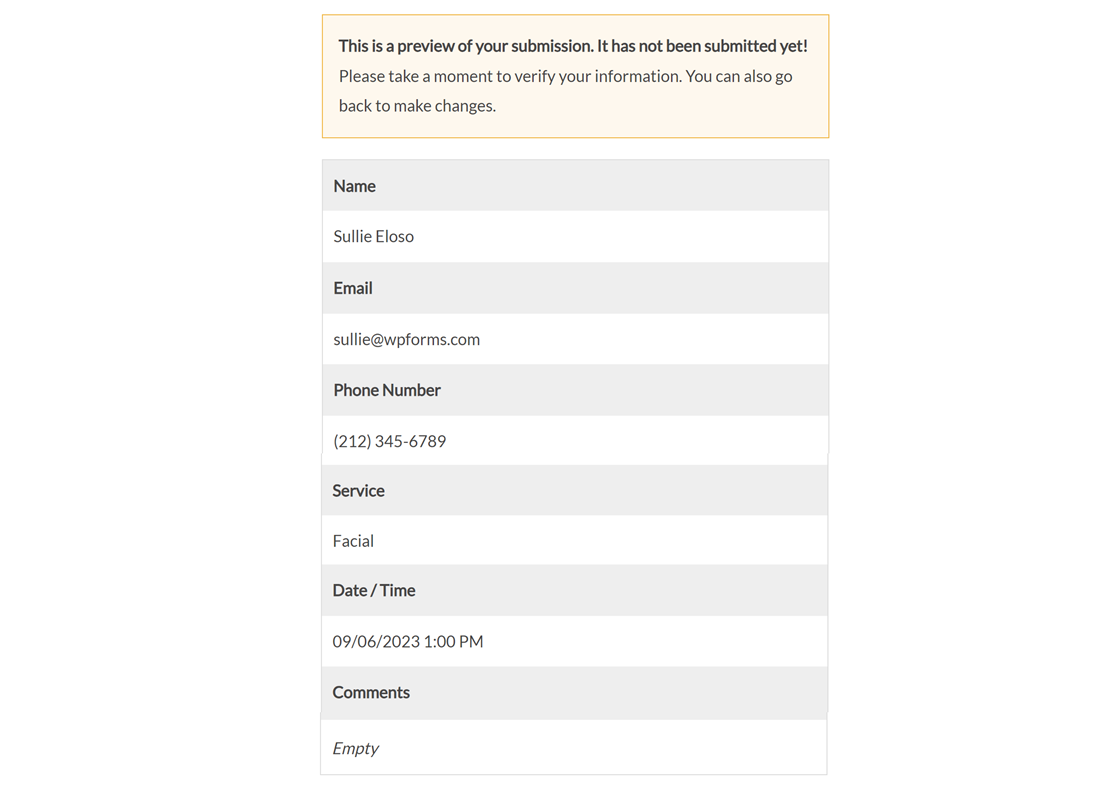
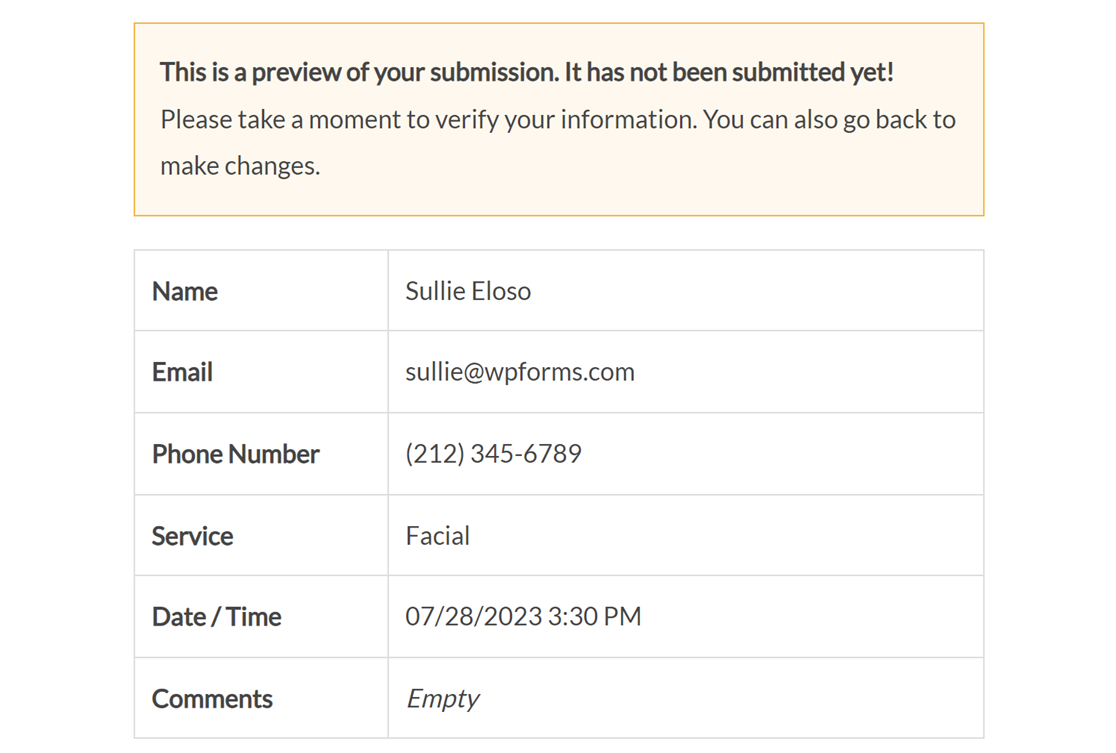
The Table style displays entries in a table with shaded rows to distinguish the field labels from the user’s input.
The Table, Compact Entry Preview Style
And finally, the Table, Compact style places entries in a table with separate columns for the field labels and the user’s input.
Adding Custom CSS to an Entry Preview Field
You may also add custom CSS classes in the CSS Classes field in the advanced field options.
Note: Want to learn more about using custom CSS classes in WPForms? Check out our guide to adding custom CSS to your forms for more details.
Setting Up Entry Preview Confirmations
You can use entry preview confirmations instead of or in addition to the Entry Preview field.
The Entry Preview field enables users to go back and change their input or selections. This can be useful if you want to let visitors correct mistakes in their entries before submitting your form.
However, there are some situations in which you may want to let users preview their entries without giving them the option to change their input or selections. In these cases, you can use an entry preview confirmation instead.
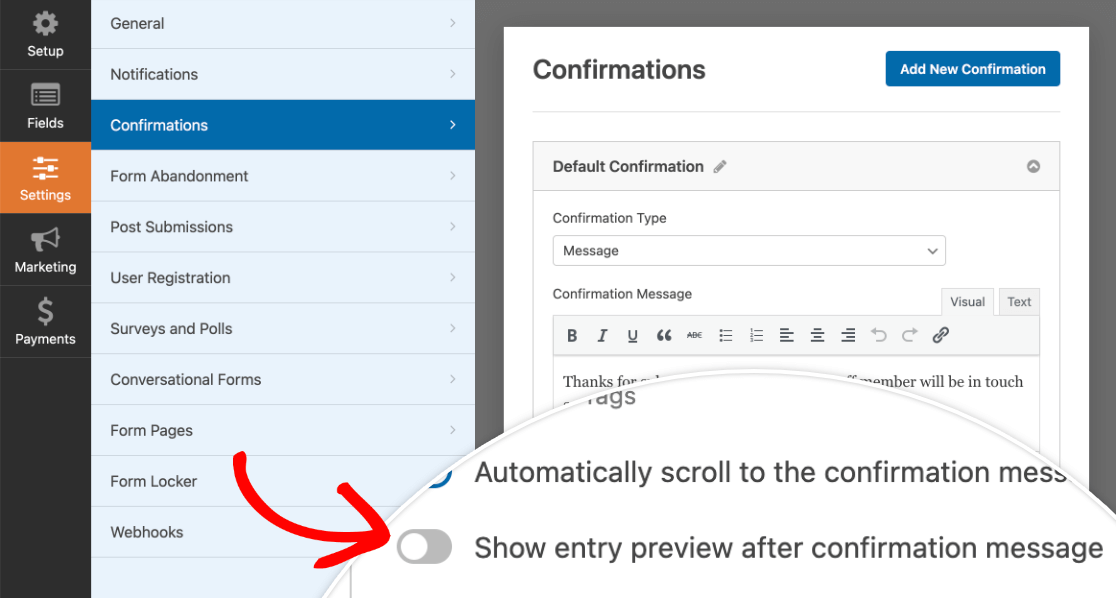
To do so, go to Settings » Confirmations in the form builder. For any confirmation you’ve created, you can toggle on the Show entry preview after confirmation message option.
Note: Need help setting up your form confirmations? Our tutorials on WPForms confirmations settings and creating conditional form confirmations have all the details.
Once this setting is on, a dropdown will appear where you can select which entry preview style you would like to use for this confirmation.

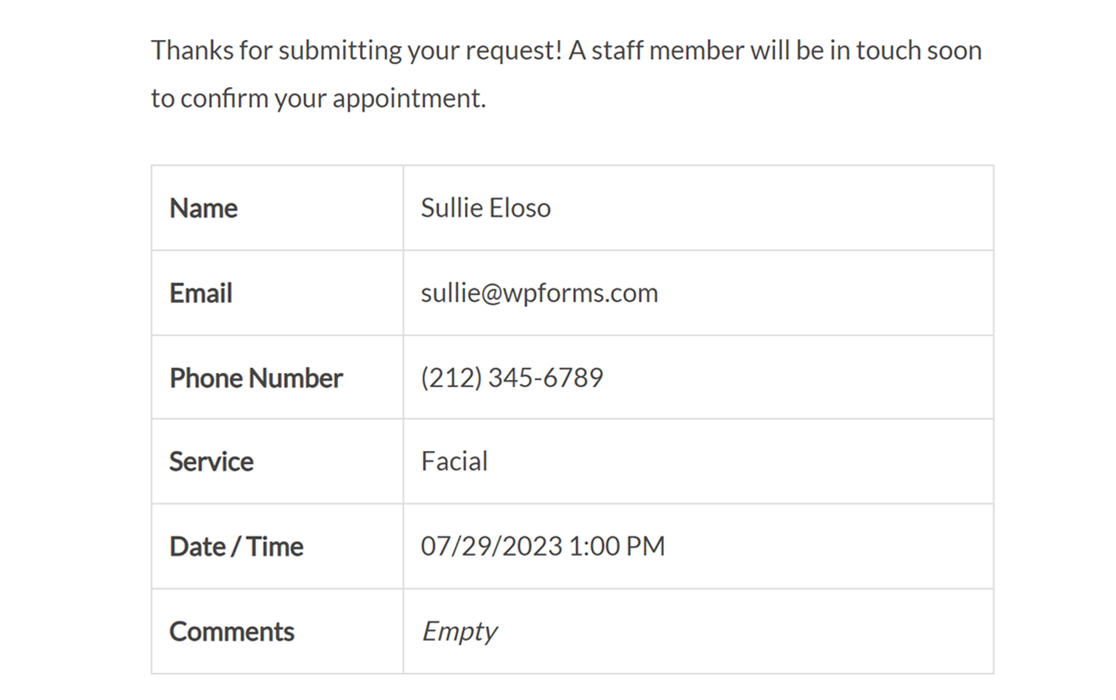
Be sure to save your changes before exiting the form builder. On the frontend, your entry preview confirmation might look something like this.
That’s it! Now you can let users preview their entries before or after they submit your forms.
Next, want to learn how to manage users’ entries? Check out our complete guide to entries in WPForms for all the details.
