Would you like to receive a CSV attachment when your form is submitted? WPForms offers a downloadable CSV file attached to your notification email that includes user-submitted data, along with the form name, entry ID, user’s IP address, and more.
This tutorial will show you how to attach CSV files to form notification emails.
Before getting started, you’ll need to create a new form or edit an existing one to access the form builder. Then, make sure to complete the basic form notification setup.
Enabling Entry CSV Attachments
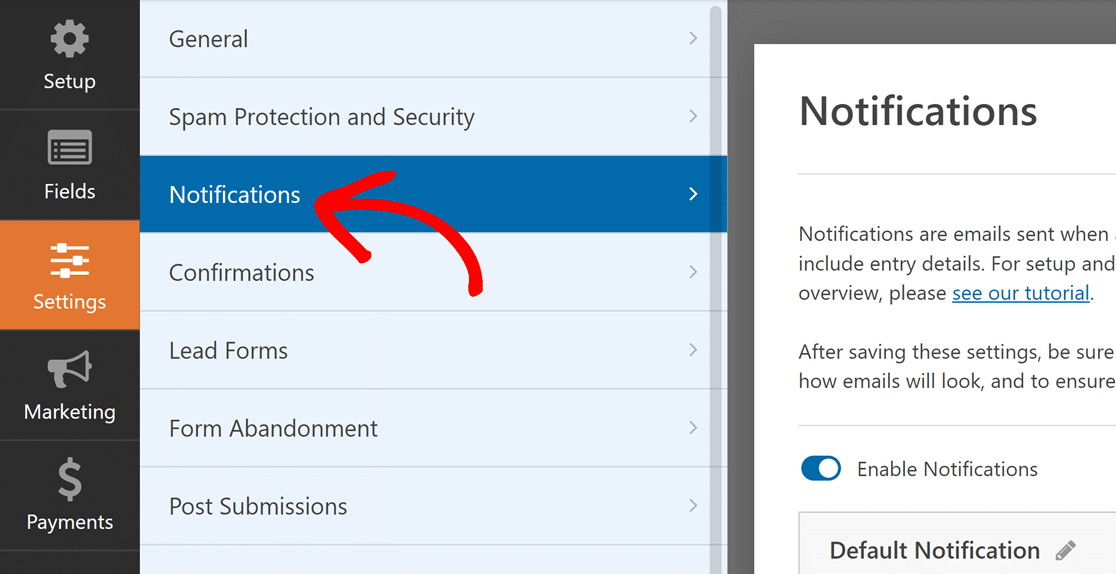
The first step is to enable the Entry CSV Attachments. After opening the form builder, go to Settings » Notifications to access all of the notification options for your form.
Then, scroll to the bottom of the notification settings and click Advanced.
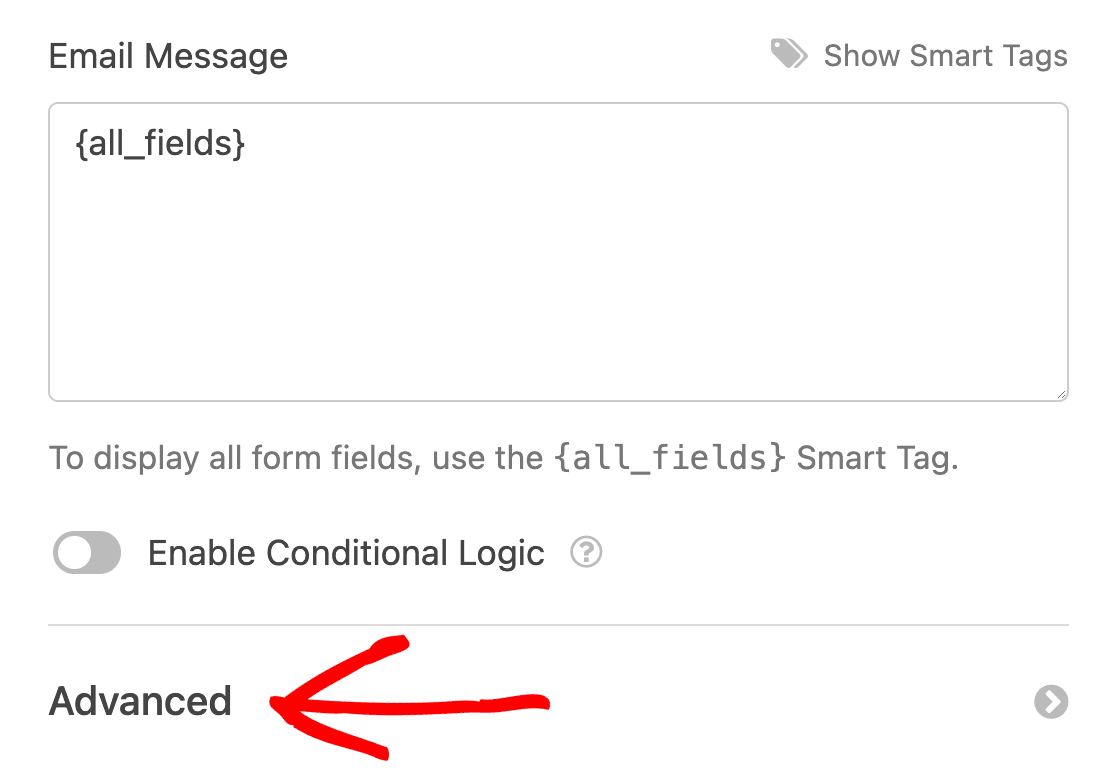
Then, toggle on the Enable Entry CSV Attachment option.

Configuring Entry CSV Attachment Settings
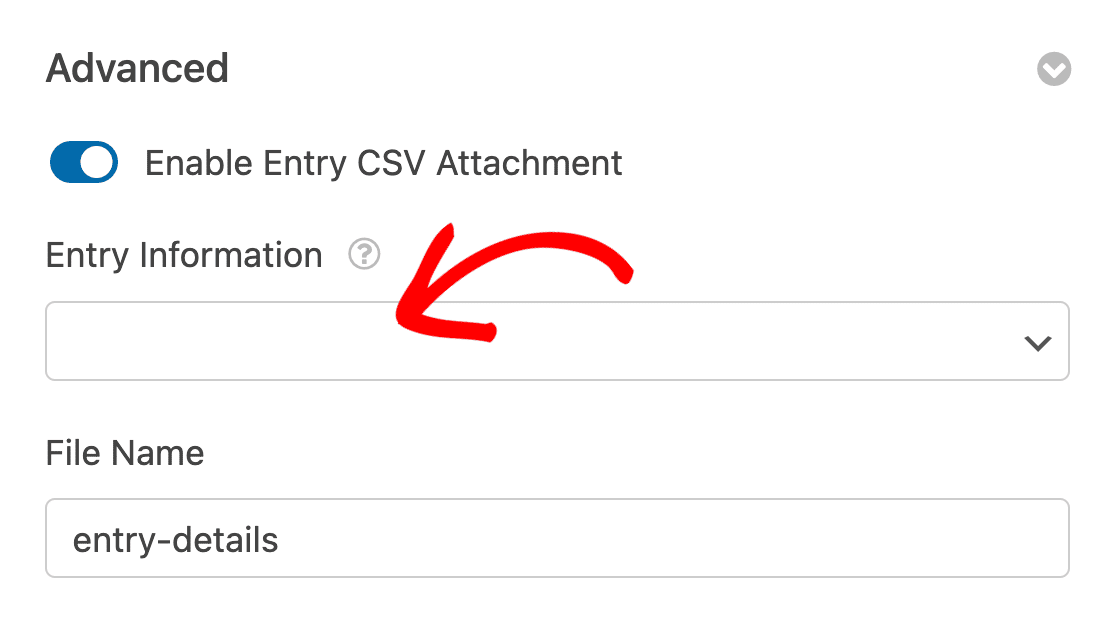
Once you’ve enabled the Entry CSV attachment option, more settings will appear for you to configure. Go ahead and click the Entry Information field to reveal the available items you can include in the CSV file.
Next, you’ll need to select the form fields you’d like to include in the CSV attachment. If you’d like to include all fields, simply click the All Fields option.
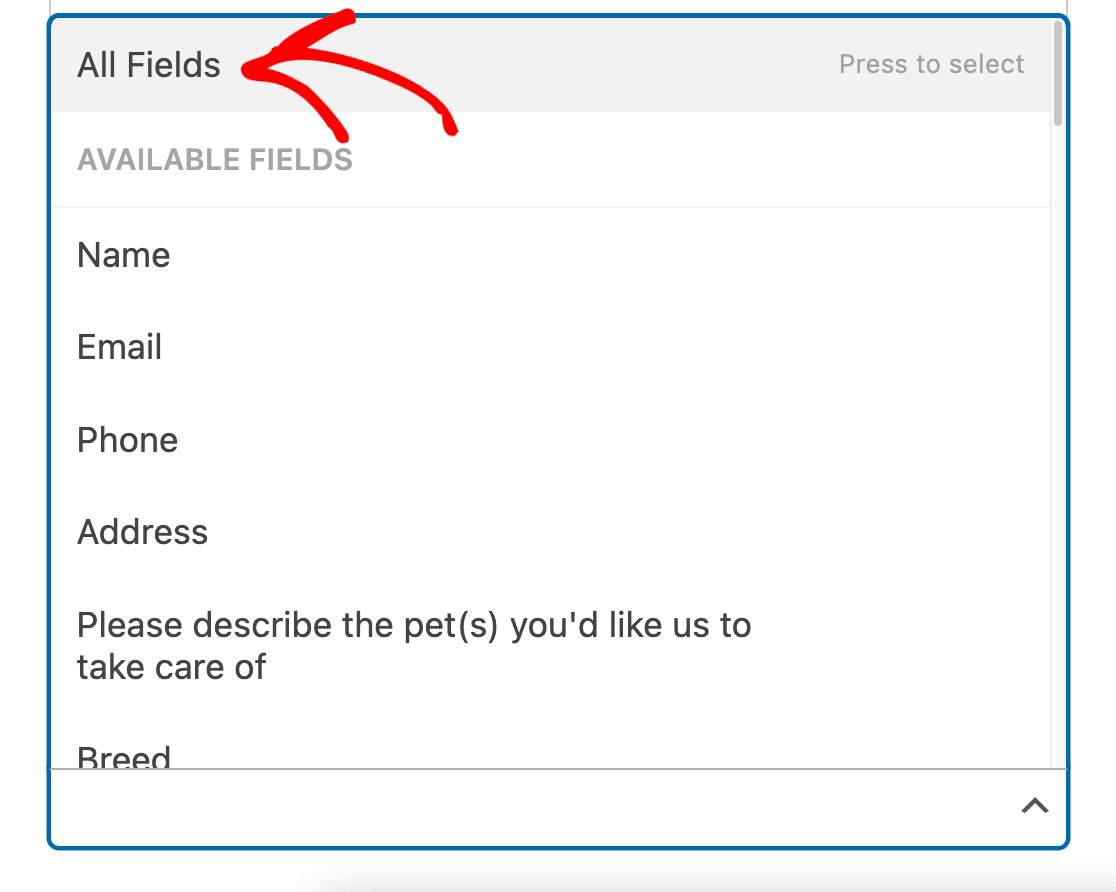
Or, you can select individual fields by clicking on each one you’d like to include.
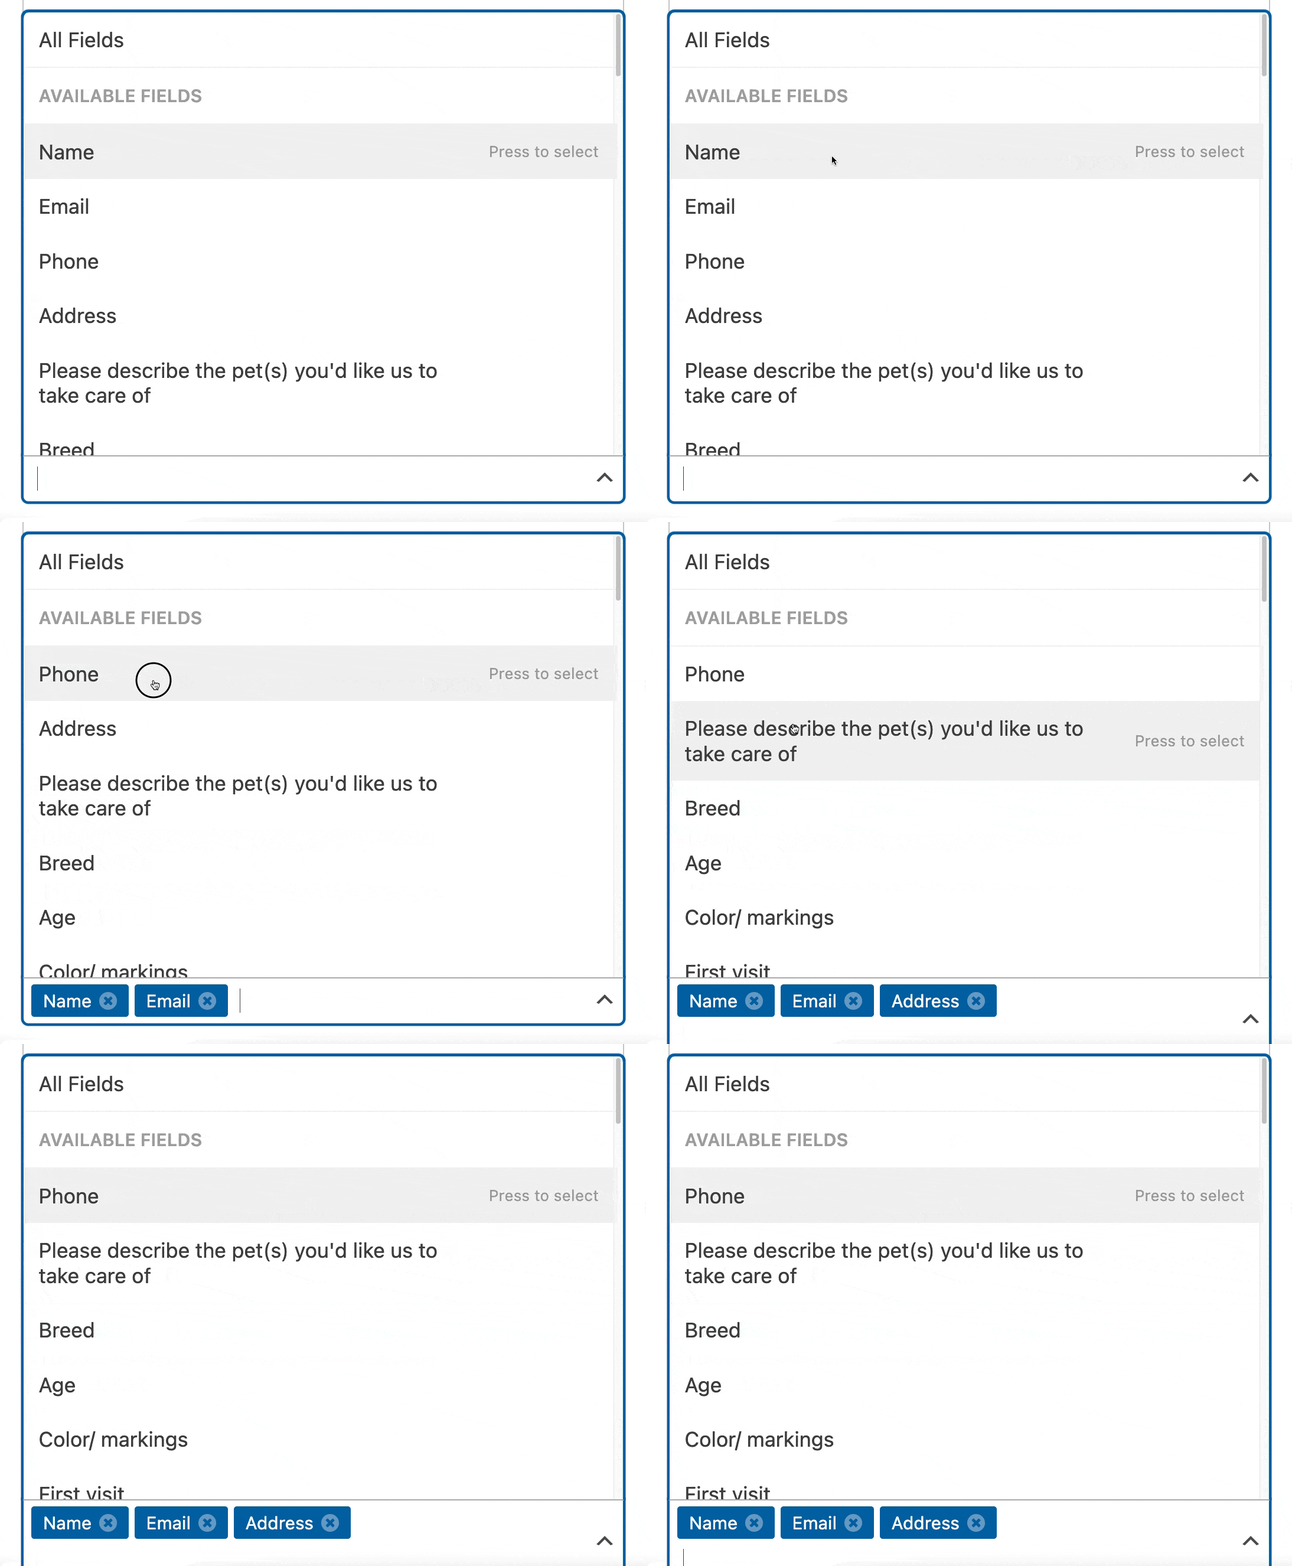
Note: You’ll need to include at least one item from the Entry Information dropdown to attach a CSV file to the email notification.
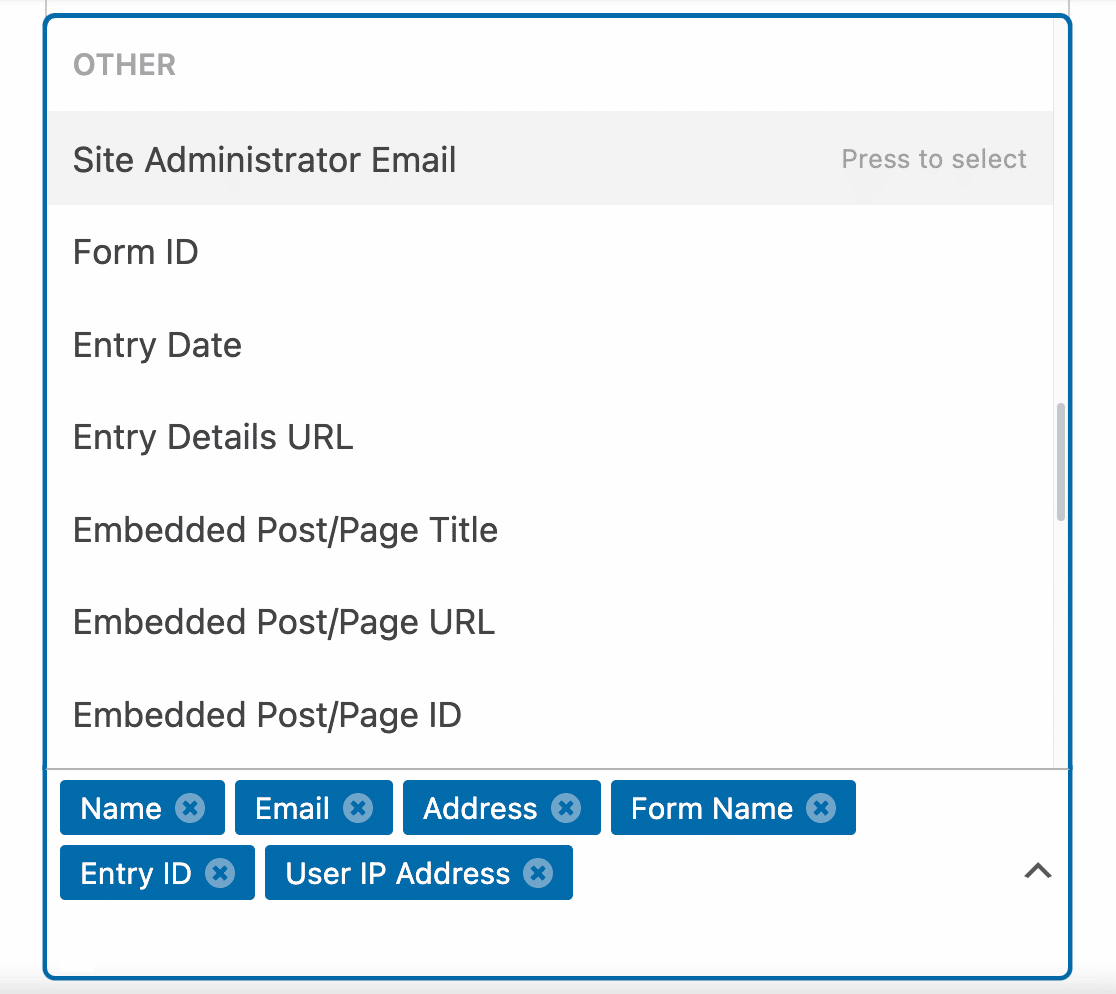
To include more entry details beyond the information the user submits through your form, scroll to the OTHER section of the dropdown and click on each item you’d like to include.
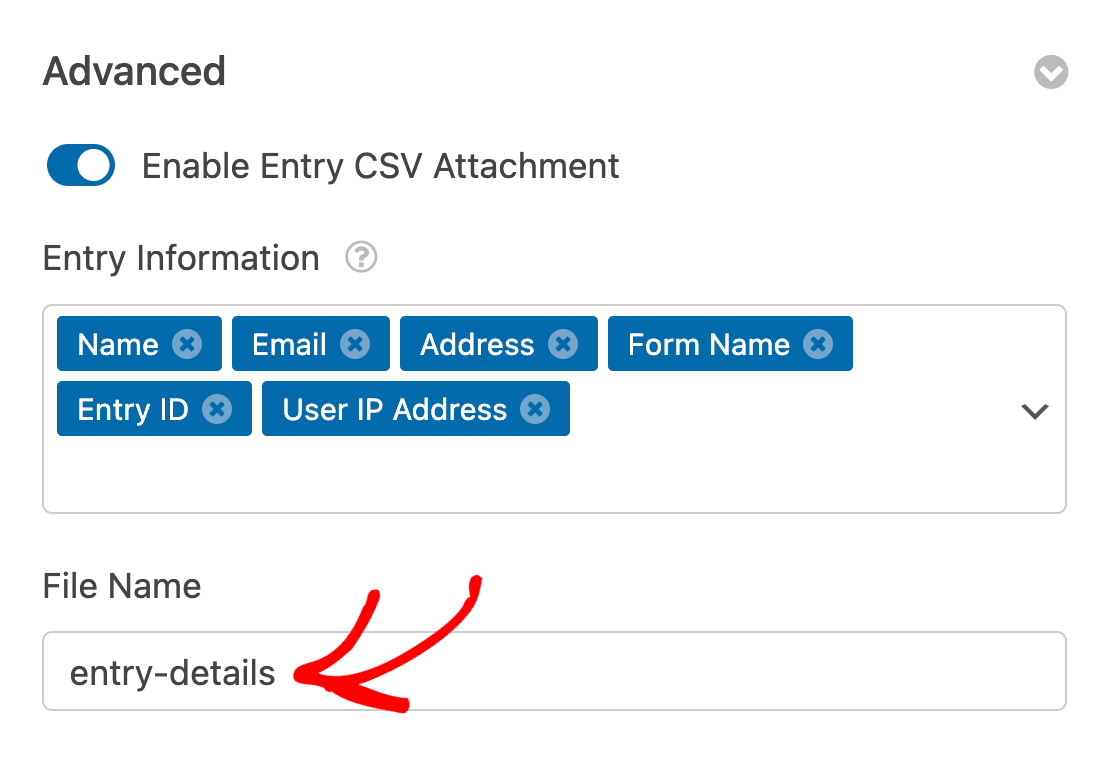
Next, go ahead and add a name for your file in the File Name field. You’ll see that the File Name is set to “entry-details” by default, but feel free to change the name to whatever you’d like.
When you’re finished, be sure to click the Save button to save your settings.

Now the recipient of the email notification will receive a CSV attachment with the entry information you’ve included.
That’s it! Now you can set up CSV attachments for all of your forms.
Be sure to explore our other tutorials on form notifications to learn how you can get the most out of them.
