AI Summary
Introduction
Would you like to send field values from your form to Excel through Zapier? By default when enabling the option to Show Values on Dropdown, Checkbox and Multiple Choice form fields, the value isn’t stored in the entry. However, using a small PHP snippet and the Zapier addon you can easily send these values to Excel. In this tutorial, we’ll walk you through each step.
Enabling the Show Values option
First, we’re going to start by enabling the Show Values with this small snippet from this tutorial.
/**
 * Show values in Dropdown, checkboxes, and Multiple Choice.
 *
 * @link https://wpforms.com/developers/add-field-values-for-dropdown-checkboxes-and-multiple-choice-fields/
 */

add_action( 'wpforms_fields_show_options_setting', '__return_true' );
Adding this snippet will allow you to enable this option for Dropdown, Checkbox and Multiple Choice form fields.
Creating the form
Next, we’ll create the form. If you need help in creating your form, please see this documentation.
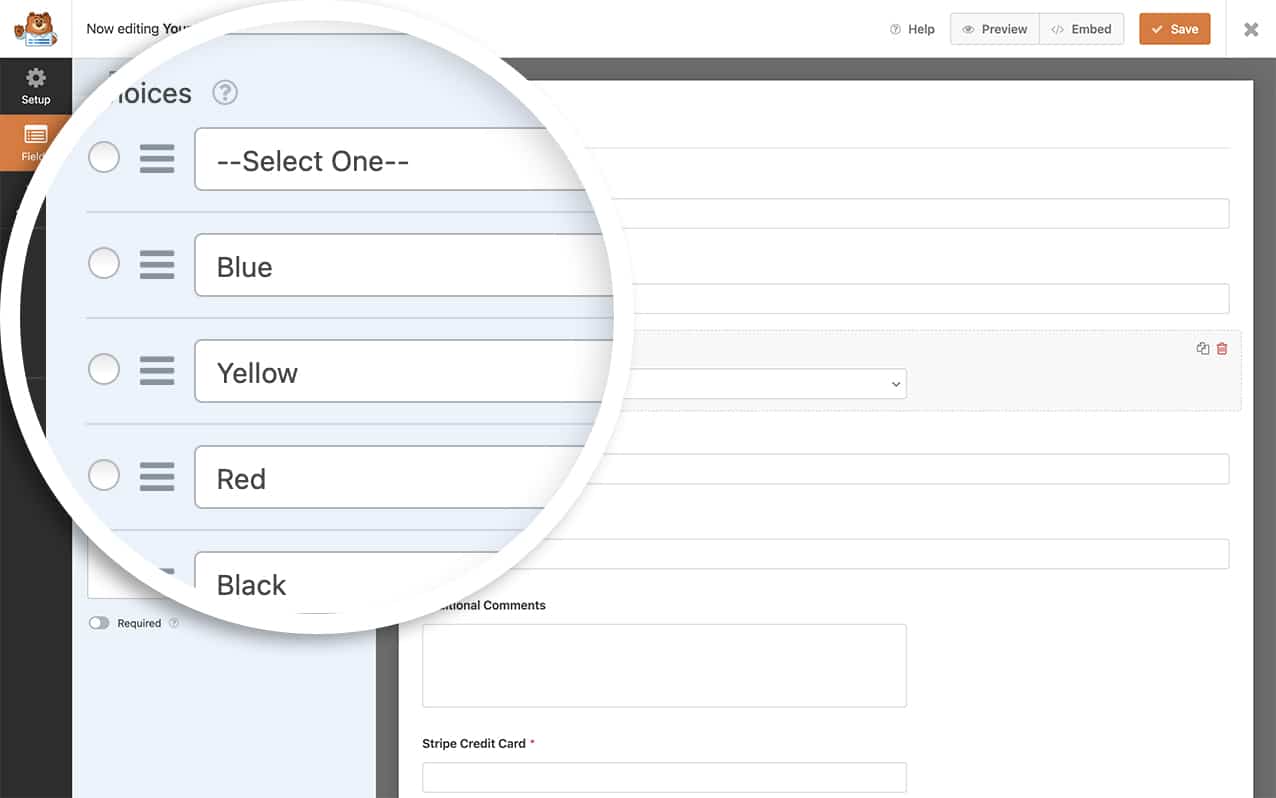
For the purpose of this tutorial, we’re going to add a Dropdown field to the form that will allow for color options.

Enabling the Show Values option
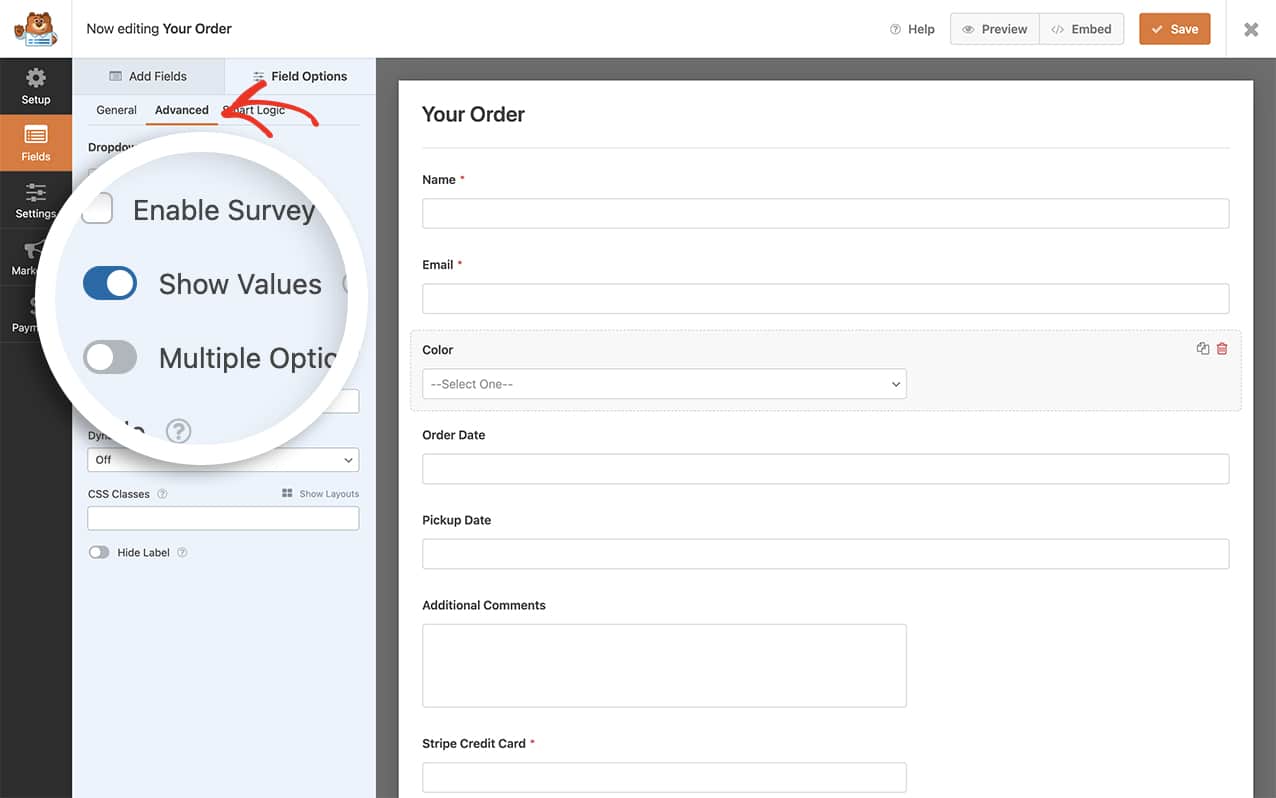
We want to use the Show Value setting so that we can assign the hex value for the color. With the Dropdown field selected, click on the Advanced tab and toggle the Show Values option.

Creating the zap to send field values to Excel
For this step, we’ll need to first set up and install the Zapier addon before we can create a zap to send our form entries over to Excel.
For assistance with installing the Zapier addon, please review this documentation.
Adding the snippet
Now it’s time to add the snippet to your site.
If you need any help in how to add snippets to your site, please see this tutorial.
/**
 * Send field values to Zapier for Checkbox, Dropdown and Multiple Choice
 *
 * @link   https://wpforms.com/developers/how-to-send-field-values-to-excel-using-zapier/
 */

function wpf_dev_add_zapier_field_value_filter( $fields, $entry_id, $form_data ) {

$form_fields = wpforms_get_form_fields( $form_data );

   $entry = wpforms()->get( 'entry' )->get( $entry_id );

   if ( empty( $entry ) ) {
      return $fields;
   }

   $entry = wpforms_decode( $entry->fields );

   foreach ( $form_fields as $field_id => $field ) {
      if ( in_array( $field[ 'type' ], [ 'checkbox', 'select', 'radio' ], true ) ) {

         $fields[ 'field' . $field_id ] = $entry[ $field_id ][ 'value_raw' ] ? $entry[ $field_id ][ 'value_raw' ] : $entry[ $field_id ][ 'value' ];
      }
   }


   return $fields;
};

add_filter( 'wpforms_zapier_process_entry_data', 'wpf_dev_add_zapier_field_value_filter', 10, 3 );
Once you’ve gotten the Zapier addon installed, you can now create a zap that would send WPForms submissions to Excel. If you need some help with that, Zapier has put together a walk-through tutorial on how to set this up.
Now, when your form is submitted, Zapier will send the data through to the Excel sheet you have chosen and instead of showing the label for the Dropdown field, it’ll show the value you have set up.

And that’s it! Would you like to send multiple files to Google Drive using the Zapier addon? Check out this tutorial on How to Send Multiple Files to Google Drive with Zapier.
Related
Filter Reference: wpforms_fields_show_options_setting
