AI Summary
Would you like to make sure emails from WPForms are delivered to your email inbox? Subscribing to our email newsletter ensures that you are among the first to receive all the best tips, techniques, and resources to help you make the most of WPForms, save you time, and help grow your business.
This tutorial will show you how to allow emails from WPForms to ensure you don’t miss important updates.
Why Is this Important?
Many email and internet service providers have put in aggressive programs and filtering systems to block unwanted e-mails (also known as spam).
WPForms applaud their intention to protect us from spam. However, everyone agrees that the current system is far from perfect.
Often, these programs block emails that you actually want to get. Here’s how you can help the system prevent “false positives” and join the fight against spam.
Solution: Allow-list Emails from WPForms
An allowlist is a list of email addresses of people from whom you want to receive emails (and the system will never block those).
It’s a way for you to tell your email provider that Jared from WPForms is my friend, and I want to learn from him.
When you do this, email providers will use your list to make adjustments to their overall filtering system to allow emails from the list you’ve added.
Adding WPForms Email Address to Your Email Client Allowlist
The steps to update your email allowlist differ depending on your email client. Below, we’ve shared instructions for some of the more popular ones. If yours isn’t here, please contact your email provider’s support team, and they’ll be able to help you out.
Gmail
You’ll first need to log in to your Gmail account. In your inbox, find an email from [email protected] (for example, your welcome email).
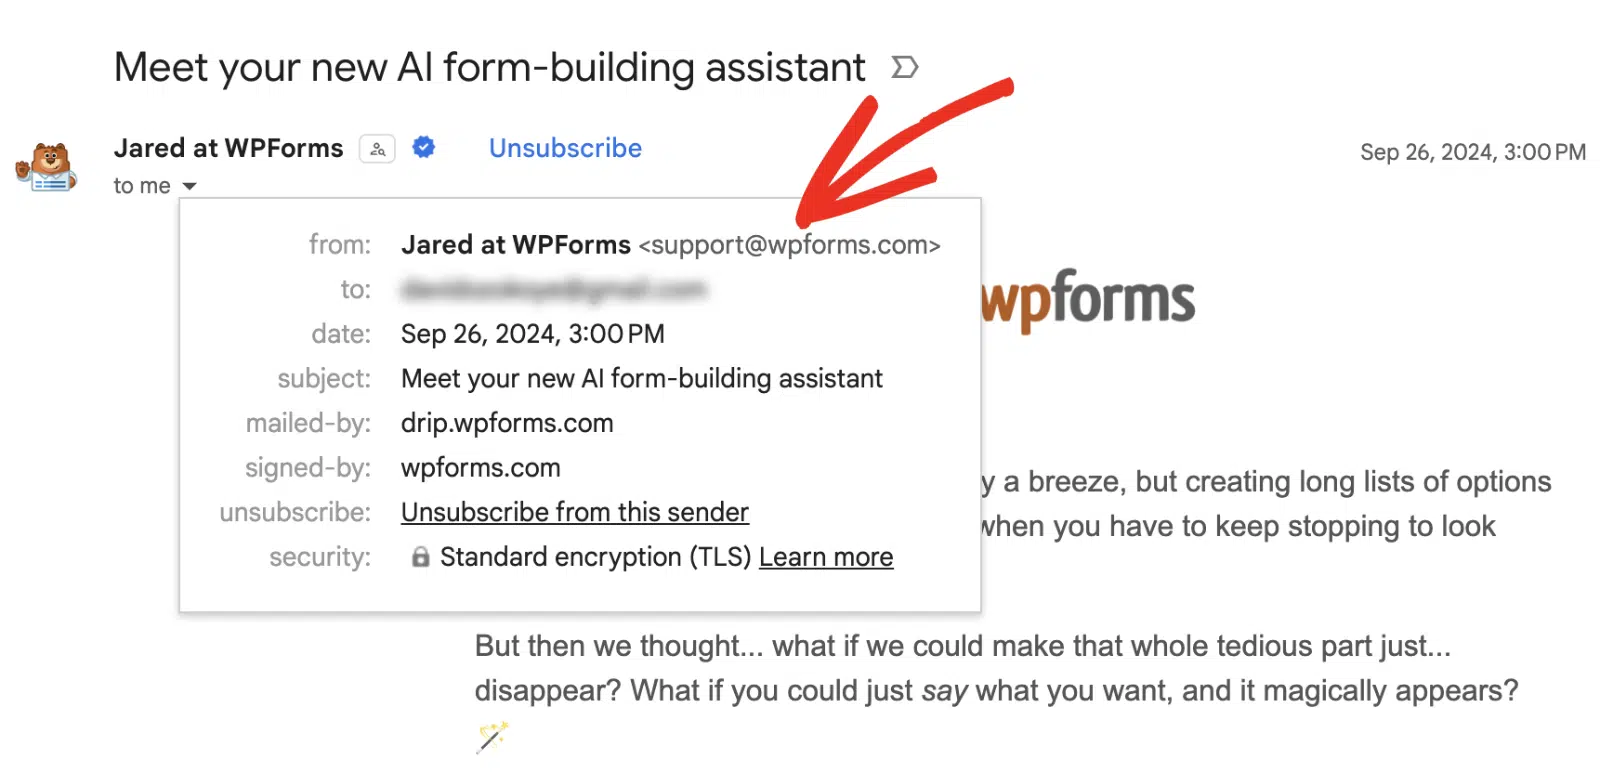
After that, drag this email to the Primary tab of your inbox.

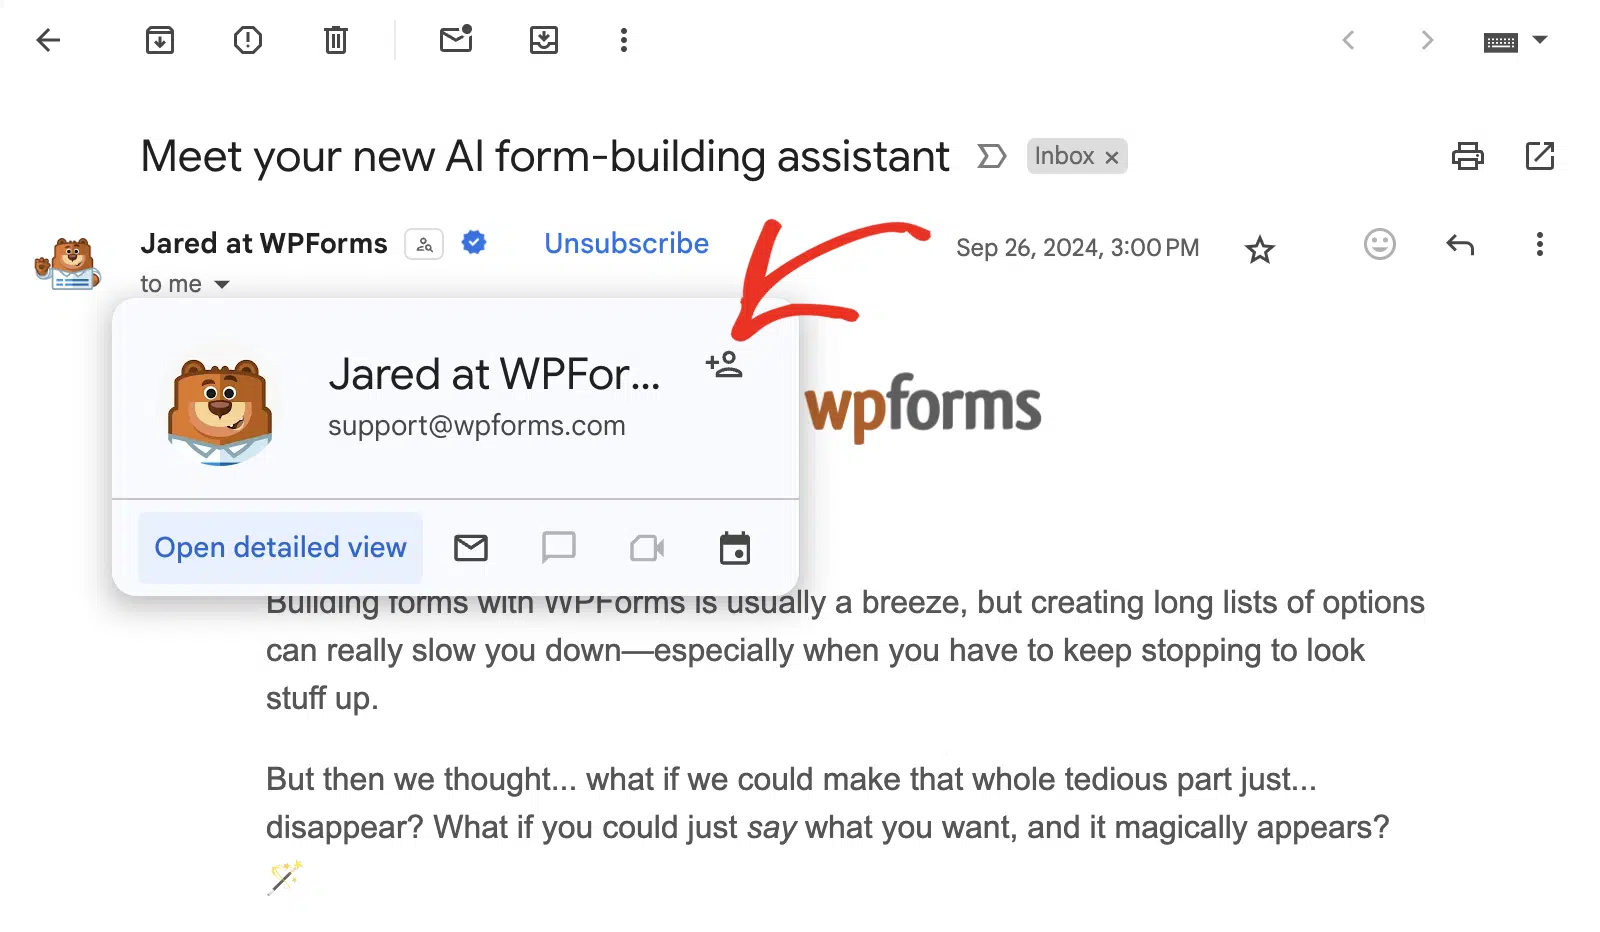
Now, you’ll need to add us to your contacts in Gmail. Here’s how to do it.
First, open up the email from [email protected]. Then, hover your mouse over the sender’s logo. From the popup, click the Add to Contact icon.
You’ll see that all our emails will go to your primary folder in the future!
Yahoo! Mail
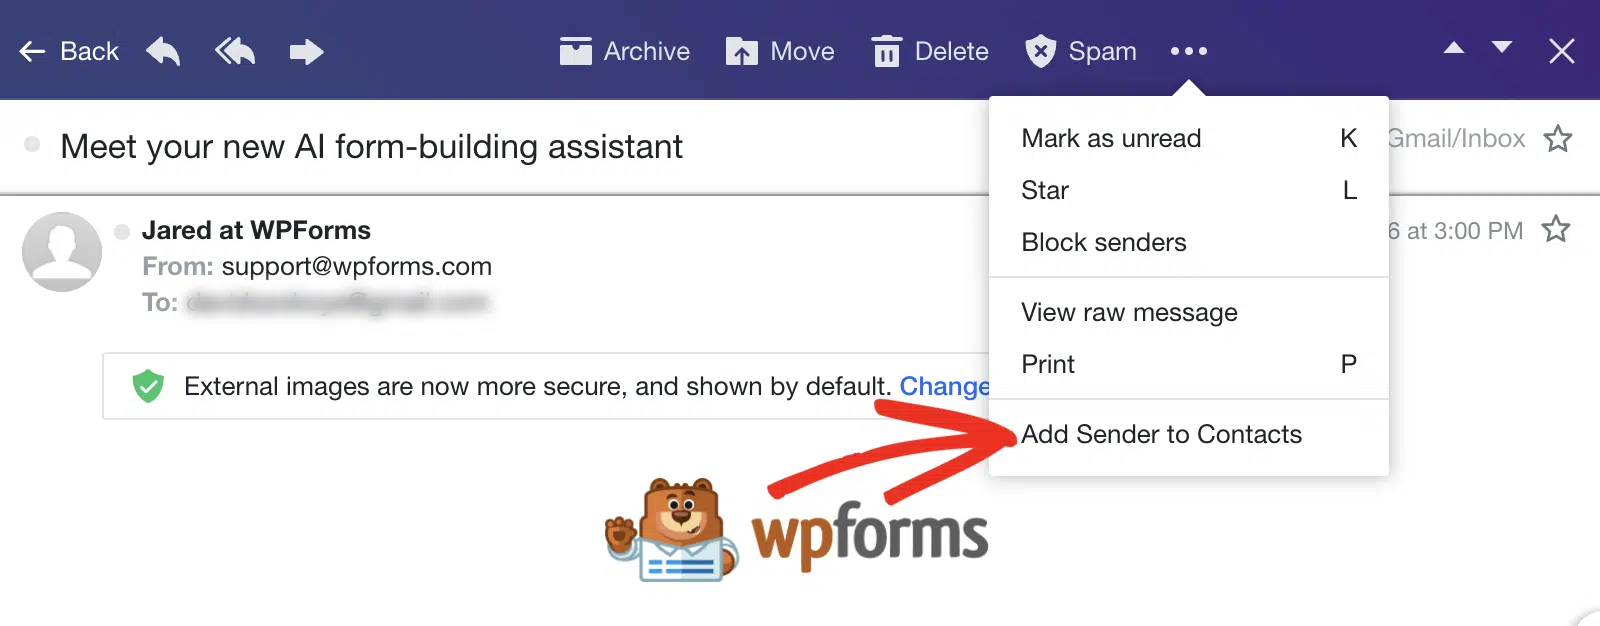
For Yahoo! Mail, you’ll first need to open an email from WPForms and then click the 3 dot icon to open additional options.
Then select the Add Sender to Contacts option.
Apple Mac Mail
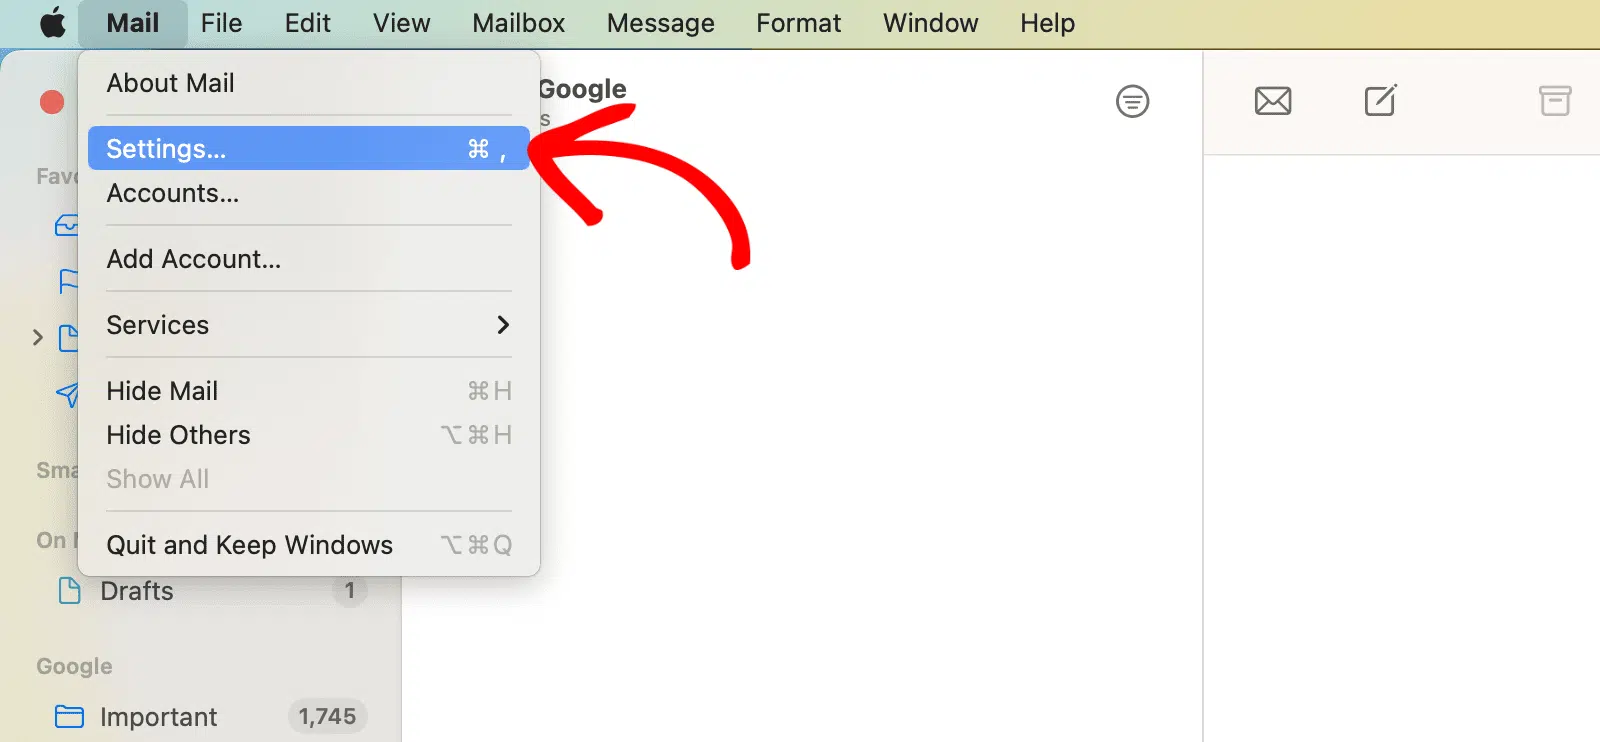
If you’re on a Mac, we’ll show you an easy way to add us to your allowlist.
Open up Mail and look to the top left of your screen. Click Mail and then click Settings from the dropdown.
From the icons at the top, click the Rules tab.
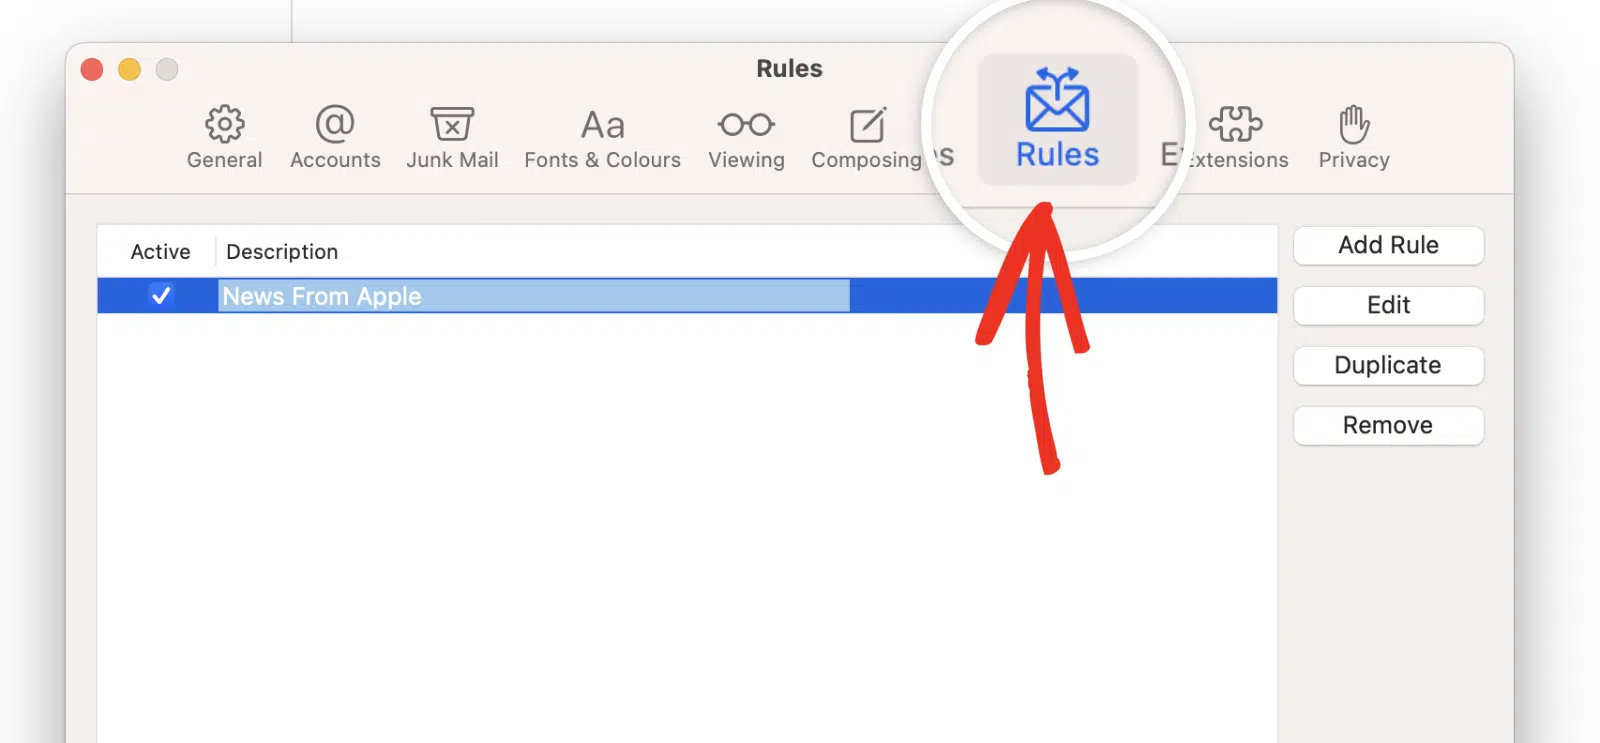
Next, click the Add Rule button.
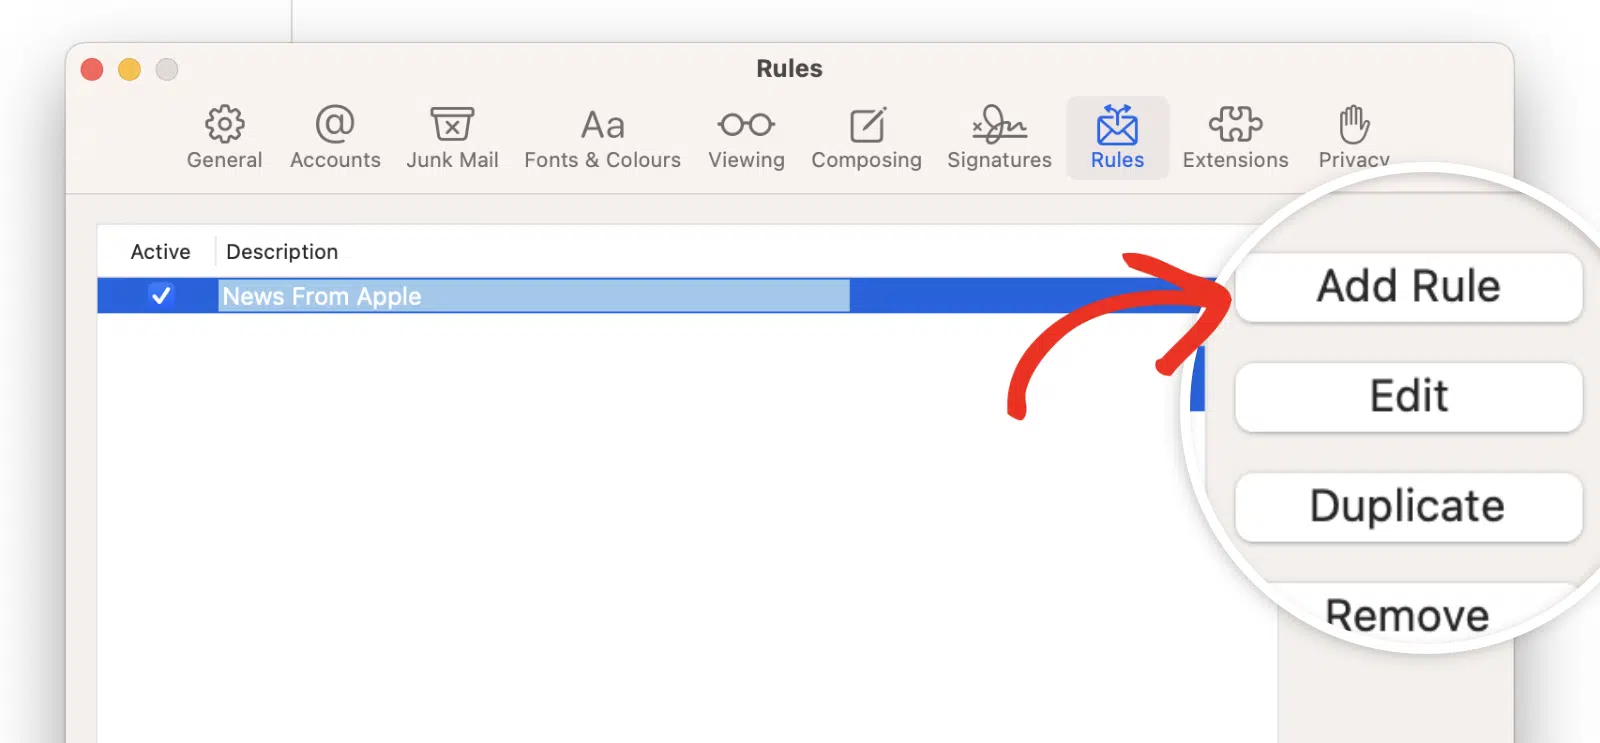
We’re going to create a new rule as follows:
- Description: Type any description so you can easily find your rule
- If any of the following conditions are met
- From contains [email protected]
- Move message to mailbox: Inbox
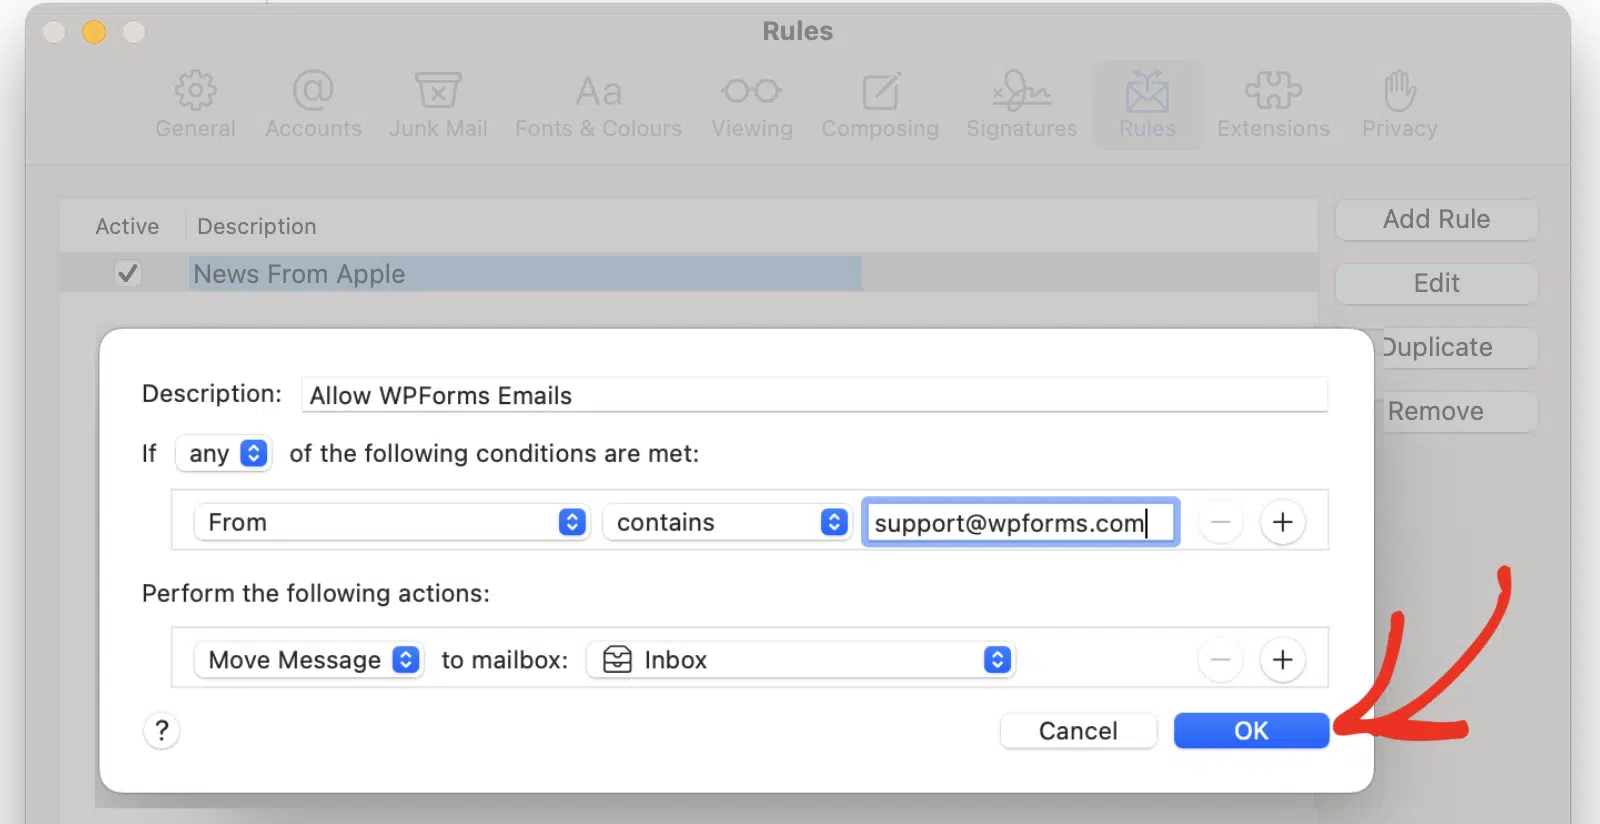
Click OK to save your new rule.
Microsoft Outlook (Desktop)
If you’re using Outlook on your computer, these instructions will help you to whitelist our emails.
From the Home tab, click the Junk dropdown.

Then, from the dropdown, click Junk Email Options.

You’ll see a window open up. Click on the second tab here, labeled Safe Senders.

Now click Add to create a new entry in the list. In the popup, type @wpforms.com, including the leading @ sign. Then click OK.
And finally, click OK again to save. That’s it!
Outlook.com (Web)
If you have a Hotmail, Outlook, or Live address, these instructions will work for you.
First, log in to your Outlook mail and then click the Settings gear icon.
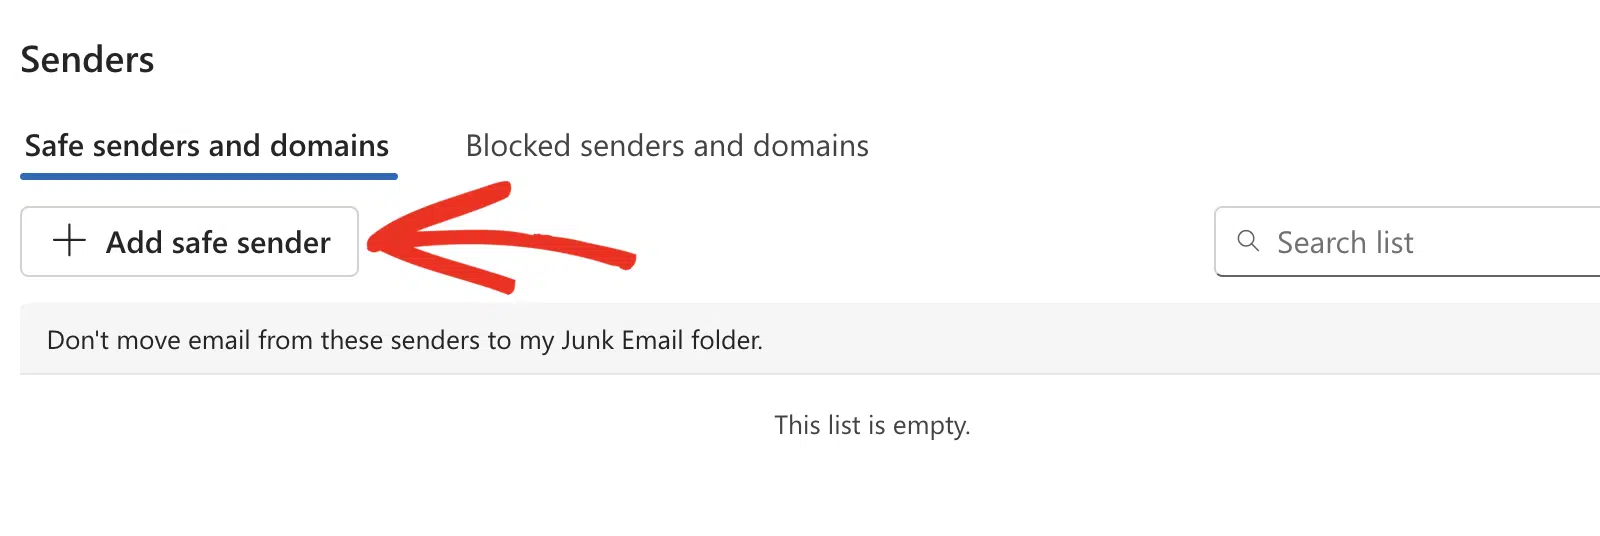
After that, navigate to Email » Junk email and then scroll to the Senders section.
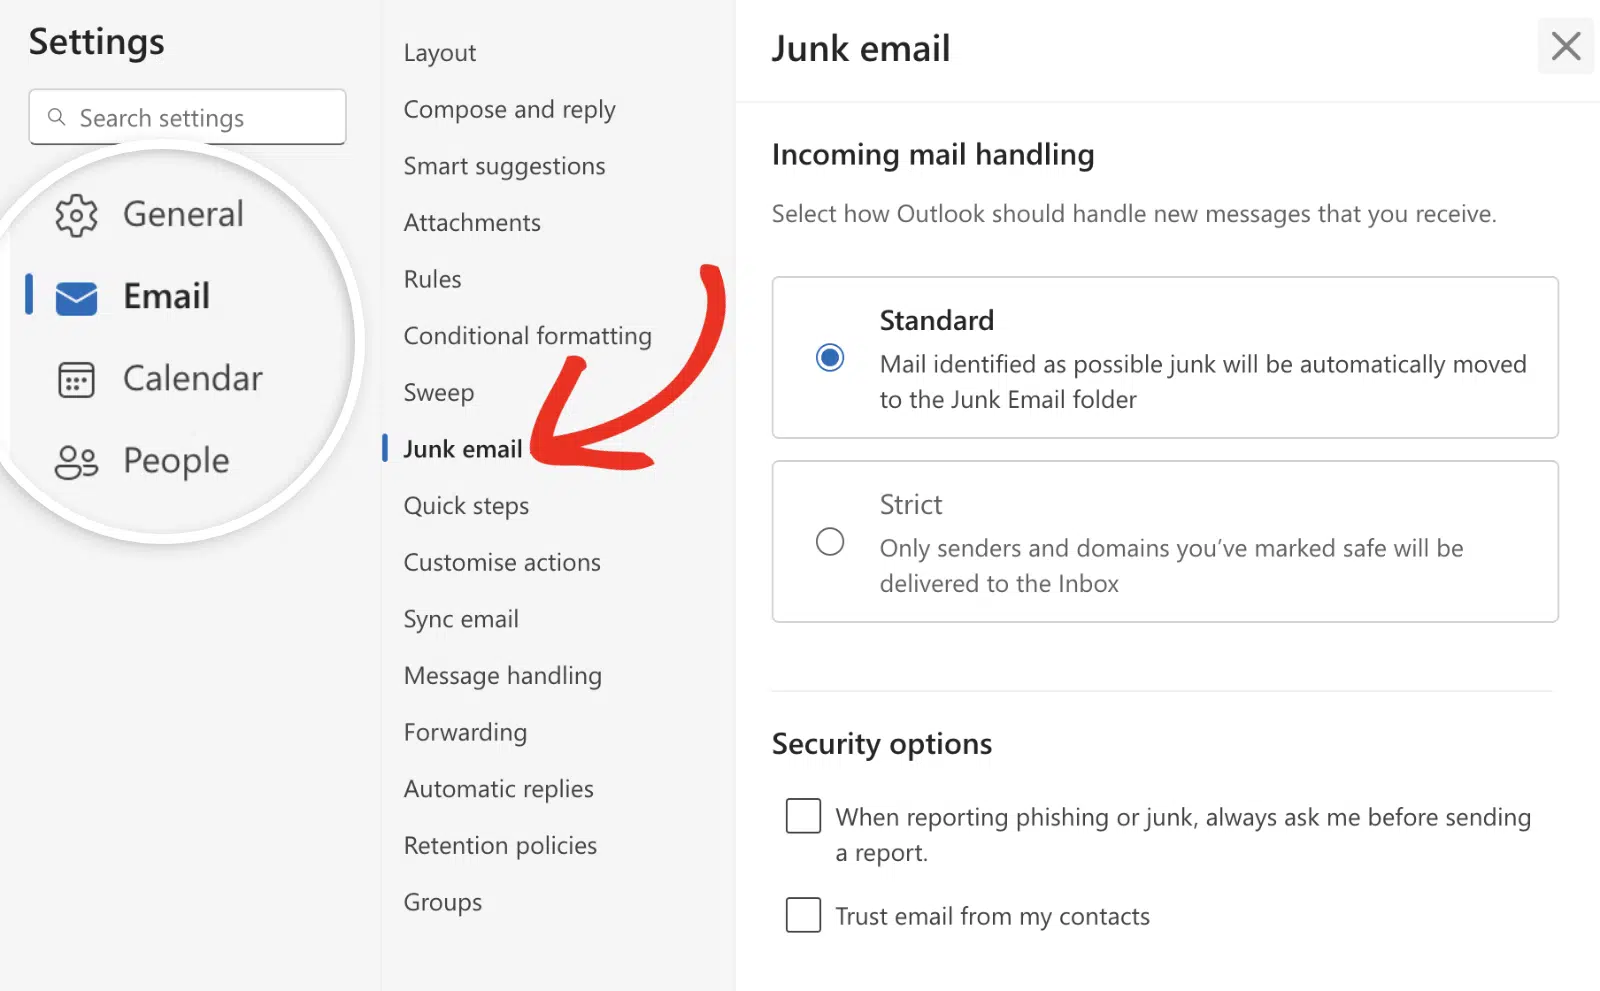
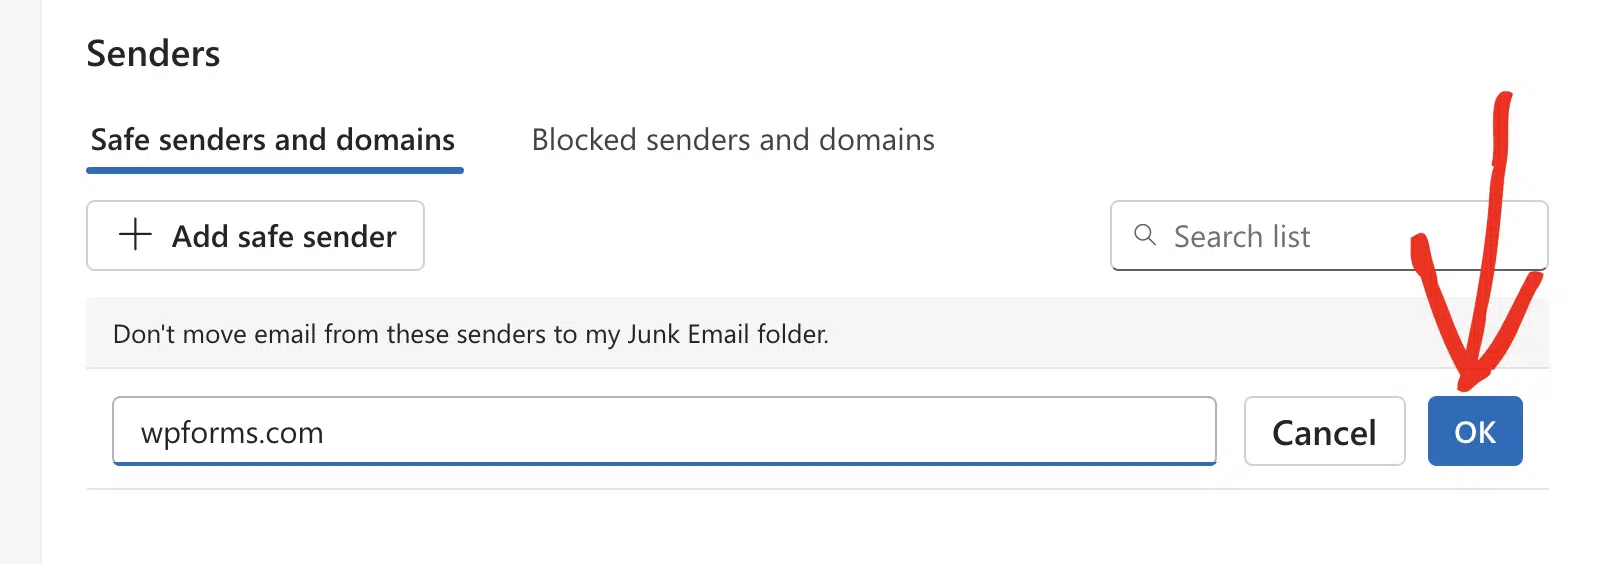
Once here, click the Add safe sender button and type wpforms.com into the domains field.
After that, click OK to proceed.
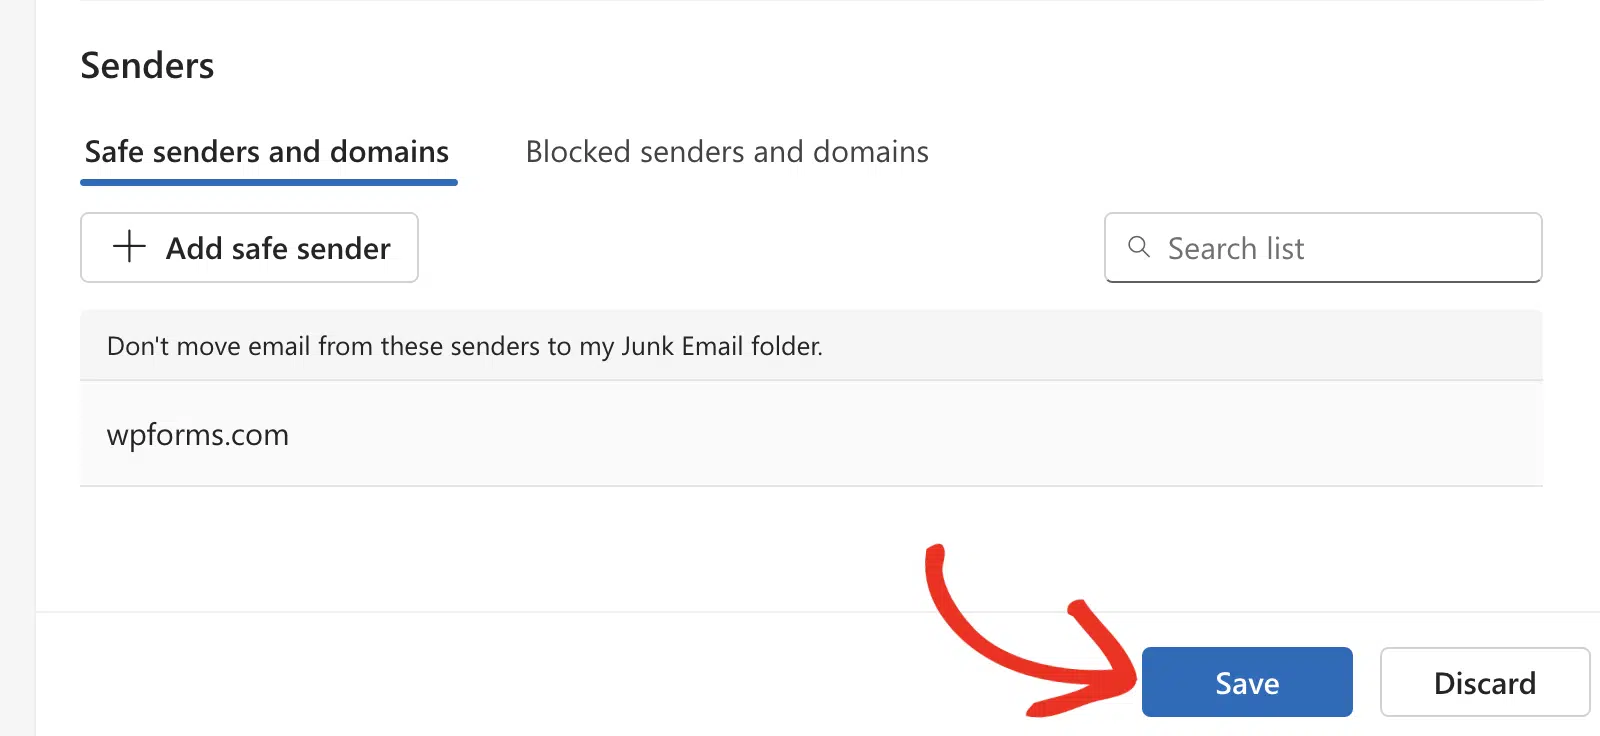
Then click the Save button to save your changes.
That’s it! You’ve now learned how to whitelist emails from WPForms to allow you to receive important updates.
Next, would you like to enable email notifications on the forms you create on your site? Be sure to check our tutorial on enabling email notifications for more details.