AI Summary
Would you like to create a simple feedback form that submits automatically when users make a selection? This is perfect for quick “Was this helpful?” surveys where users can respond with a single click. By automatically submitting after selection, you can maximize response rates by making the process effortless for users.
This guide will show you how to create a streamlined feedback form that submits instantly when users make their choice.
Setting Up Your Form
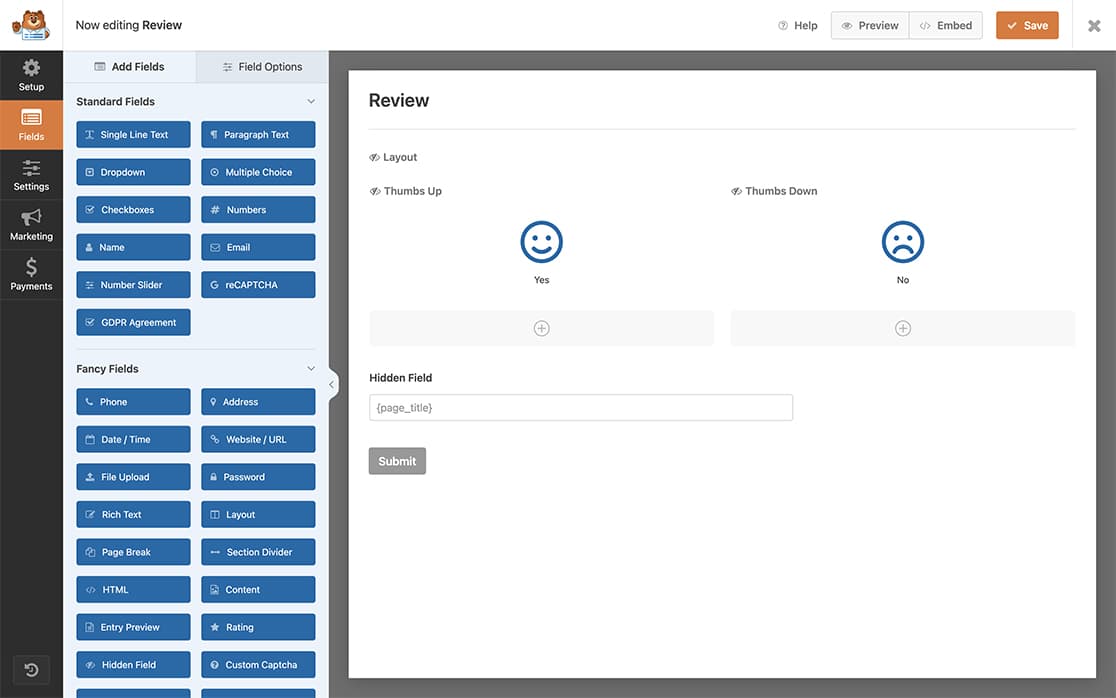
First, create a new form with this structure:
- A Layout field to organize your options
- Two Checkbox fields – one in each Layout column for “Yes” and “No” options
- A Hidden field to capture the page title

If you need help with creating your form, please review this form creation guide.
Configuring the Icon Choices
For a polished look, we’ll use icon choices for the Yes/No options. Configure your checkbox fields with these settings:
Yes Checkbox
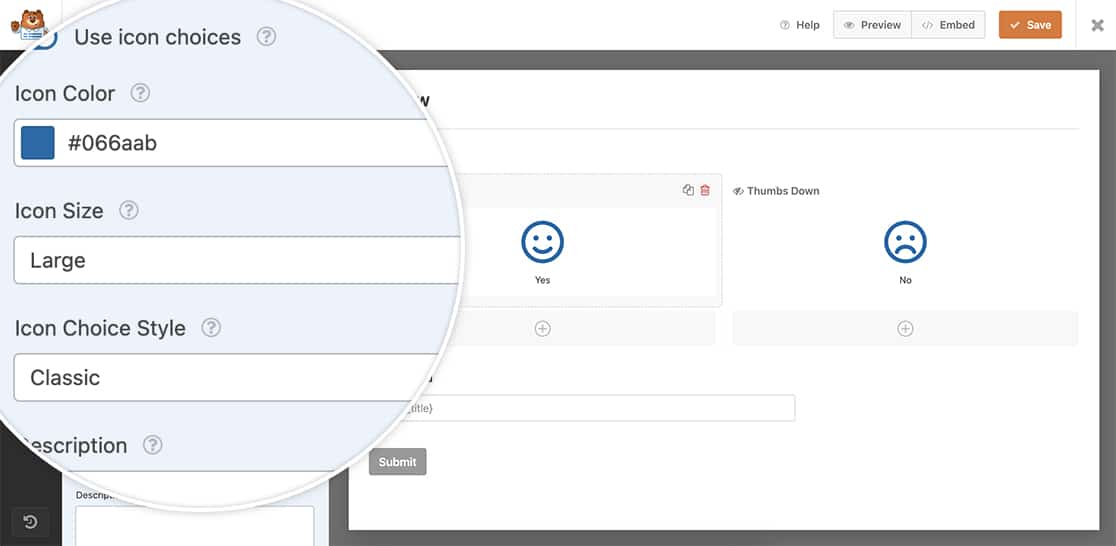
- Enable Use icon choices
- Icon: face-smile
- Icon Color: #066aab
- Icon Size: Large
- Icon Choice Style: Classic
- Hide Label: enabled
No Checkbox:
- Same settings but with face-frown icon

Adding a Smart Tag to the Hidden Field
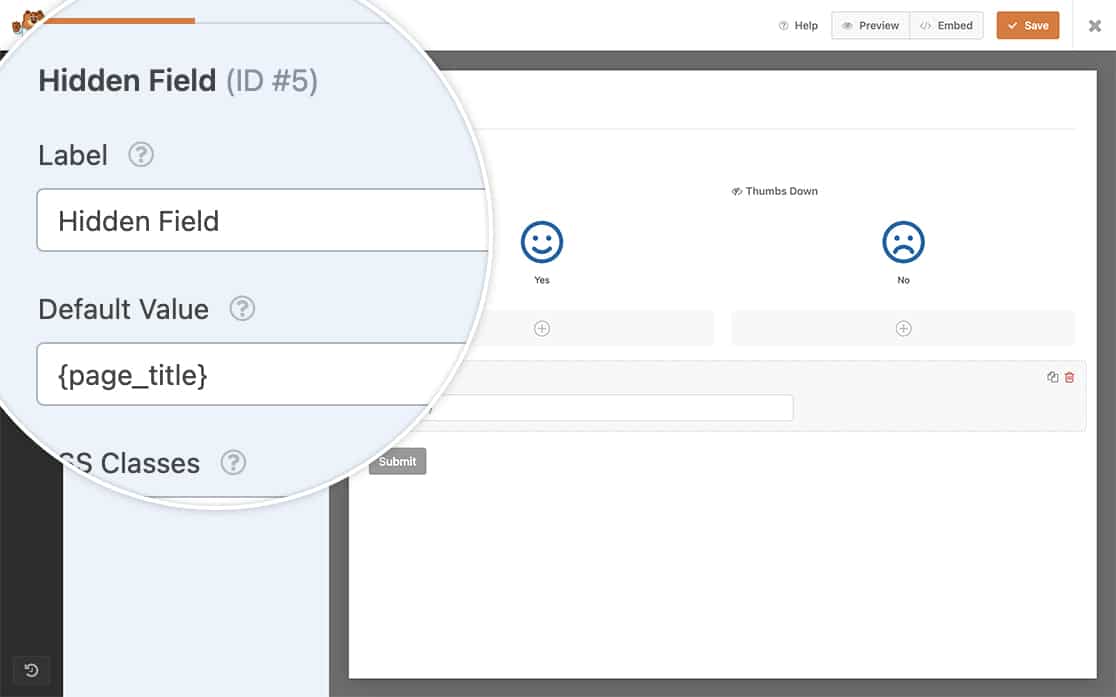
For the Hidden Field, we’re going to add the Smart Tag to capture the page title when the form is submitted. To learn more about built-in Smart Tags with the WPForms form builder, you can review this documentation.
We’ve added the Smart Tag {page_title} to Default Value of the Hidden Field.

Automatically submit the form
Now it’s time to add the snippet to your site. If you need help in how to add snippets to your site, please check out this tutorial.
This snippet will only run on the form ID 3046, when either of the Checkbox fields are checked, it will trigger this function and automatically submit the form.
You’ll need to update this form ID to match your own form ID. If you need assistance in finding your form ID, please review this guide.
Styling the Form
Add this CSS to style your form appropriately. Update the form ID (3046) and field IDs (3 and 4) to match your form:
This CSS hides unnecessary elements and positions your icons perfectly. For help in adding CSS, review our guide on adding CSS code to your WordPress site.
You’ll need to update the form ID for these CSS rules to make sure that it’s targeting the correct form and field IDs.
Our form ID for the purpose of this documentation is 3046. Our first checkbox is the field ID 3 and the second checkbox is field ID 4.
Now whatever option your visitors selects, the form will automatically submit.

And that’s it! Now when your visitors click either icon choice, the form will automatically submit. Would you like to show or hide your submit button conditionally based on an answer from your form? Please check out the tutorial on How to Conditionally Show the Submit Button.
