AI Summary
Would you like more control over the layout of your WordPress forms? The Layout field for WPForms provides a powerful solution for building advanced form layouts that automatically adjust to the users’ screen size.
This tutorial will demonstrate how to use the Layout field in WPForms.
Before you get started, be sure to install and activate WPForms and verify your license. Then, create a new form or edit an existing one to access the form builder.
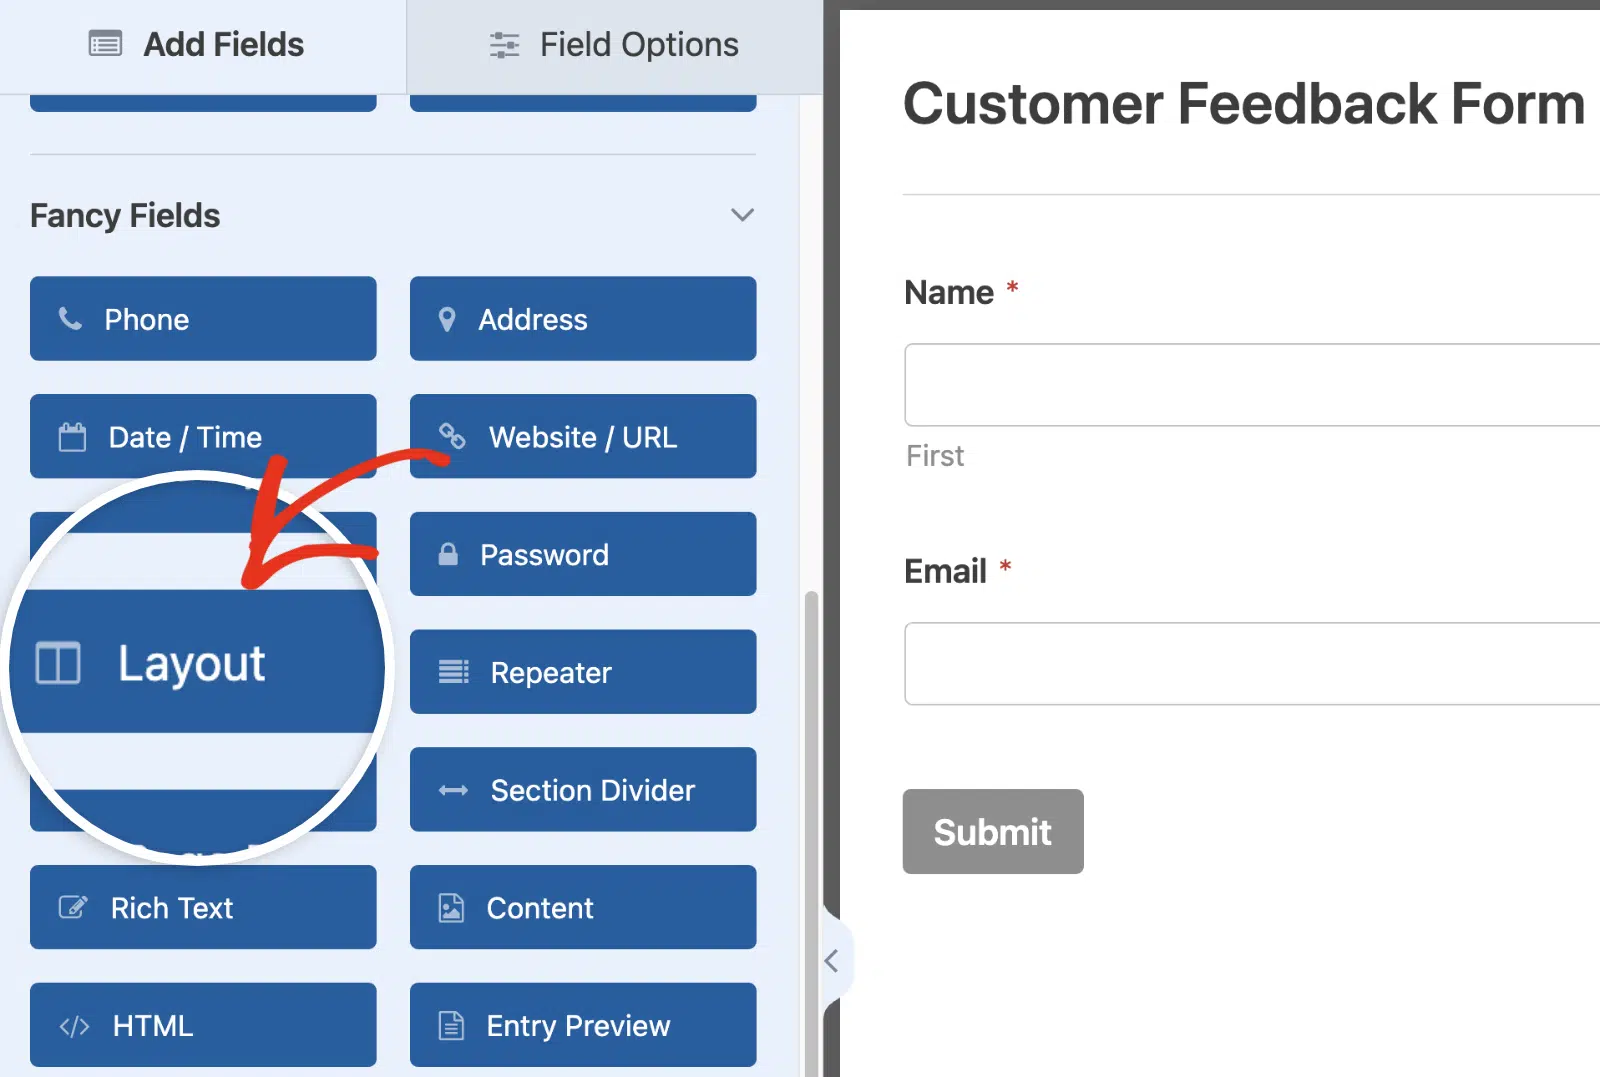
Adding a Layout Field to Your Form
In the form builder, you’ll find the Layout field located under the Fancy Fields section. Go ahead and click the Layout field or drag and drop it to the preview area to add it to your form.
Choosing a Column Layout
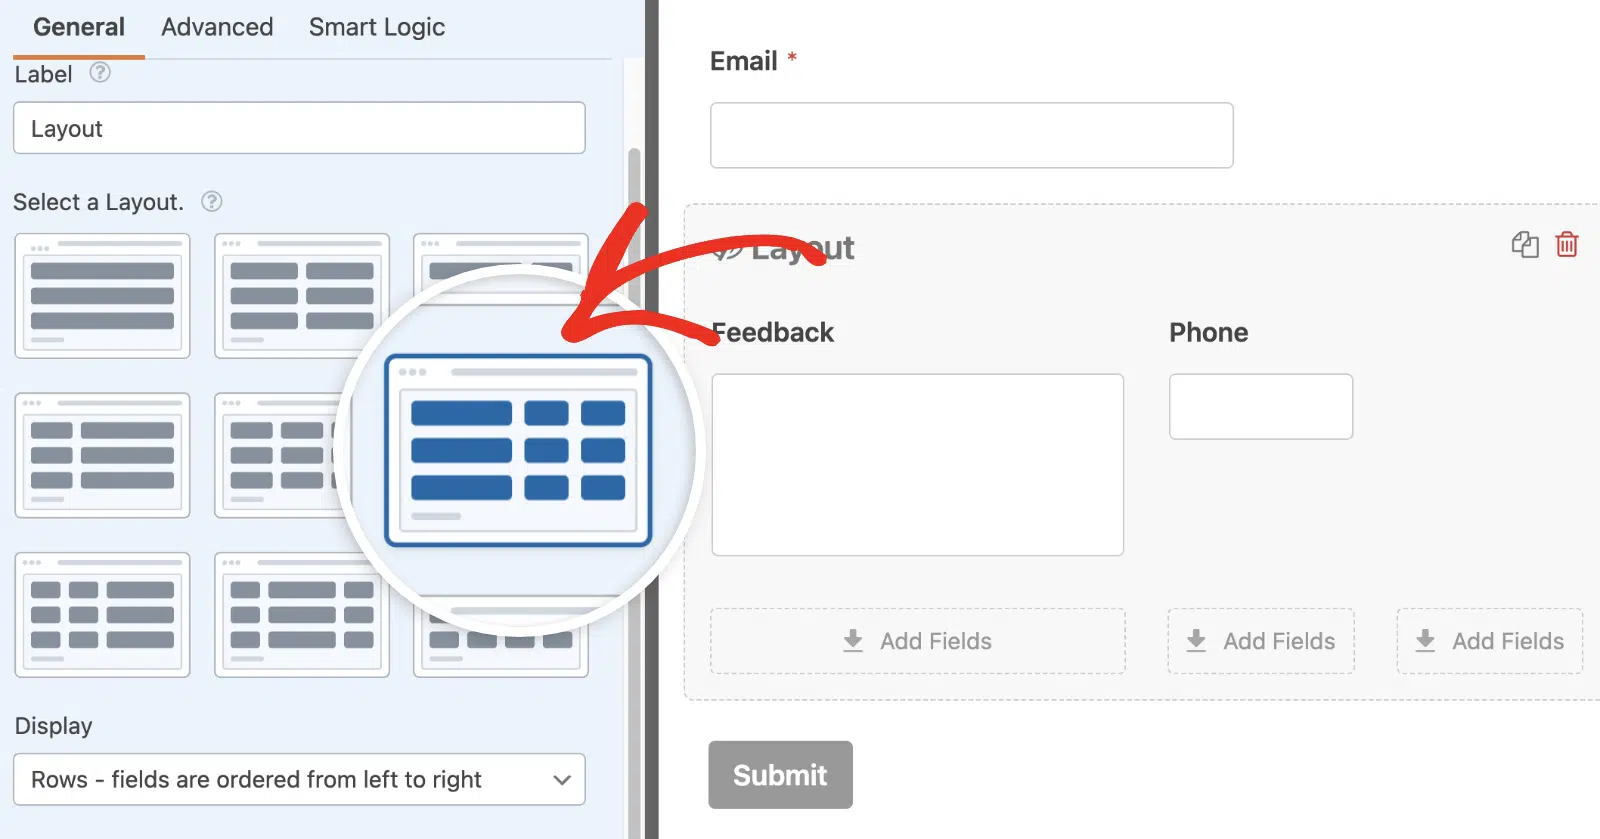
Once you’ve added a Layout field to your form, it’s time to choose your preferred layout.
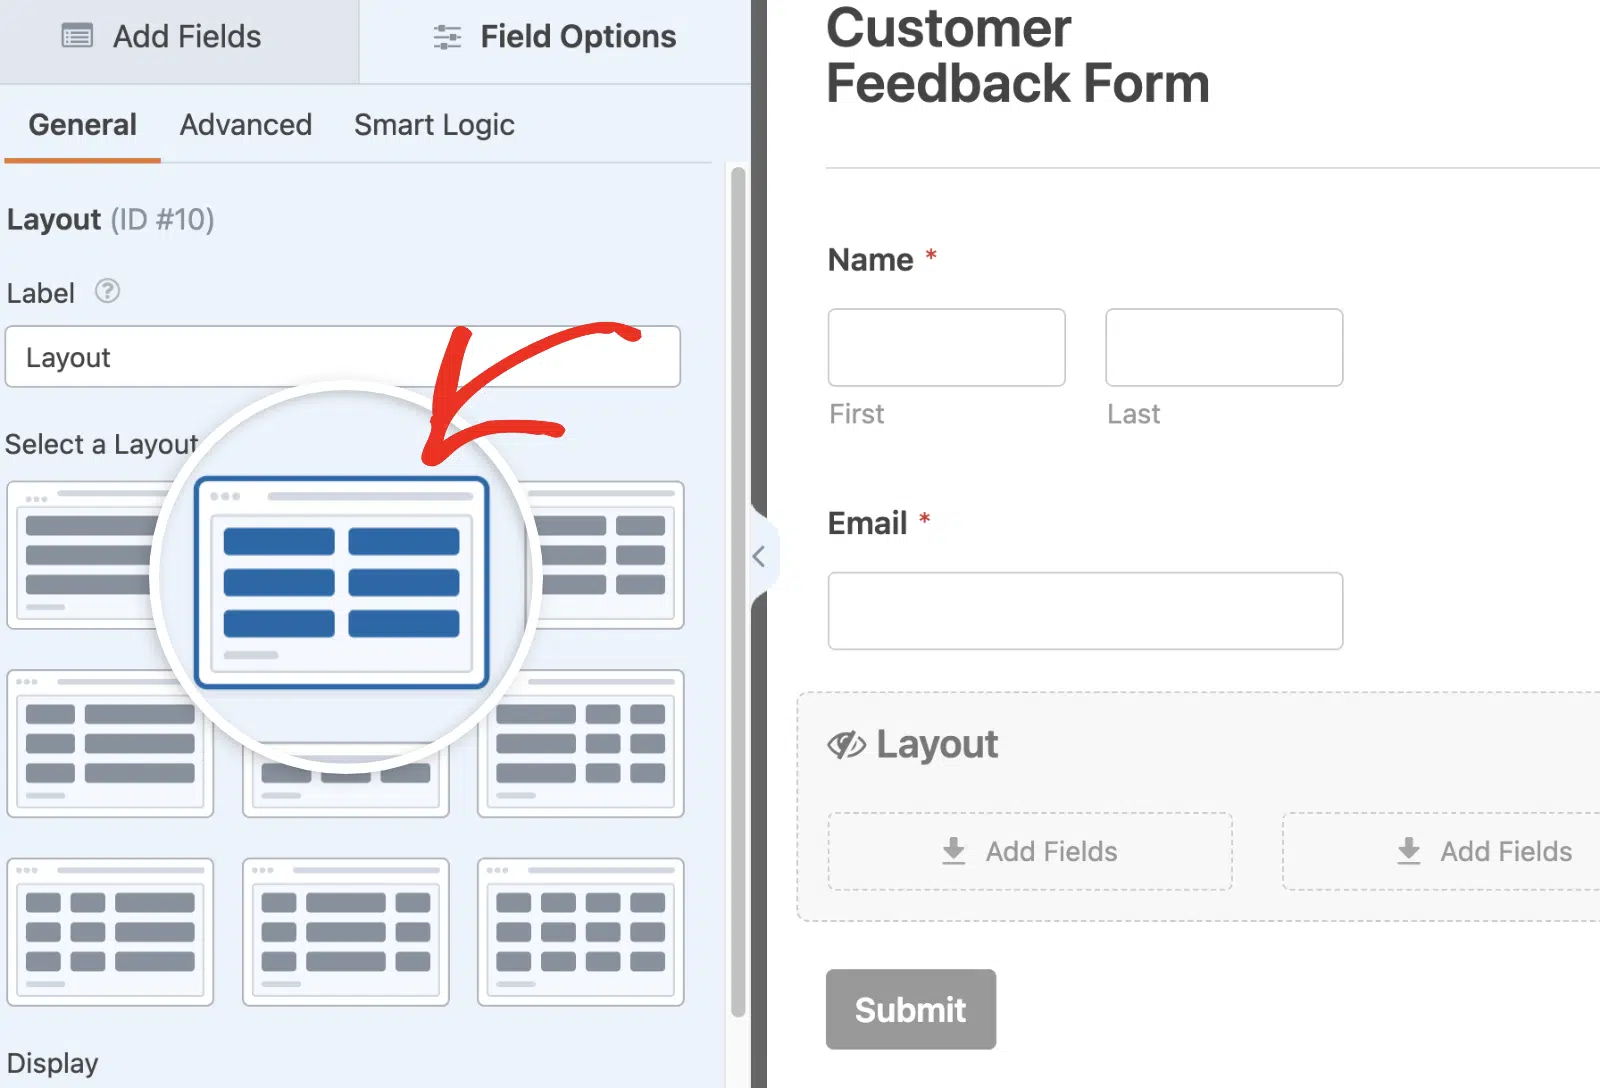
The Layout field features multiple options for arranging your form fields in different columns. To open the Field Options panel and view the available column layouts, click the Layout field in the form preview area.
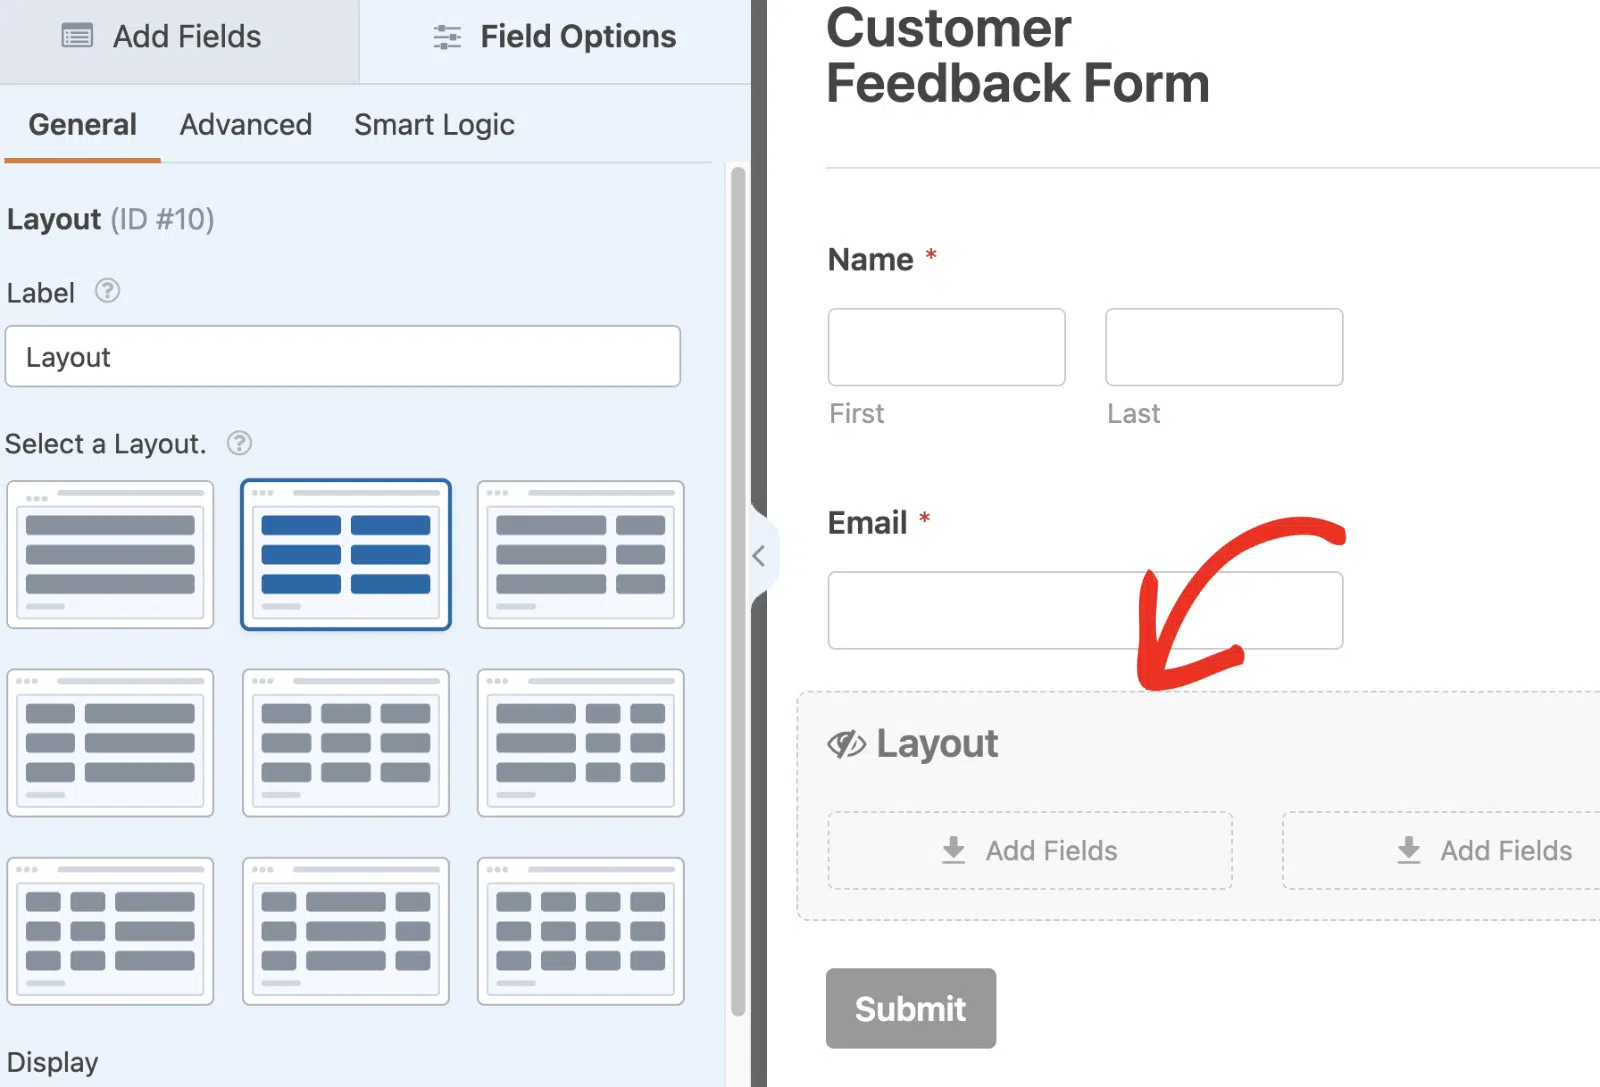
Now you’ll see several available layouts featuring between 1 and 4 columns. By default, the Layout field will select the 2-column layout, which has 2 columns of equal width.
We’ll use the default layout in this tutorial, but the functionality remains the same for all layouts.
Note: Your form fields won’t display correctly if you previously used the CSS classes option to enable multi-column layout. See our FAQ section for more details.
Setting the Field Display Order
The Display dropdown determines how fields are ordered in your form. Fields in the new Layout fields are set to display in rows by default, allowing users to navigate through the form horizontally from left to right.
To change this order, click on the Display dropdown and select the preferred option.
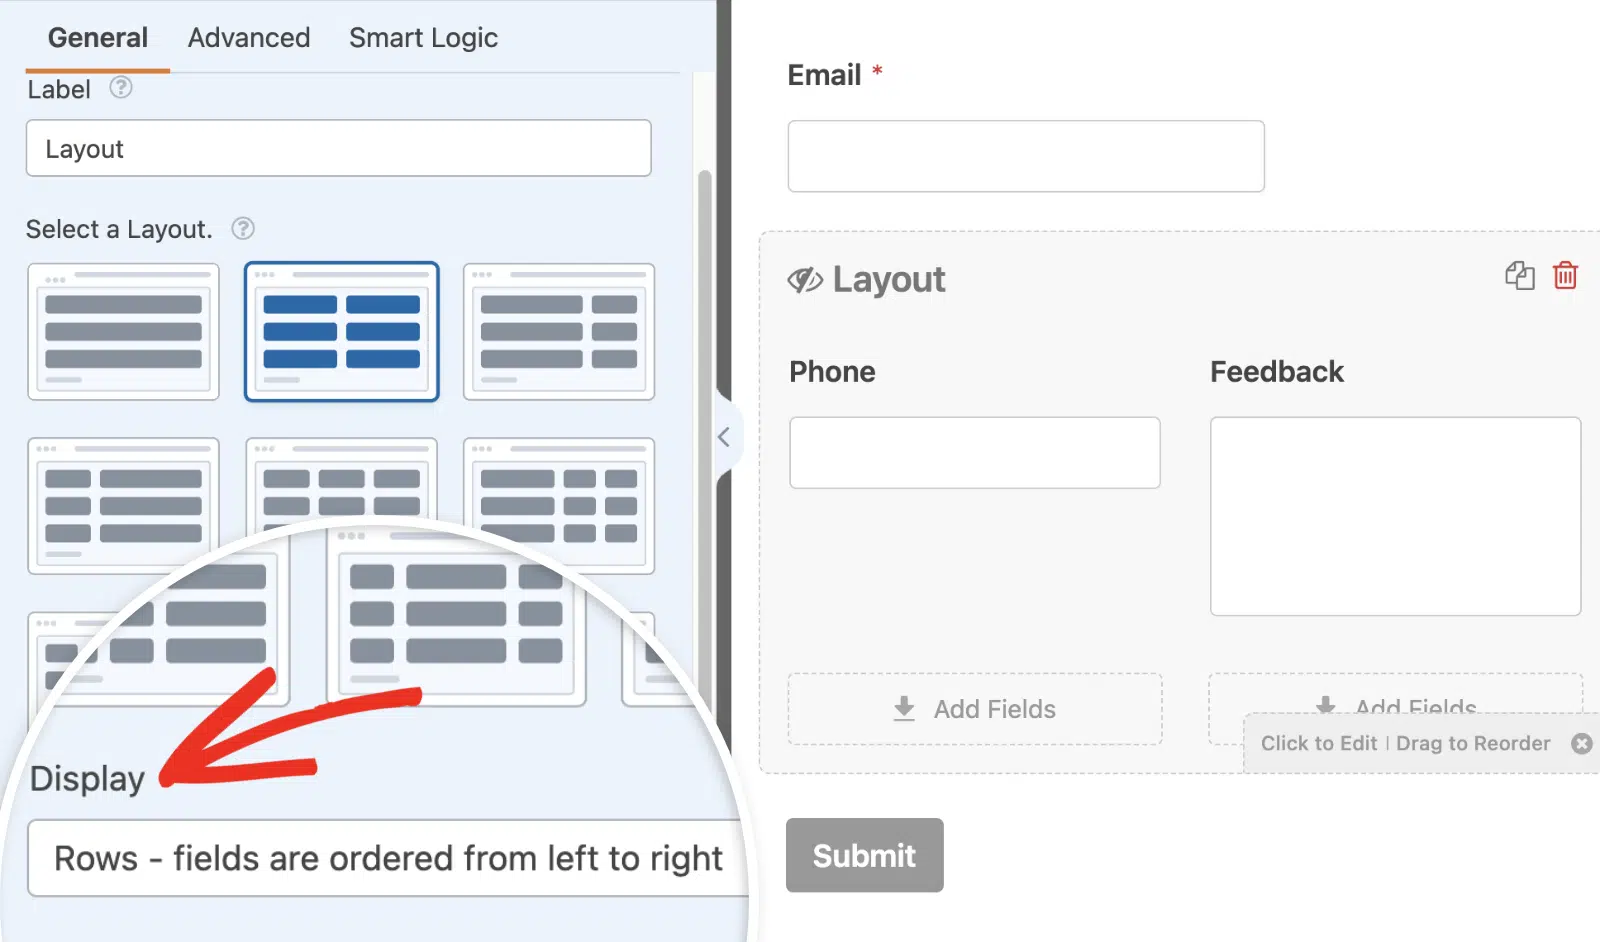
Note: If your form includes a Layout field with multiple stacked fields, it’s recommended to use the Rows – fields are ordered from left to right option from the Display dropdown. This ensures that fields are displayed in the mobile view, form notifications, and entries exactly as you’ve arranged them, preserving the intended form structure and user experience.
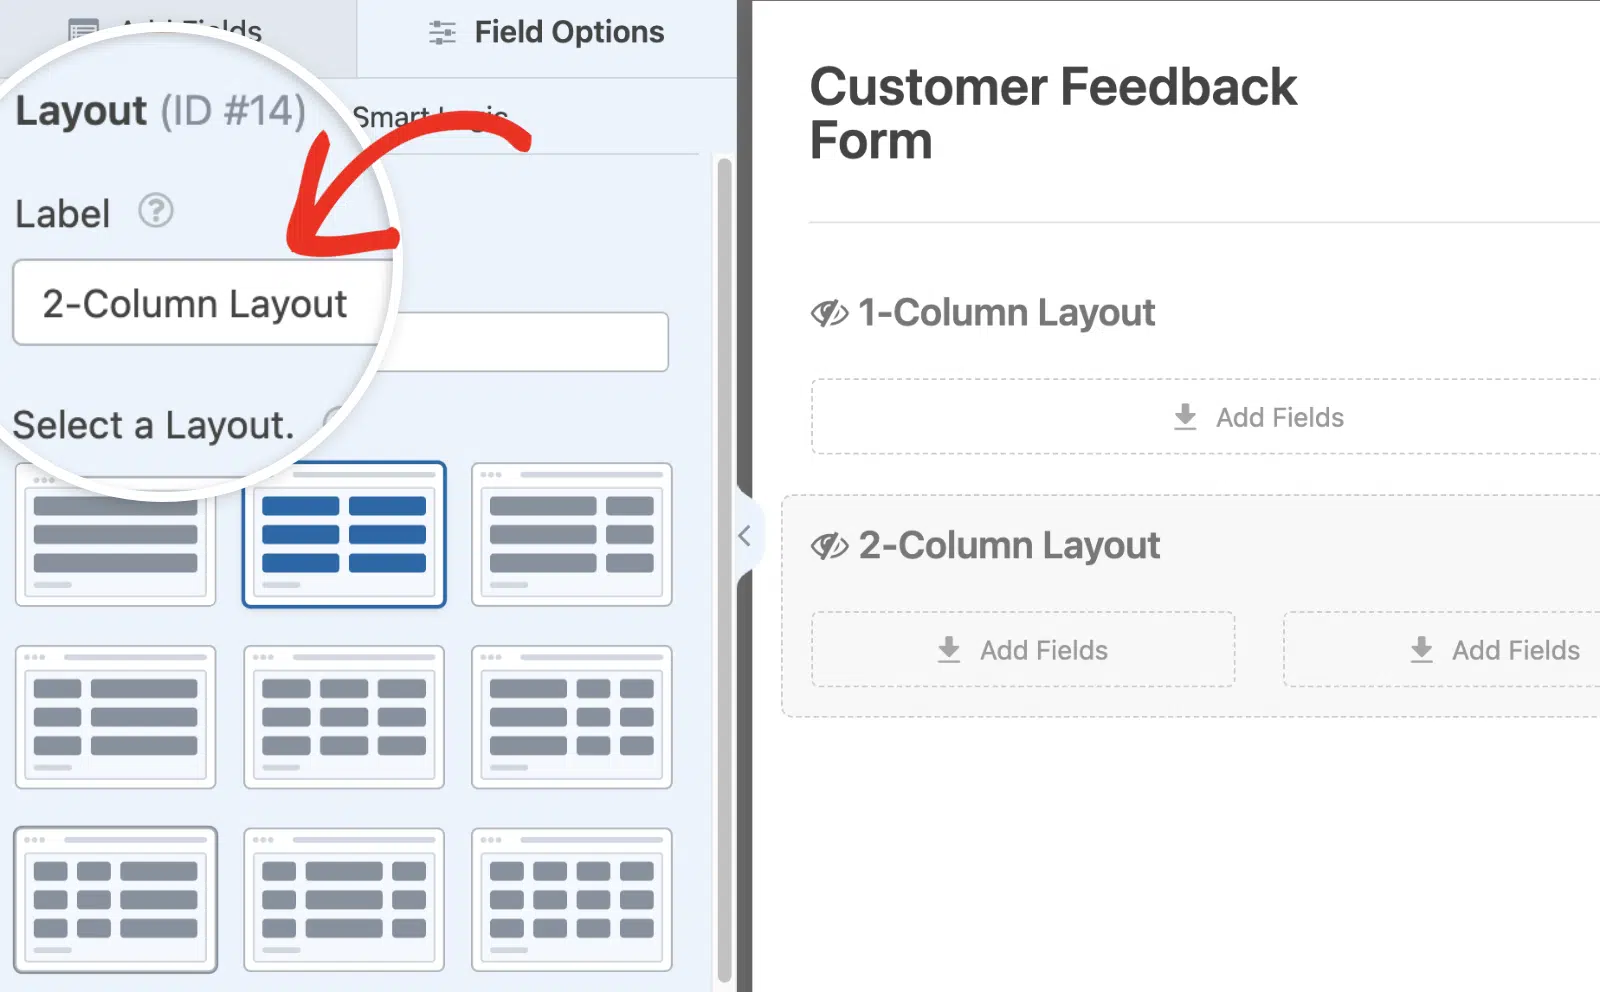
Switching Layouts
If you’d like to change layouts, even after adding fields to individual columns, simply select any of the available layouts from the Field Options panel.
Columns and their contents will automatically adjust their size and position according to the user’s screen size.
Note: If fewer columns are in the newly selected layout than in the previous, any fields in the last column will be removed from the Layout field and placed in the main body of your form.
Using Multiple Layouts
If you’d like, you can add multiple Layout fields to your form and choose different column configurations for each one.
For example, one Layout field can have 1 column, and another Layout field can have 2 columns, giving you more flexibility in your form’s appearance.
To help you differentiate each Layout field, feel free to add a label to the Label field in the Field Options panel.
Since Layout fields act as containers, they are the perfect solution for grouping items in the form.

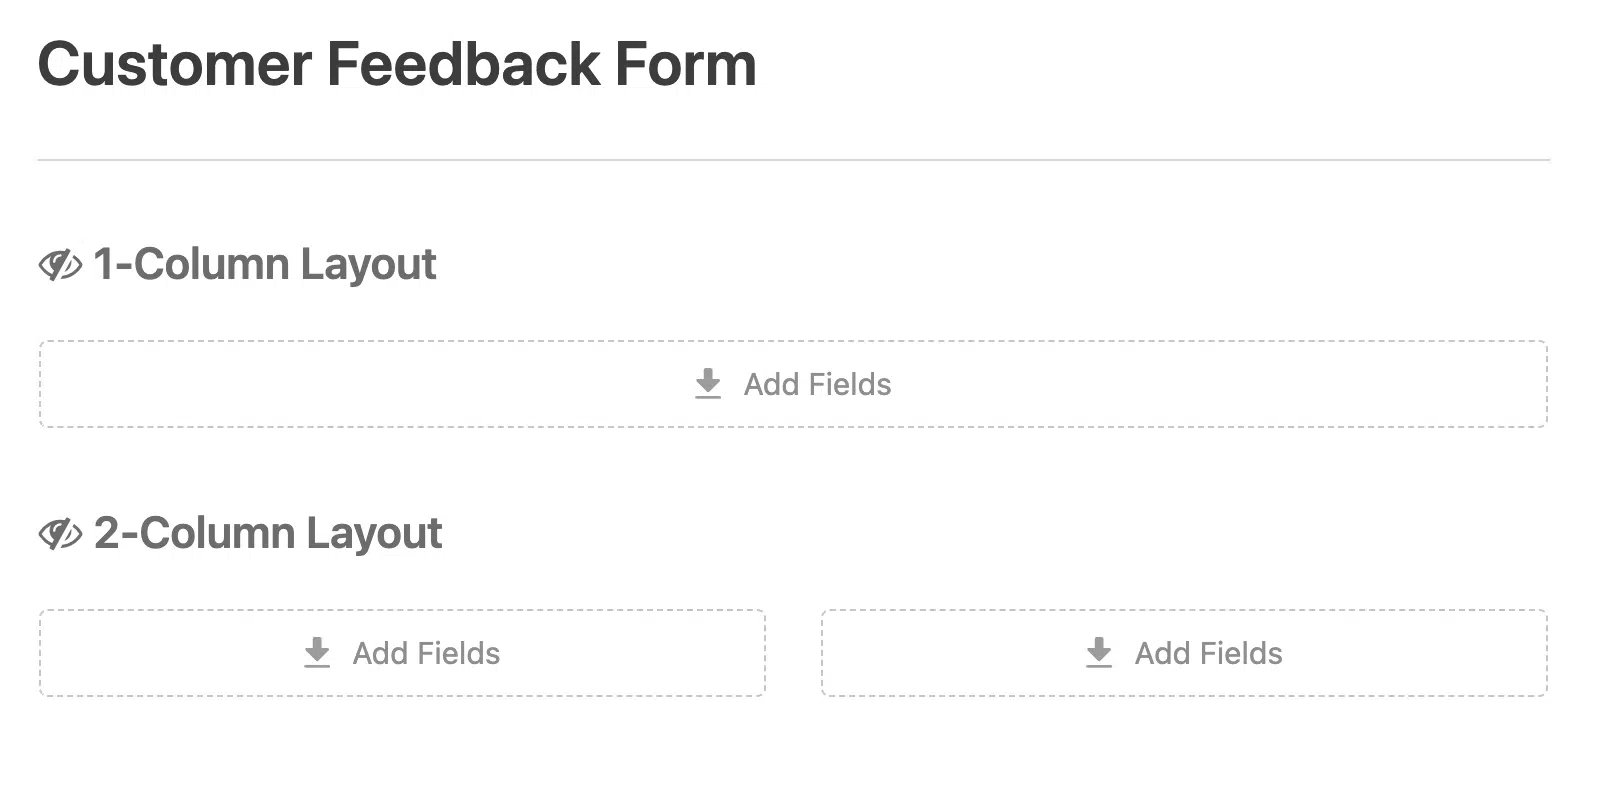
Adding Fields to Individual Columns
To add a field to any column, click and drag the field from the sidebar to the target column.

Note: The Layout, Page Break, Repeater, and Entry Preview fields can’t be added inside a Layout field.
Most fields added to the Layout field will default to a large field size, meaning they’ll take up the entire width of the column. However, the Rich Text and Paragraph Text field size is determined by height, defaulting to a medium field size inside the Layout field.
For an adjustable height for the Paragraph Text field, refer to our developer documentation.
Enabling Conditional Logic
The Layout field also supports enabling conditional logic to show or hide an entire Layout field based on user selection.
Note: You’ll need WPForms version 1.9.0 or higher to access the conditional logic feature for the Layout field.
To enable conditional logic, click on the Layout field to open its Field Options panel. Then navigate to the Smart Logic tab.
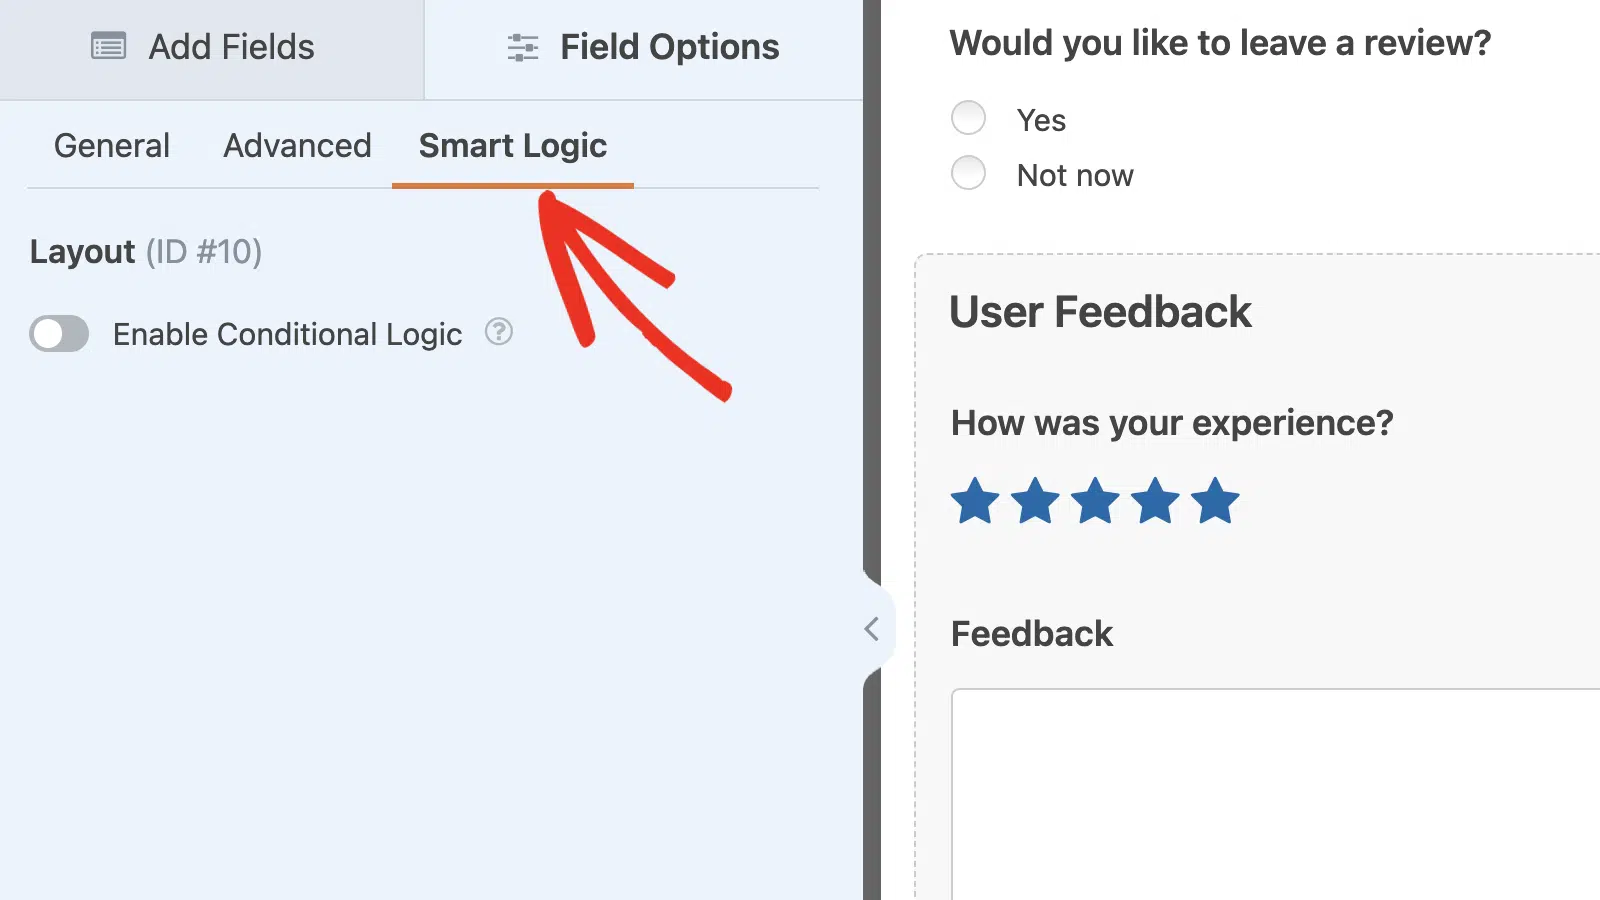
Once there, toggle the Enable Conditional Logic option to the ON position.
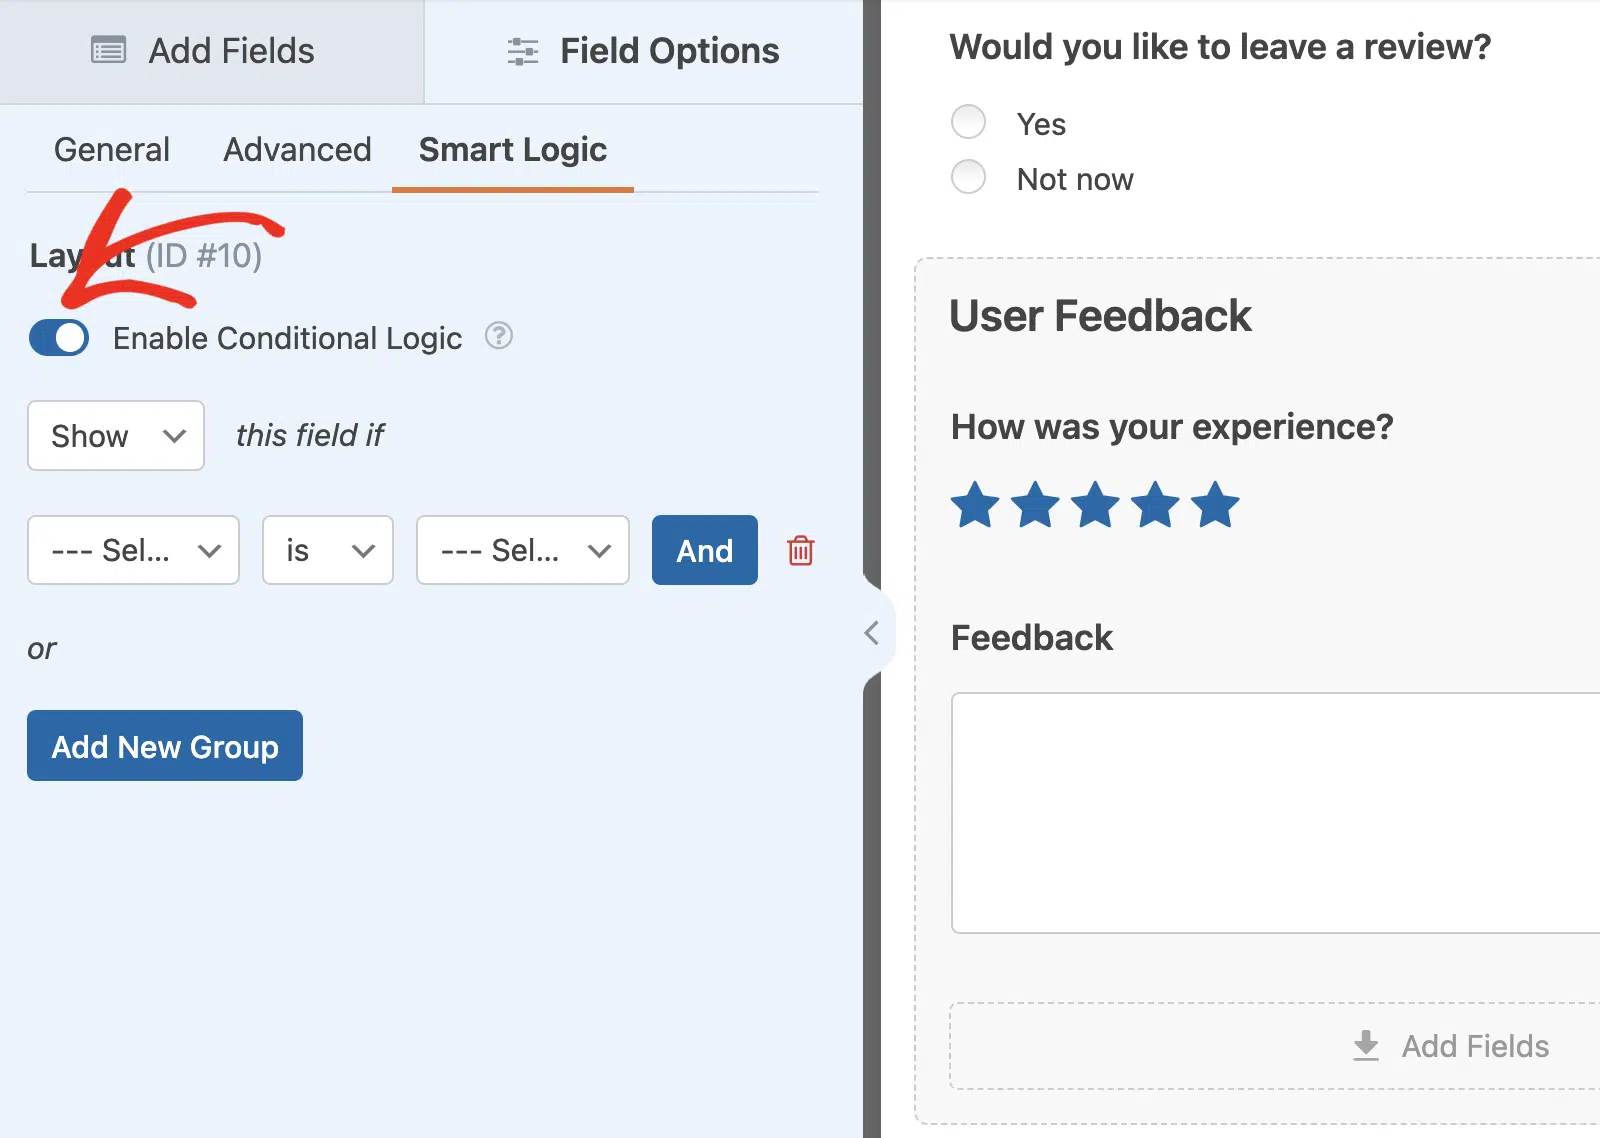
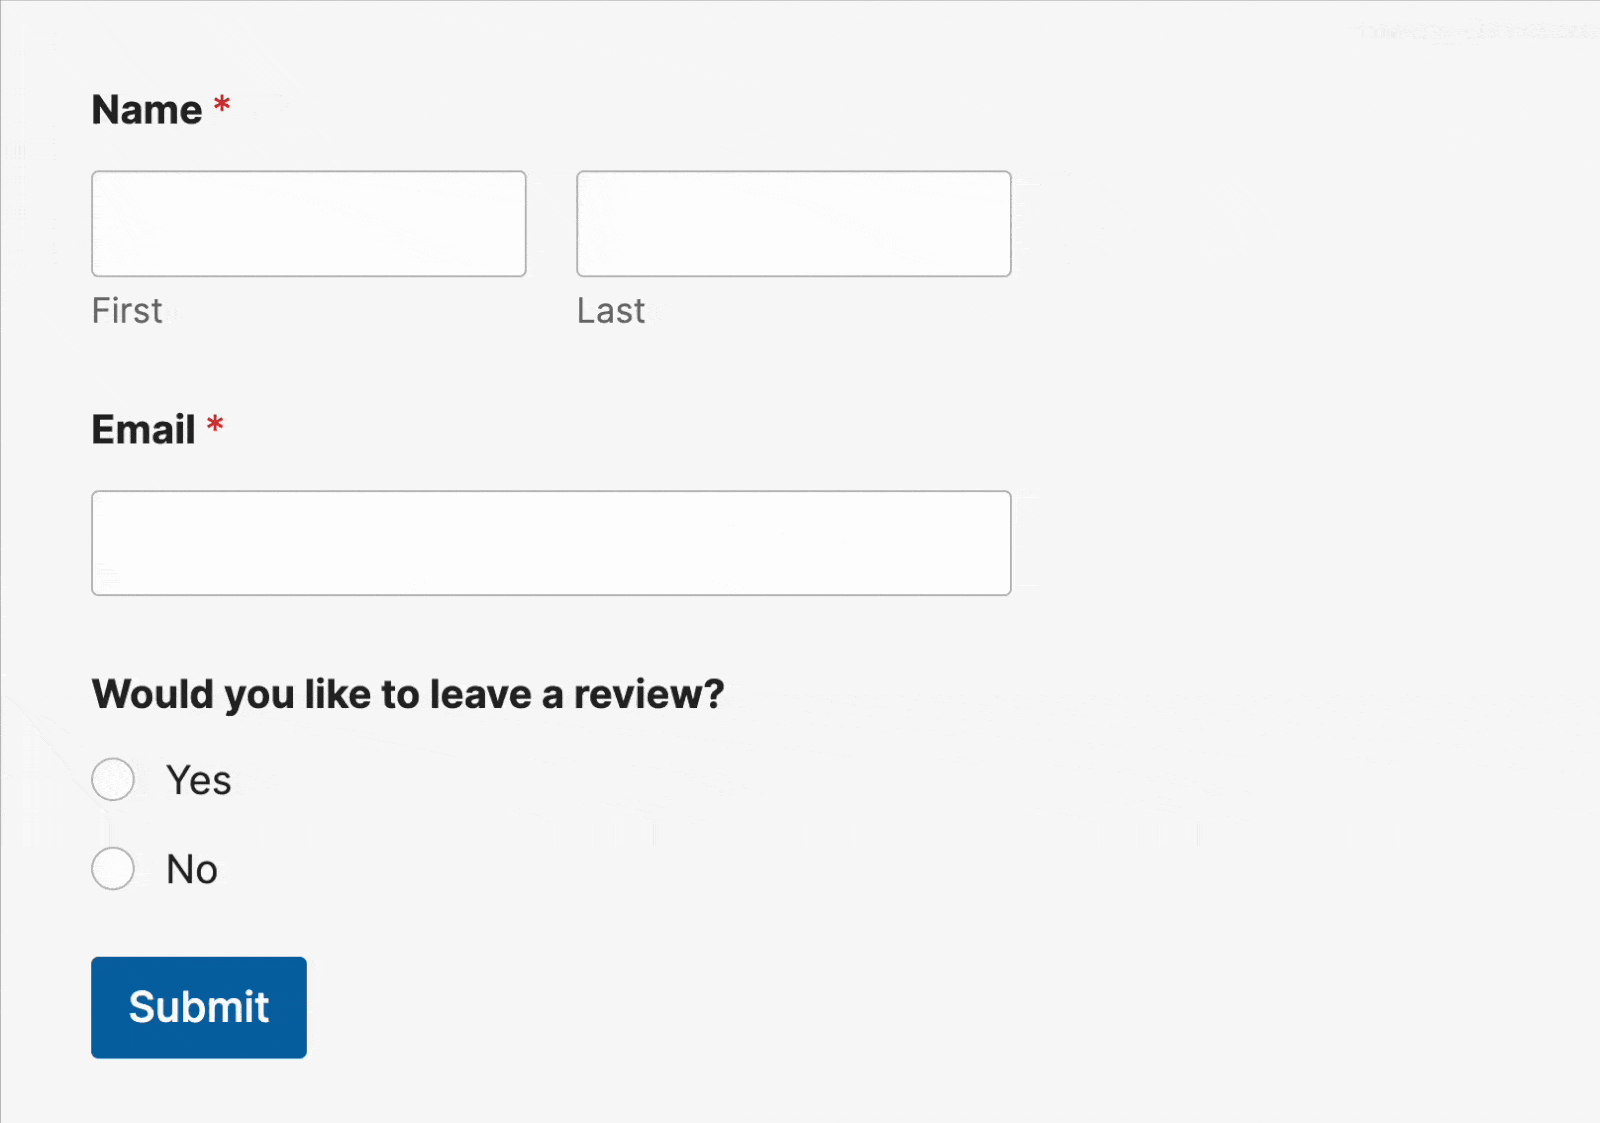
After enabling it, additional options will appear to configure the conditional logic rule. For our example, we’ve added a Multiple Choice field that asks users if they’d like to leave a review. Then we set the rule to Show this field if Would you like to leave a review? is Yes.
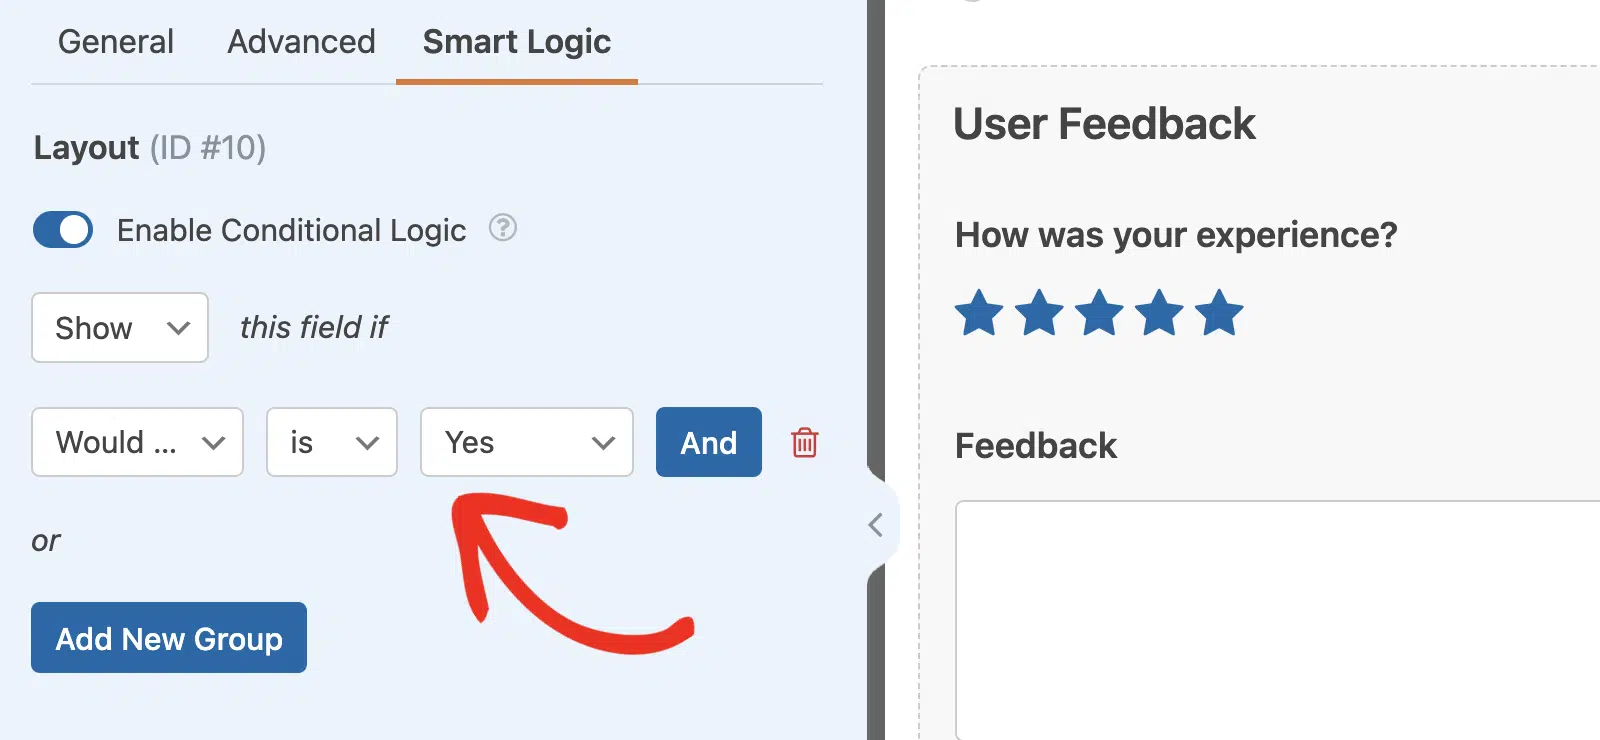
This rule will hide all the fields within the Layout field when you publish your form. The fields will only show when the user selects Yes from the Multiple Choice field options.
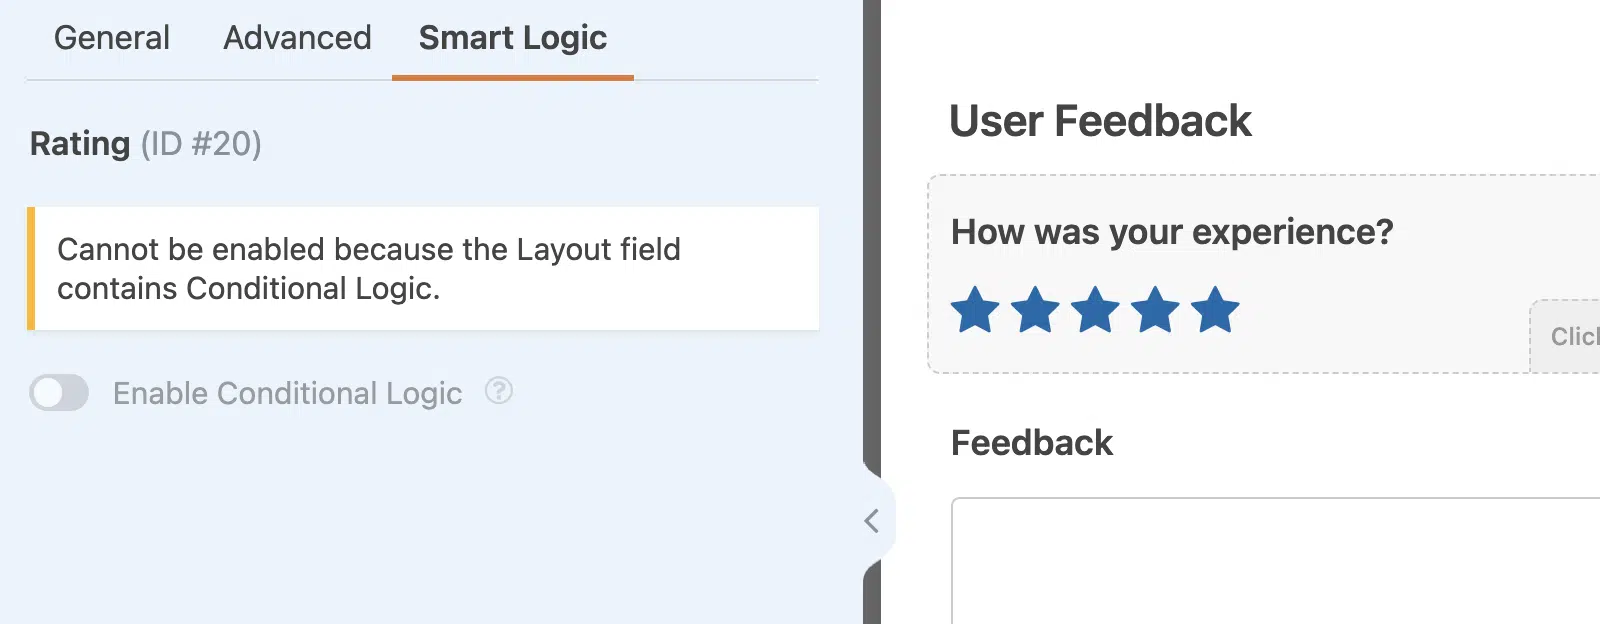
After enabling conditional logic for a Layout field, the option to use conditional logic will be disabled on individual fields within the Layout field.
Note: For more details on how conditional logic works, be sure to check our complete guide to using conditional logic in WPForms.
Removing a Layout Field From Your Form
If you’d like to remove a Layout field from your form, hover over the field and click the trash icon.
Since deleting a Layout field will also delete all the fields inside it, you’ll see an overlay appear asking you to confirm the deletion. Go ahead and click OK if you agree to delete the Layout field and all fields you’ve added inside it.
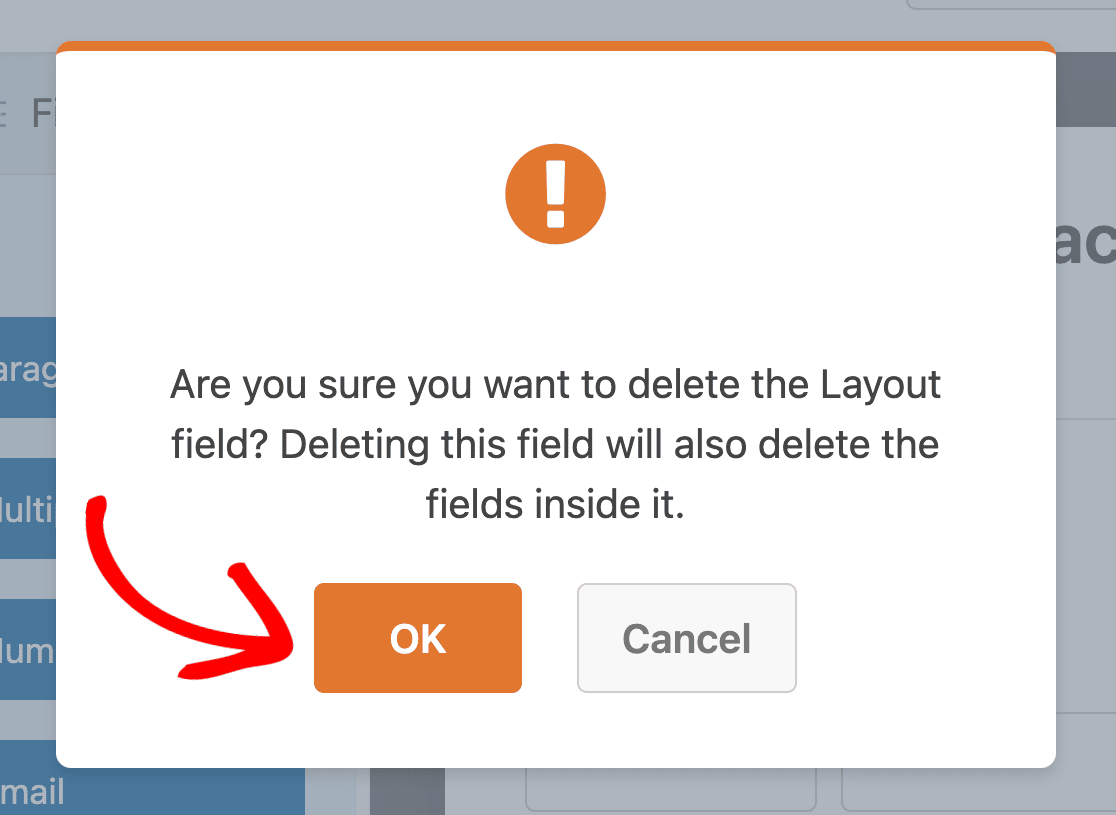
Note: You won’t be able to recover any of the fields you added inside the Layout field once they’re deleted.
Previewing Your Form
Once you’ve added fields to the columns inside your Layout field(s), go ahead and save your changes by clicking Save.

Then, click the Preview button to open the form preview in a new tab.

On the preview page, you’ll see a working version of your form. Here you can interact with your form and test out its visual layout. You’ll also be able to test how well your form works on different screen sizes.

Frequently Asked Questions
These are answers to some top questions about creating multi-column form layouts.
Why is the Layout field not showing properly when I preview my form?
If you previously used the CSS classes option to create multi-columns on your form, it will prevent the Layout field from working properly. You’ll need to remove the CSS classes from your form fields before using the Layout field.
For this, open the form builder and click on the field you’d like to edit to open the Field Options panel. Next, navigate to the Advanced tab and remove the multi-column CSS class(es) from the CSS Classes field.

After removing the CSS classes, be sure to save your changes and preview your form to ensure it looks and works as expected.
Can I display or hide a Layout field based on user selection?
Yes, you can show or hide a Layout Field in your forms depending on the answers provided by your users. This requires enabling conditional logic on the specific Layout field you’d like to hide. Please refer to our conditional logic section for additional details.
Can I align the submit button on the same line with the Layout field?
Yes. If you’d like to use the Layout field to create a single line form, you’ll need to add a custom CSS class in the form’s settings page.
For this, go to Settings » General in your form builder, and add the CSS class inline-fields to the Form CSS Class field.
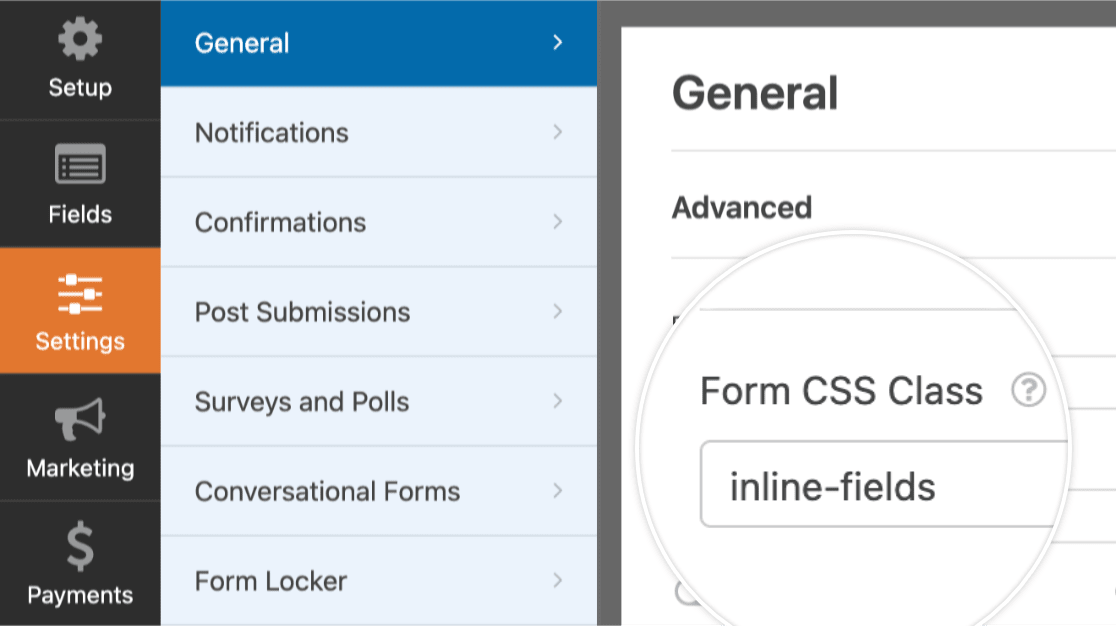
Note: Using the inline-fields class in WPForms can sometimes conflict with your WordPress theme’s styles. To learn more, be sure to check our tutorial on displaying forms in a single line.
That’s it! You now know how to use the Layout field in WPForms.
Next, would you like to know how to show different options in your form based on user interactions? Check out our guide to using conditional logic in WPForms.