AI Summary
Do you want to streamline your users’ form-filling experience on WordPress? Auto-populating form fields with information from a previous form can enhance user experience and ensure data accuracy. This tutorial will guide you through the process of passing information between forms using pre-populated query strings.
Before we go into the steps to achieve this, let’s dive in a little about query strings and why they are awesome!
What Are Query Strings?
Think of query strings as handy messengers between different parts of your website. They’re bits of information added to the end of a URL, helping web pages communicate with each other. You’ll usually see them after a question mark in a web address, followed by key-value pairs separated by ampersands.
How Do They Work?
Imagine you’re filling out a form on a website. When you hit Submit, the form sends your data to the website’s server. But what if you want to pass that data to another form or page without making users fill it in again? That’s where query strings come in.
By adding query strings to the redirect URL after form submission, you’re essentially saying, Hey, here’s some info from the first form. Use it to pre-fill fields on the next one! It’s like leaving a trail of breadcrumbs for your website to follow.
Why Are They Beneficial?
- Saves Time: Users love convenience. Query strings save them the hassle of retyping information they’ve already provided.
- Accuracy: Have you ever made a typo filling out a form? With query strings, you’re pulling data directly from the first form, reducing the chance of errors.
- Higher Conversions: By streamlining the form-filling process, you’re making it easier for users to complete actions on your site, leading to higher conversion rates.
- Seamless Experience: It’s all about smooth sailing for your users. Auto-filling forms create a seamless journey through your website, enhancing user experience.
In a nutshell, query strings are like magic threads connecting different parts of your website. They pass information between forms, making life easier for both you and your users. With less typing and more automation, everyone wins!
With that being said, let’s dive right in!
Using the query strings
We’ll start by creating two separate forms. If you need any help in creating forms, please see this documentation.
1) Creating the homepage form
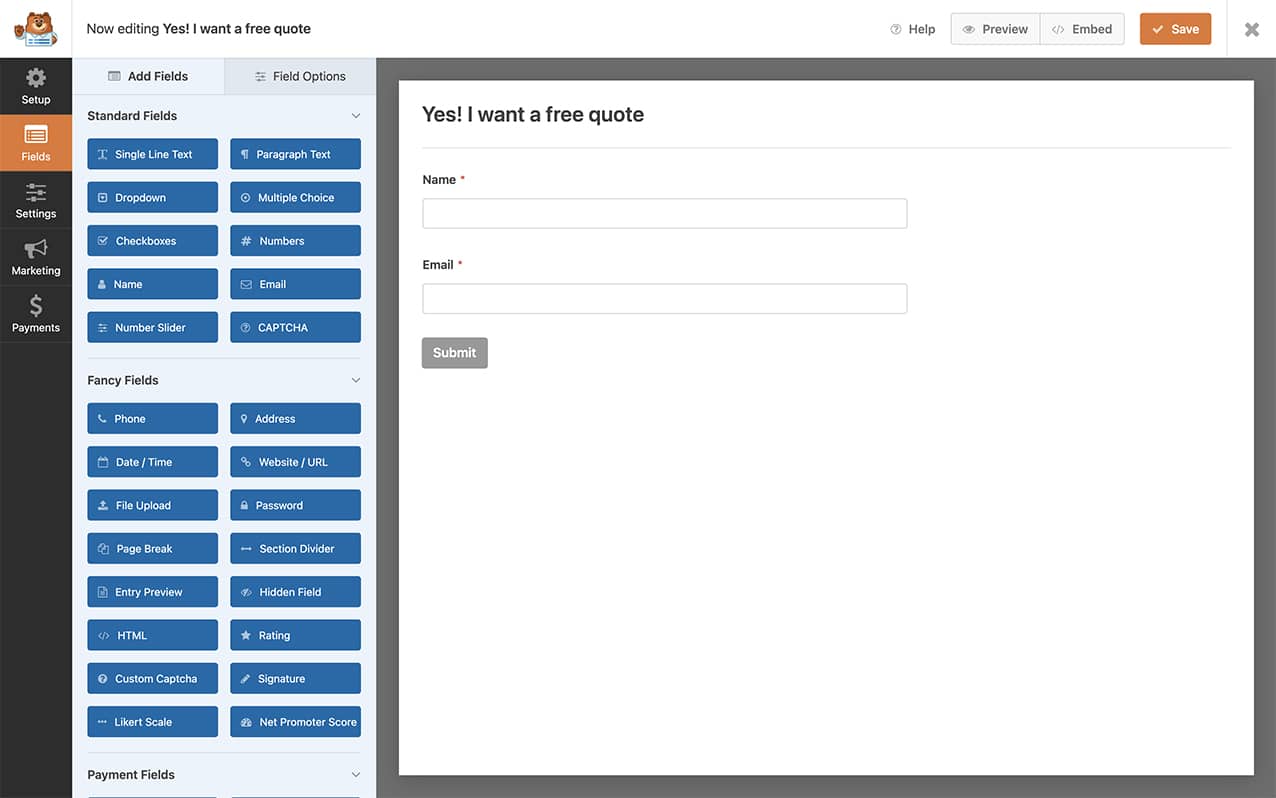
First, create your first form and add all of the fields that you need to this form.
Click Save for now, as we’ll revisit this form later.

2) Creating an additional form
In this step we’re going to create another form that will receive the pre-populated information. Add all the necessary fields, ensuring they align with the information you want to pre-fill.
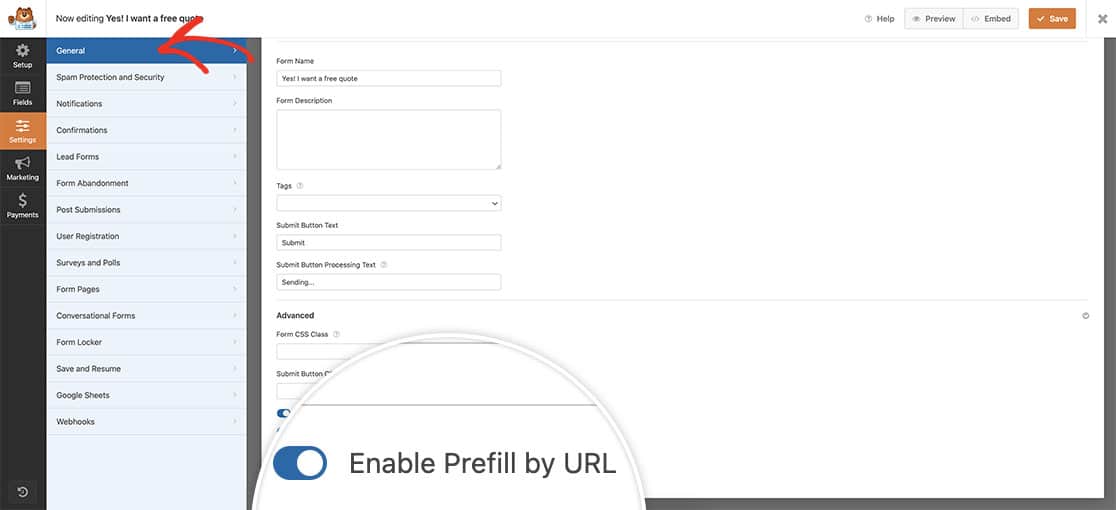
Next, navigate to the Settings » General tab and click the dropdown arrow to enter the Advanced options. Here, you can toggle the button to Enable Prefill By URL.

3) Configuring the redirect on form submission
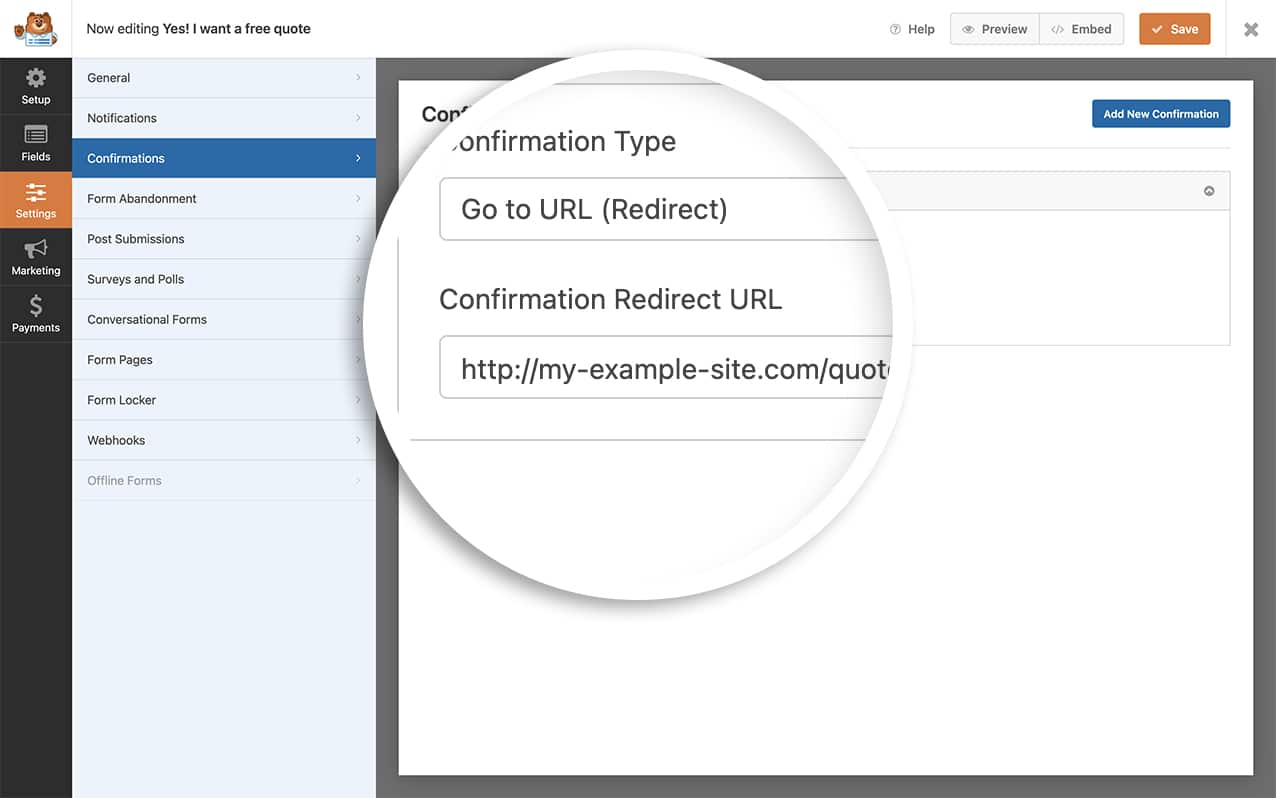
Now it’s time to pull it all together. Let’s edit the form we created in the first step, the homepage form. In the form builder, go to Settings » Confirmations.
Once here, change the Confirmation Type to Go To URL (Redirect) and in the Confirmation Redirect URL field, copy and paste this URL.
http://example.com/quote/?wpf1036_1={field_id="1"}&wpf1036_2={field_id="2"}
With that URL above, there will be some things you’ll need to change. Such as:
- Replace example.com with your own domain.
- Replace the word quote with your page name.
- Adjust
wpf1036_1andwpf1036_2to match the form ID of the receiving form and the respective field IDs. - Update
{field_id="1"}with the field ID from the homepage form for the Name field.

If you need help finding your specific field ID numbers, take a look at this tutorial.
Once you’ve added that to your Confirmation Redirect URL, click Save on the form.
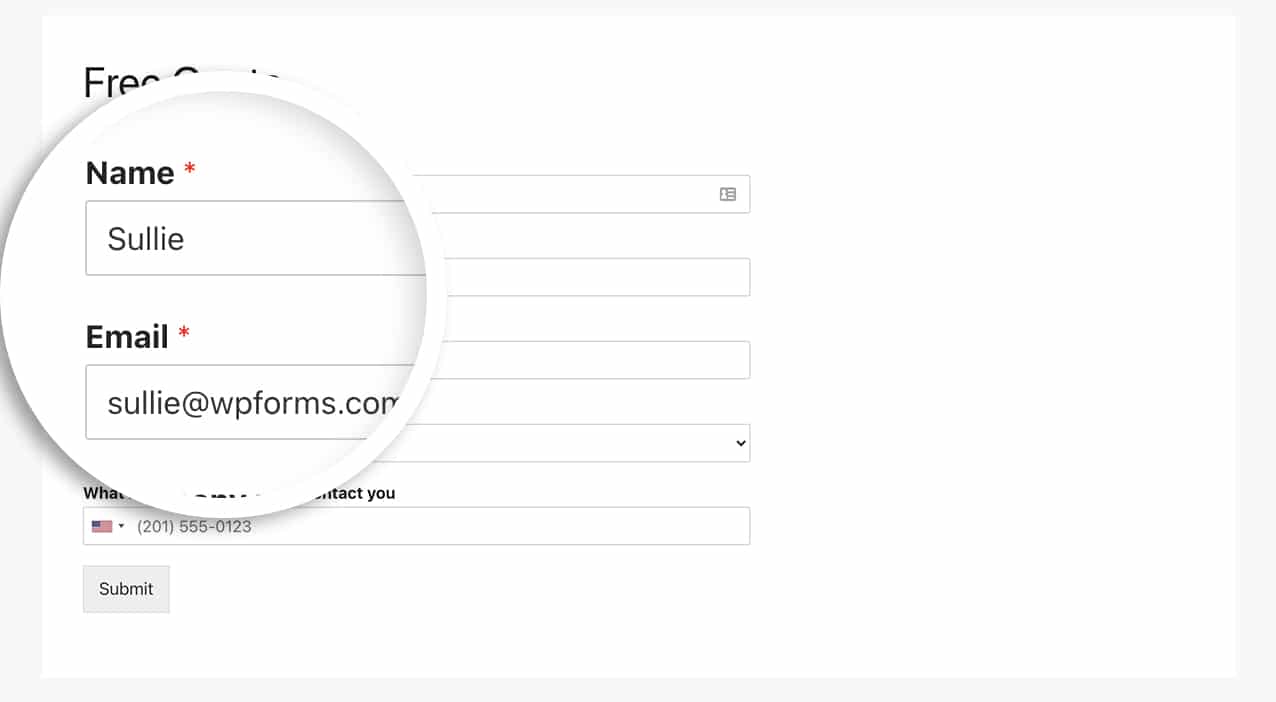
Now, when users see the homepage form, they can fill in their name and email address, and when they click the Submit button, the page will redirect to another form that will automatically pre-populate the Name and Email Address fields with the information collected from the form on your homepage.

And that’s all you need to use a query string to pre-populate your form fields. Would you like to see what other fields you can use this with? Take a look at our documentation on How to Enable Prefill By URL Setting in WPForms.
FAQ
Q: Why isn’t it pre-populating the next form?
A: If you notice that your fields aren’t pre-populating, please check that on your second form, you have enabled the setting.
Open the form builder of the second form and go to Settings » General tab. Then click the Advanced dropdown towards the bottom of your screen and toggle the button to Enable Prefill By URL.

Q: What do I do if I’m using a first and last name for my name field?
A: If you’re not using the Simple format for your name, you would just list out your name field in the URL like this.
http://my-example-site.com/quote/?wpf1036_1_first={field_id="1|first"}&wpf1036_1_last={field_id="1|last"}&wpf1036_2={field_id="2"}
The same can be said for the Address field. Your format for breaking down the address would appear like this.
&wpf1036_3_address1={field_id="3|address1"}&wpf1036_3_address2={field_id="3|address2"}&wpf1036_3_city={field_id="3|city"}&wpf1036_3_state={field_id="3|state"}&wpf1036_3_postal={field_id="3|postal"}
