AI Summary
Would you like to create a more compact form layout by displaying labels next to their fields instead of above them? While WPForms displays labels above fields by default, you can easily modify this layout using CSS to show labels and fields side by side.
This tutorial will show you how to achieve this professional horizontal layout.
Setting Up Your Form
First, you’ll need to create your form and add your desired fields. If you need help, please see this guide on creating your first form.
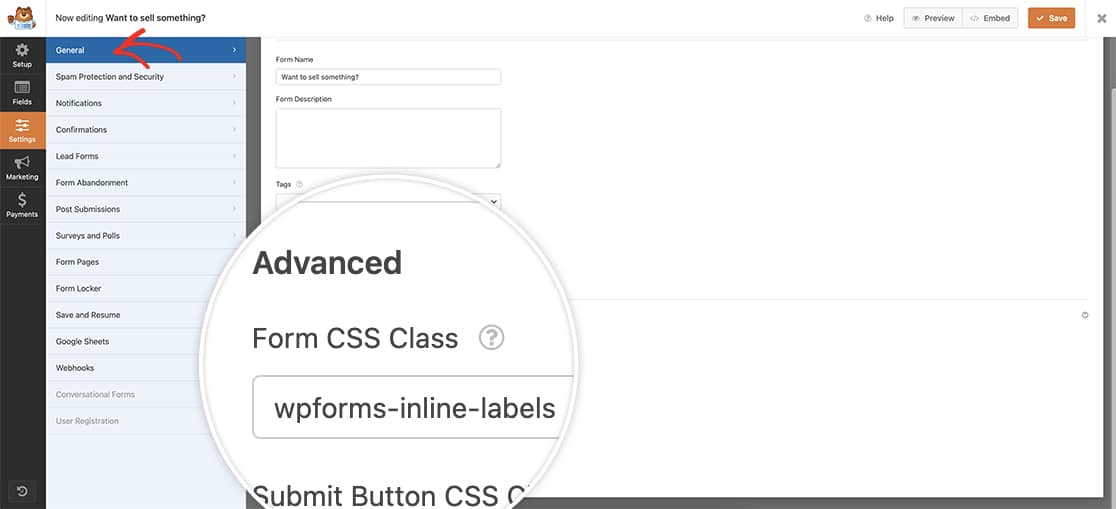
Once you’ve created your form, click on the Settings » General, click the Advanced arrow to open these options. Once there, inside the Form CSS Class, add the class wpforms-inline-labels.
This CSS class allows us to target specific forms rather than affecting all forms on your site.

Adding the Label Styling
Now it’s time to add the CSS code to your site. If you’re not sure how to add CSS to your site, check out this guide on adding custom CSS styles.
.wpforms-container.wpforms-inline-labels .wpforms-form .wpforms-field {
    display: grid;
    grid-template-columns: 225px auto;
    align-items: center;
}
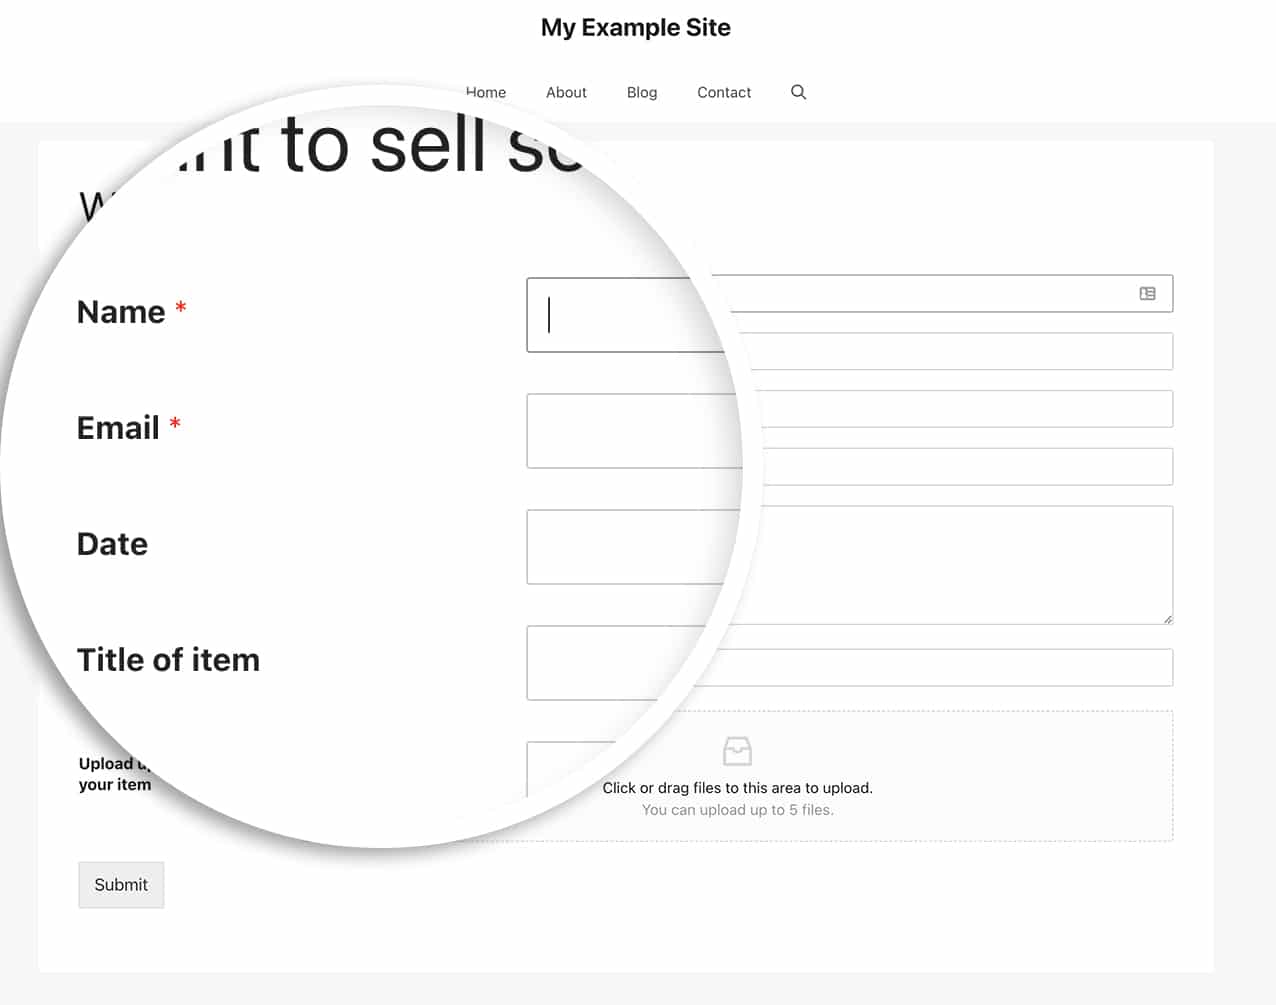
After adding this CSS, you’ll see your form labels now appear on the same line as your form fields.

And that’s it! Would you like to style the form labels to appear inside the form field? Check out our tutorial on How to Create a Form With Floating Labels.
Frequently Asked Questions
Q: What if I wanted to apply this to all of my forms?
A: If you’d like this for all of your forms, use this CSS instead and skip the step above when adding the Form CSS Class. This wouldn’t be necessary if you wanted to apply this for all forms.
.wpforms-container .wpforms-form .wpforms-field {
    display: grid;
    grid-template-columns: 225px auto;
    align-items: center;
}
That’s it! Next, would you like to explore more form styling options? Take a look at our guide on styling the submit button with CSS.
