AI Summary
Introduction
Would you like to store Checkbox values as arrays for your Post Submissions form on a custom meta field created from Advanced Custom Fields plugin? With a small PHP snippet, you can store these values in an array for your custom fields.
By default, when custom fields are mapped in the Post Submission addon, WPForms stores the data in the custom field in the same format WPForms stores the data in all forms.
An example being for Checkbox form fields (and anything with multiple values), WPForms store the values as a single string, with each value on a new line.
Red
Green
Blue
However, with a small PHP snippet, you can easily change this to have it stored as an array.
array( 'Red', 'Green', 'Blue')
Creating Your Custom Fields
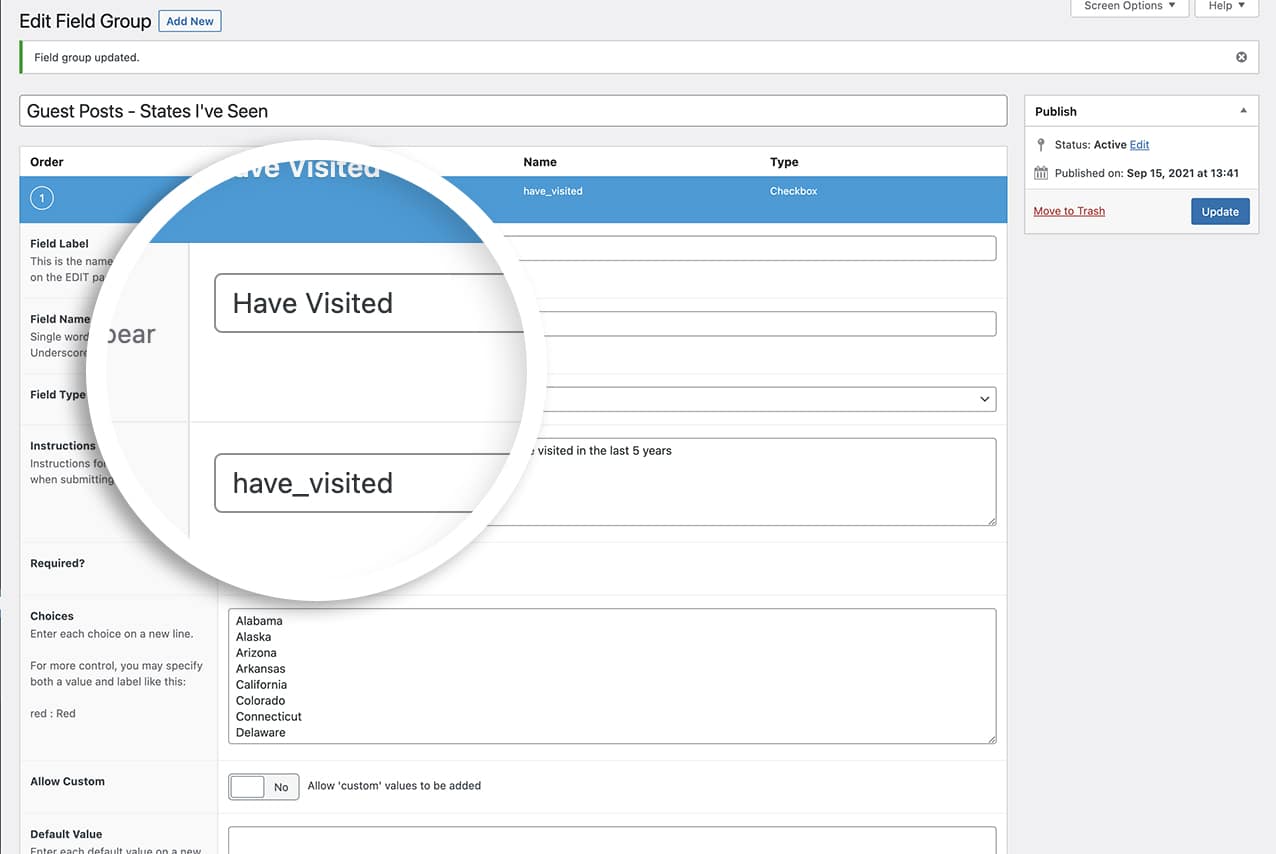
First, we’re going to create a custom field for our posts using the Advanced Custom Fields plugin.
If you need more information about setting up custom fields, please see this article.
Creating the Form
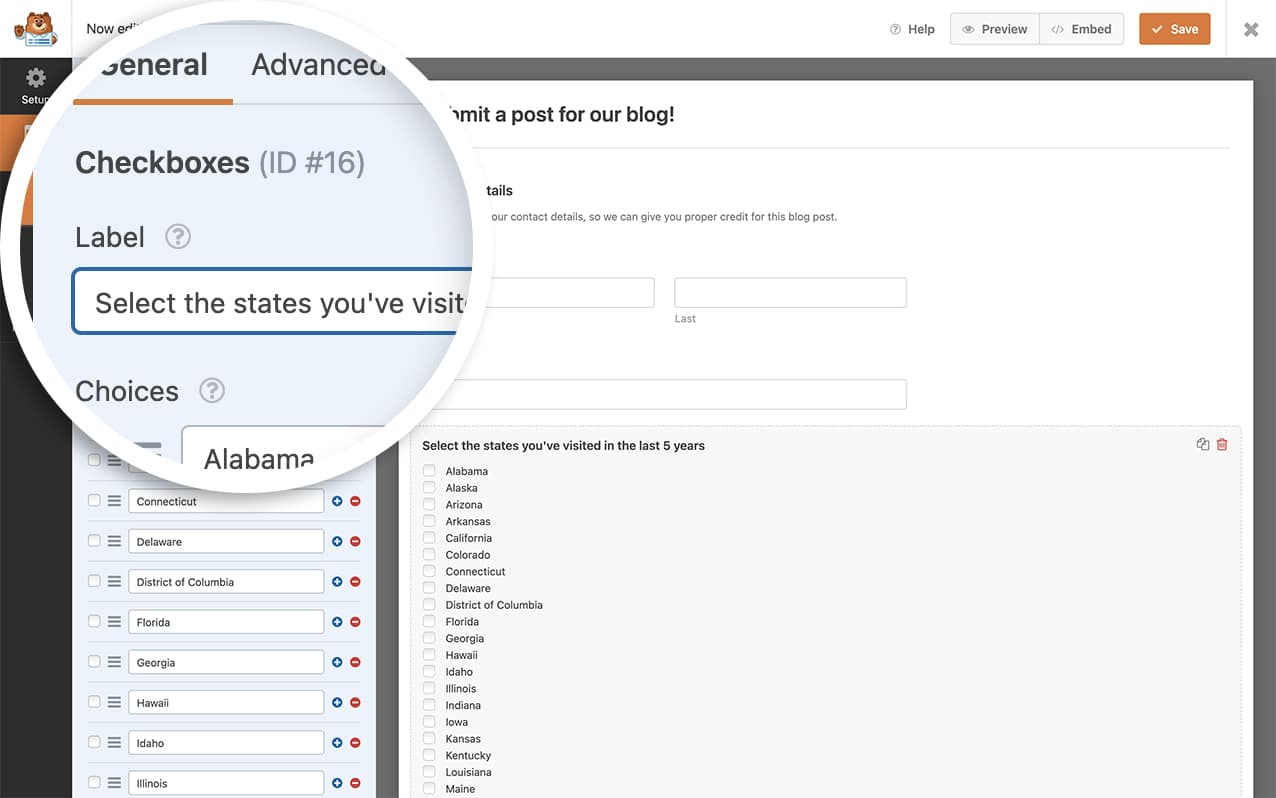
Now it’s time to create your post submission form and add a Checkbox field to the form.
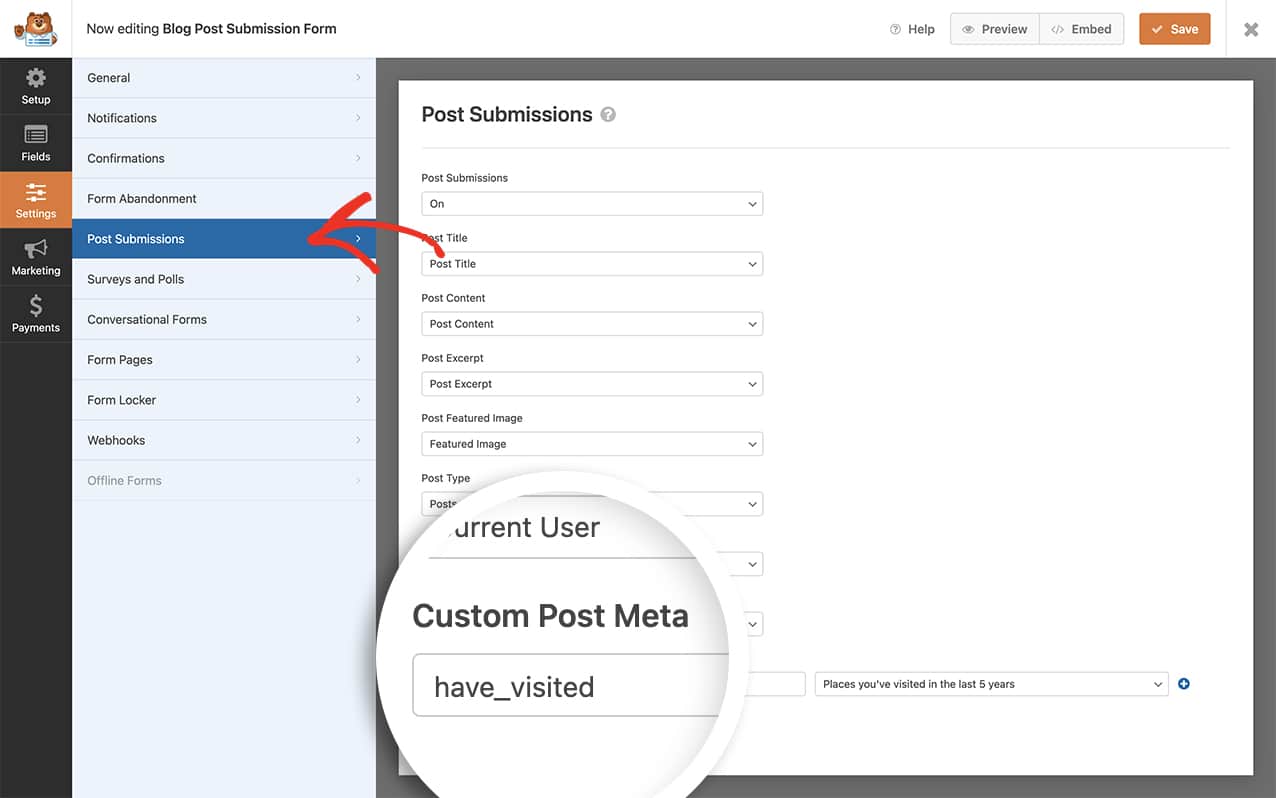
Once you’ve added the remaining fields to your form, go to the Settings tab and click Post Submissions to make sure your custom field is mapped correctly.
Adding the Snippet to Store Values as Arrays
To store the values as an array, you’ll just need to copy this snippet to your site.
If you need any help adding snippets to your site, please see this tutorial.
/**
 * Turn checkbox values into an array.
 *
 * @link https://wpforms.com/developers/how-to-store-checkbox-values-as-arrays-with-post-submissions/
 */

function wpf_dev_post_submission_process_meta( $field_value, $meta_key, $field_id, $fields, $form_data ) {

    // Only run on my form with ID = 443
    if ( absint( $form_data[ 'id' ] ) !== 443 ) {
            return;
    }

    // The $meta_key name is the same name that shows in the Field Name on Advanced Custom Fields
    if ( $meta_key === 'have_visited' ) {

            $field_value = explode( "\n", $field_value );

        }

    return $field_value;
}
add_filter( 'wpforms_post_submissions_process_meta', 'wpf_dev_post_submission_process_meta', 10, 5 );
Note: It’s important to note here that in the entries screen of WPForms and in the meta field while editing the post, you’ll still see a checkbox. It’s only when you echo out the values that it will show as an array (on a single line) and we’ll show you that in the next step. Also remember to update the form ID from 443 to match your own form ID. If you need help in where to find your form ID, please check out this helpful documentation.
Displaying the Values
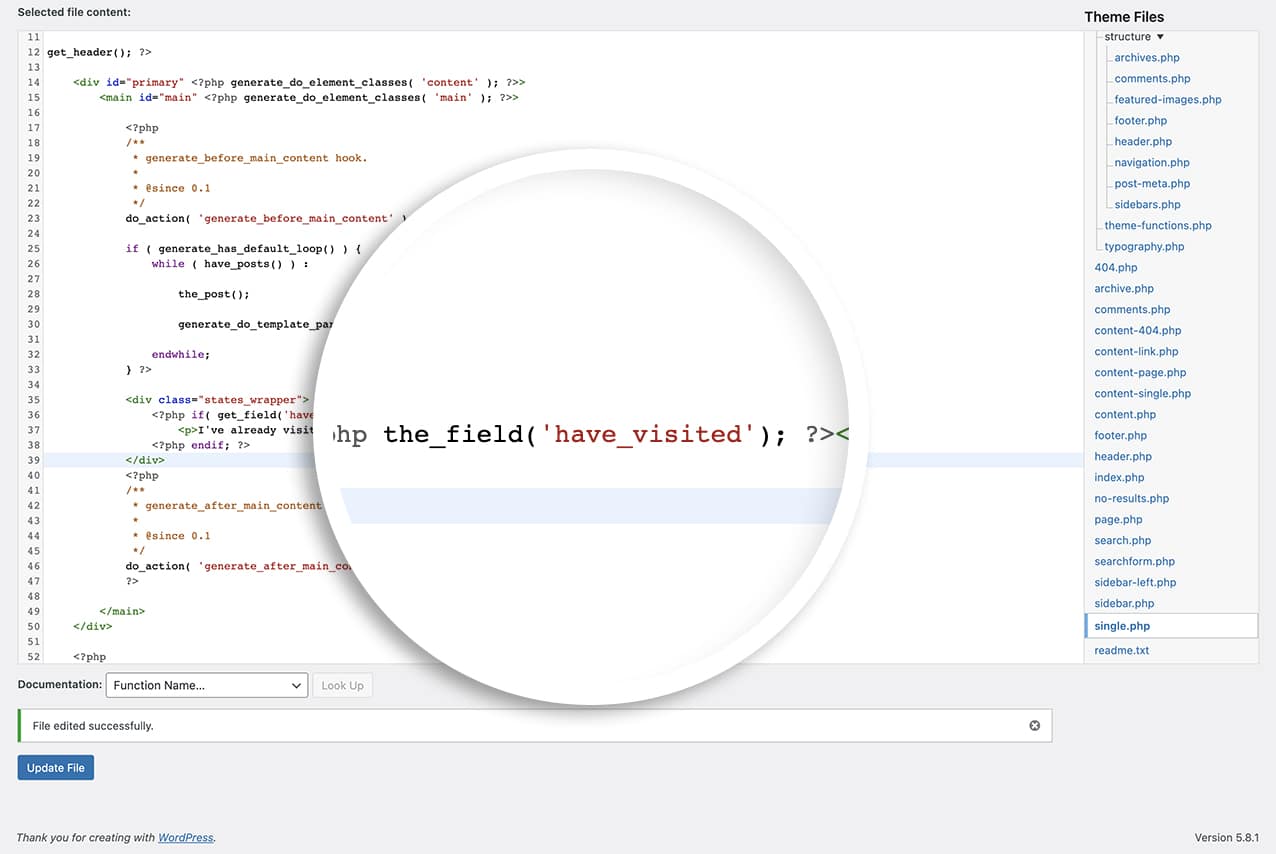
Now it’s time to display those values on your single post template. WPForms never recommends making live changes to your theme so it’s best to use a child theme or a custom function to echo this out on your template.
For more information on creating a child theme, have a look at this excellent article from our friends at WPBeginner.
<div class="states_wrapper">
    <?php if( get_field('have_visited') ): ?>
        <p>I've already visited these states in the last 5 years: <?php the_field('have_visited'); ?></p>
    <?php endif; ?>
</div>
For the purpose of this tutorial, we’ve created our child theme and on single.php we added this line of code to first make sure values are there and if they are to display them.
When your post is displayed, you’ll see the states are listed in a paragraph format rather than a line-by-line display.

And that’s it! You’ve successfully changed how these values are stored in your WordPress database. Would you like to also use images for your Checkbox form field labels instead of text? Take a look at our article on How to Apply Images to Checkbox Labels Using CSS.
Related
Filter Reference: wpforms_post_submissions_process_meta
FAQ
A: Can I use this in other addons as well?
A: Absolutely! For example, if you take the same scenario as mentioned in this tutorial, you could add this to the User Registration addon so it’s automatically saved to the user profile page while using ACF to add further information to the WordPress User Profile.
In User Registration addon version 2.8.0 and newer, the filter for storing custom meta values is:
wpforms_user_registration_process_base_custom_meta_value
Note: In older versions (before User Registration 2.8.0), this filter was named:
wpforms_user_registration_process_registration_custom_meta_value
If you’re maintaining a legacy site, you can keep both hooks for backward compatibility.
/**
 * Turn checkbox values into an array with the User Registration addon.
 *
 * @link https://wpforms.com/developers/how-to-store-checkbox-values-as-arrays-with-post-submissions/
 */
function wpf_dev_user_submission_process_meta( $field_value, $meta_key = '', $field_id = 0, $field = array(), $form_data = array() ) {

	// The $meta_key name is the same name that shows in the Field Name on Advanced Custom Fields.
	if ( $meta_key === 'have_visited' ) {
		$field_value = explode( "\n", $field_value );
	}

	return $field_value;
}

// User Registration addon 2.8.0+.
add_filter( 'wpforms_user_registration_process_base_custom_meta_value', 'wpf_dev_user_submission_process_meta', 10, 5 );

// Backward compatibility for older versions (before 2.8.0).
add_filter( 'wpforms_user_registration_process_registration_custom_meta_value', 'wpf_dev_user_submission_process_meta', 10, 5 );
That’s it! Now your submitted checkbox values will be saved as an array when WPForms maps them to your custom post meta field.
Would you like to learn more about setting up Post Submissions, including mapping Custom Post Meta fields, in our Post Submissions addon guide.
