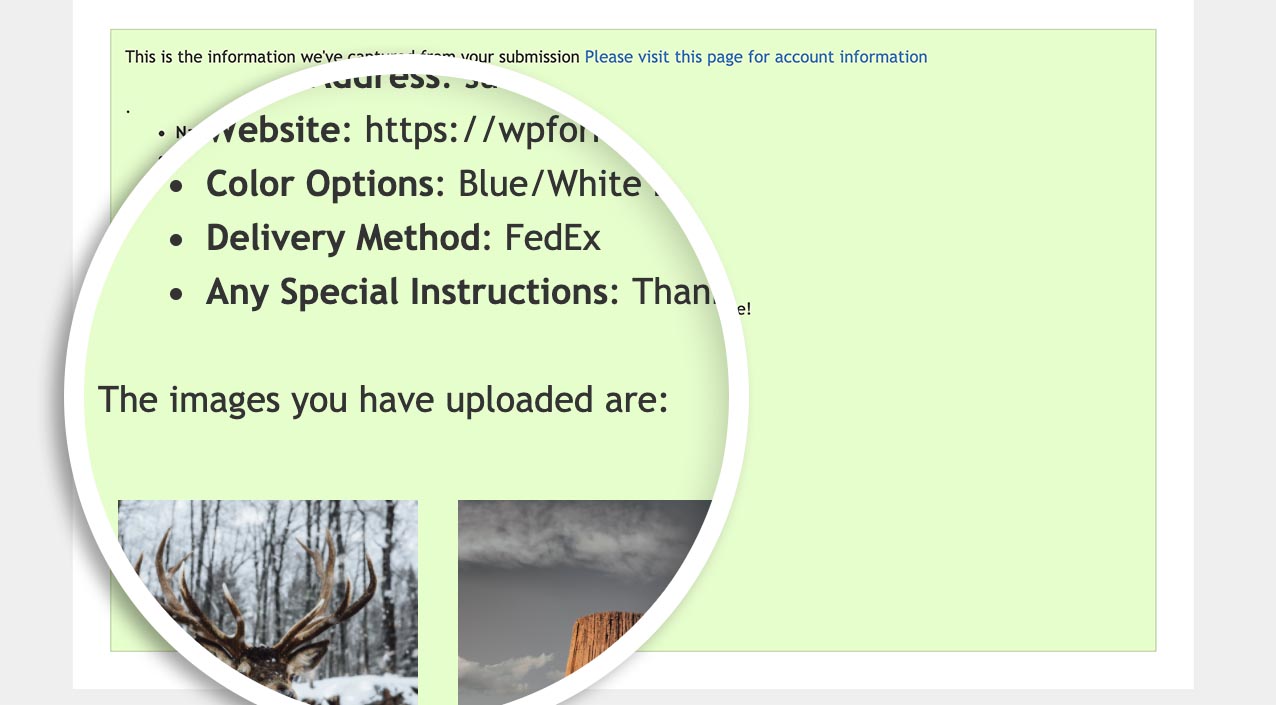
Would you like to show all of your completed form fields inside your confirmation message? WPForms includes an Entry Preview field that lets users view their entry before it’s submitted. However, the Entry Preview does not currently display any images uploaded in the submission.
In this tutorial, we’ll show you how to display all fields in your confirmation message using a custom PHP snippet.
Note: WPForms version 1.6.9 and higher includes the Entry Preview field. If you’d like to use this field instead, be sure to check our tutorial on using the Entry Preview field to learn how.
Creating Your Form
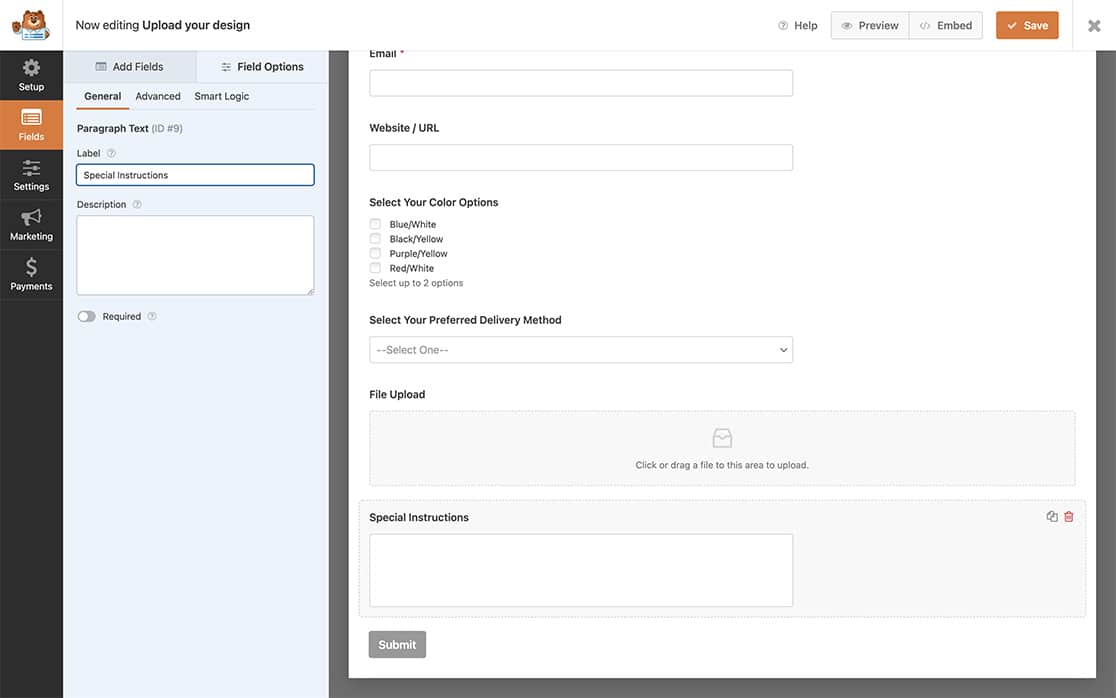
First, create a new form or edit an existing one to access the form builder. In our form, we’ve added the File Upload field, which can accept up to three images.

Adding the PHP Code to Your Site
Now, it’s time to add our code snippet. For help with how and where to add your code snippets to your site, please review this tutorial.
/**
 * Show all fields in the confirmation message
 *
 * @link https://wpforms.com/developers/how-to-show-all-fields-in-your-confirmation-message/
 */

function wpf_dev_frontend_confirmation_message( $message, $form_data, $fields, $entry_id ) {

    // Only run on my form with ID = 1107
    if ( absint( $form_data[ 'id' ] ) !== 1107 ) {
        return $message;
    }

    // Name form field - ID #1
    $name = $fields[ '1' ][ 'value' ];

    // Address form field - ID #2
    $address = $fields[ '2' ][ 'value' ];

    // Phone form field - ID #3
    $phone = $fields[ '3' ][ 'value' ];

    // Email form field - ID #4
    $email = $fields[ '4' ][ 'value' ];

    // Website URL form field - ID #5
    $website = $fields[ '5' ][ 'value' ];

    // Color Options form field - ID #6
    $color_options = $fields[ '6' ][ 'value' ];

    // Delivery Method form field - ID #7
    $delivery_method = $fields[ '7' ][ 'value' ];

    // Special Instructions form field - ID #9
    $special_instructions = $fields[ '9' ][ 'value' ];

    // Modern Upload form field - ID #8
    $field_id = 8;
          $images = '';
          if ( is_array( $fields[ $field_id ][ 'value_raw' ] ) ) {
             foreach ( $fields[ $field_id ][ 'value_raw' ] as $value_raw ) {
                $images .= '<div class="image_container"><img src="' . $value_raw[ 'value' ] . '" class="small"></div>';
             }
          }


    $message = "<p>This is the information we've captured from your submission <a href=\"http://google.com\" target=\"_blank\">Please visit this page for account information</a></p>.
    <ul>
    <li><strong>Name</strong>: $name </li>
    <li><strong>Address</strong>: $address </li>
    <li><strong>Phone Number</strong>: $phone </li>
    <li><strong>Email Address</strong>: $email </li>
    <li><strong>Website</strong>: $website </li>
    <li><strong>Color Options</strong>: $color_options </li>
    <li><strong>Delivery Method</strong>: $delivery_method </li>
    <li><strong>Any Special Instructions</strong>: $special_instructions </li>
    </ul>
    <p>The images you have uploaded are:";

    return $message . '<br>' . $images . '</p>';

}
add_filter( 'wpforms_frontend_confirmation_message', 'wpf_dev_frontend_confirmation_message', 10, 4 );
In the code above, we’re targeting the form ID 1107, and then we’re going to map every field ID number to a variable that we create. For example, the Name field on our form is field ID 1. So, we created a variable called $name and used the equals (=) sign to set that value to that particular variable.
You just need to make sure that you’ve created variable names that make sense to you and map them to your field IDs.
If you need help finding your form or field ID, please review this tutorial.
Another example is that we’re using the Modern File Upload field. Since we know that users can upload more than one image depending on our settings, we want to make sure we loop through all the images uploaded to display them in the confirmation message.
So we created a PHP if statement to run through each image that was uploaded in order to display each image inside the confirmation message.
Note: To learn more about PHP if statements, see the official PHP.net manual on structuring if statements.
Styling the Entry Preview With Custom CSS (optional)
This step is completely optional, but because we’ve added some HTML to our images inside the if statement. We’ll add some styling to make sure the images don’t look too large in our confirmation message but still display neatly.
To add custom CSS to your site, please review this tutorial.
.image_container {
    height: 250px;
    max-width: 25%;
    display: inline-block;
}
.image_container img {
    float: left;
    display: inline-block;
}
.small {
	max-width:150px;
	padding: 10px;
}
Showing All the Fields in the Confirmation Message
It’s now time to pull everything together. After creating your form and adding your custom snippet, it’s time to see what your code snippet has added for you. Test your form by submitting some entries to see how all the fields display in your confirmation.

That’s it! You’ve successfully created a way to show all fields in the confirmation message!
Next, would you like to remove the styling of the confirmation message, such as removing the background color? Take a look at our article on customizing confirmation message box styling.
Related
Filter Reference: wpforms_frontend_confirmation_message
