Introduction
Do you want to transmit the entry ID through Webhooks addon? The entry ID, which is assigned once the form is submitted, plays a vital role in linking your WPForms entries with an external CRM for cross-referencing. In this tutorial, we’ll guide you through the process using a simple PHP snippet.
Creating the form
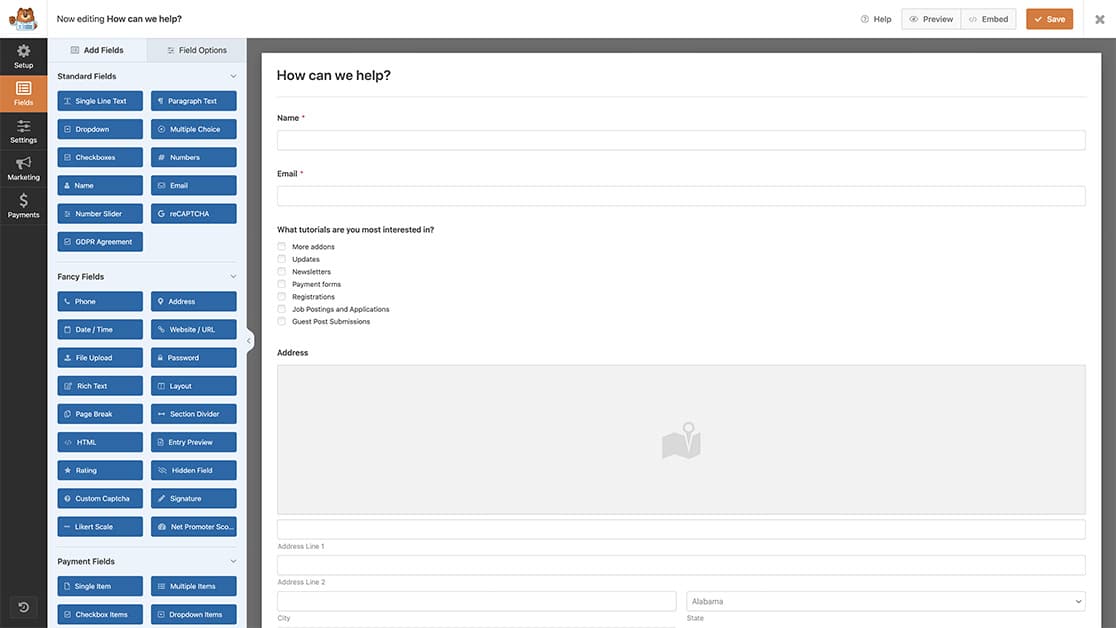
Let’s kick things off by creating a form and adding the necessary fields. If you’re unsure how to create a form, you can refer to this documentation for guidance.

Setting up the webhook
In order to send the entry ID through webhooks, we need to start by enabling the Webhooks addon. If you need assistance with setting up the Webhooks addon, please check out this article.
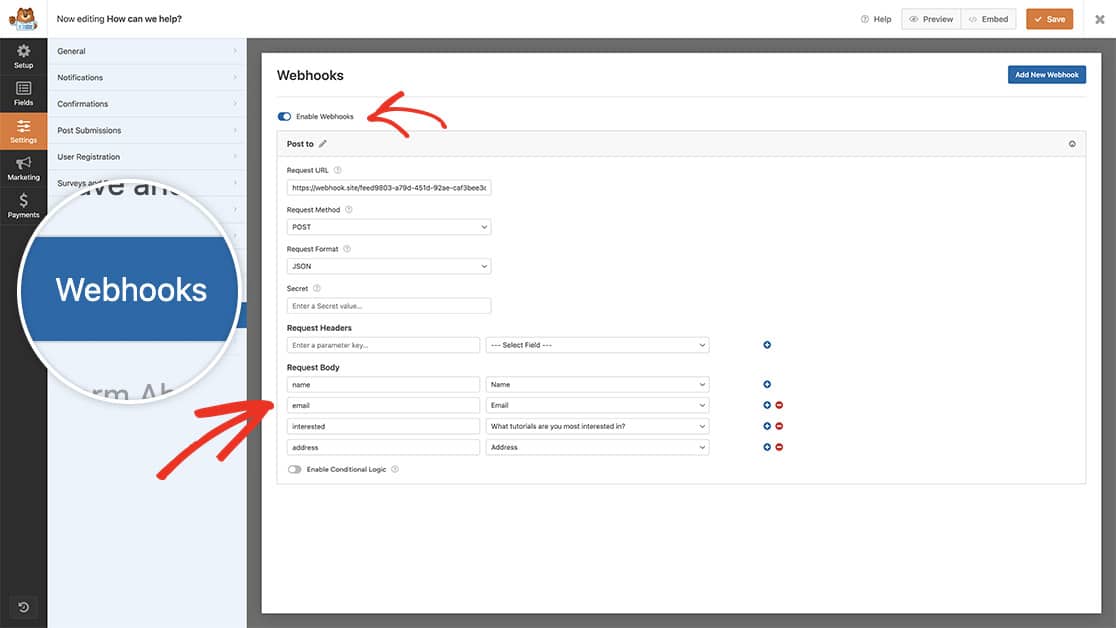
To activate the addon, go to the form builder, click on Settings, and then click Enable Webhooks. You’ll be able to enter your webhook URL and map the form fields to the Request Body, specifying the information you want to include in the webhook.

For the purpose of this tutorial, we’re using the Webhook.site for testing that our information is being sent through our webhook. When you’re setting up your webhook, you would use the webhook URL to the external source you’re posting to and assign your variables. It’s important to remember that each external source that accepts incoming webhooks may have different ways of setting up variables to send the information. You’ll need to research this external source to make sure you don’t need to manually create your variables inside that source to make sure the variable names match what you’re assigning in the form builder.
Adding the snippet
Next, it’s time to copy the snippet to our site.
For any assistance on how and where to add snippets to your site, please see this tutorial.
/**
 * Send the entry id through webhooks request.
 *
 * @link https://wpforms.com/developers/how-to-send-the-entry-id-through-webhooks/
 */

function wpf_dev_webhooks_process_delivery_request_options( $options, $webhook_data, $fields, $form_data, $entry_id ) {

	// Optional, you can limit to specific forms. Below, we restrict output to
    // form #1899.
    if ( absint( $form_data[ 'id' ] ) !== 1899 ) {
        return $options;
    }

	$body = ! is_array( $options[ 'body' ] ) ? json_decode( $options[ 'body' ], true ) : $options[ 'body' ];

	// Create a new entry and assign the entry_id
	$body[ 'entry_id' ] = $entry_id;

	// Format request data.
	if ( !empty( $options[ 'method' ] ) && $options[ 'method' ] !== 'GET' && $webhook_data[ 'format' ] === 'json' ) {

		// Encode request body.
		$options[ 'body' ] = wp_json_encode( $body );
	}

	return $options;
}

add_filter( 'wpforms_webhooks_process_delivery_request_options', 'wpf_dev_webhooks_process_delivery_request_options', 100, 5);
With this snippet, we’re going to add an additional variable to the webhook called entry_id and assign this ID number that is created from WPForms when the form is submitted but only for the form ID 1899, you’ll need to update this form ID number to match your own ID. If you’re not sure where to find your form ID number, please review this tutorial.
Now when you see the information sent from the webhook, you’ll notice not only your mapped field names are there, but also the entry ID as well.

And that’s it! You can now pass the entry ID through your webhook. Would you like to also send through the geolocation information in the webhook? Check out our article on How to Send Geolocation Through Webhooks.
