AI Summary
Would you like to automatically populate form fields when users click links on your page? Using anchor links and JavaScript, you can fill form fields with predefined text when visitors click specific links.
This guide will show you how to implement this dynamic form population.
Understanding the Concept
When a user clicks an anchor link (like #daily or #weekly), we’ll capture that interaction and automatically populate a form field with corresponding text. This is useful for:
- Service selection forms
- Product inquiry forms
- Support request forms
- Contact forms with predefined subjects
Setting Up Your Form
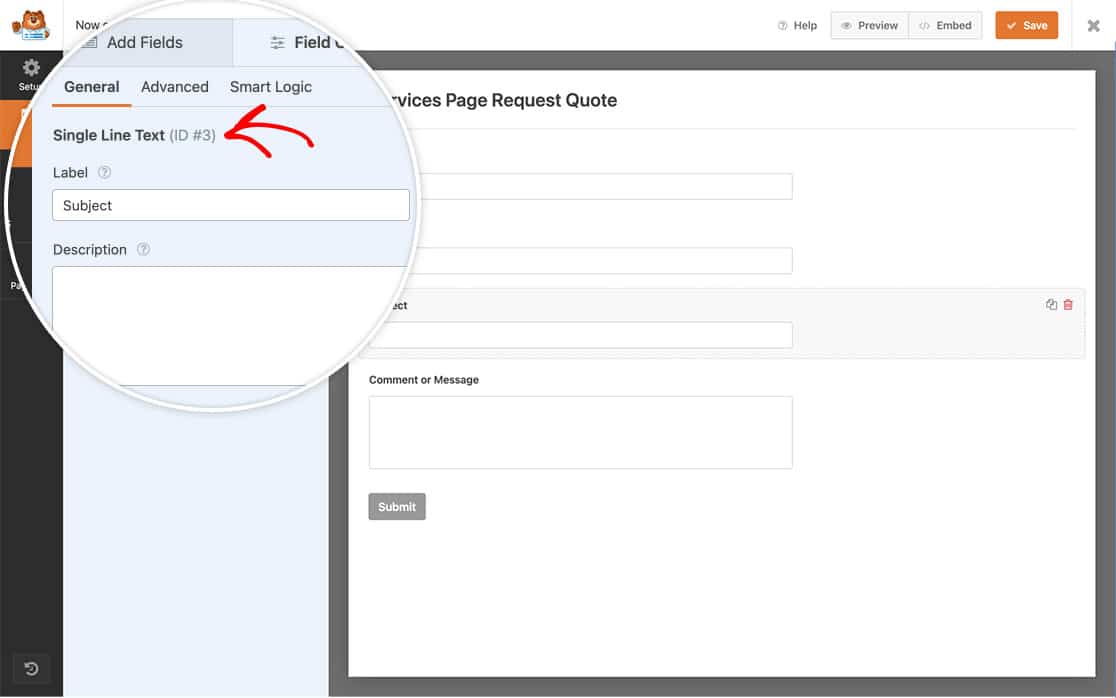
First, let’s create our form. It’s a simple one with fields for Name, Email Address, Subject (Single Line Text), and Message (Paragraph Text).
If you need guidance on making your form, check out our guide on creating your first form.
Next, note down the ID numbers of your form and fields. You’ll need them for the code snippet. If you’re not sure how to find these IDs, review out guide on finding form and field IDs.
Setting Up the Form Notifications
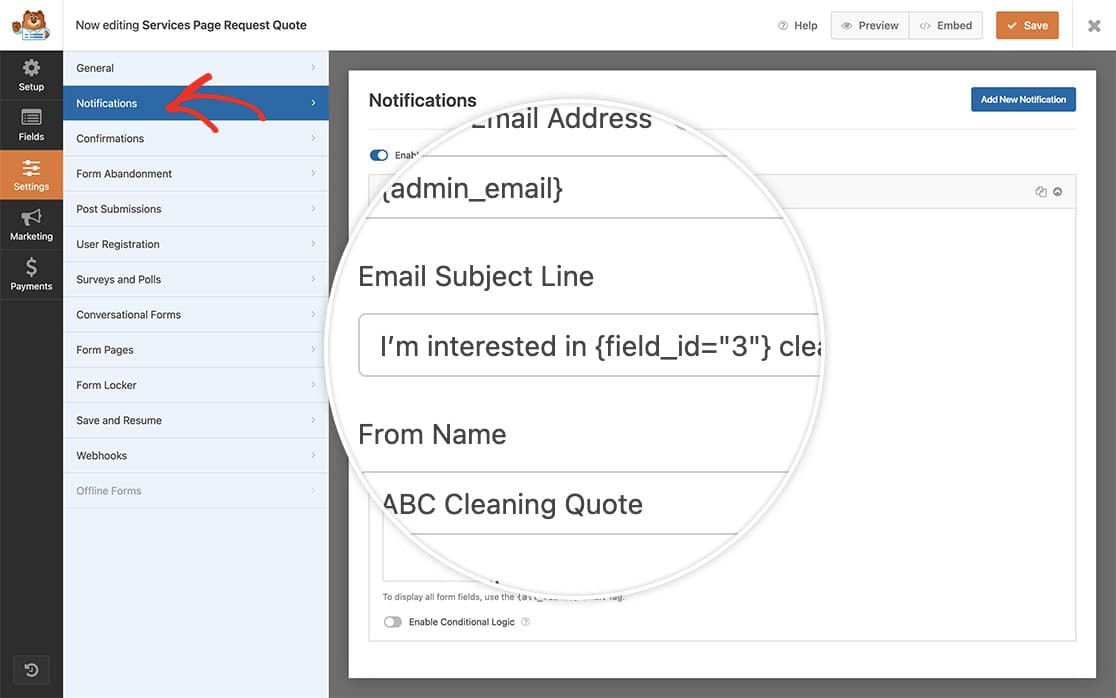
In this step, we’ll make our Subject field automatically populate the Subject field in the Notifications tab of the form builder.
Simply go to the Notifications tab, and in the Subject field, type the text you want along with the field ID, just like you use Smart Tags elsewhere in the form builder.
In our example, our field ID is 3, so our Subject line will be: “I’m interested in {field_id=”3″} cleaning for my company”.
Creating Anchor Links
Next, let’s create a new page on our site with anchor links and the form we just made.
If you need help understanding anchor links or creating them, check out this tutorial from WPBeginner.
To create anchor links, simply type up your page content and use Headings in WordPress. In the Block Editor, select a Heading, go to the Advanced tab, and add the text you want to use for the anchor link. WordPress recommends keeping it short, with no spaces, or using hyphens for multiple words. For example, “about-us” for an About Us section.
For our tutorial, we’ll have sections for Daily, Weekly, Monthly, and Quarterly.
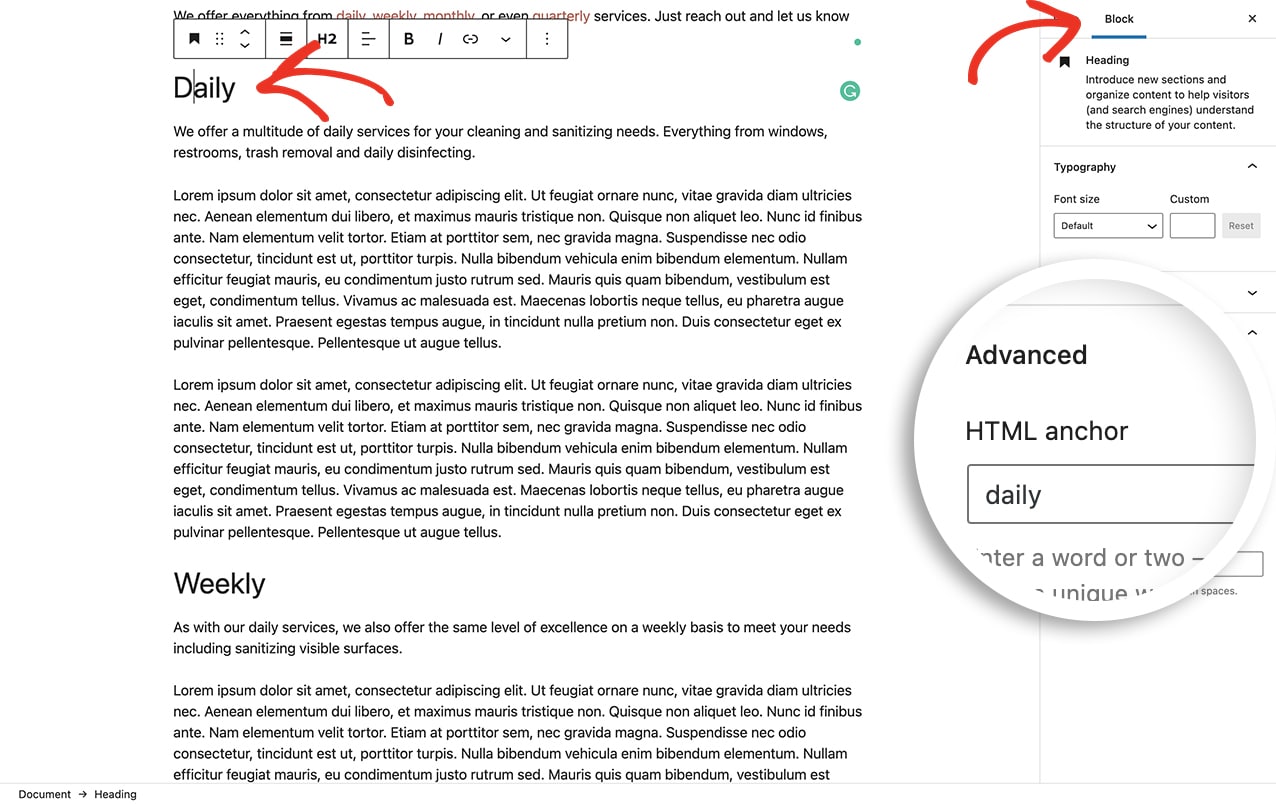
For each heading, we’ll insert a one-word anchor link. For example, the Daily section will have the anchor link daily.
Once we’ve added the anchor links, we’ll select text in the content that will jump to each section when clicked and populate our form’s Subject field.
To link text to the anchor links, we’ll add a link as usual in WordPress. Select the text, click the chain icon, and instead of a full URL, add a pound sign and then the anchor link word. For example, #daily.
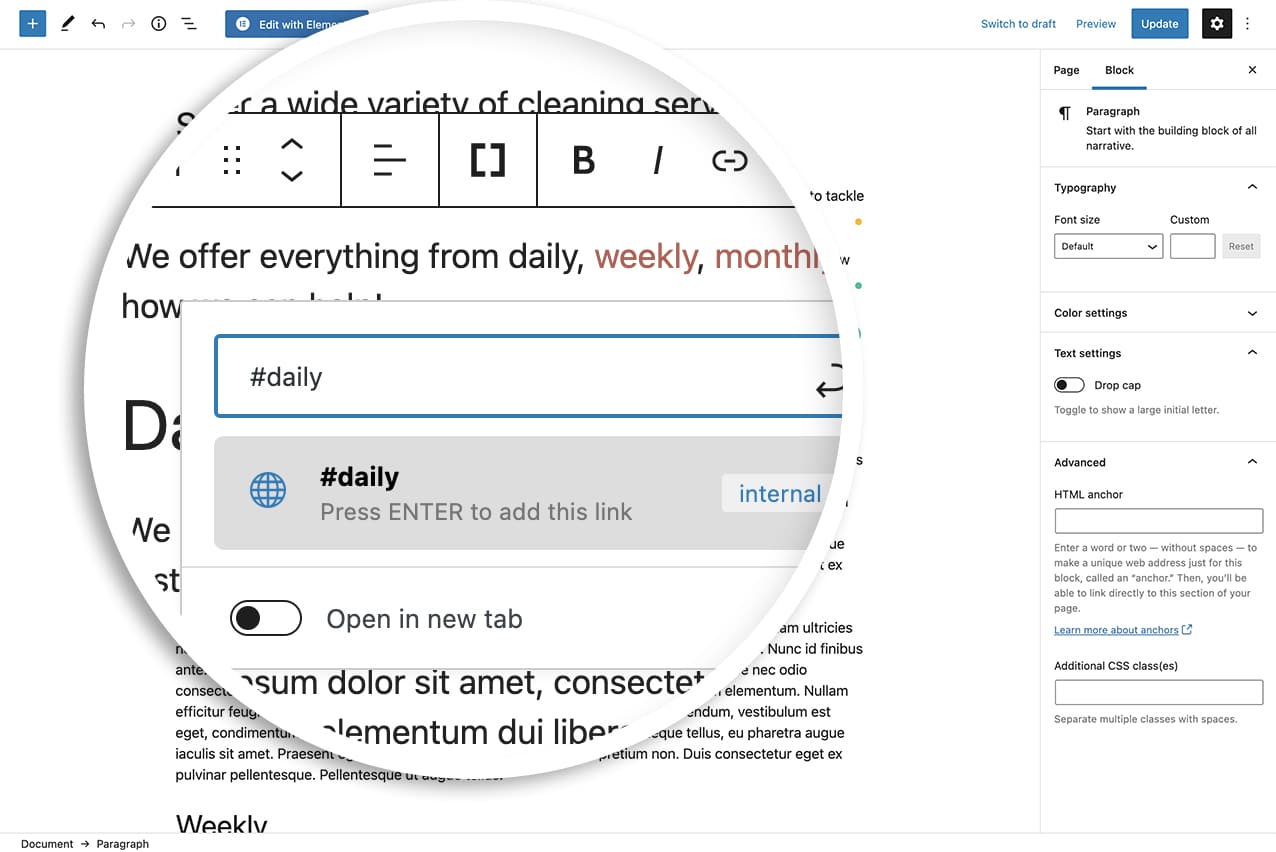
WordPress will automatically assign each link a unique data-id based on the link name. So #daily will have a data-id of #daily.
We’ll do the same for the #weekly, #monthly, and #quarterly sections of our page.
Populating the Form With the Anchor Link Text
Now it’s time to add the snippet that will pull this all together. If you need any help in adding snippets to your site, please see this tutorial.
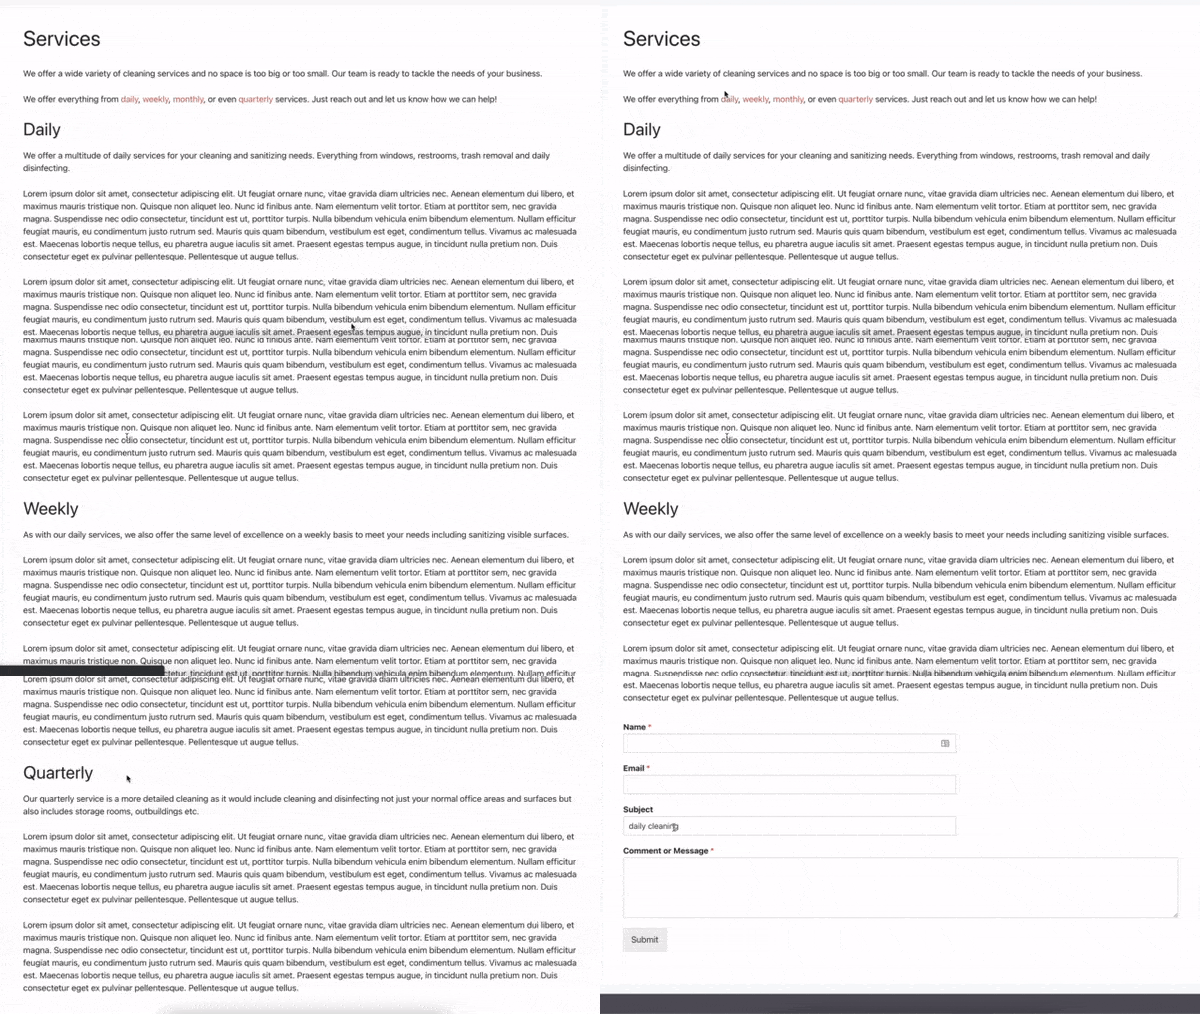
And that’s it! Did you know you can do something very similar just inside the form itself? Take a look at our tutorial on How to Add a Table of Contents for Long Forms.
Reference Action
Frequently Asked Questions
Q: Can I also use a CSS classname or ID?
A: Absolutely! If you would rather trigger the JavaScript by a CSS class or ID, you would just change the script. For example, if your CSS class names were daily-link, weekly-link, monthly-link, and quarterly-link, the snippet would be this.
/**
 * Populate field from anchor link.
 *
 * @link https://wpforms.com/developers/how-to-populate-a-form-field-from-an-anchor-link/
 */

function wpf_dev_autofill_field() {
?>
<script type="text/javascript">
    jQuery(document).ready(function(){
        jQuery( 'a.daily-link' ).click(function(){
            document.getElementById( 'wpforms-378-field_3' ).value = "daily cleaning";
        });
        jQuery( 'a.weekly-link' ).click(function(){
            document.getElementById( 'wpforms-378-field_3' ).value = "weekly cleaning";
        });
        jQuery( 'a.monthly-link' ).click(function(){
            document.getElementById( 'wpforms-378-field_3' ).value = "monthly cleaning";
        });
        jQuery( 'a.quarterly-link' ).click(function(){
            document.getElementById( 'wpforms-378-field_3' ).value = "quarterly cleaning";
        });
    });
</script>

<?php
}
add_action( 'wpforms_wp_footer_end', 'wpf_dev_autofill_field', 10 );
If you were using an ID instead of a class, just replace the period with a pound sign in each of the links. Example: a#daily-link.
And that’s it. Next, would you like to create some custom Smart Tags? Take a look at our tutorial on creating custom smart tags for more details.
