Are you utilizing the Post Submission addon and interested in incorporating the post URL into your confirmation message? Achieving this is straightforward with a PHP snippet and WPForms Smart Tags, and we’ll guide you through the process step by step.
Smart Tags serve as quick reference links usable within confirmation messages. WPForms provides a plethora of pre-built tags for your convenience. For more details on the available options, please refer to this documentation.
But did you know that you can also craft your own Smart Tags for use in WPForms? In this tutorial, we’ll demonstrate how to create three new custom Smart Tags:
- Submitted Post Title
- Submitted Post Type ID Number
- Submitted Post URL
These tags will prove invaluable within our confirmation message, enabling us to furnish users who’ve just submitted the form with a direct link to the post.
Creating your form
If you need help creating a form using the Post Submission addon, please review this tutorial.
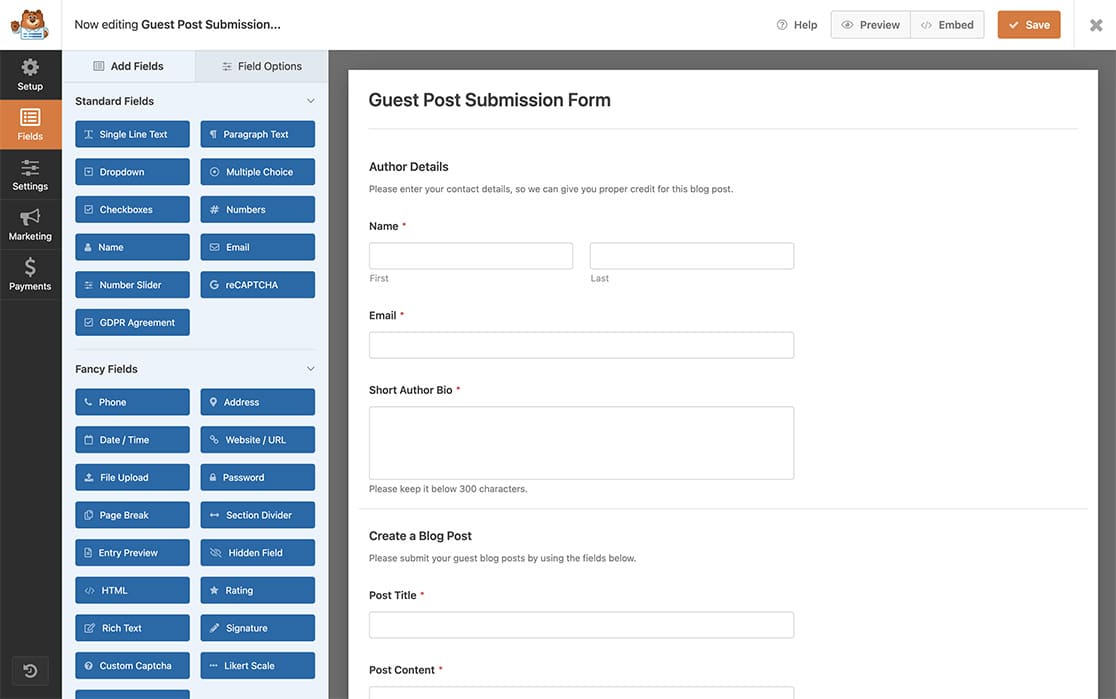
For the purpose of this tutorial, we’ve already created our form with the default fields that come with the Blog Post Submission Form template.

Enabling post submission
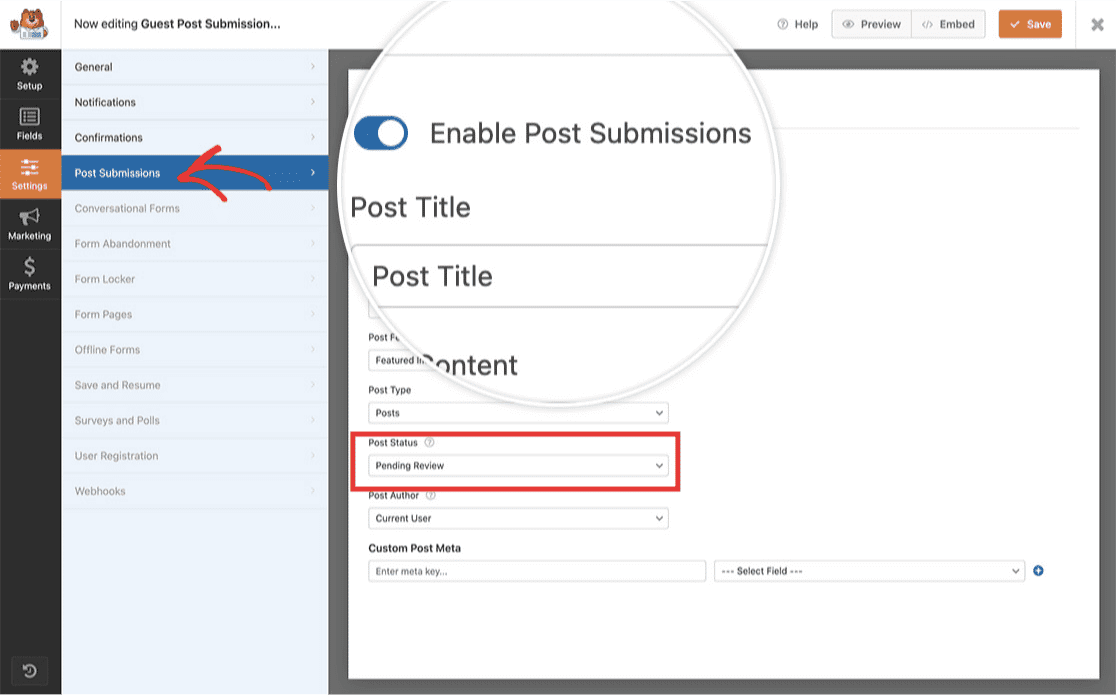
Next, we’ll need to enable post submissions. To do this, from within the form builder, click on the Settings tab, select Post Submissions and toggle the switch to Enable Post Submissions.

Please remember that if the users submitting the posts are not logged into your WordPress site and you have the status of your posts (after submission) set to Draft or Pending Review, when they try to view the post URL from the confirmation message they will get a 404 page as you can only view draft posts while logged into WordPress.
Adding the post URL to the confirmation message
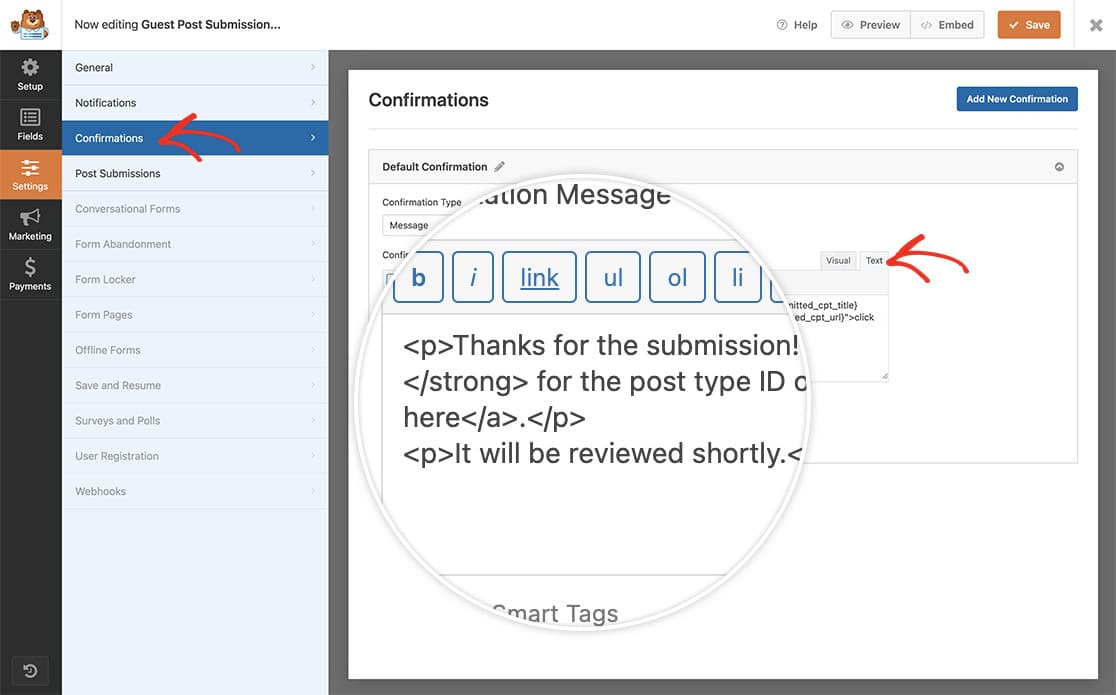
Once your form settings are complete, click the Confirmations tab.
Since we don’t just want to display the post URL but actually make it a clickable link, click the Text tab on the Editor window and you can add your message.

We’re going to place our text and HTML for our message and post URL by typing the following:
<p>Thanks for the submission!
If you'd like to see a preview of your post titled
<strong>{submitted_cpt_title}</strong> for the post type ID of
<strong>{submitted_cpt_id}</strong>, just
<a href="{submitted_cpt_url}">click here</a>.</p>

<p>It will be reviewed shortly.</p>
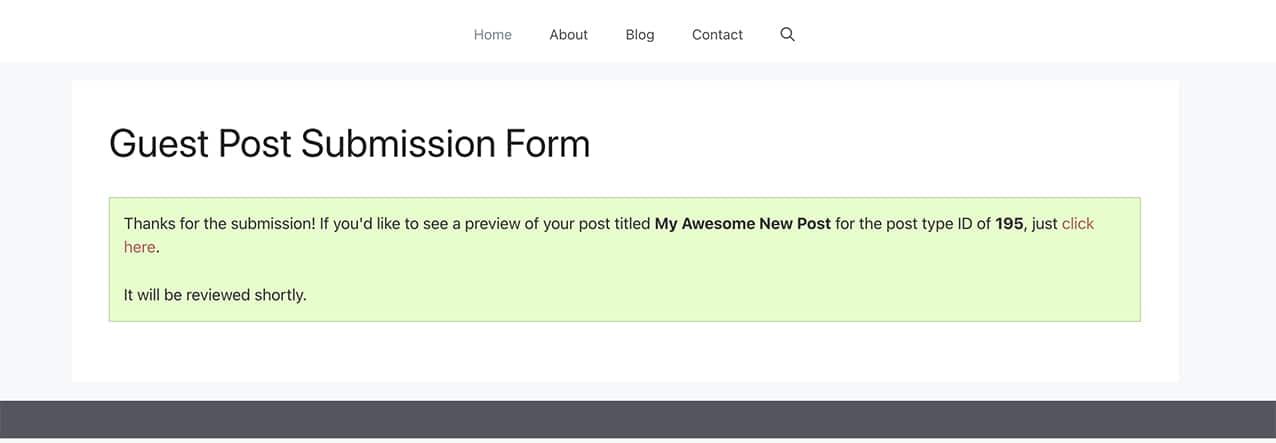
We’re adding a message that is informing the visitor submitting the form the Post Type ID Number, the Post Title and the Post URL that would be a clickable link inside the Confirmation Message.
Once you’ve added your message, click Save on the form and you’re ready for the next step!
Creating the post submission URL Smart Tag
Now it’s time to add our code snippet to your site that will pull this all together. If you need help in how to add code snippets to your site, please see this tutorial.
/**
 * Add Smart Tags to the Post Submission confirmation messages
 *
 * @link   https://wpforms.com/developers/how-to-include-post-submissions-post-url-in-the-confirmation-message
 *
 */

// This function sets up the names of the Smart Tags we will be using.
function wpf_dev_register_smarttag( $tags ) {

	// Key is the tag, value is the tag name.
	$tags[ 'submitted_cpt_id' ]    = 'Submitted Post Type ID';
	$tags[ 'submitted_cpt_url' ]   = 'Submitted Post Type URL';
	$tags[ 'submitted_cpt_title' ] = 'Submitted Post Type Title';

	return $tags;
}

add_filter( 'wpforms_smart_tags', 'wpf_dev_register_smarttag', 10, 1 );

//This function will process the Smart Tags so that we can
//use them inside the confirmation message and email notifications
function wpf_dev_process_smarttag( $content, $tag ) {

	if ( empty( $_POST[ 'wpforms' ][ 'entry_id' ] ) ) {
		return $content;
	}

	/** @var WPForms_Entry_Handler $entry */
	static $entry;

	if ( empty( $entry ) ) {
		$entry = wpforms()->entry->get( (int) $_POST[ 'wpforms' ][ 'entry_id' ], [ 'cap' => false ] );
	}

	if ( empty( $entry->post_id ) ) {
		return $content;
	}

	switch ( $tag ) {

		case 'submitted_cpt_id':
			$content = str_replace( '{submitted_cpt_id}', (int) $entry->post_id, $content );
			break;

		case 'submitted_cpt_url':
			$content = str_replace( '{submitted_cpt_url}', esc_url( get_permalink( (int) $entry->post_id ) ), $content );
			break;

		case 'submitted_cpt_title':
			$title   = get_post_field( 'post_title', $entry->post_id );
			$content = str_replace( '{submitted_cpt_title}', esc_html( $title ), $content );
			break;
	}

	return $content;
}

add_filter( 'wpforms_smart_tag_process', 'wpf_dev_process_smarttag', 10, 2 );
Inside the first function, we’re setting up the Smart Tags with names and definitions of what information they will hold such as the title, URL, and the ID number of the post.
The second function processes these Smart Tags and will assign them the title, permalink (URL), and the post type ID number which will allow us to use these Smart Tags in our confirmation messages.
Now whenever we use the {Submitted Post Type URL}, {Submitted Post Type Title} or {Submitted Post Type ID} Smart Tag, they will automatically be assigned those values after a successful form submission and your visitors will be able to easily click the click here link we’ve added to our confirmation message and be taken to the draft (or full published post) of their submission as well as see the other information such as the Post ID and Post Title.

And that’s all you need! Would you like to create more custom Smart Tags? Take a look at our tutorial on How to Create a Custom Smart Tag.
Reference Filters
FAQ
Q: Can I make the post URL open in a new window/tab?
A: Absolutely! If you want the link to open in a new tab, just create your HTML link like this:
<p>Thanks for the submission!
If you'd like to see a preview of your post titled
<strong>{submitted_cpt_title}</strong> for the post type ID of
<strong>{submitted_cpt_id}</strong>,
just <a href="{submitted_cpt_url}" target="_blank">click here</a>.</p>

<p>It will be reviewed shortly.</p>
Q: Can I use this in the email notifications?
A: Currently this is not available to use inside the email notifications.
Q: Would I be able to use these Smart Tags inside the form?
A: No, since the post ID and URL aren’t actually assigned until the form is submitted, you wouldn’t be able to use these prior to the form submission.
