AI Summary
Would you like to customize the styles on the email template for your email notifications? Since the version of 1.8.5, WPForms has many different template styles to choose from for email notifications. You can read more about these templates by reviewing this announcement post.
However, if you’d like to extend the styling of these templates, this tutorial will walk you through the best way to achieve this.
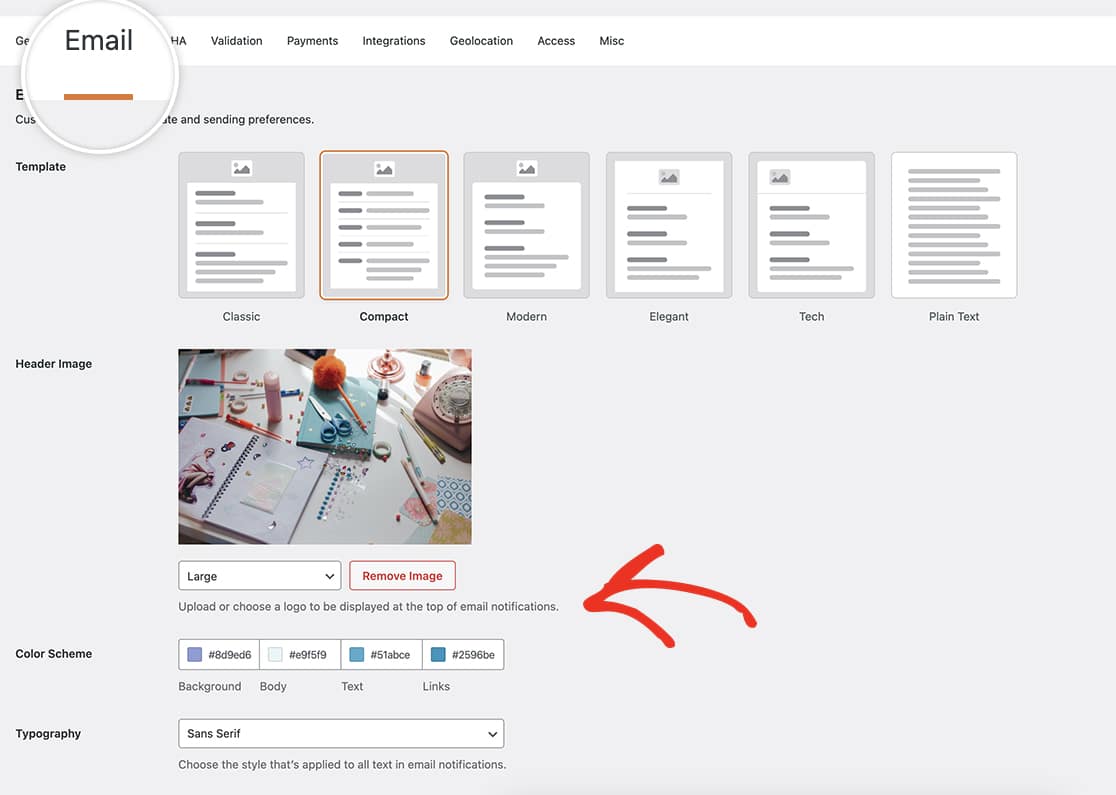
By default, WPForms already gives the ability to change the color scheme on each of the templates as well as add a header image. For more details on how to do that, please review this documentation.
Each template, with the exception of Plain Text will give you the option to set your color scheme and upload a header logo. Simply navigate to the WordPress dashboard » WPForms » Settings » Email to set your preferences on which template as well as customizing the design of the template.

Creating your form
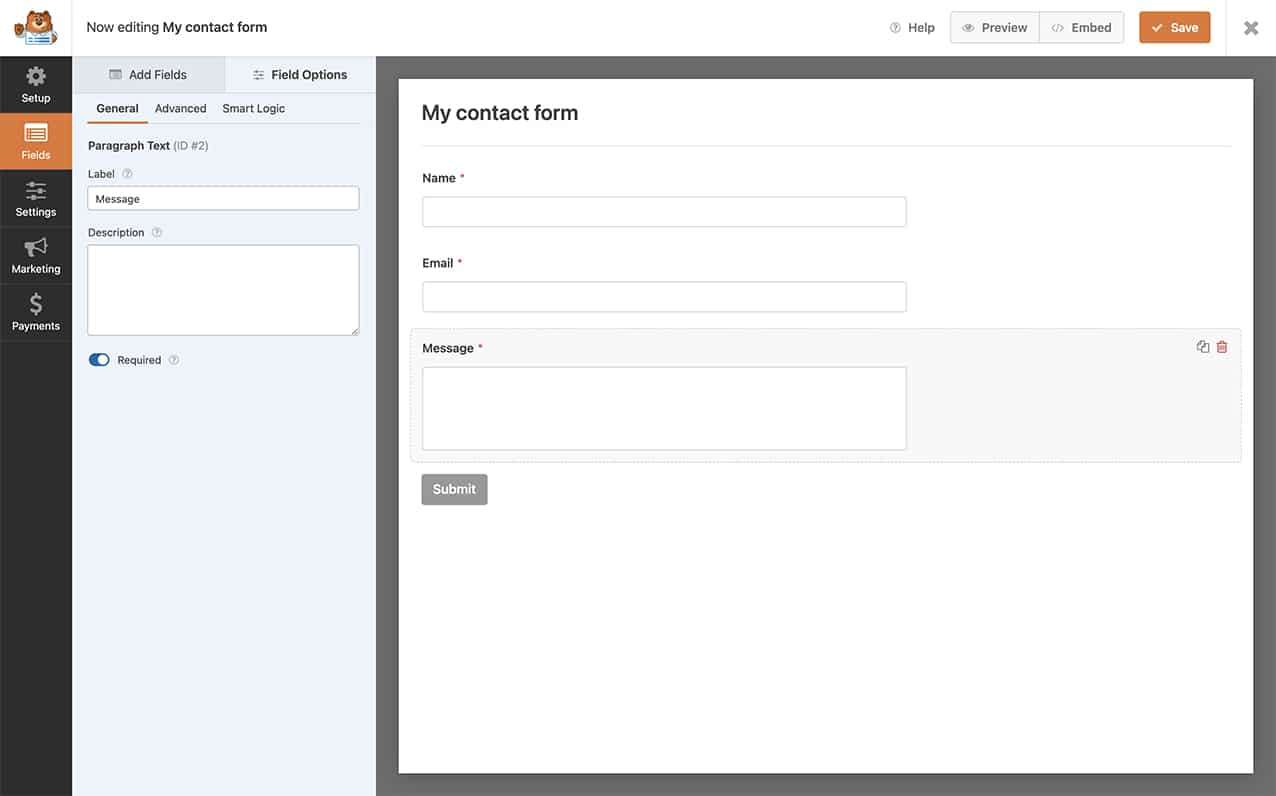
To begin, you’ll need to create your form and add your fields. If you need any help in creating your form, please see this documentation.

Looking for the Legacy template? This template was retired with the 1.8.5 version, however you can still enabled this should you choose. If you’re looking for this email template, please review this tutorial.
Altering the email messages using HTML
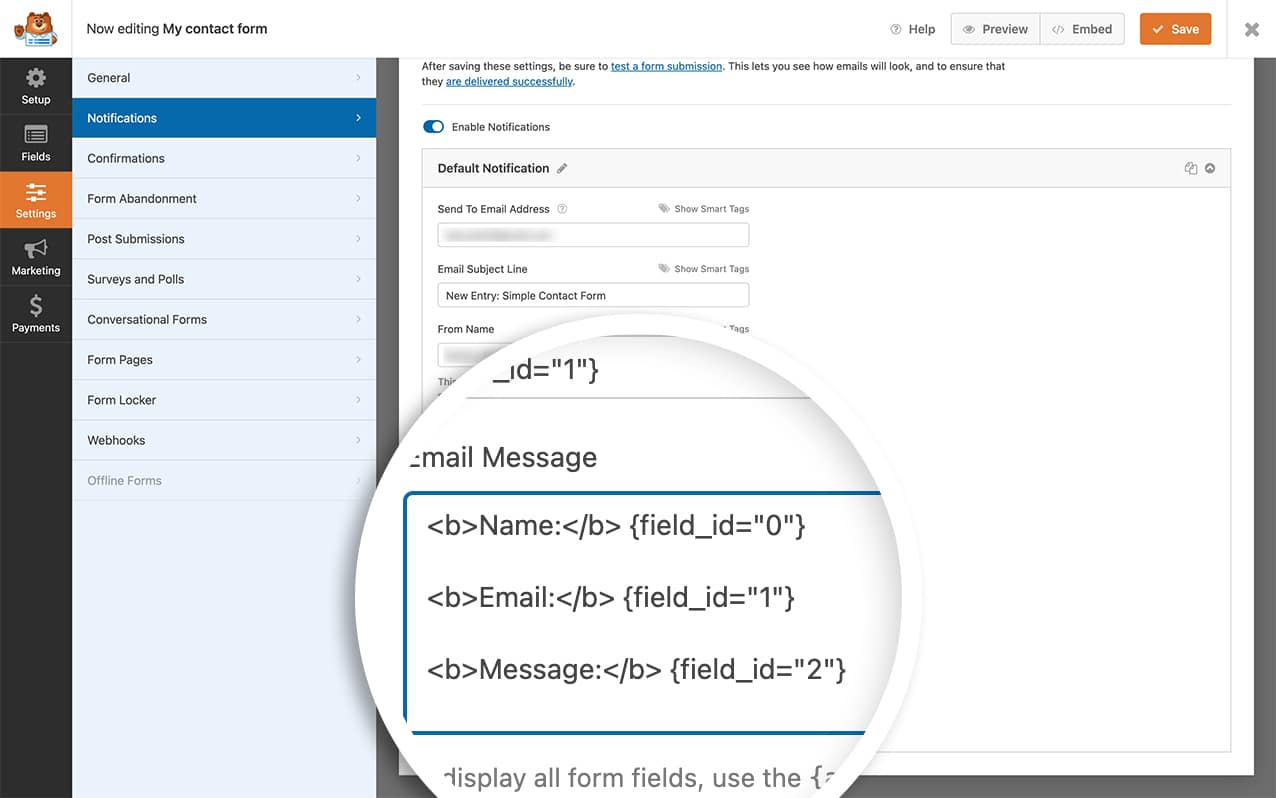
If you would like to add further customization to your email notifications by just bolding the labels in the email text, you can also do that easily by editing your form and on the Settings » Notifications tab inside the form builder, change your Message field. You can replace the {all_fields} in your Message field to:
<b>Name:</b> {field_id="0"}

<b>Email:</b> {field_id="1"}

<b>Message:</b> {field_id="2"}

We use Smart Tags in our Message field to build out this response. For further help on using completed form fields as Smart Tags, please review this tutorial.

Customizing the email template
If you want to change the look of your WPForms email templates but find coding a bit intimidating, don’t worry! There’s a straightforward way to do this without diving too deep into technical details.
Imagine your email templates as the outfits your forms wear when they send messages. We can tweak these outfits by adjusting the template files in your child theme. For more information on how to create a child theme, please review this helpful guide!
Let’s say you want to give a different background color to the Classic template. Here’s what you do:
Go to the Wardrobe: Look for the classic-style.php file in wp-content/plugins/wpforms/templates/emails/.
Copy and Paste: Take that file and put it in your child theme’s wpforms/emails/ folder. It’s like creating a customized closet for your forms. You will need to create this folder in your child theme.
Style it Up: Open the file you just pasted, and you can add any styles you want. Think of it like choosing accessories for your form’s email.
Now, why is this cool? Any styles you add will be magically transformed into inline CSS for each email element. This ensures that your styles look great on different email platforms and devices.
But here’s a pro tip: avoid using style tags in the head element; they might not work well everywhere. For more info, you can check out this resource.
Remember, this method may not work perfectly for some email clients like Outlook and Windows Mail. They can be a bit picky about recognizing certain styles.
If you’re feeling fancy and want to tweak other templates, each has its own unique file in the wpforms/emails/ directory. Just copy, paste, and style away! For templates in the pro version, find them in wp-content/plugins/wpforms/pro/templates/emails/ and bring them to your child theme’s email folder.
That’s it! Now your forms are dressed in styles that match your taste, no coding degree required. 🌟
Would you like to also change or remove the footer text completely? There is an easy way to do this with a small PHP snippet. Check out the snippet on How to Remove or Change Email Notification Footer Text.
