AI Summary
Would you like to create a quiz form using WPForms? Using Payment Fields you can easily build a quiz form that tracks the total score for your quiz. In this tutorial, we’re going to show you how you can easily do this using payment fields.
Creating the quiz form
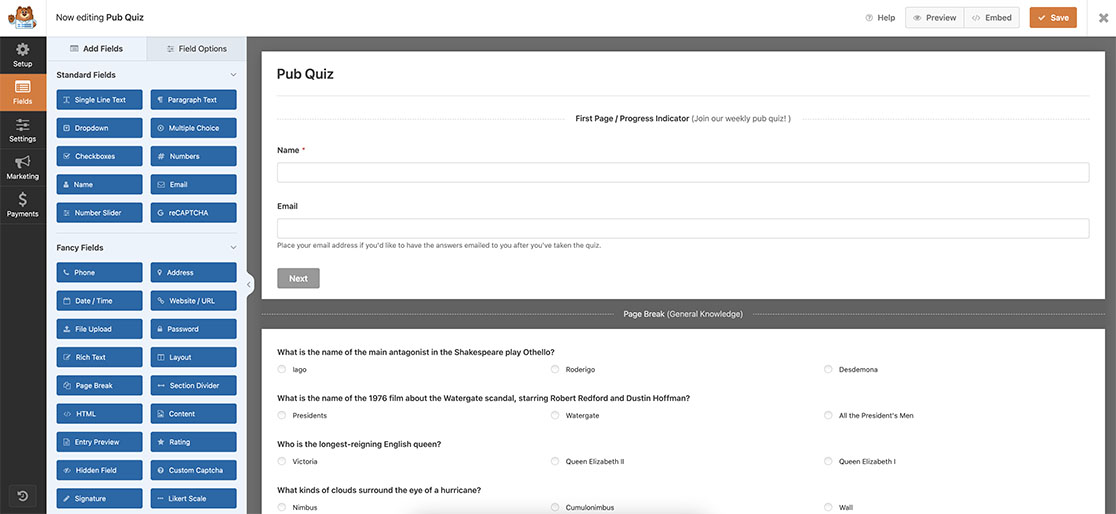
We’re going to begin by creating a new form. In our form, we’re going to add the Name and Email form fields at the beginning of the form. Then using Page Breaks, we’re going to break up the quiz into 6 categories. Each Page Break we’ll have the Page Title displaying what category your quiz takers are currently on.

For any help in creating your form, please check out this guide.
Asking quiz questions
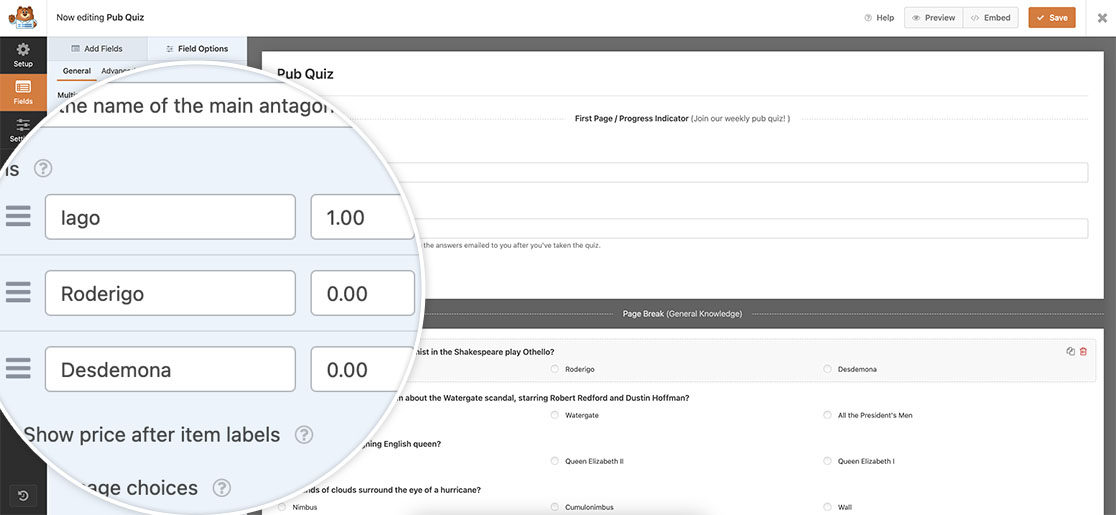
For this documentation, we’re going to use the Multiple Items fields under the Payment Fields section in the form builder to ask our quiz question and change the labels providing 3 answers for each question. For the correct answer, place a 1.00 for the correct answer and 0.00 for the incorrect answers.

Continue to do this through your questions and categories. Each question should have one answer with a 1.00 for the correct answer and 0.00 for incorrect answers. We will use the amount to gather a running total for each correct answer.
Time to total the answers
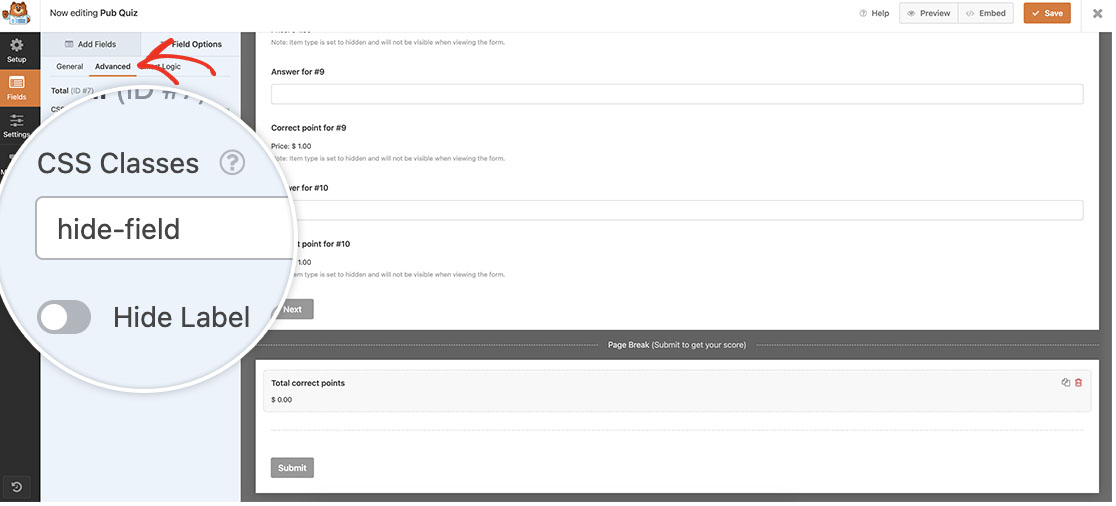
Now we want to track the total number of points for each correct answer. To achieve this, at the bottom of the form, we’re going to add a Total field. However, we’re going to give this field a CSS Class on the Advanced tab so we can keep this field hidden from view until the form is submitted.

Once you’ve saved the form, you’ll want to add the CSS needed to hide this field. Copy this CSS to your site. If you need help in finding how and where to add custom CSS, please check out this tutorial.
.hide-field {display: none;}
Creating the quiz logic
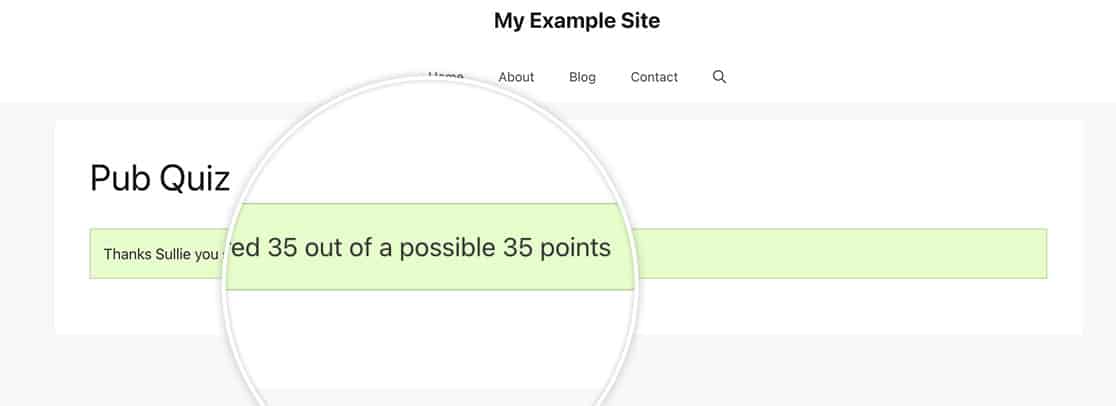
Now it’s time to add the snippet that will pull this all together. We want to display a custom confirmation message that will display a thank you message with the quiz takers name and provide them a total score. Since we don’t want any currency symbols or dollar amounts in this total, we’re going to use a custom snippet that will build our custom confirmation message.
Copy and paste this snippet to your site, if you need help with how and where to add snippets, please check out this useful tutorial.
/**
 * Display a custom confirmation message for our pub quiz.
 *
 * @link   https://wpforms.com/developers/how-to-create-a-quiz-form/
 */

function wpf_dev_quiz_custom_confirmation_message( $message, $form_data, $fields, $entry_id ) {

    // Only run on my form with ID = 3221
    if ( absint( $form_data[ 'id' ] ) !== 3221 ) {
            return $message;
        }

    // Get the name of the person who completed this form
    $contact_name = $fields[ '1' ][ 'value' ];

    // Get the points from the total field (field ID '7') to remove any decimals and currency symbols
    $points_scored = $fields[ '7' ][ 'value' ];

    // Remove white space and currency symbol
	list($points_scored) = explode('.', $points_scored);
	$points_scored = substr($points_scored, 5);


    // Add the name and points scored to the message
    $message = __('Thanks ' . $contact_name .  ' you scored ' . $points_scored . ' out of a possible 35 points', 'plugin-domain');

    return $message;

}
add_filter( 'wpforms_frontend_confirmation_message', 'wpf_dev_quiz_custom_confirmation_message', 10, 4 );
This snippet will only run on the form ID 3221. It will grab the users name from our Name field in the field ID 1 so it can be displayed in our custom confirmation message. This snippet will then grab the amount from our Total form field which is field ID 7, remove the currency symbol and white space and then convert what is left to a whole number so there isn’t a decimal point or zeros.
You’ll need to update each of these IDs to match your own form and field IDs. To find your own ID numbers, please review this documentation.
There’s no need to add anything to the Confirmations tab as the message in our snippet is the message users will see when they complete the quiz. Be sure to update this message to match what you need for your quiz.
Now when users get to the end of the quiz, they’ll click Submit and get to immediately see how many answers they had gotten correct.

And that’s it! Would you like to have the form submit for you automatically based on a value of one of your form fields? Check out our tutorial on How to Automatically Submit a Form with a Field Choice.
