AI Summary
Would you like to customize how dates appear in your forms using Smart Tags? While WPForms includes a built-in Smart Tag for displaying the current date, you can customize its format to match your needs.
This guide will show you how to use Smart Tags in field labels and customize the Date Smart Tag format.
Understanding Smart Tags
Before we begin, you might want to review our comprehensive guide on Smart Tags to learn about all the default options available. For this tutorial, we’ll focus on creating a form with a checkbox field that includes the current date in its label.
Creating Your Form
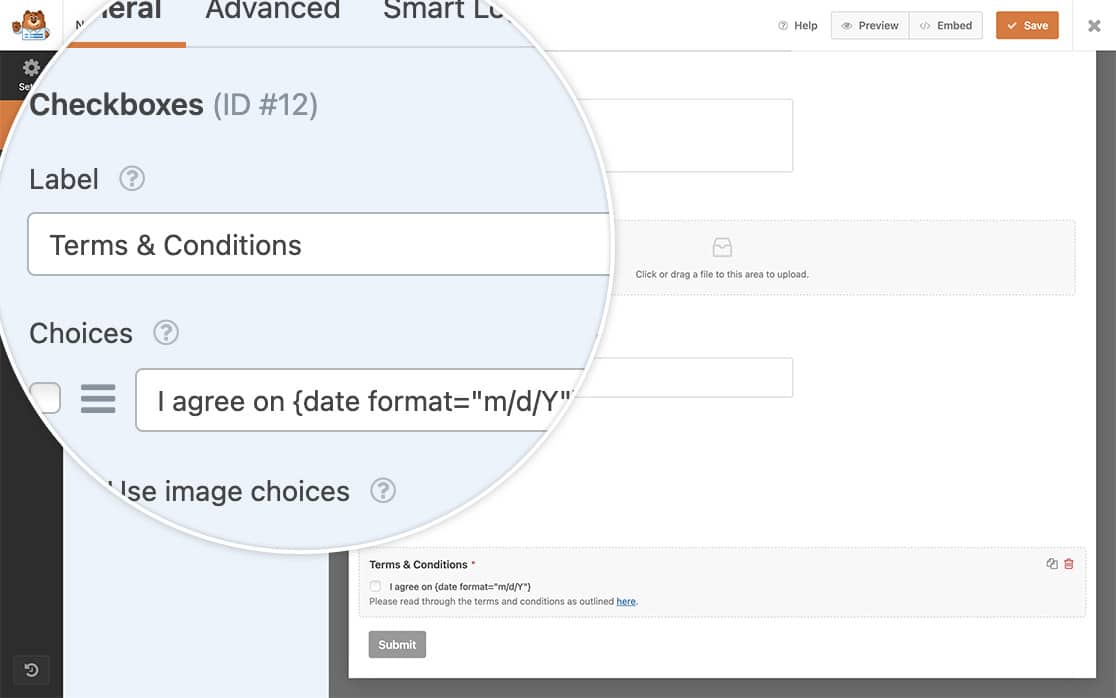
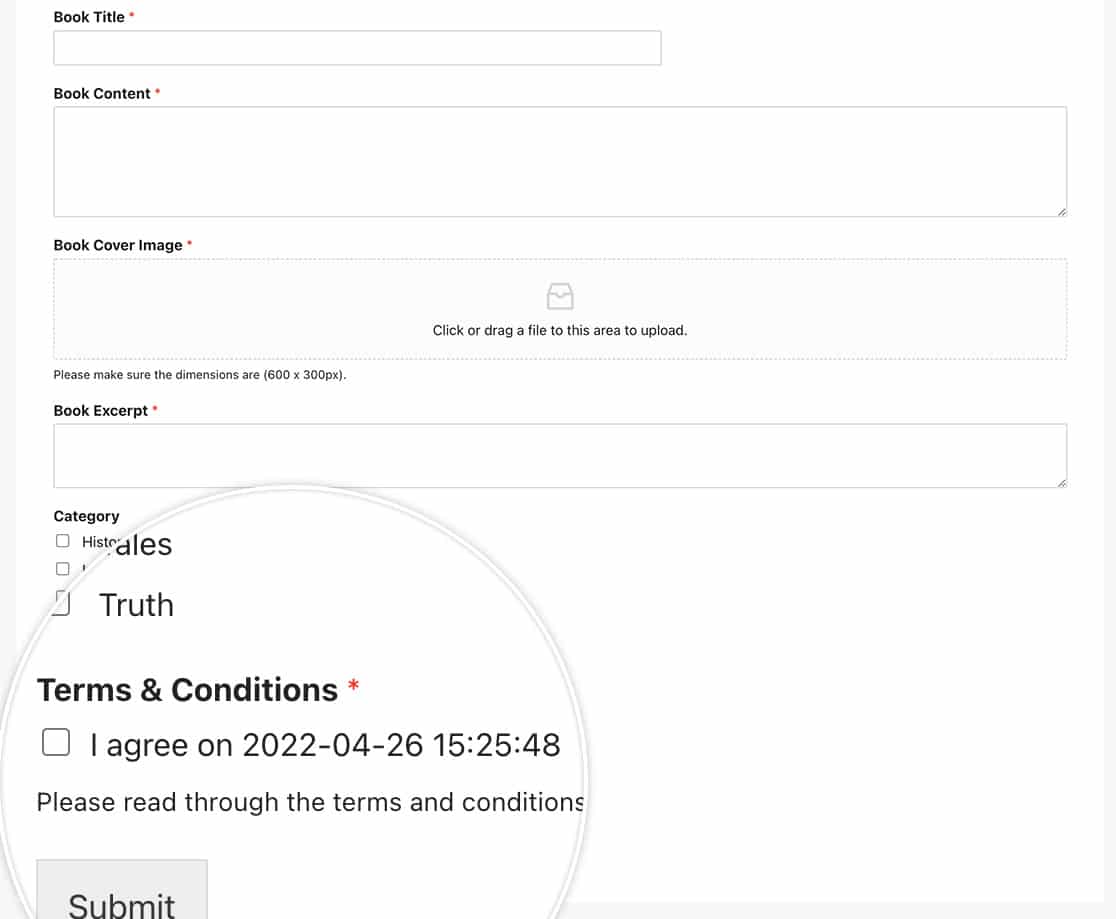
Let’s create a digital book upload form with a required checkbox for terms and conditions. This checkbox will include the current date in its label.
Once you create your form and add your Checkbox field, add this smart tag inside the label for this field:
{date format="m/d/Y"}

Enabling Smart Tags in Field Labels
First, we need to add a code snippet that allows Smart Tags in checkbox field labels. If you’re not sure how to add custom code to your site, please see our guide on adding code snippets.
/**
 * Enable Smart Tags in Checkbox field labels
 *
 * @link https://wpforms.com/developers/how-to-customize-date-format-in-the-date-smart-tag/
 */
function wpf_dev_checkbox_choices_process_smarttags( $field, $deprecated, $form_data ) {
    foreach ( $field[ 'choices' ] as $key => $choice ) {
        if ( ! empty( $choice[ 'label' ] ) ) {
            $field[ 'choices' ][ $key ][ 'label' ] = apply_filters(
                'wpforms_process_smart_tags',
                $choice[ 'label' ],
                $form_data
            );
        }
    }
    return $field;
}
add_filter( 'wpforms_checkbox_field_display', 'wpf_dev_checkbox_choices_process_smarttags', 10, 3 );
This code enables Smart Tag usage in any checkbox field label across all your forms.
Customizing the Date Format
By default, the Date Smart Tag uses the m/d/Y format. Here’s what each part means:
- m/ : Month with leading zeros (01-12)
- d/ : Day with leading zeros (01-31)
- Y : Full year in four digits (e.g., 2024)
To customize the date format, modify the Smart Tag format parameter. For example:
{date format="Y-m-d H:i:s"}
This format will display:
- Year first (Y)
- Followed by month (m)
- Then day (d)
- Plus time in hours (H), minutes (i), and seconds (s)

Advanced Date Customization
Want to add days to your date? Here’s a snippet that adds two days to the current date:
/**
 * Add 2 days to the Date Smart Tag
 *
 * @link https://wpforms.com/developers/how-to-customize-date-format-in-the-date-smart-tag/
 */
function wpf_dev_process_smarttag_date_plus_two( $content, $tag ) {
    // Only run if it is our desired tag
    if ( 'current_date_plus_two' === $tag ) {
        date_default_timezone_set( 'US/Eastern' );
        $link = date( 'Y-m-d', strtotime( '+2 days' ) ); // Output current date plus 2 days

        // Replace the tag with our link
        $content = str_replace( '{current_date_plus_two}', $link, $content );
    }
    return $content;
}
add_filter( 'wpforms_smart_tag_process', 'wpf_dev_process_smarttag_date_plus_two', 10, 2 );
That’s it! Now you know how to customize the date smart tag. Next, would you like to enhance your forms further? Check out our guide on creating a unique ID for each form entry for more details.
