Are you keen on crafting custom Smart Tags based on fields generated with ACF (Advanced Custom Fields)? In this tutorial, we’ll guide you through the process of creating these specialized Smart Tags using a concise code snippet.
For this tutorial’s illustration, let’s consider a WordPress site utilizing posts as sale portfolio items. We’ll devise a single form to be displayed on each post page, seamlessly integrating it into the PHP template.
However, for authors to effectively list their items for sale, they’ll need to input the respective prices. Leveraging the ACF plugin, we’ve incorporated a Price field into the post settings.
This Price field will be pre-filled in the form and dynamically update based on the post being viewed. As the form remains constant across posts but the Price varies, we’ll employ a Smart Tag for this field to ensure its adaptability with each post’s information update.
Creating the custom field with ACF
First, we’ll start with creating our custom field with the Advanced Custom Fields plugin.
Following along with the ACF documentation, we have added a new field to our posts called portfolio_price.
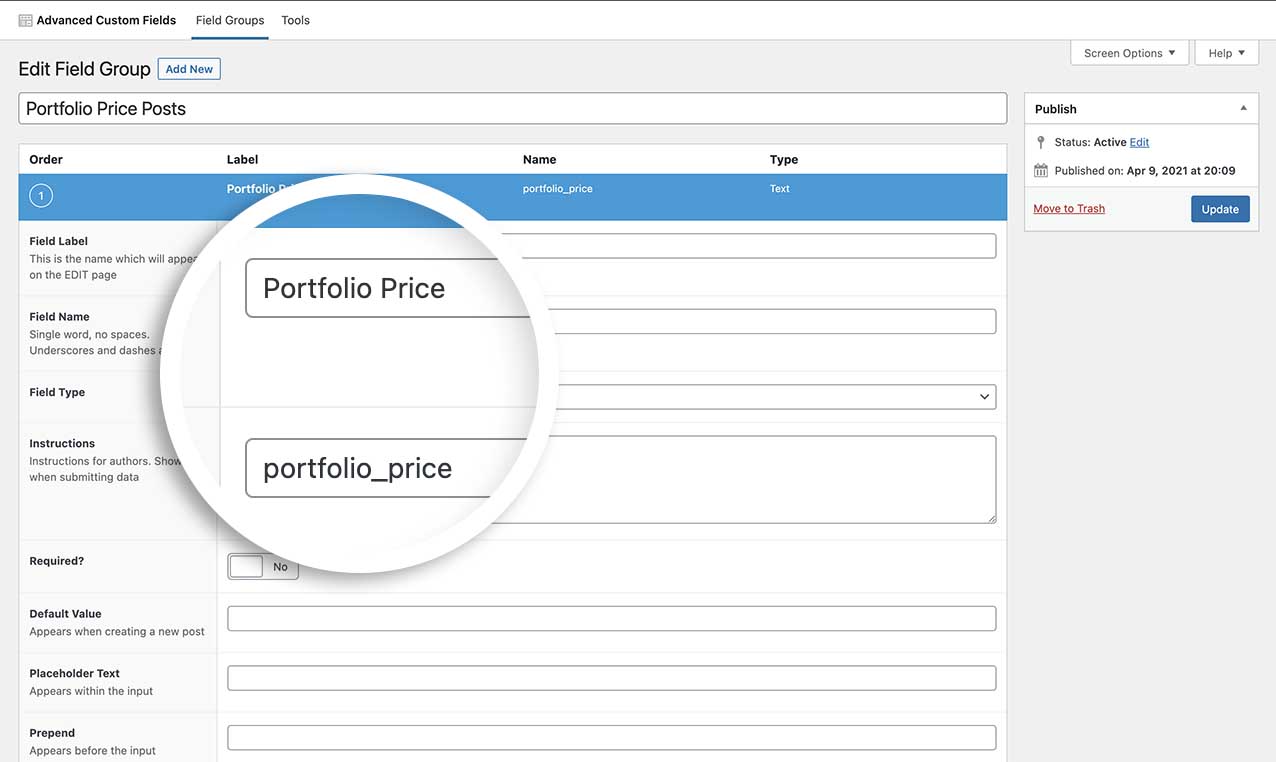
This tutorial is presuming you’ve already added your field(s) to your post. If you need help with adding fields to the WordPress posts using the Advanced Custom Fields plugin, please see their documentation.
Creating a Smart Tag from the ACF field
Normally we would create the form first. However, since we know we want to use this new Smart Tag inside our form builder, we’re going to add the snippet before creating the form.
If you need help in adding snippets to your site, please see this tutorial.
/**
 * Register the Smart Tag so it will be available to select in the form builder.
 *
 * @link   https://wpforms.com/developers/how-to-create-a-smart-tag-from-an-acf-field/
 */

function wpf_dev_register_smarttag( $tags ) {

    // Key is the tag, item is the tag name.
    $tags[ 'portfolio_price' ] = 'Portfolio Price';

    return $tags;
}

add_filter( 'wpforms_smart_tags', 'wpf_dev_register_smarttag' );

/**
 * Process the Smart Tag.
 *
 * @link   https://wpforms.com/developers/how-to-create-a-smart-tag-from-an-acf-field/
 */

function wpf_dev_process_smarttag( $content, $tag ) {

    // Only run if it is our desired tag.
    if ( 'portfolio_price' === $tag ) {

        //Get the field name from ACF
        $my_acf_field = get_field( 'portfolio_price', get_the_ID() );

        // Replace the tag with our link.
        $content = str_replace( '{portfolio_price}', $my_acf_field, $content );
    }

    return $content;
}

add_filter( 'wpforms_smart_tag_process', 'wpf_dev_process_smarttag', 10, 2 );
Let’s break down these two functions.
The first function is creating an empty Smart Tag with the name ‘Portfolio Price’. Nothing will be assigned to this tag yet, we’re just creating it with this function.
The next function is where we will define the Smart Tag and where it should pull the information from.
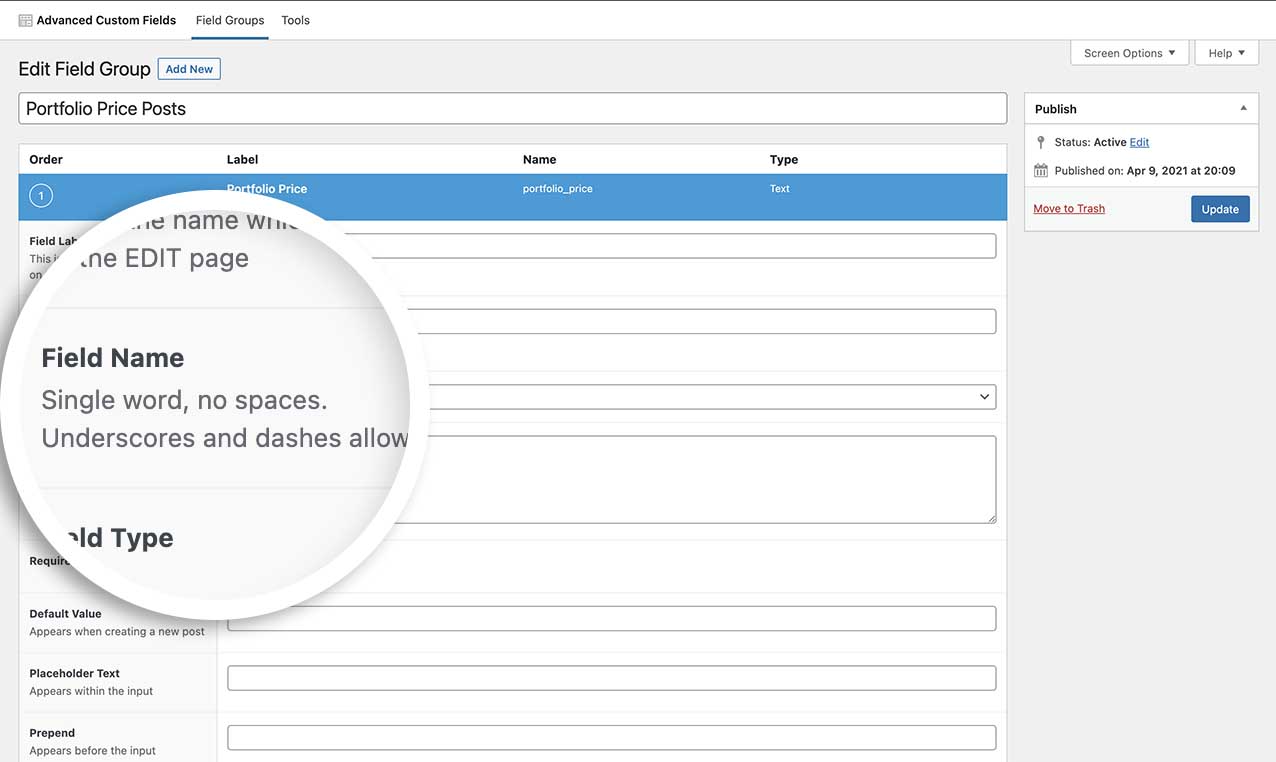
With the line $my_acf_field = get_field( ‘portfolio_price’, get_the_ID() ); we’re telling the code that it needs to go to Advance Custom Fields and get this field value. You’ll need to enter the field name here. For our tutorial, we named our field portfolio_price.
If you need help in finding your field name, simply edit the field you created in ACF and look for the label Field Name.
Creating the form
We’ve created our form to have the Name, Email, Product Title (Single Line Text), Product Price (Single Line Text), and Comments (Paragraph Text) form fields.
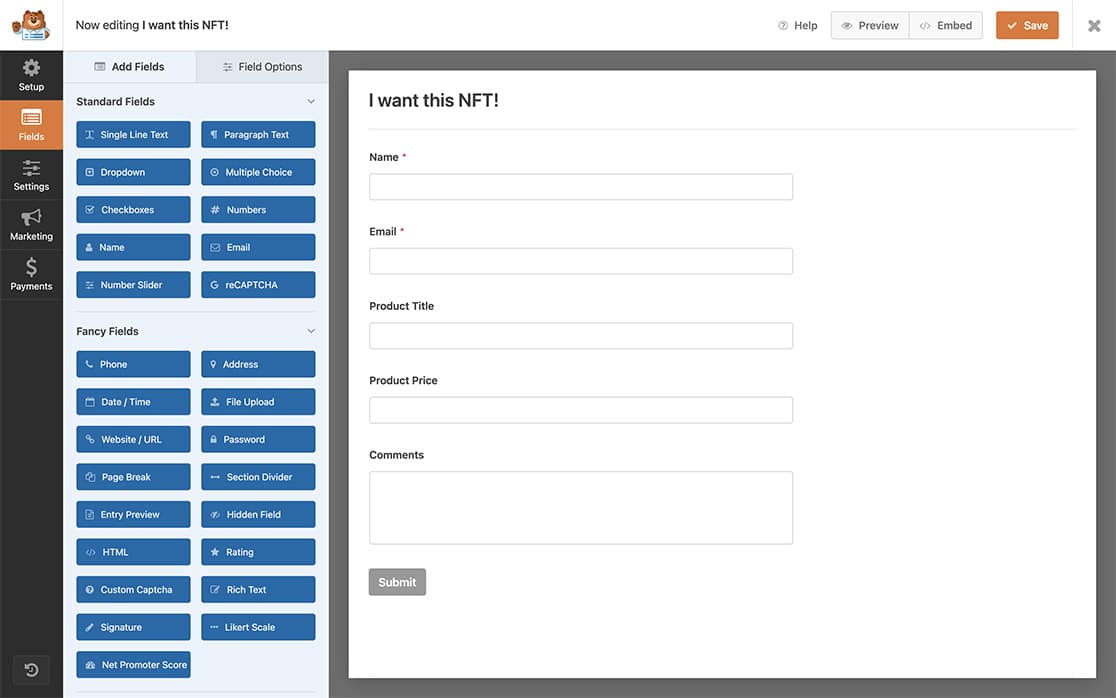
If you need help in creating a form, please see this tutorial.
Adding the Smart Tags
For our form, we’re going to bring in the Product Title, which is the post title. We can use a built-in Smart Tag that WPForms already provides for this.
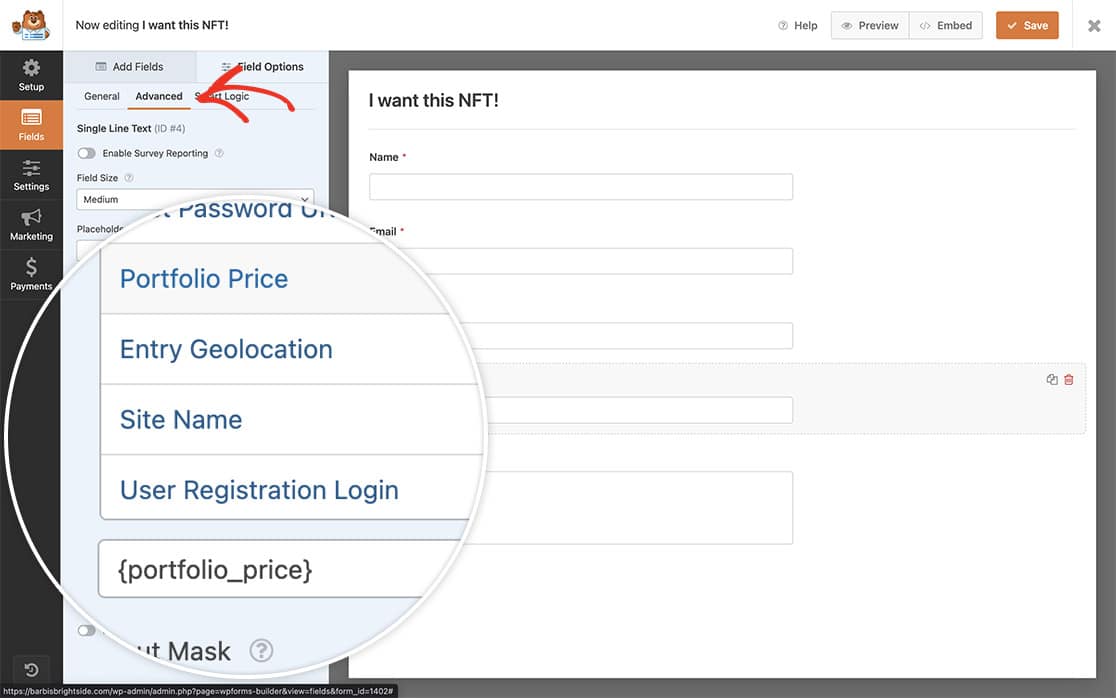
Once you add the Single Line Text field for the Product Title, just click on the Advanced tab. In the Default Value for the field, click the Show Smart Tags link and select the Embedded Post/Page Title to have the post title automatically fill in this form field.
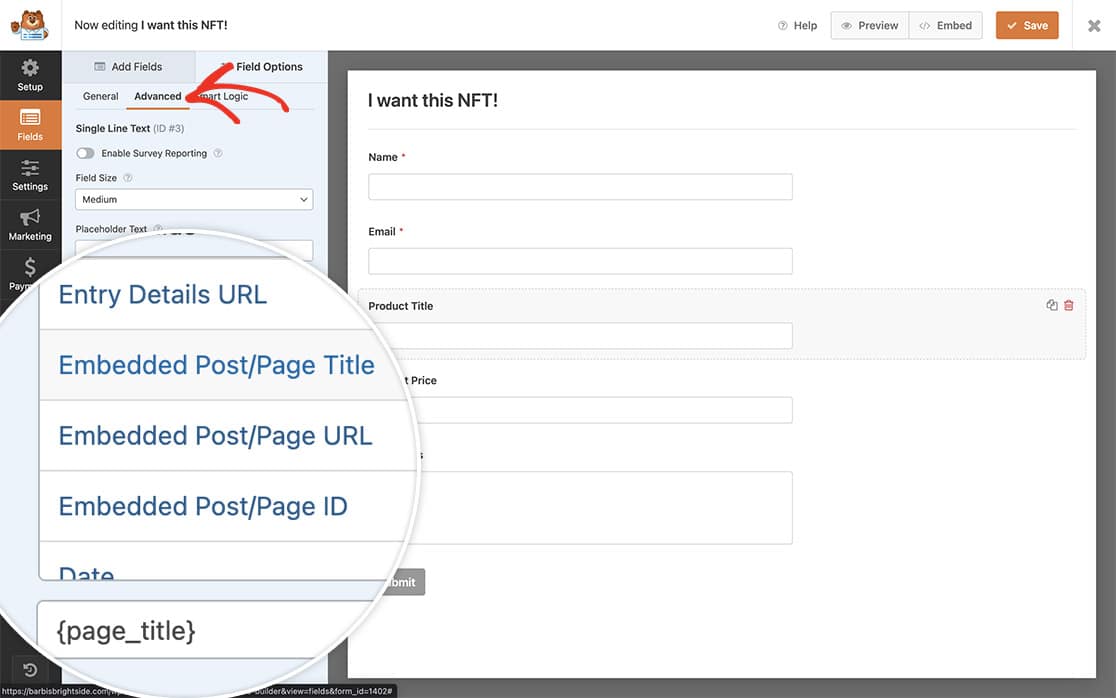
Next, we’ll repeat this step again for the Product Price field.
On the Advanced tab of the Product Price field, select the {portfolio_price} Smart Tag from the available Smart Tags.
Adding the WPForms shortcode to a PHP template
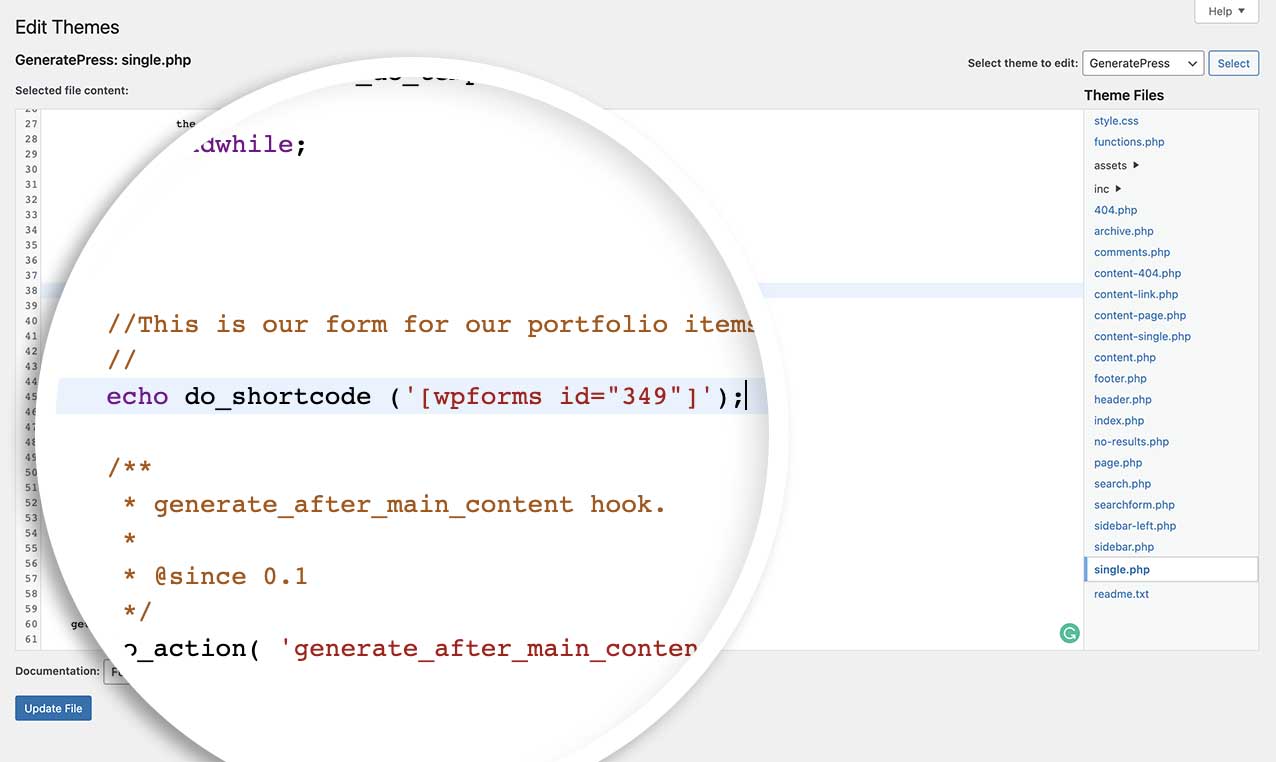
If you need help with adding a shortcode to a PHP template, please review this tutorial.
For this tutorial, we’ve added our shortcode to the bottom of the single post page template.
Now you can see as your posts change, so will your form’s Product Price and Product Title.

Would you like to create more custom Smart Tags? Take a look at our tutorial on How to Create a Custom Smart Tag.
