
Resumo de IA
As inscrições online são a norma atualmente, e os alunos esperarão poder preencher um formulário em seu portal com suas informações acadêmicas.
Um formulário de inscrição universitária online ajuda potenciais alunos a enviar todos os detalhes necessários para ver se eles se encaixariam bem em sua instituição.
Crie Seu Formulário de Inscrição Universitária Agora 🎓
Neste post, vou guiá-lo pelas etapas para criar facilmente um formulário de inscrição universitária com um modelo usando o plugin WPForms.
Como Criar um Formulário de Inscrição Universitária no WordPress
O plugin WPForms torna super fácil criar praticamente qualquer tipo de formulário WordPress que você precise. Siga as etapas abaixo para começar:
- Passo 1: Instale o Plugin WPForms
- Passo 2: Obtenha o Addon Form Locker
- Etapa 3: Projete Seu Formulário de Inscrição Universitária
- Etapa 4: Adicione um Campo Repetidor ao Formulário
- Etapa 5: Configure as Notificações do Formulário de Candidatura
- Etapa 6: Defina a Data de Encerramento do Seu Formulário de Inscrição
- Etapa 7: Publique Seu Formulário de Inscrição Universitária
- Perguntas Frequentes sobre Formulários de Inscrição Universitária
- Em seguida, aprenda como criar um formulário de inscrição em grupo
Passo 1: Instale o Plugin WPForms
WPForms é uma escolha ideal para criar um formulário de inscrição universitária online devido à sua facilidade de uso, flexibilidade e recursos poderosos. Ele permite que você crie formulários rapidamente com uma interface intuitiva de arrastar e soltar.
Para seguir este guia, você precisará da licença WPForms Pro que inclui o Addon Form Locker. Este addon permite controlar o acesso ao formulário, definir limites de entrada e especificar datas de encerramento, garantindo que seu processo de inscrição ocorra sem problemas.

Depois de comprar a licença, baixe, instale e ative o plugin WPForms em seu site WordPress. Se precisar de ajuda com esta etapa, confira este guia para iniciantes sobre como instalar um plugin no WordPress.
Crie seu formulário WordPress agora
Passo 2: Obtenha o Addon Form Locker
Em seguida, vamos instalar o addon Form Locker. Isso ajuda a dar um prazo ao seu formulário de inscrição universitária para que ele feche automaticamente após uma data e hora definidas.
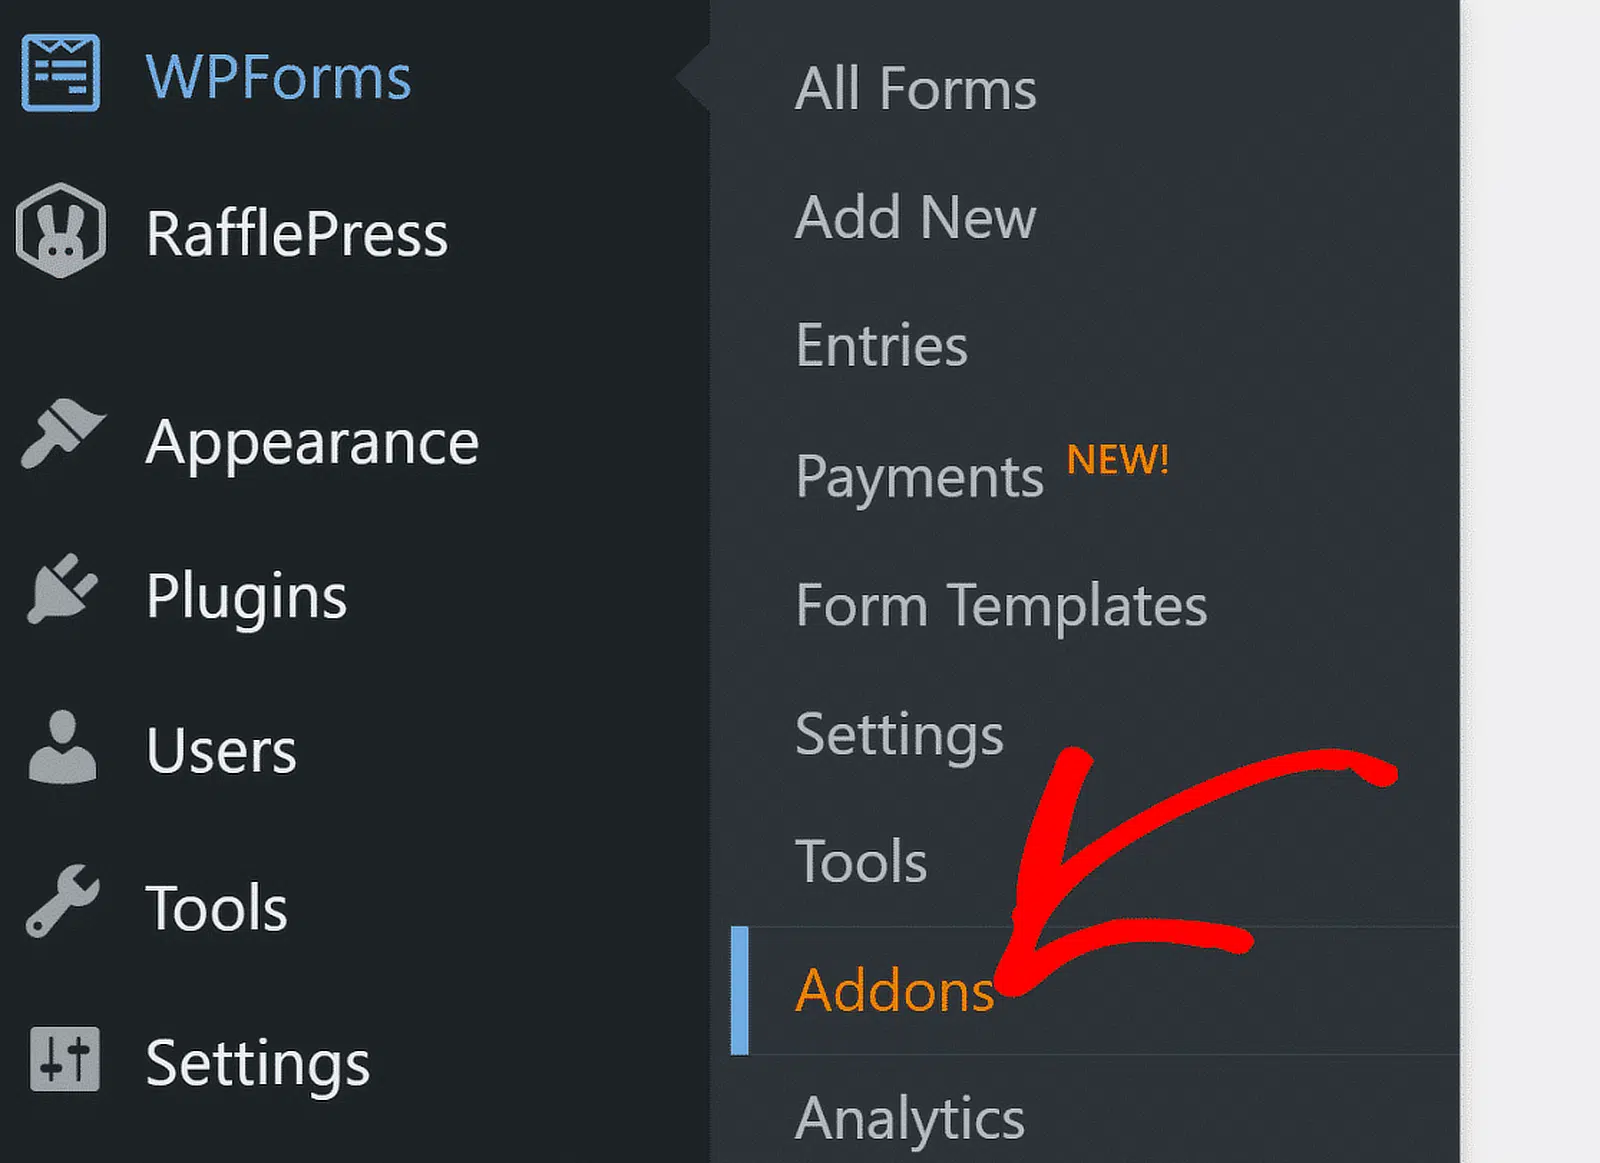
No seu painel WordPress, navegue até WPForms e clique na opção Addons no menu.
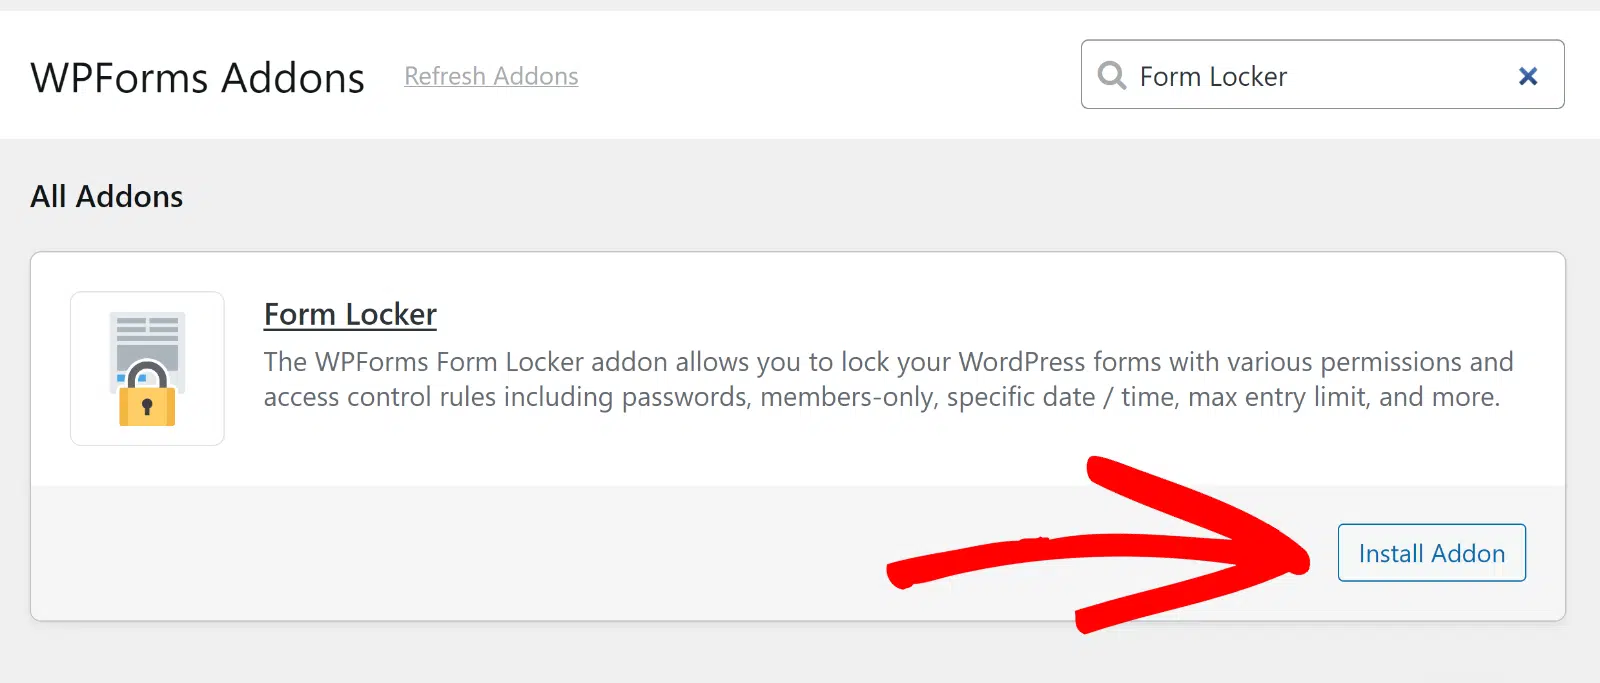
Em seguida, use o campo de pesquisa ou role para baixo para encontrar o Addon Form Locker e clique no botão Instalar Addon.
Ótimo, você está pronto para criar seu formulário. Vamos abrir o modelo de formulário de inscrição universitária em seguida para iniciar o processo de criação do formulário.
Etapa 3: Projete Seu Formulário de Inscrição Universitária
Criar formulários é muito fácil com o WPForms. E como você pode usar um modelo, a maior parte do trabalho de design do formulário já está feita para você!
Então, vamos usar o modelo de Formulário de Inscrição Universitária para agilizar as coisas. No seu painel WordPress, vá para WPForms » Adicionar Novo.

O construtor de formulários será aberto em uma janela de tela inteira. Vá em frente e nomeie seu formulário na área Nomeie Seu Formulário.
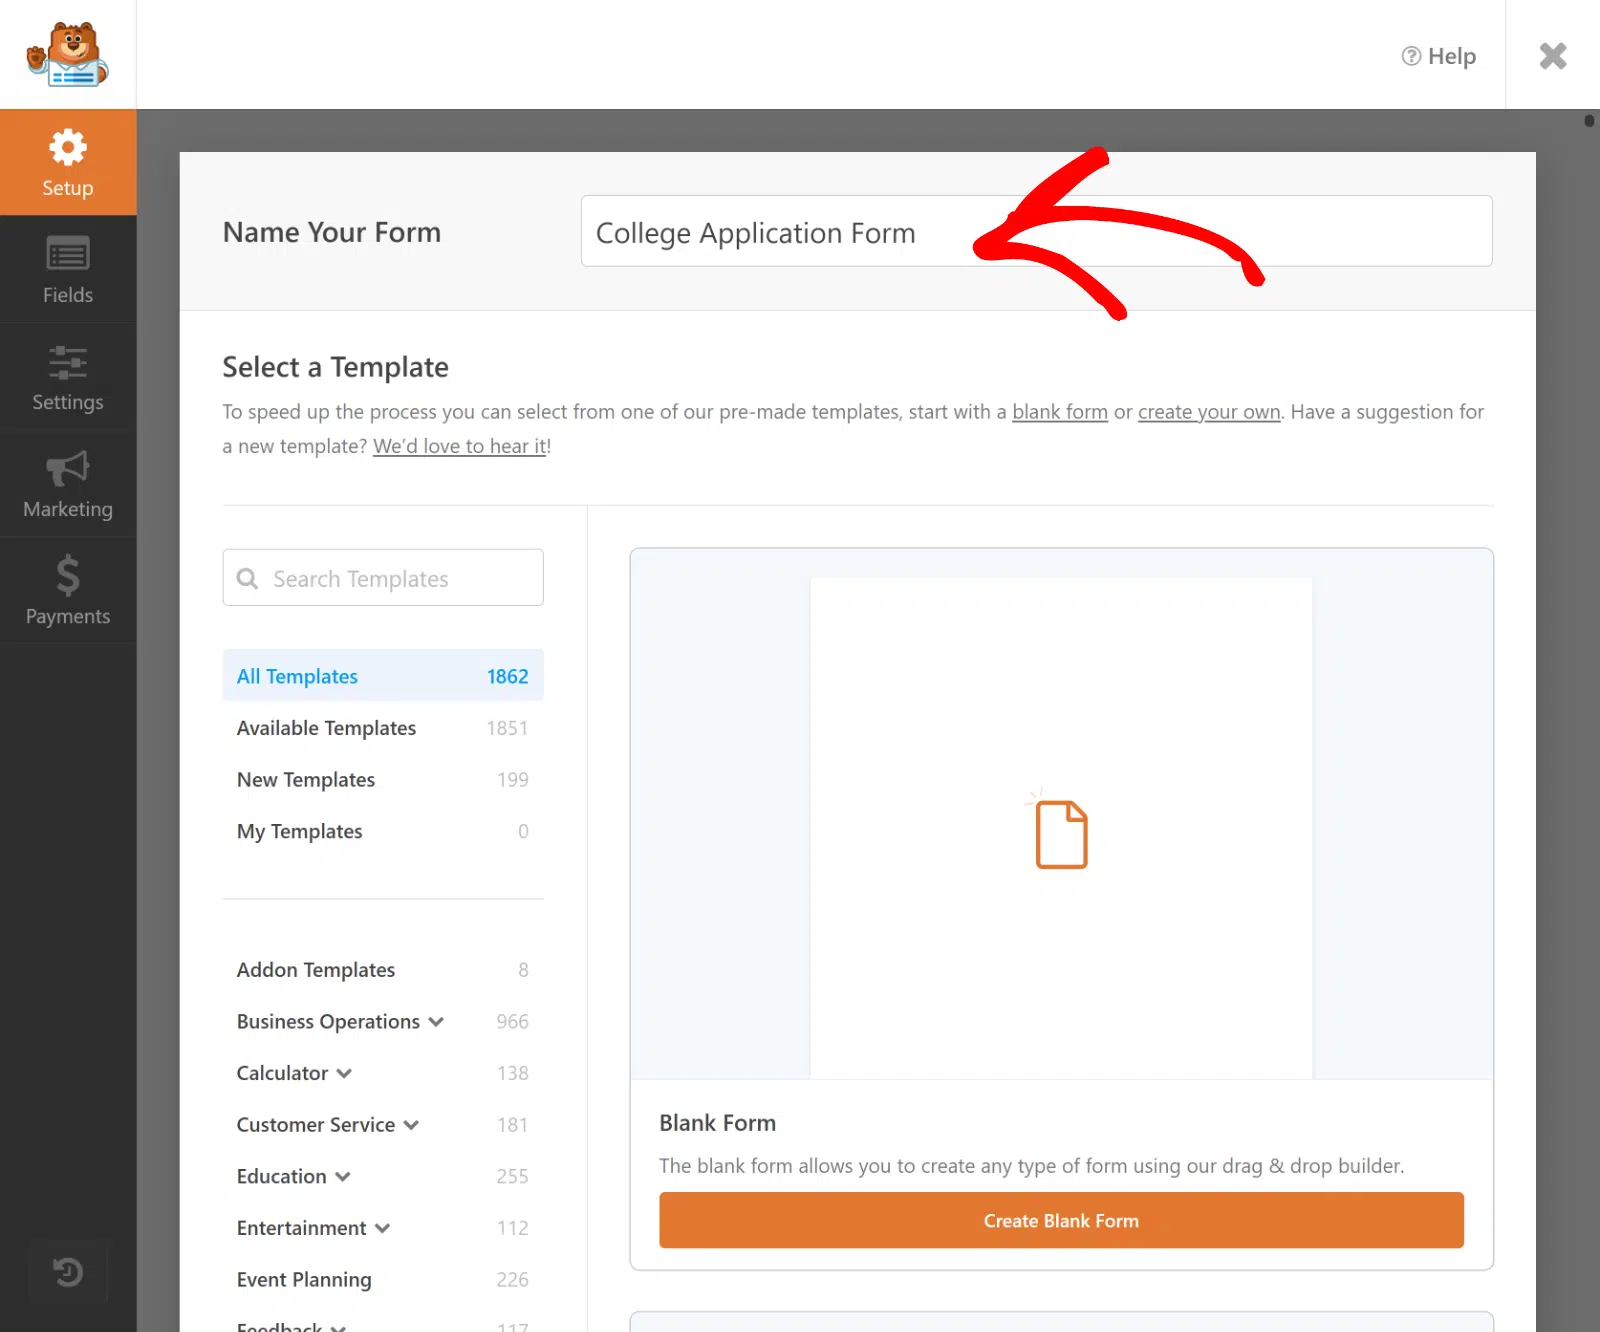
Em seguida, role para baixo até a seção Selecionar um Modelo. O WPForms vem com mais de 2.100 modelos de formulários WordPress, todos personalizáveis como você quiser.
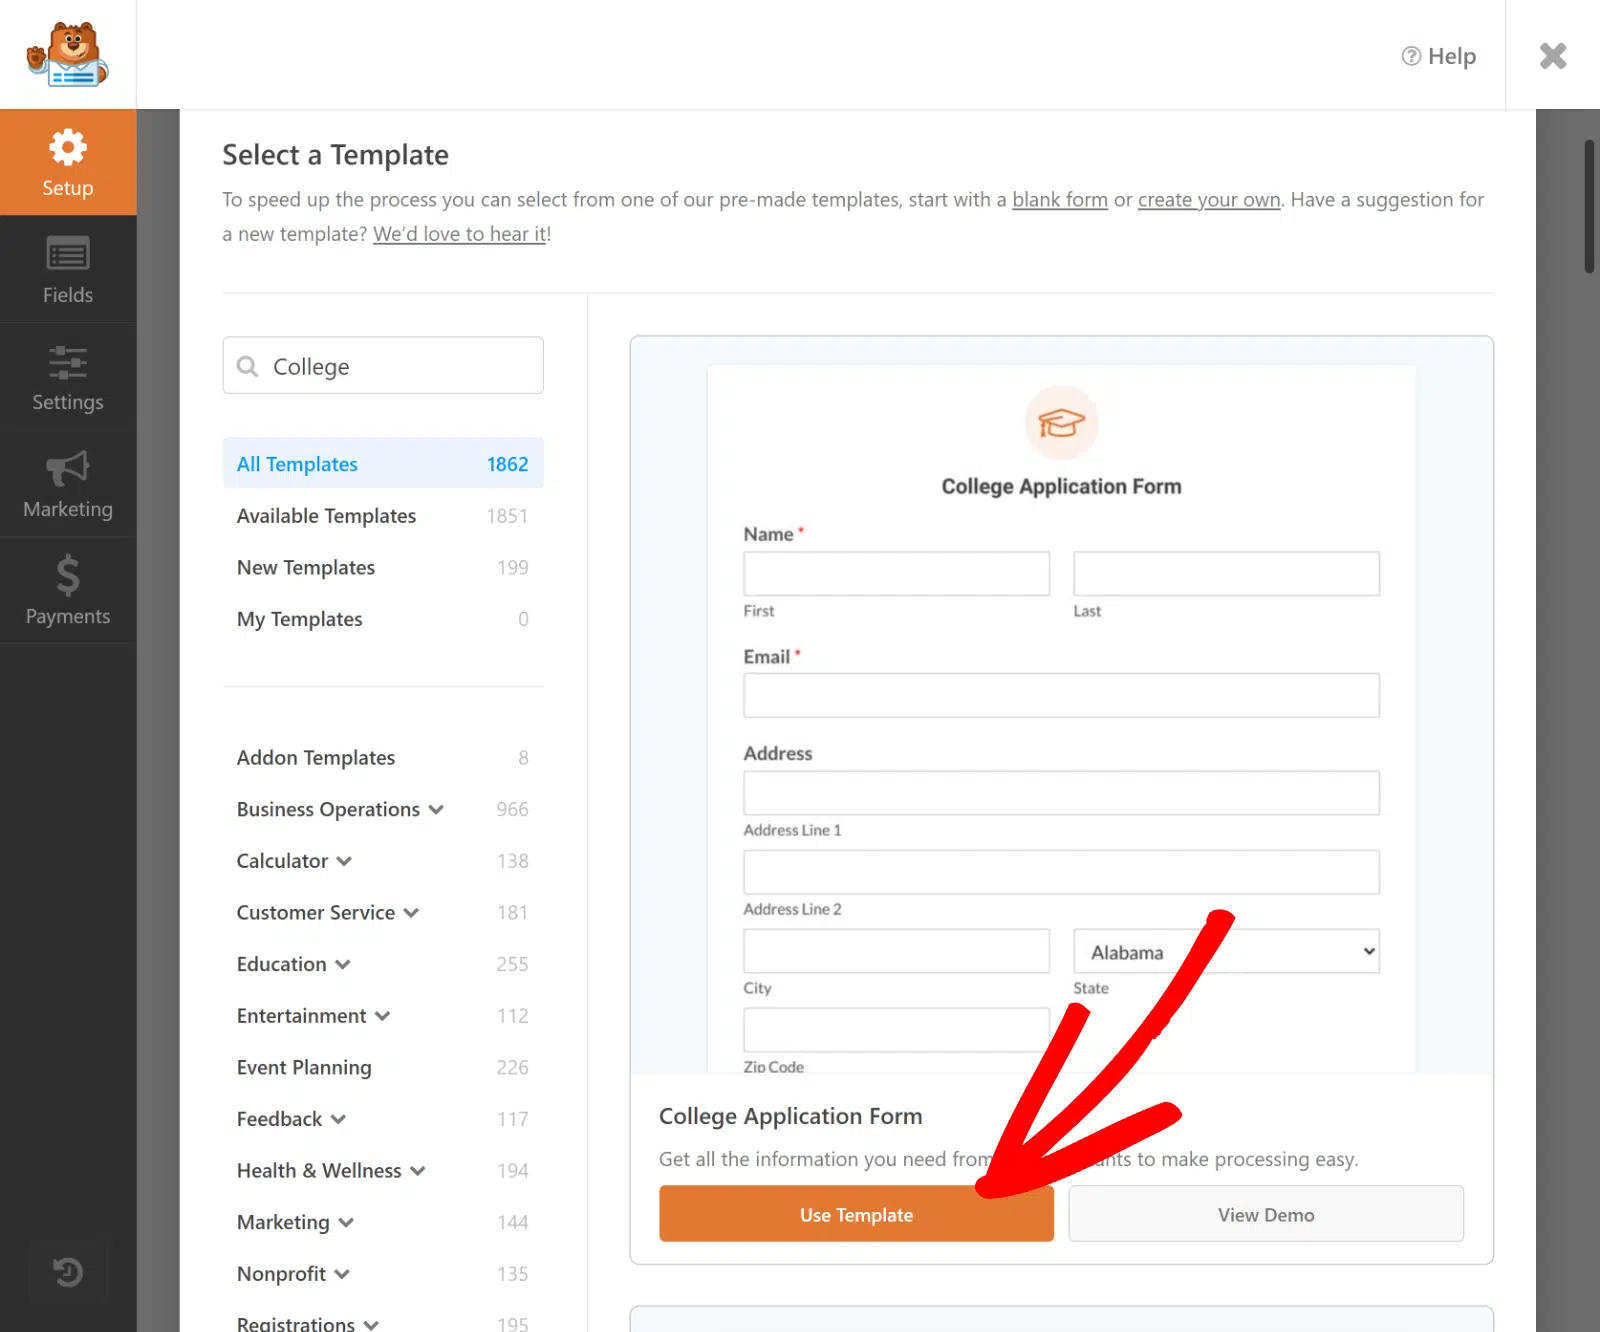
Vá em frente e pesquise por "college". Em seguida, clique em Usar Modelo sob o modelo de Formulário de Inscrição Universitária para abri-lo.
O modelo será aberto no construtor de formulários, onde você notará que seu formulário de inscrição universitária já tem muitos campos configurados para você, como:
- Informações de Contato
- Contato de Emergência
- Demografia
- Detalhes do Ensino Médio
- Atividades Extracurriculares
- Upload de Arquivos
- Detalhes dos Pais
- Status de Cidadania
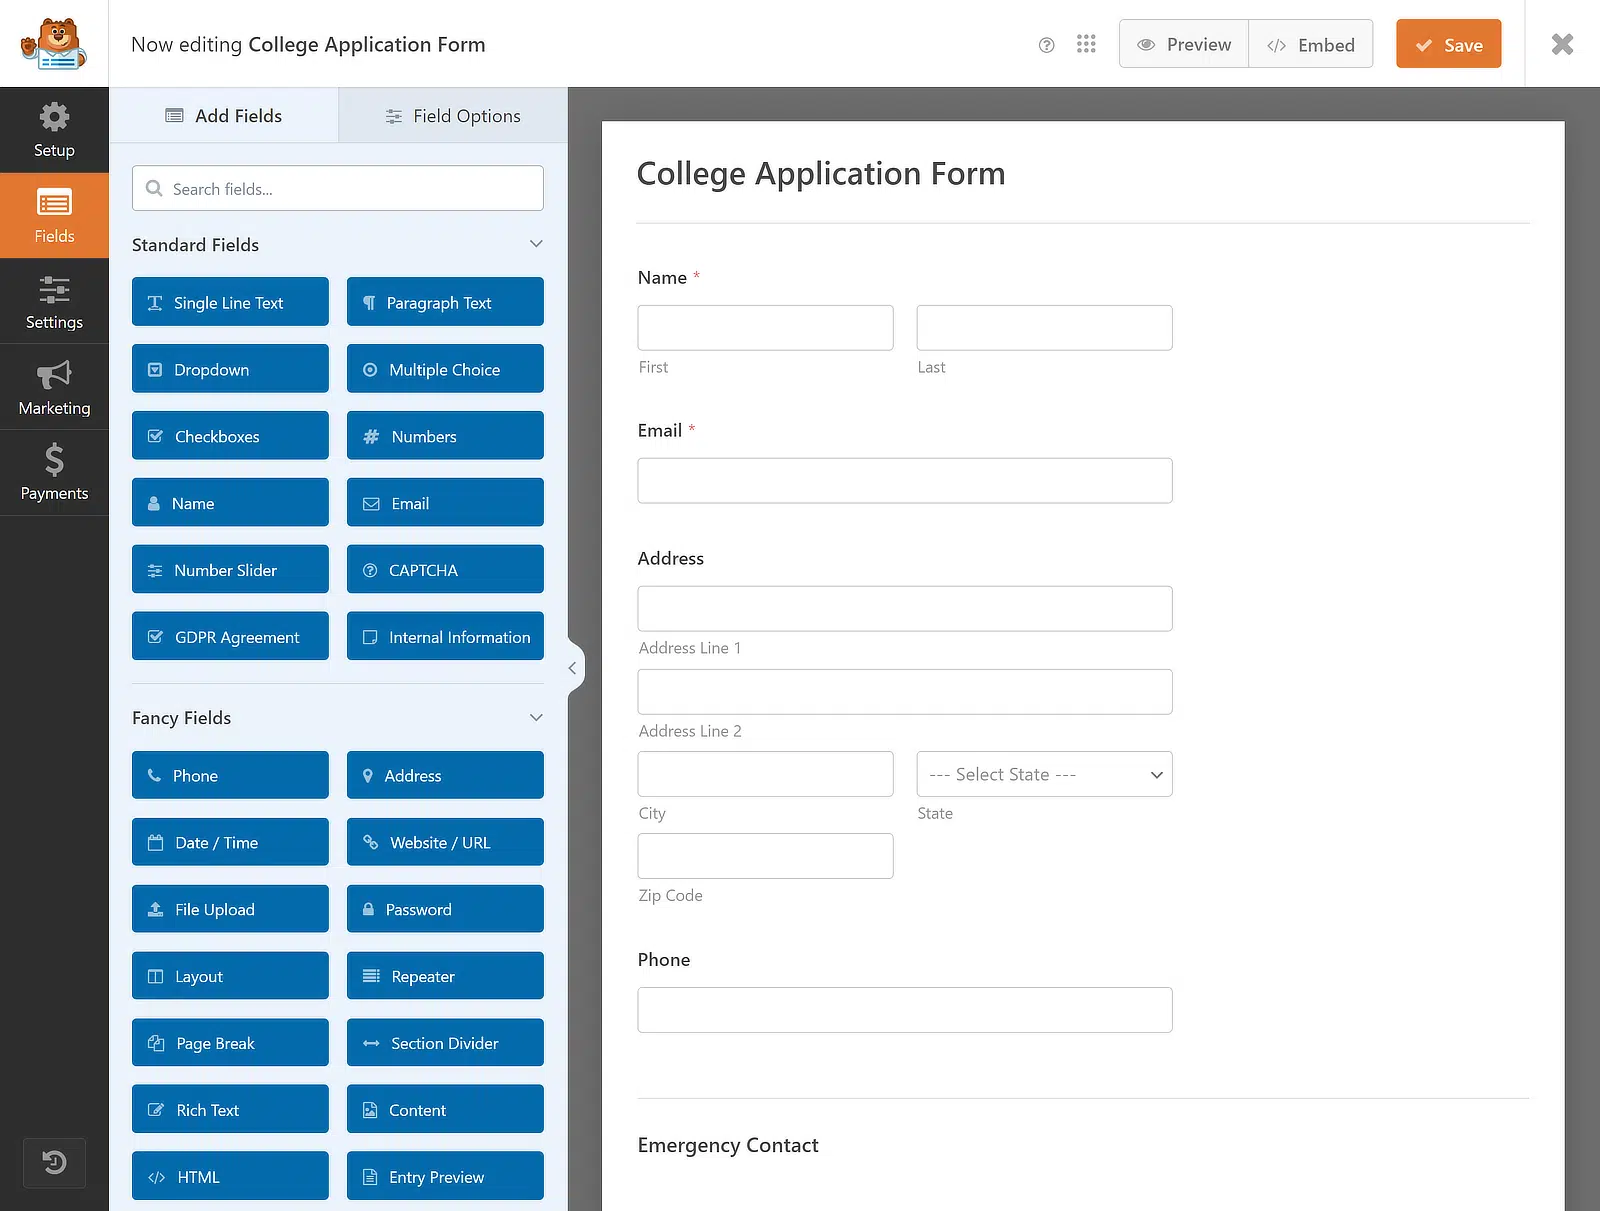
Agora você pode arrastar e soltar um campo para reorganizar a ordem do seu formulário de inscrição universitária ou clicar em qualquer campo para abrir suas opções e personalizá-lo.
Por exemplo, se você quiser usar o modelo para aceitar vários conjuntos de dados semelhantes, recomendo adicionar um campo Repetidor.
Etapa 4: Adicione um Campo Repetidor ao Formulário
O Modelo de Formulário de Inscrição para Faculdade vem equipado com vários campos para coletar todas as informações vitais do estudante.
Entre eles está a seção de Atividades Extracurriculares, Pessoais e Voluntárias, onde um campo Repetidor pode ser útil.
Se quisermos que esses campos sejam repetíveis, primeiro precisamos inserir o campo Repetidor arrastando-o do painel à esquerda para a direita.
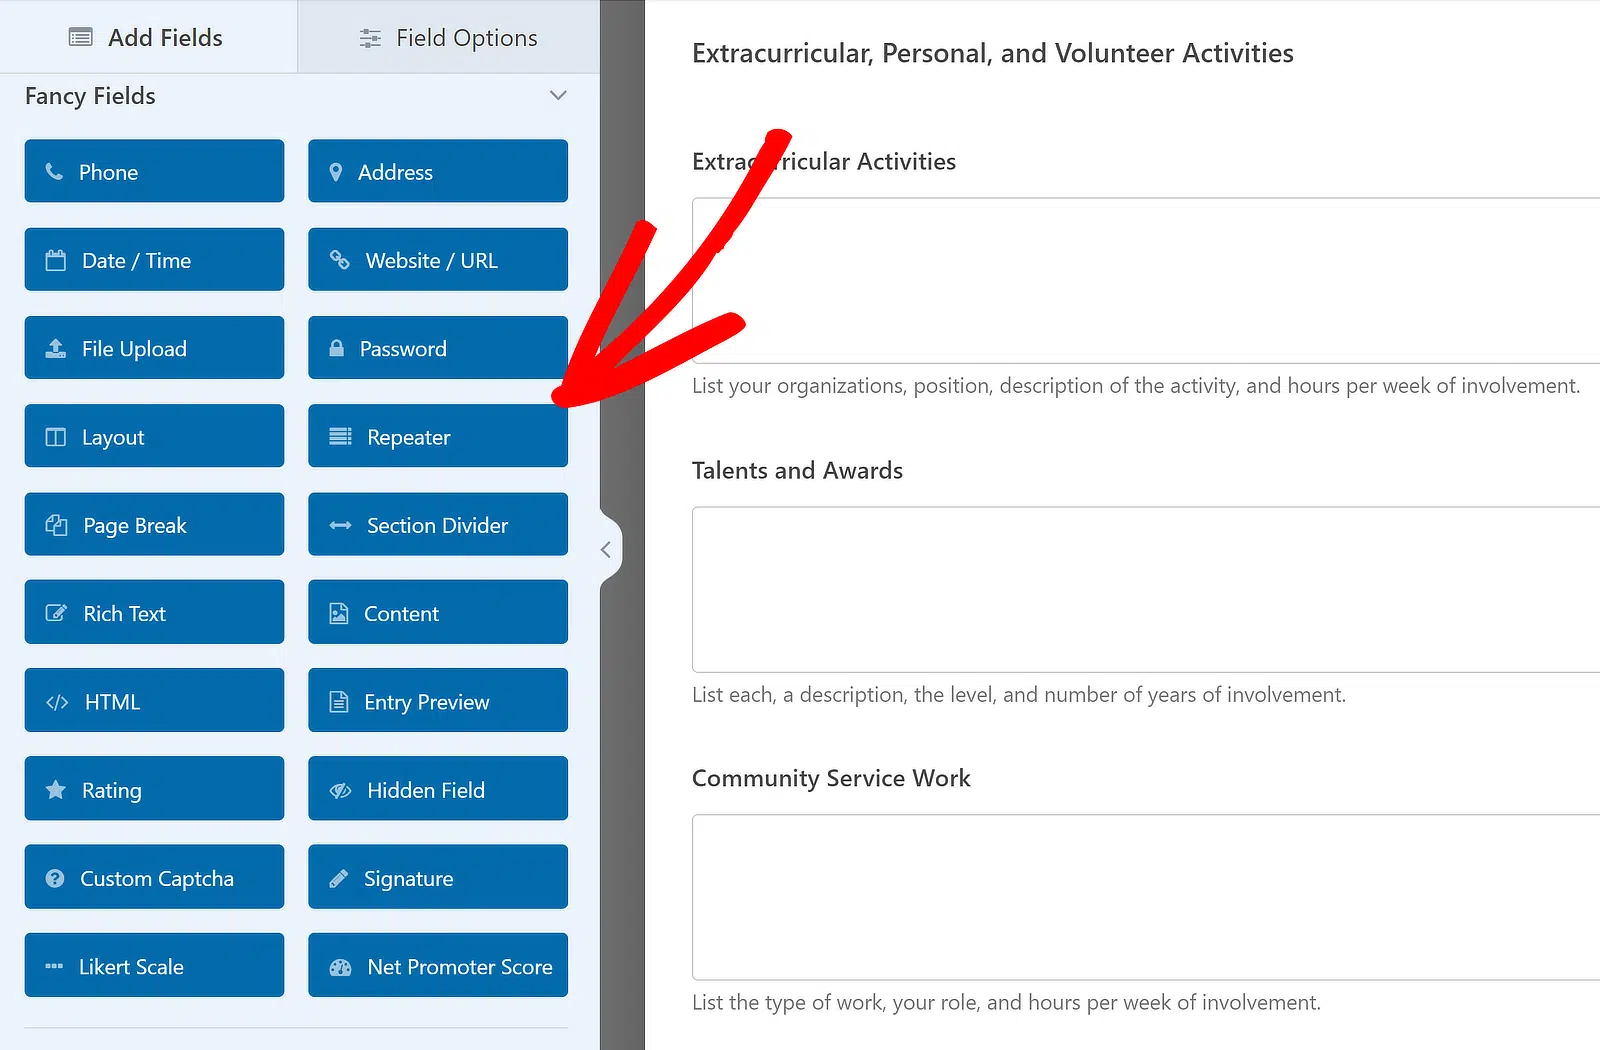
Depois que o campo Repetidor for inserido, clique nele para exibir as Opções de Campo associadas à esquerda.
Agora você pode escolher se deseja exibir o campo Repetidor em Linhas ou Blocos. Selecionarei a opção Linhas, pois funciona melhor para este caso.
Ao mesmo tempo, você precisará escolher um Layout para o campo. Optarei pelo layout padrão, mas sinta-se à vontade para escolher qualquer um dos nove presets disponíveis.
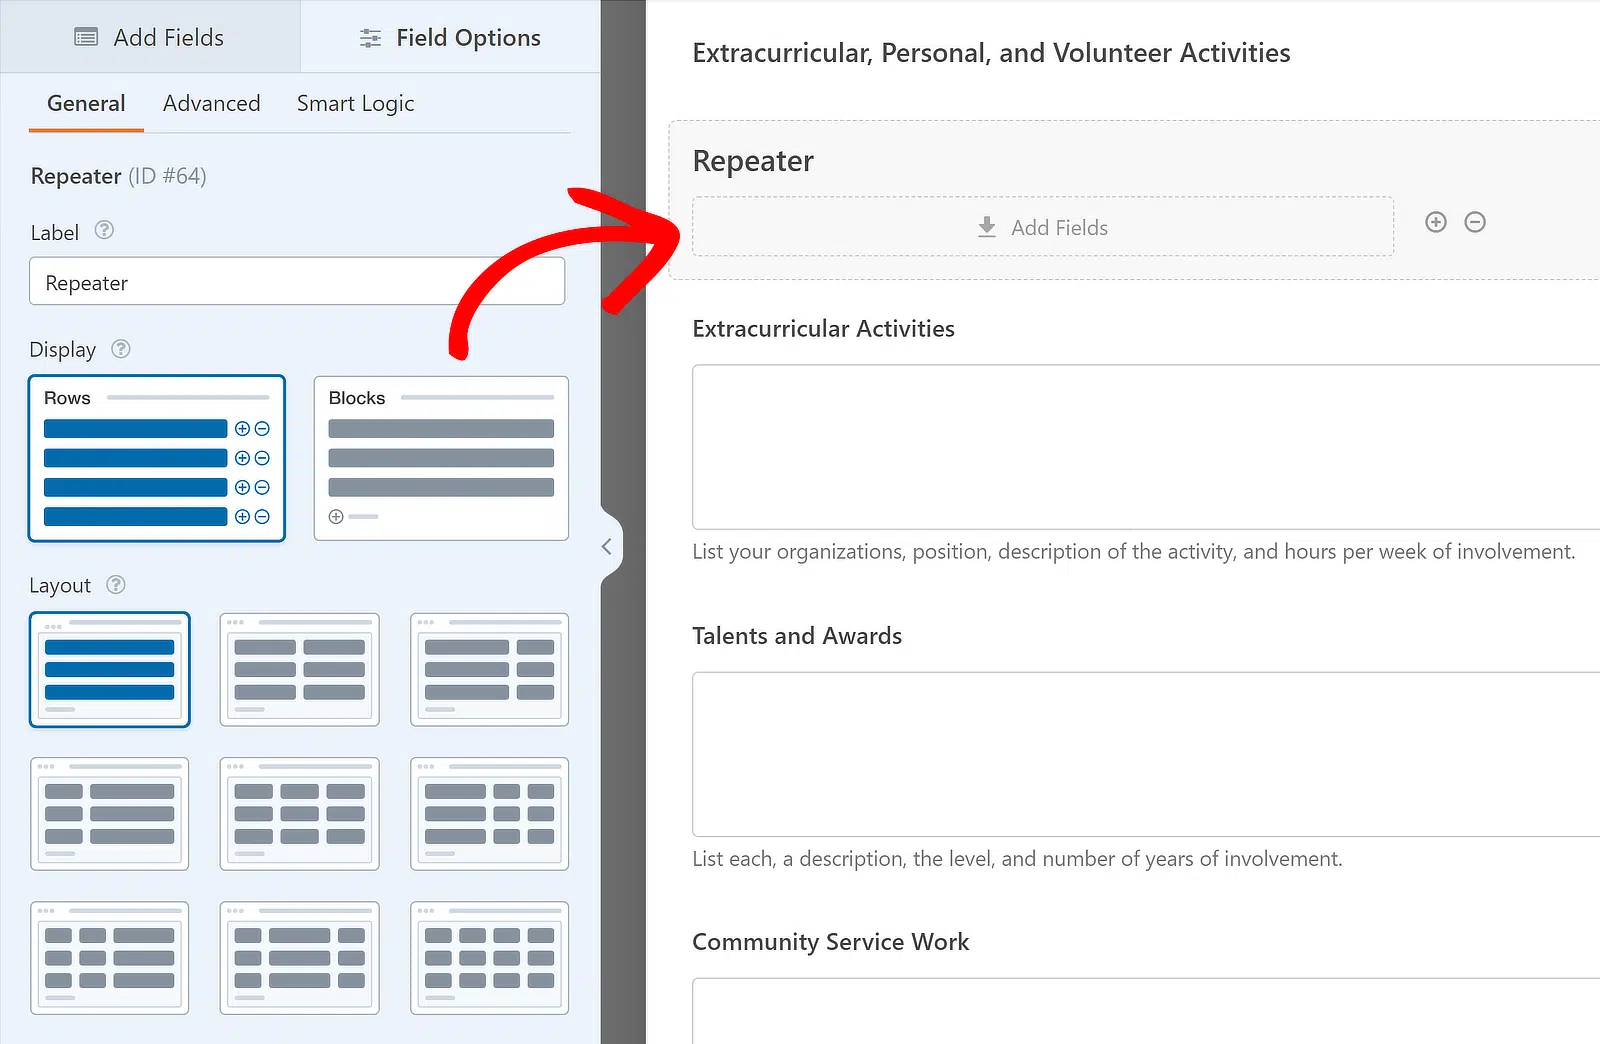
À medida que você seleciona o Layout dos presets disponíveis, a pré-visualização à direita será atualizada imediatamente e uma zona de arrastar aparecerá.
Isso permitirá que você adicione quaisquer campos que deseje tornar repetíveis. Por exemplo, primeiro adicionarei o campo Atividades Extracurriculares dentro dele.
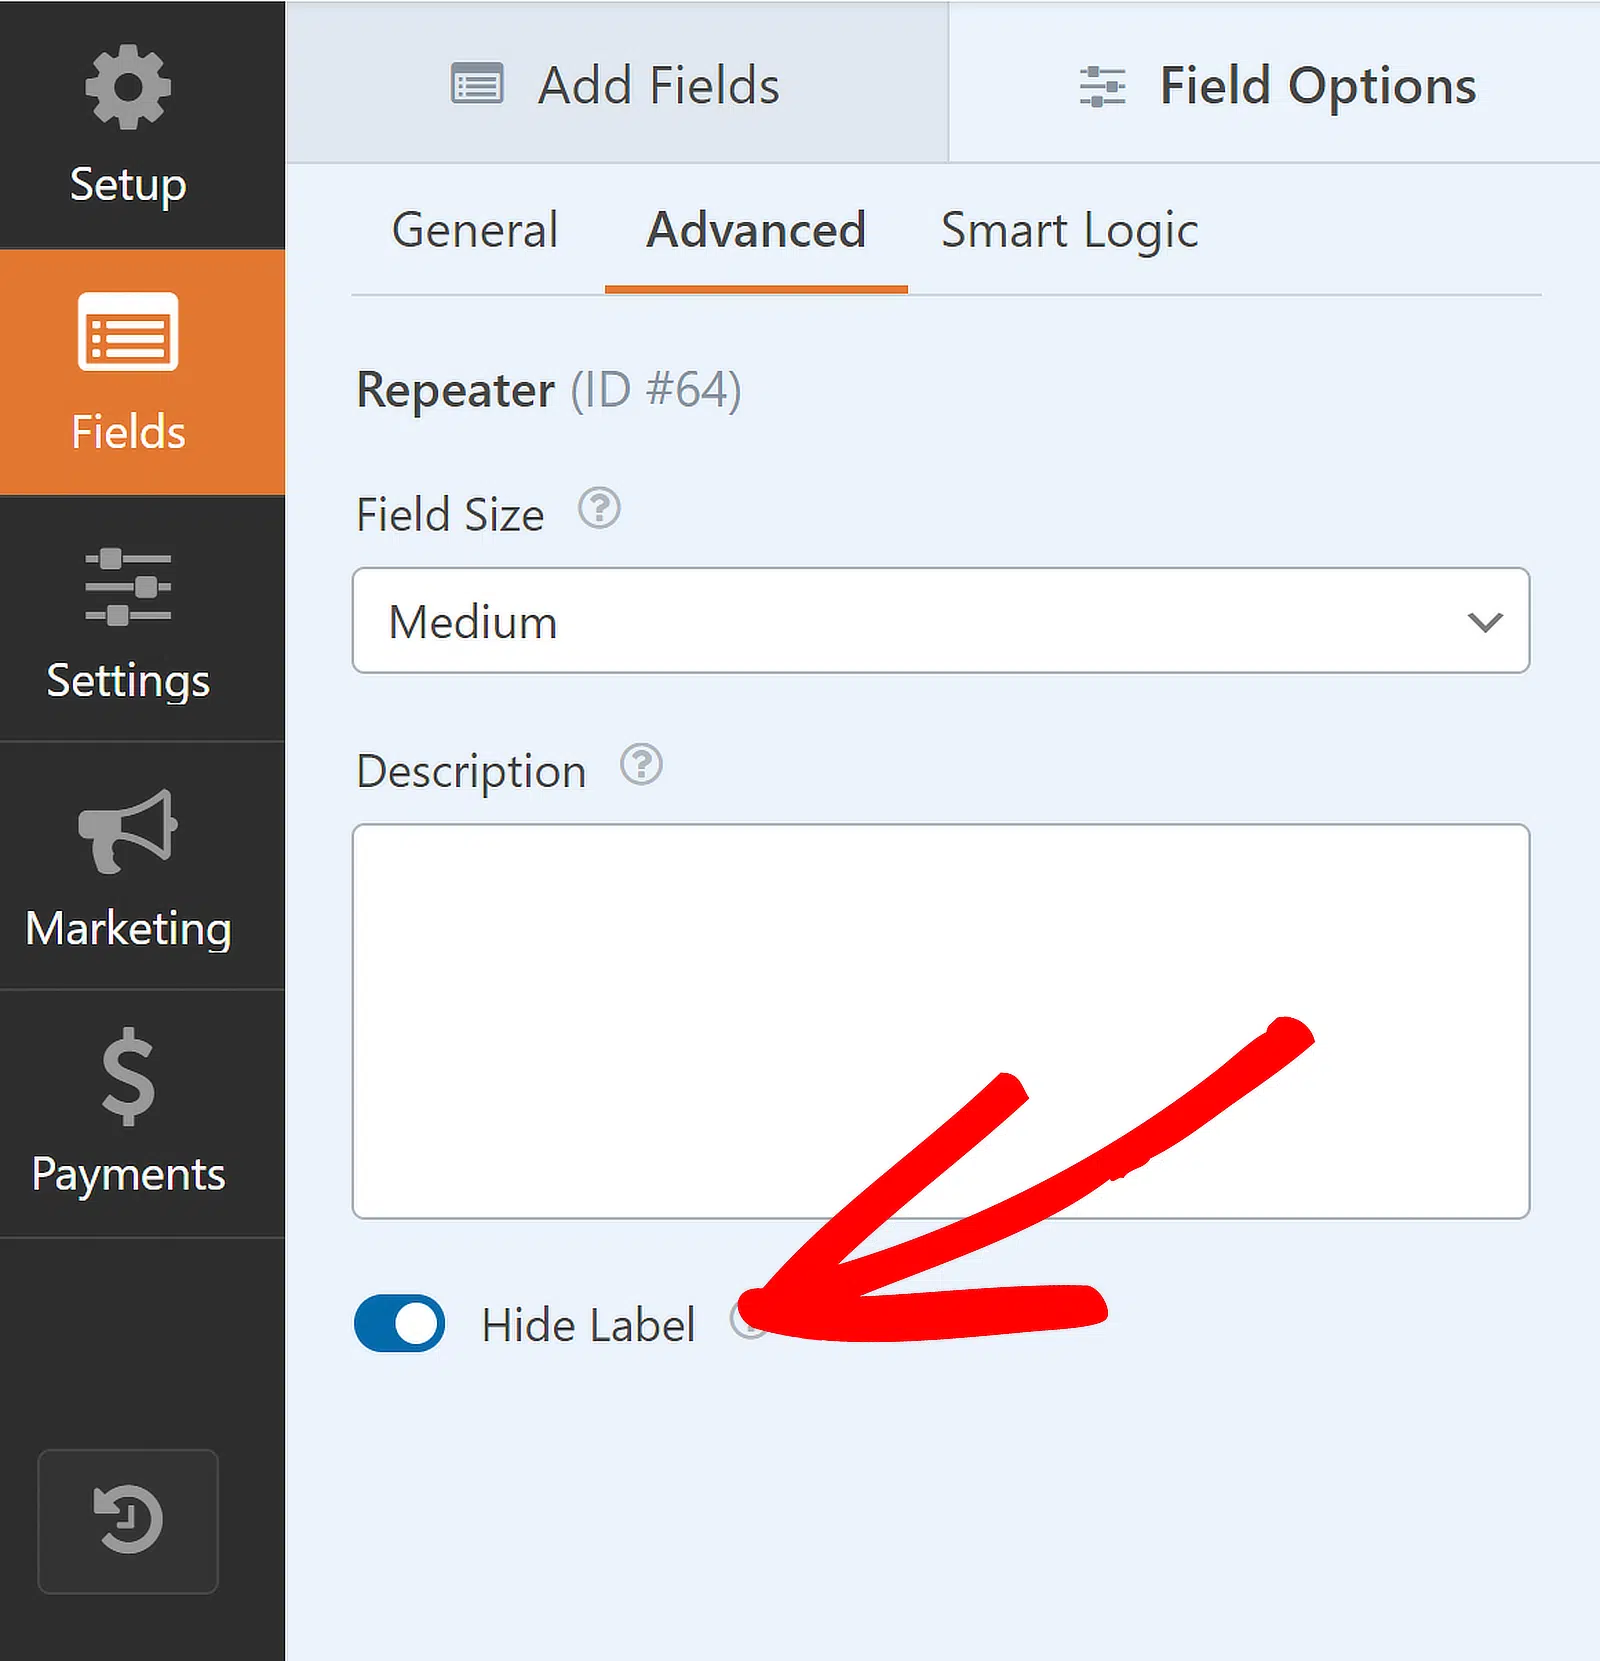
Em seguida, editarei o Rótulo do Campo Repetidor; se necessário, você pode desativá-los/ocultá-los no menu Avançado.
Agora, criarei campos Repetidores separados para Talentos e Prêmios, Trabalho de Serviço Comunitário e Emprego. Veja como fica:

Você também pode controlar quantas vezes um usuário pode repetir um campo em um envio de formulário. O mínimo padrão é 1 entrada e o máximo é 10.
Para ajustar os limites, vá para o painel Opções de Campo do campo Repetidor específico e encontre a seção rotulada Limite.

Você está indo muito bem até agora! Agora, com o campo Repetidor adicionado, vou mostrar as etapas para personalizar as configurações do seu formulário.
Etapa 5: Configure as Notificações do Formulário de Candidatura
Vamos configurar os e-mails de notificação que serão enviados quando alguém preencher seu formulário de inscrição para a faculdade.
Para começar, clique em Configurações no lado esquerdo do construtor de formulários. Em seguida, clique em Notificações para abrir as configurações de e-mail.
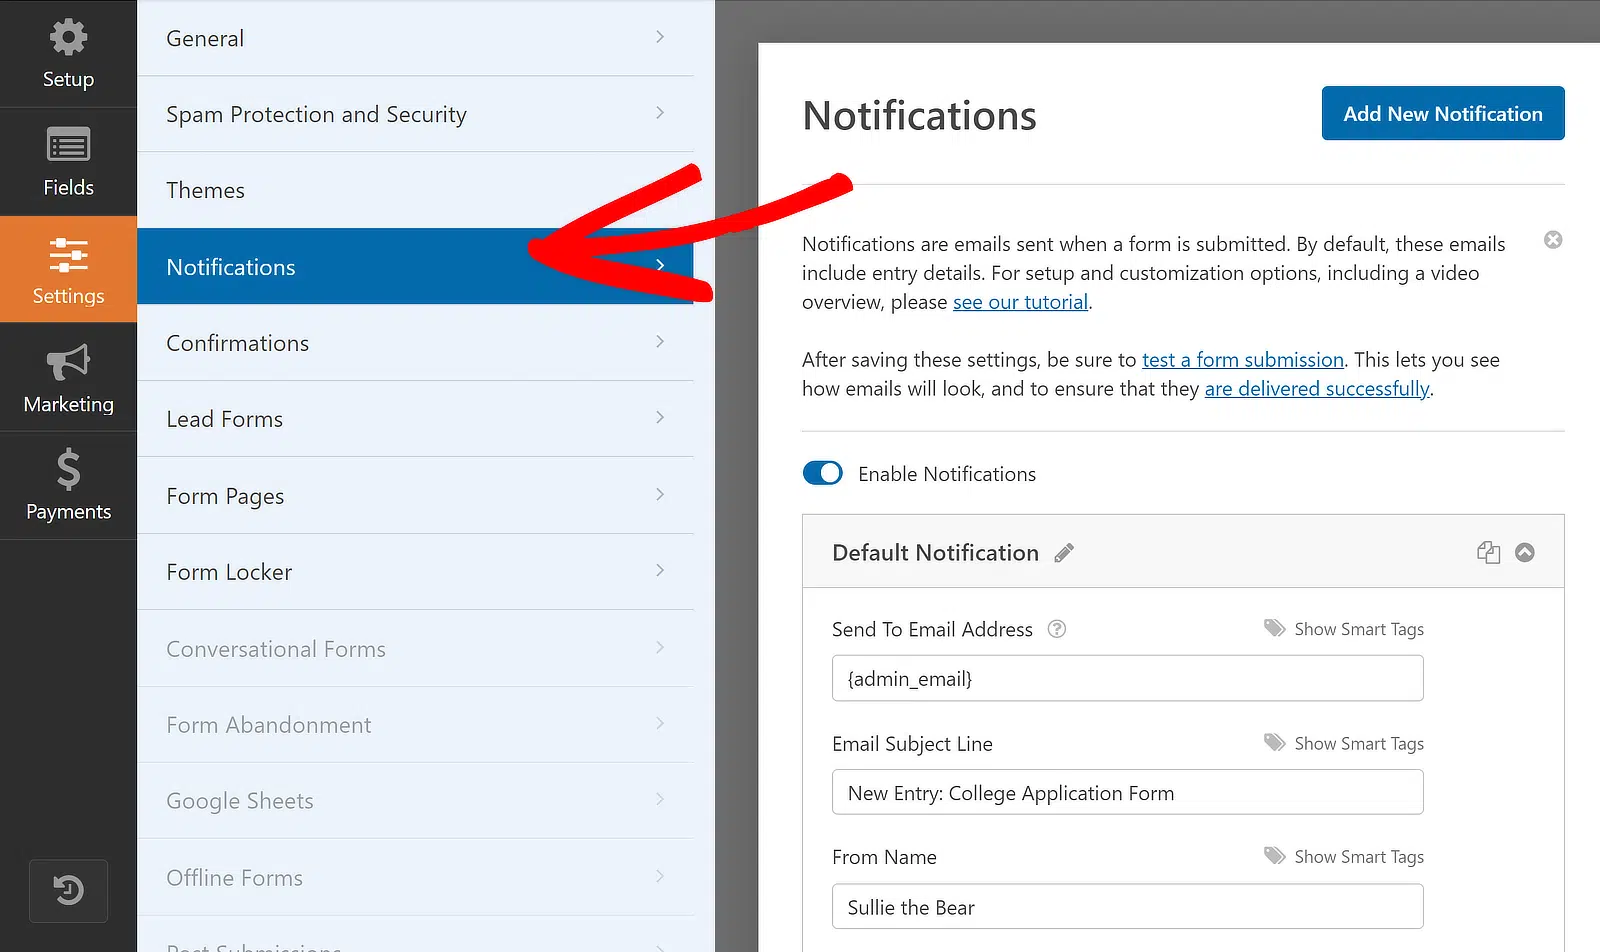
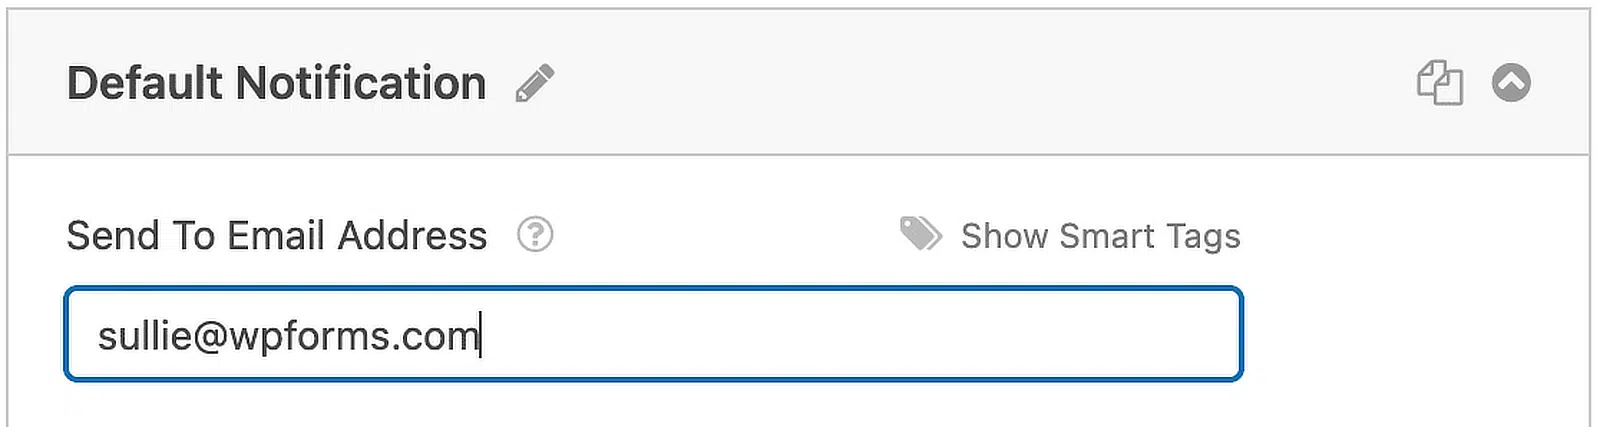
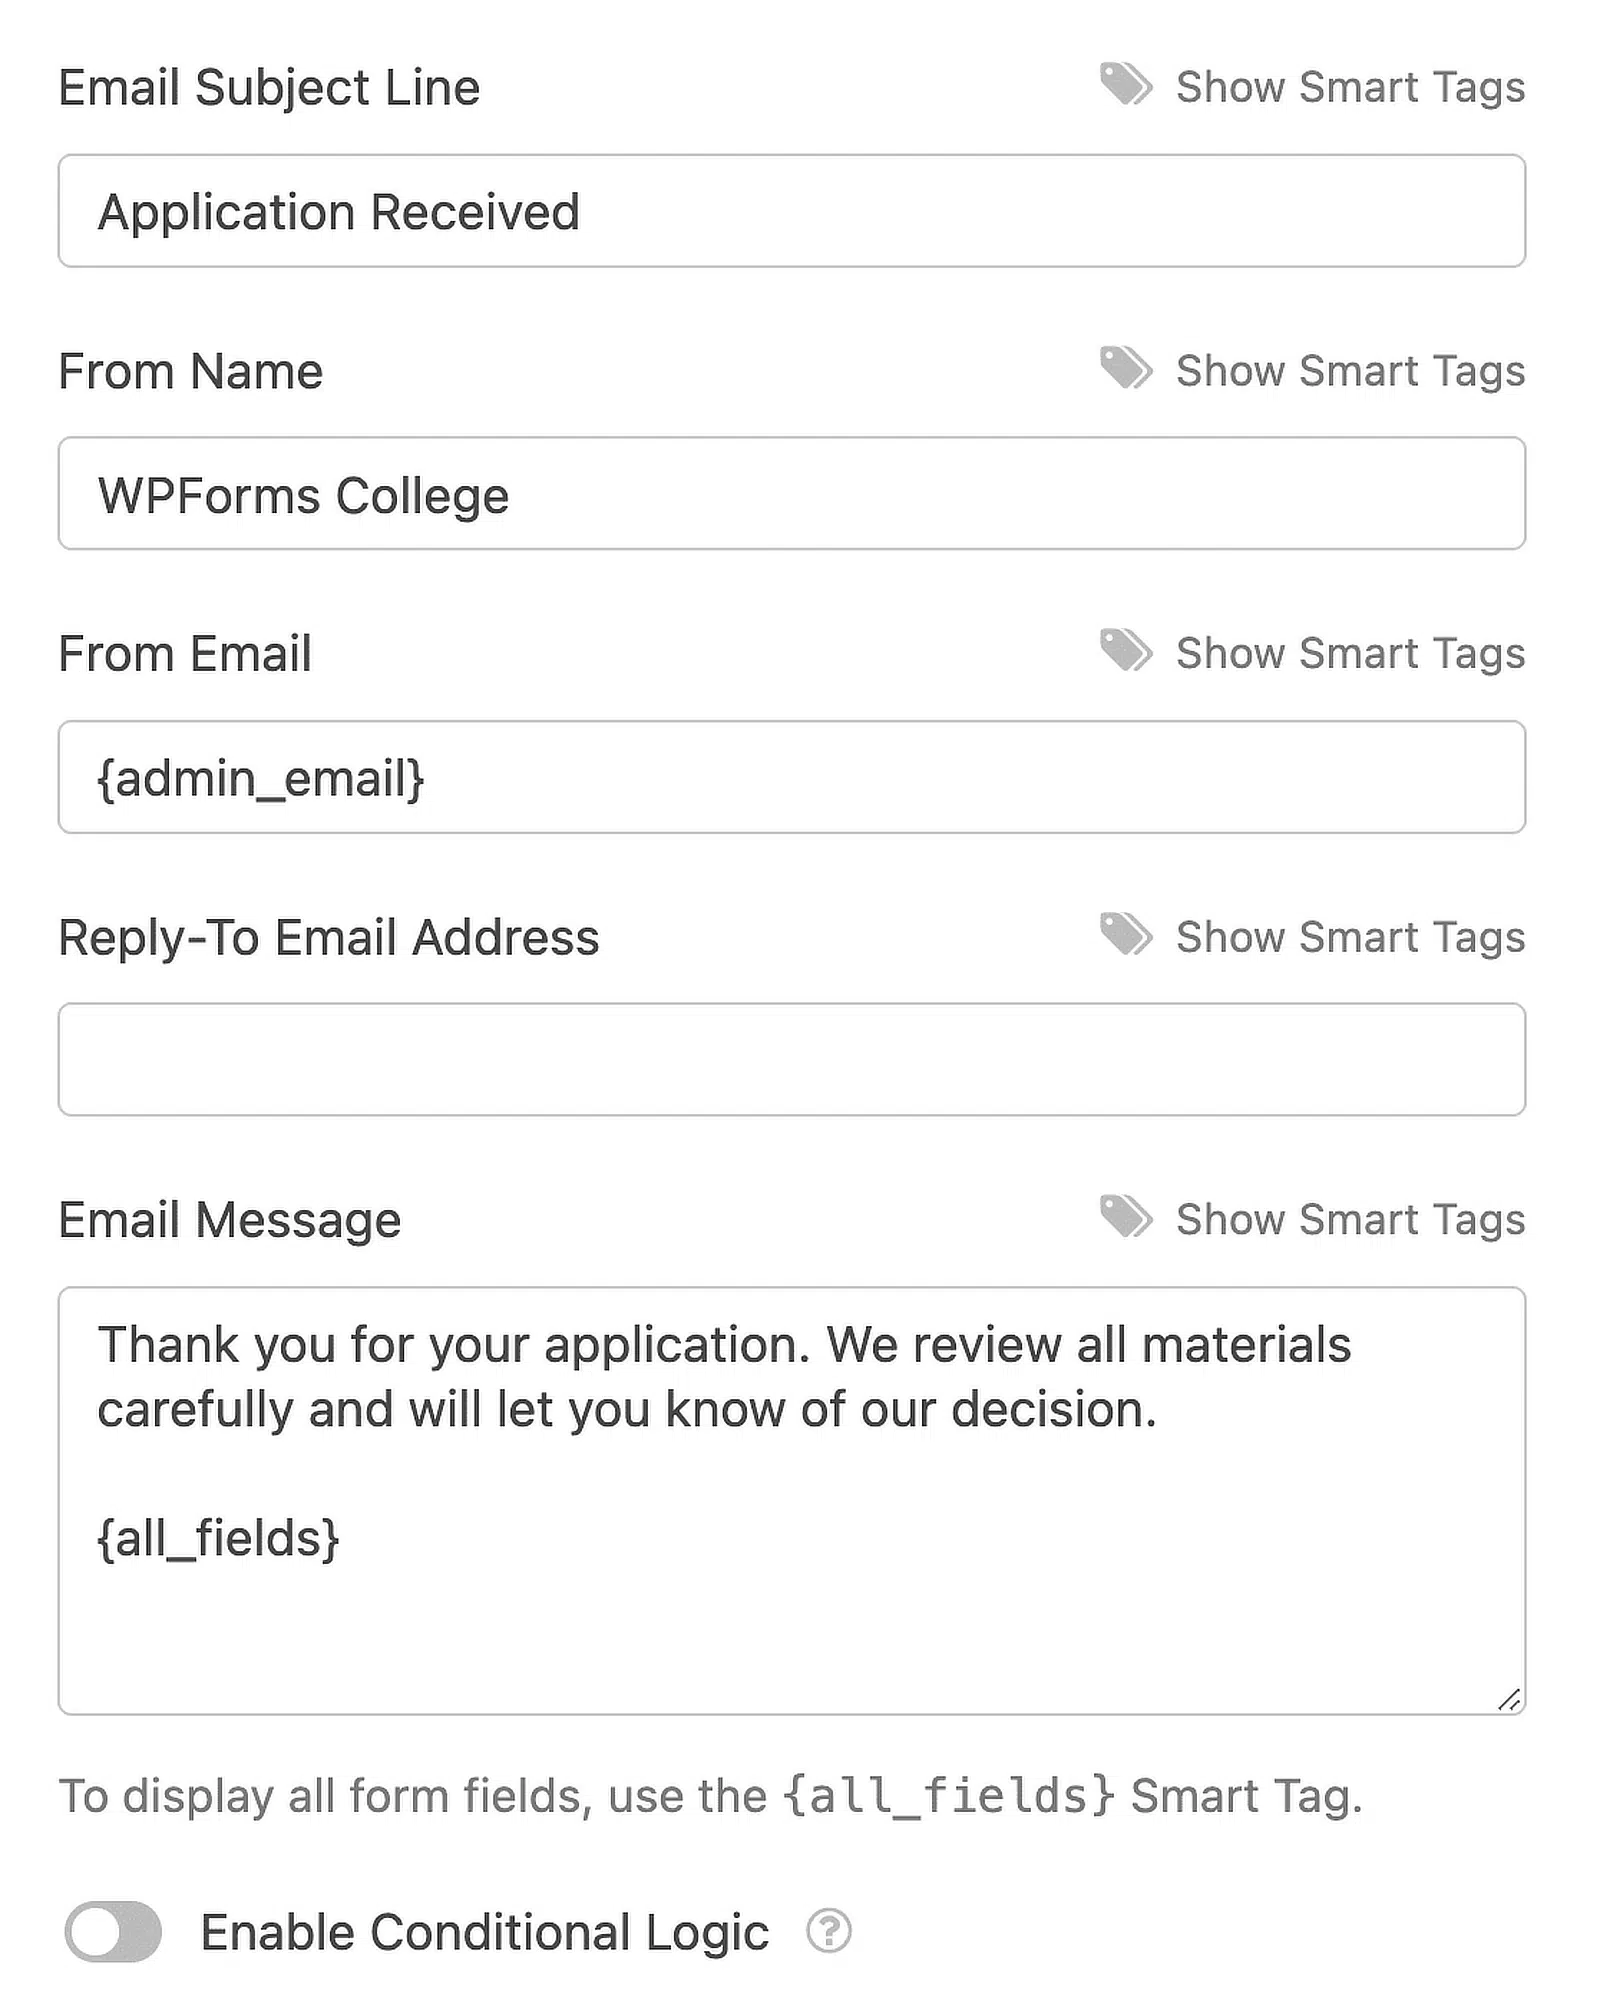
Por padrão, o WPForms envia notificações para o e-mail de administrador do WordPress, mas você também pode facilmente alterá-lo para um e-mail diferente.
Tudo o que você precisa fazer é excluir a tag {admin_email} e digitar o endereço de e-mail que deseja usar em vez disso.
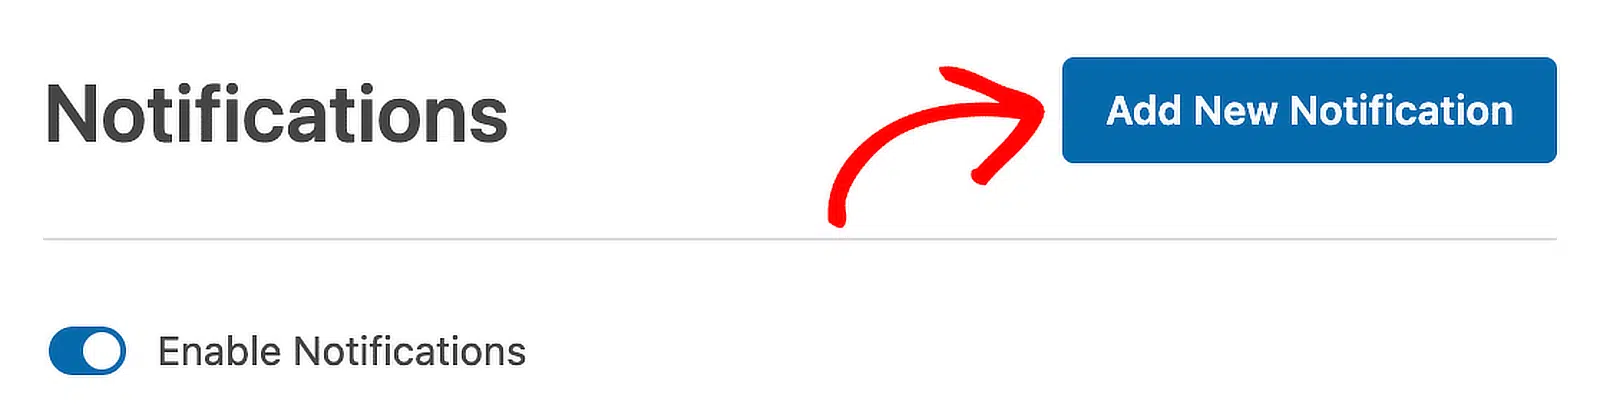
Também é importante enviar um e-mail ao candidato assim que ele se inscrever para informá-lo de que sua inscrição para a faculdade foi recebida. Para fazer isso, clique em Adicionar Nova Notificação.
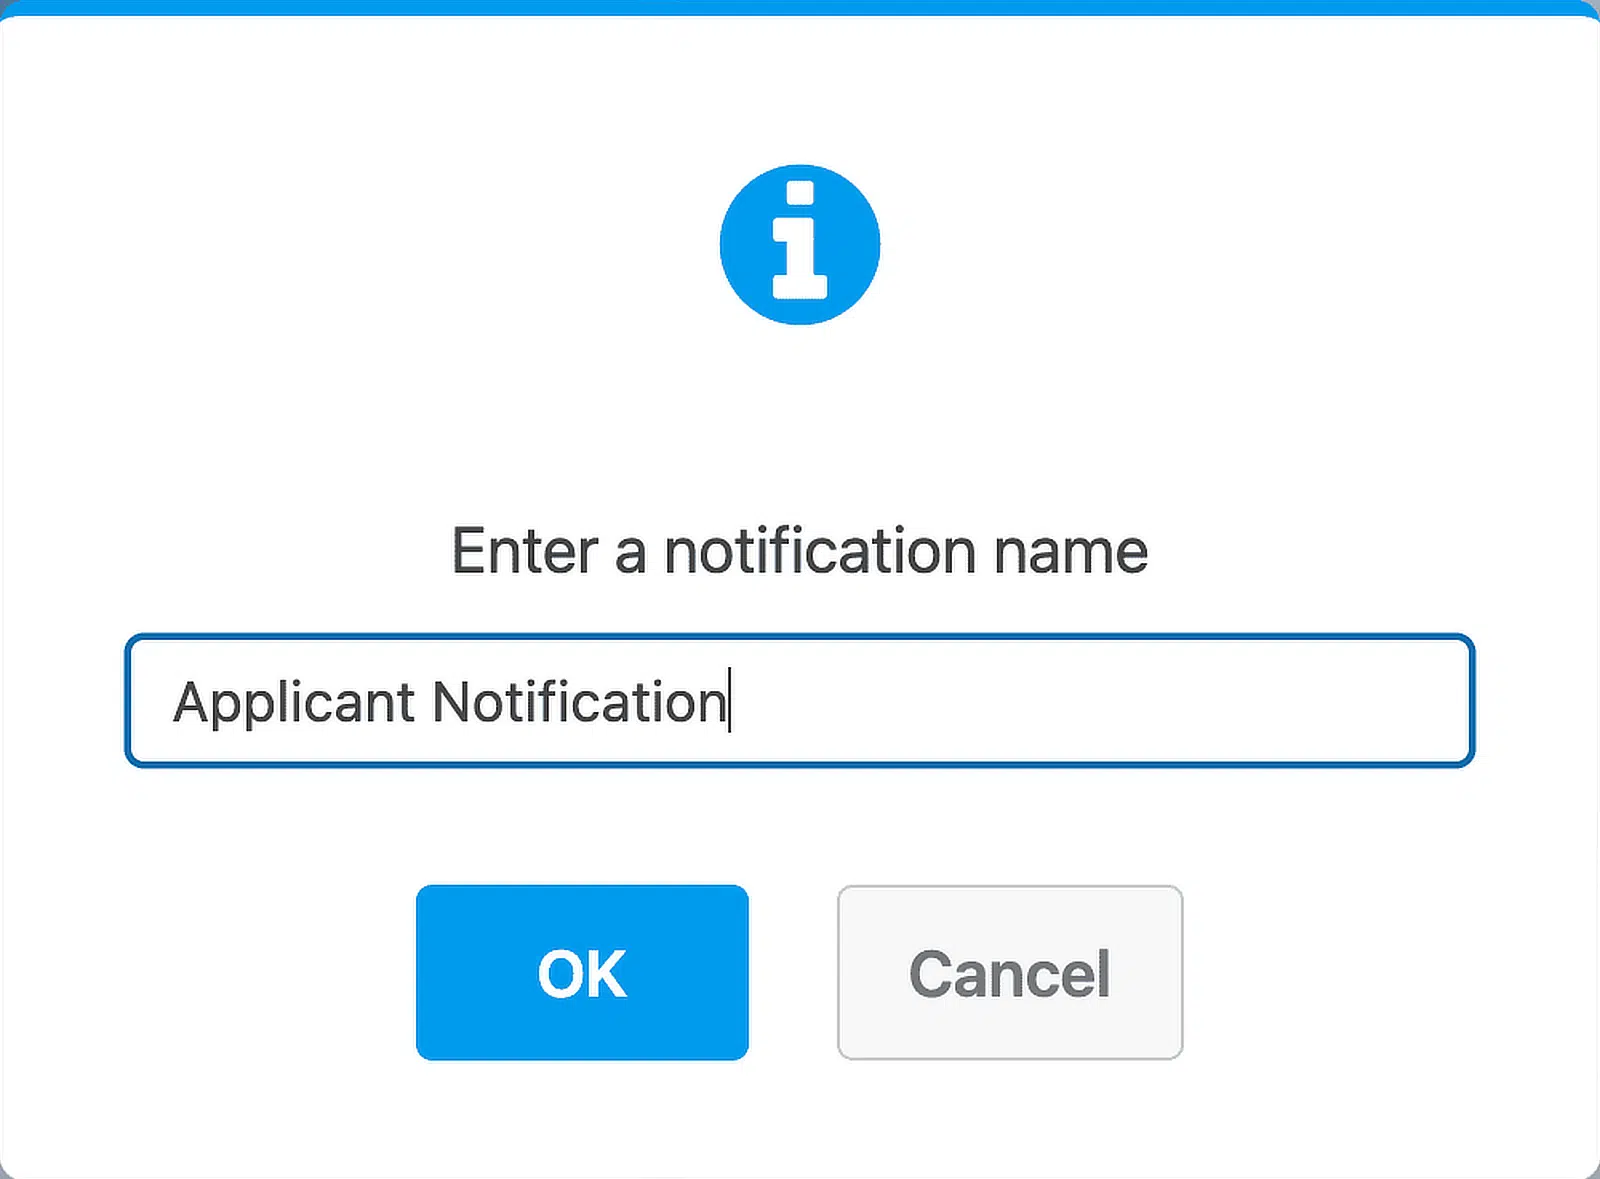
Vamos dar um nome distinto à nova notificação para que possamos encontrá-la facilmente mais tarde e alterar a mensagem, se necessário.
Se você rolar para baixo, verá duas notificações no painel do lado direito. Vamos editar a que você acabou de criar.
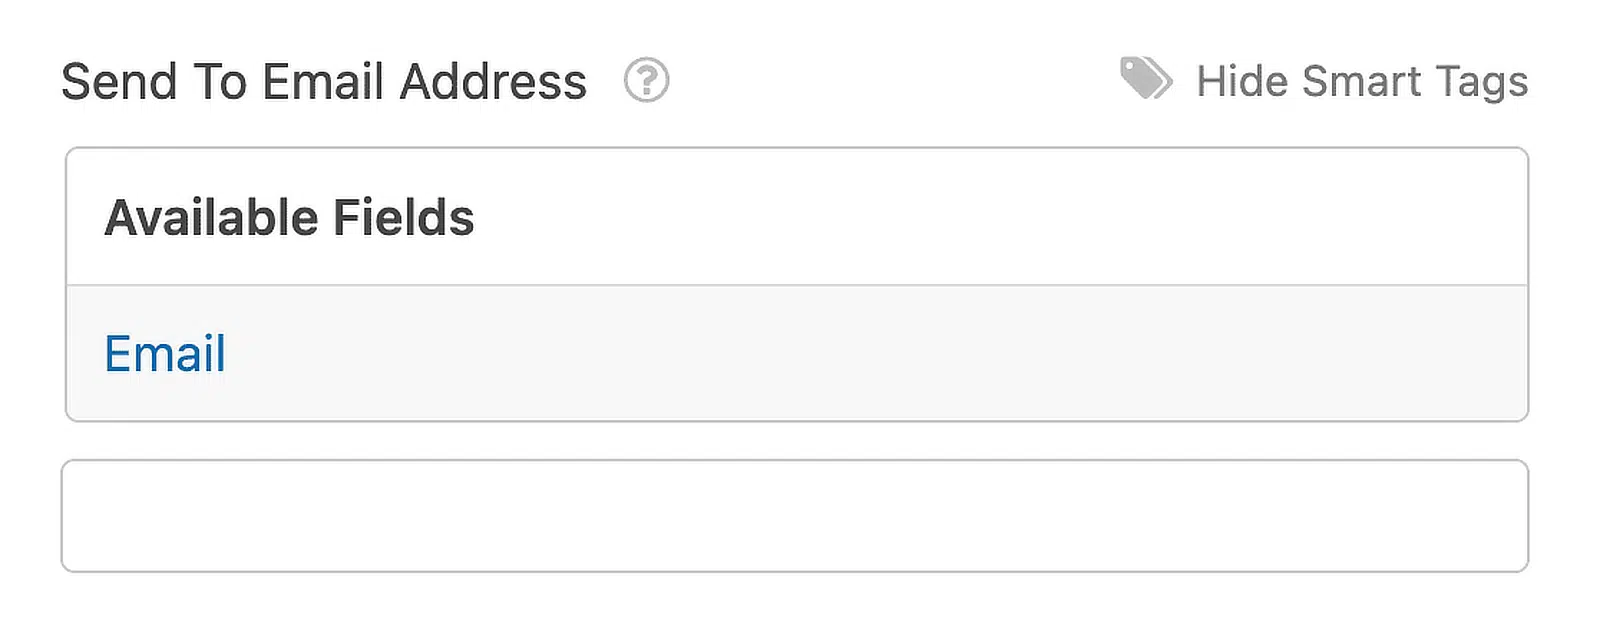
No campo Enviar Para Endereço de E-mail, use a Tag Inteligente de E-mail. Dessa forma, o WPForms enviará automaticamente esta notificação para o endereço de e-mail do candidato.
Você também pode personalizar o texto no assunto e no corpo do e-mail, se necessário, para informar o candidato sobre quaisquer etapas adicionais.
Ok, ótimo. Tudo está configurado. Vamos clicar em Salvar. Agora, você pode definir a data de encerramento no formulário de inscrição.
Etapa 6: Defina a Data de Encerramento do Seu Formulário de Inscrição
Como você está usando seu formulário de inscrição da faculdade para coletar inscrições, faz sentido fechar o formulário antes do início do ano letivo ou do semestre.
É aqui que o complemento Form Locker que instalamos anteriormente será útil. Ele permite que você adicione facilmente uma data de expiração ao seu formulário.
Portanto, no painel Configurações, clique em Form Locker. Isso abrirá um novo menu no lado direito da tela.

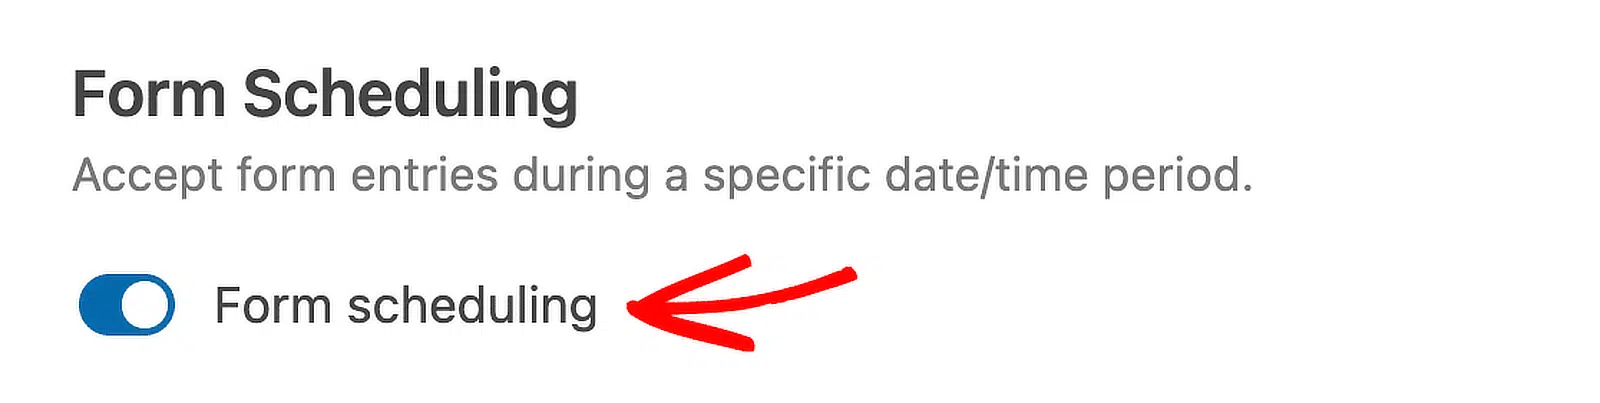
Na lista de opções disponíveis, basta mover o controle deslizante para a posição LIGADO abaixo da opção Agendamento de formulário.
Agora, defina a data de encerramento do formulário usando Data de Fim e Hora de Fim. Isso permitirá que os candidatos apenas
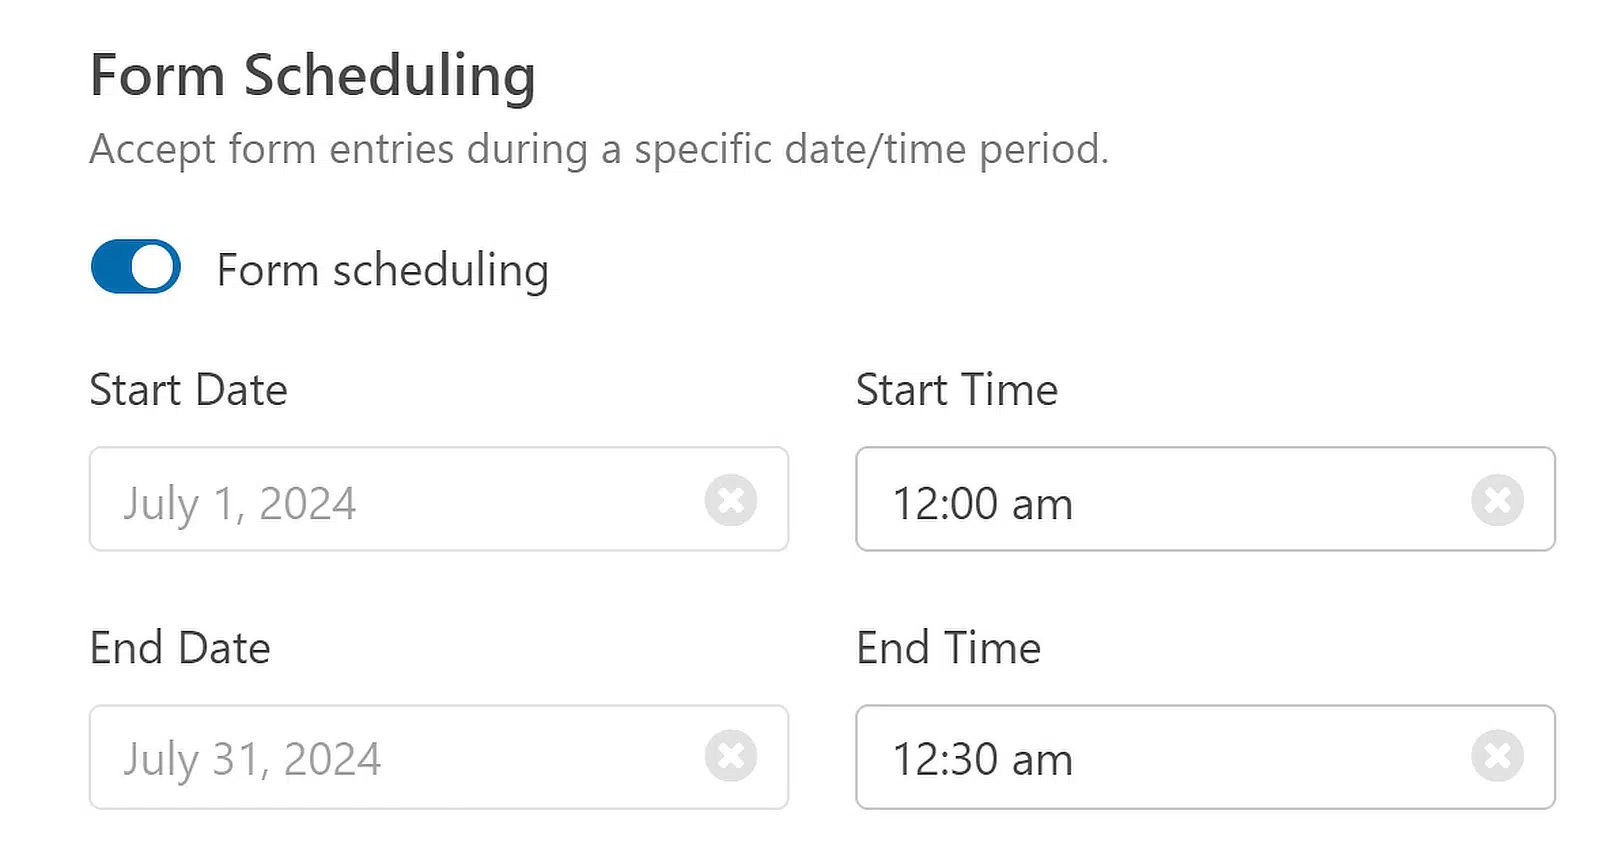
Este campo usa o fuso horário do WordPress. Aqui está um guia para alterar a hora e a data no WordPress se você precisar verificar as configurações de hora.
O formulário fechará automaticamente na data que você definir, parará de aceitar inscrições e desaparecerá. Quando isso acontecer, uma Mensagem de Fechado aparecerá em seu lugar.
Abaixo da data e hora, você pode personalizar a Mensagem de Fechado, que aparecerá assim que um candidato tentar enviar o formulário.
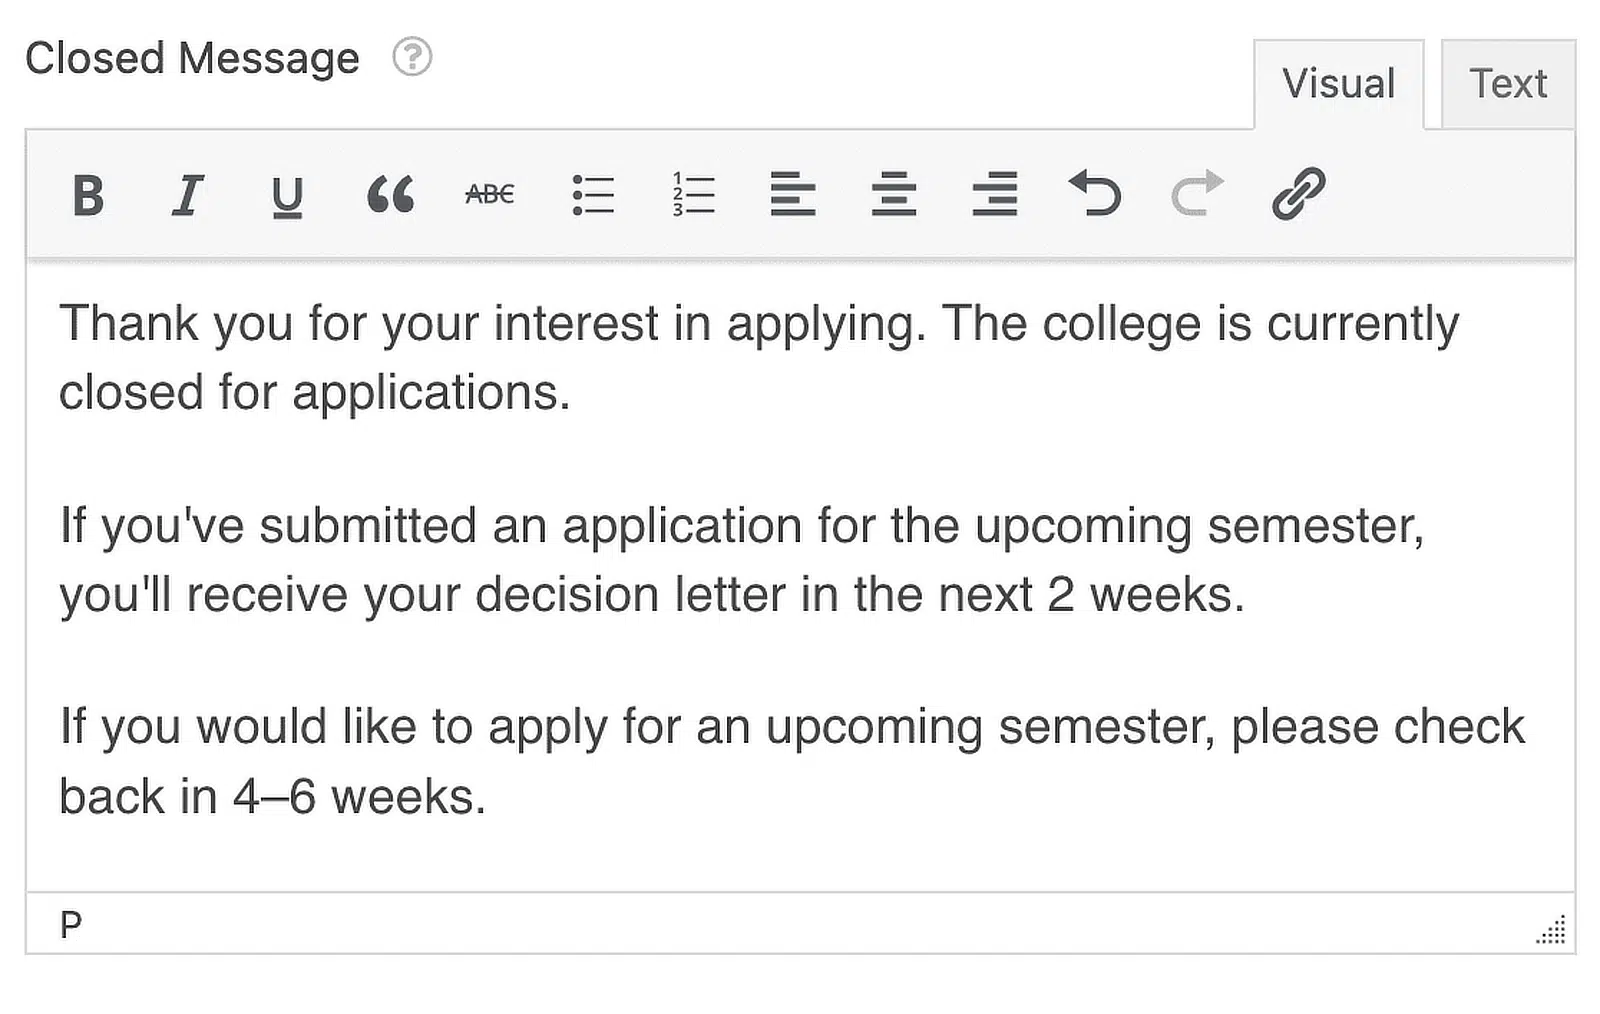
Você também pode adicionar um link para outra página ou um link externo, como uma página de mídia social, para que as pessoas possam se manter atualizadas sobre quando seu próximo período de inscrição começa.
Seu formulário está quase pronto. Agora, você só precisa publicar o formulário de inscrição da faculdade em seu site WordPress.
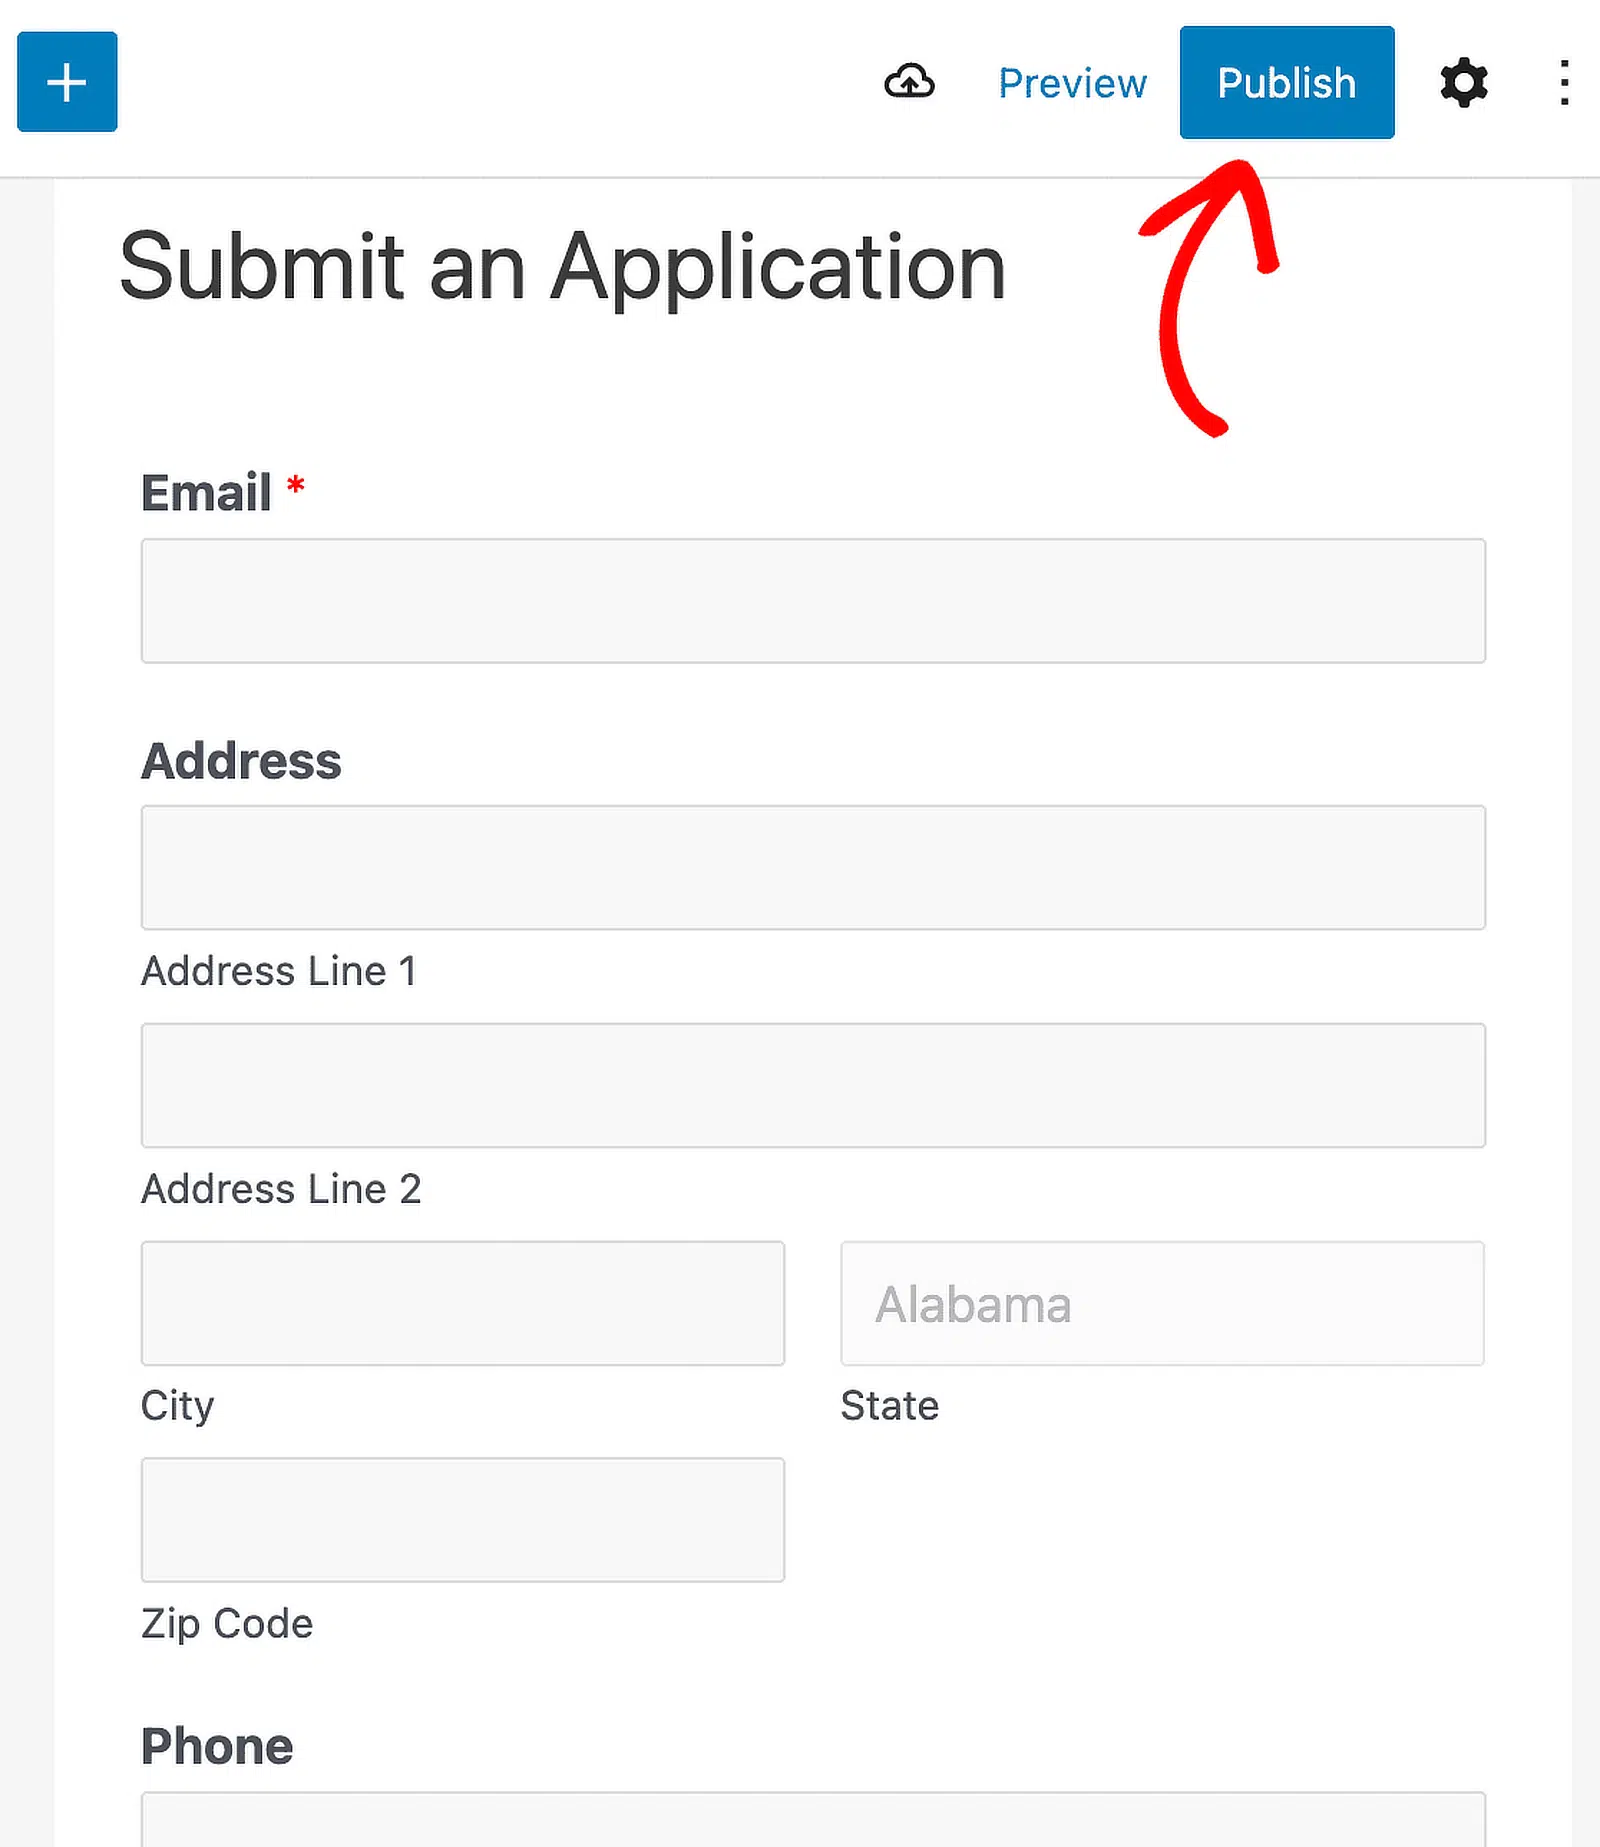
Etapa 7: Publique Seu Formulário de Inscrição Universitária
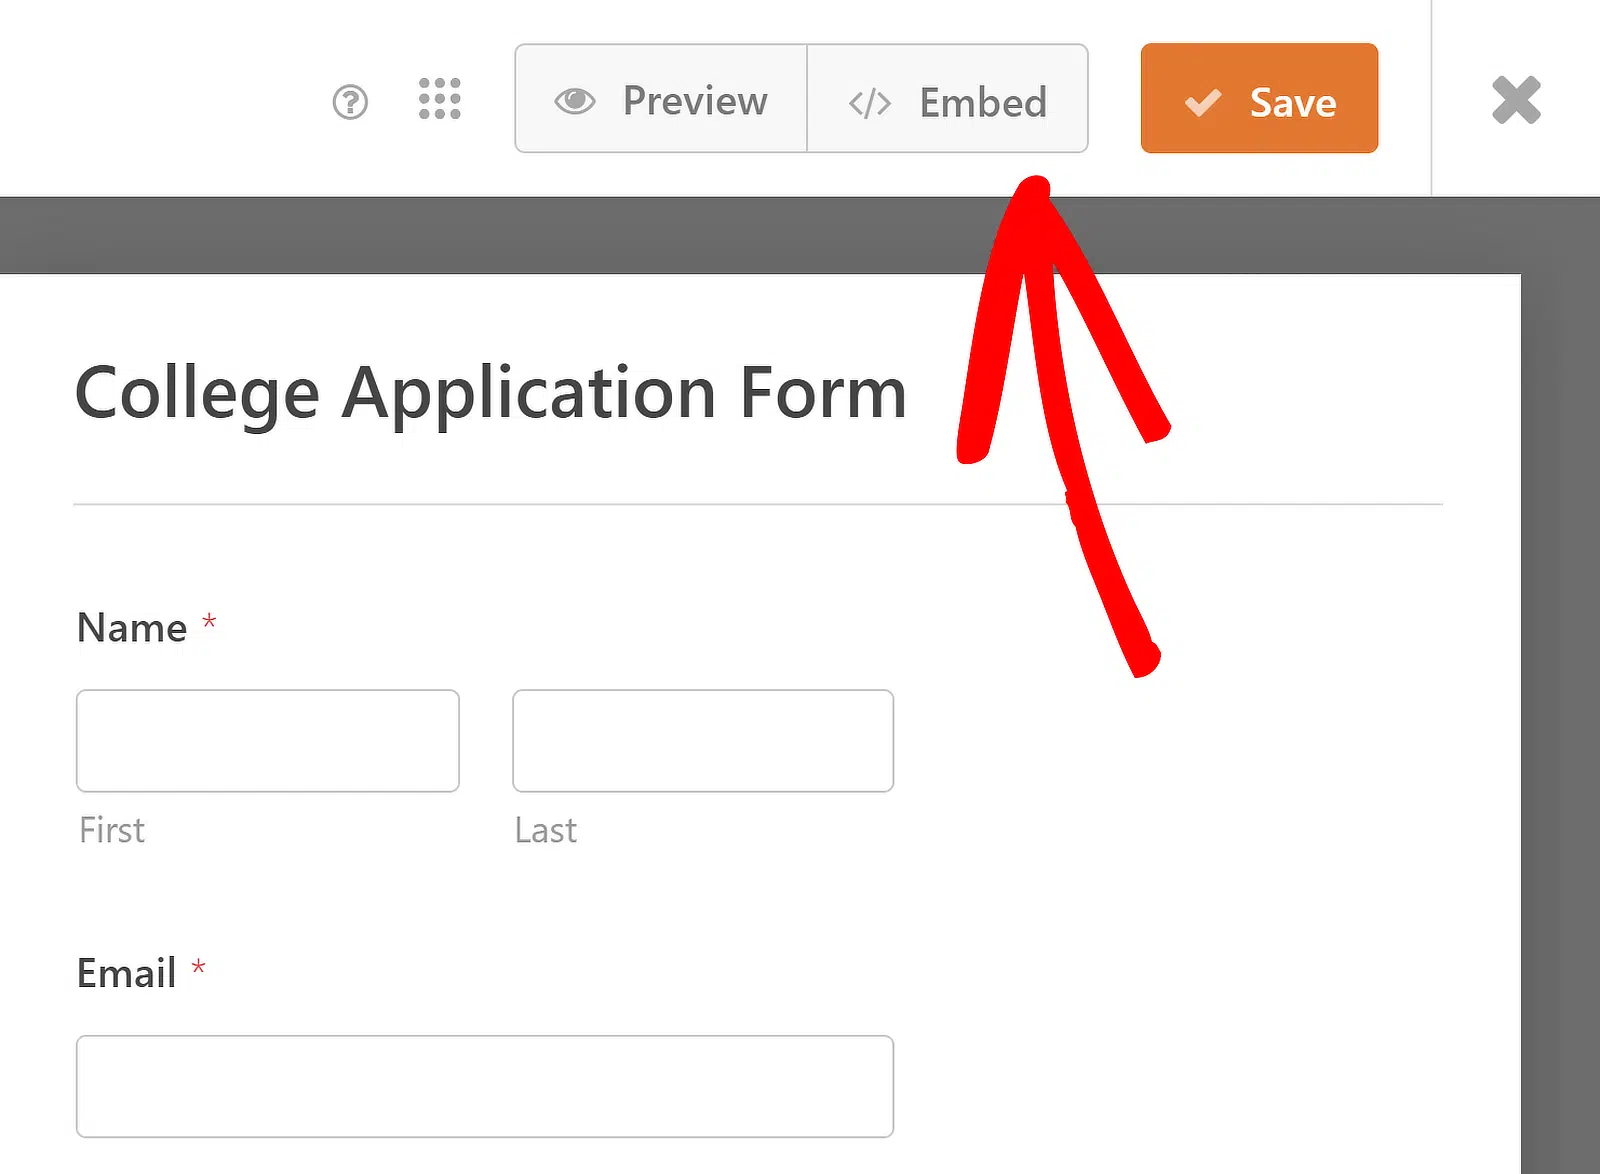
Agora que seu formulário de inscrição da faculdade está completo, vamos publicá-lo online. Comece clicando no botão Incorporar na parte superior do construtor de formulários.
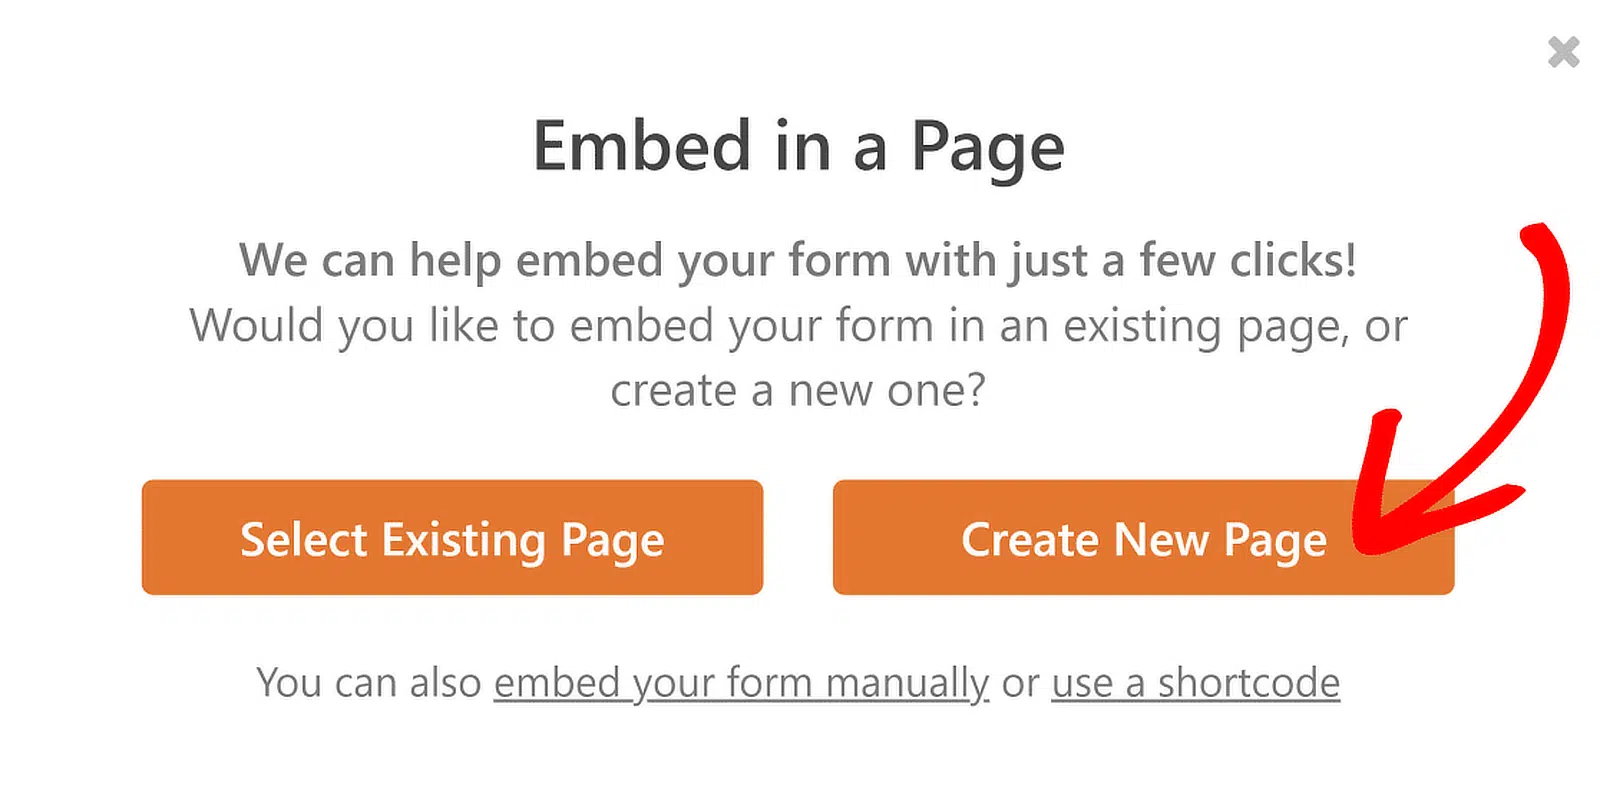
Em seguida, quando esta notificação aparecer, clique na opção Selecionar Página Existente ou Criar Nova Página, o que parecer melhor. Se você já tem uma página onde deseja que o Formulário de Inscrição da Faculdade apareça, você pode selecionar uma página existente.
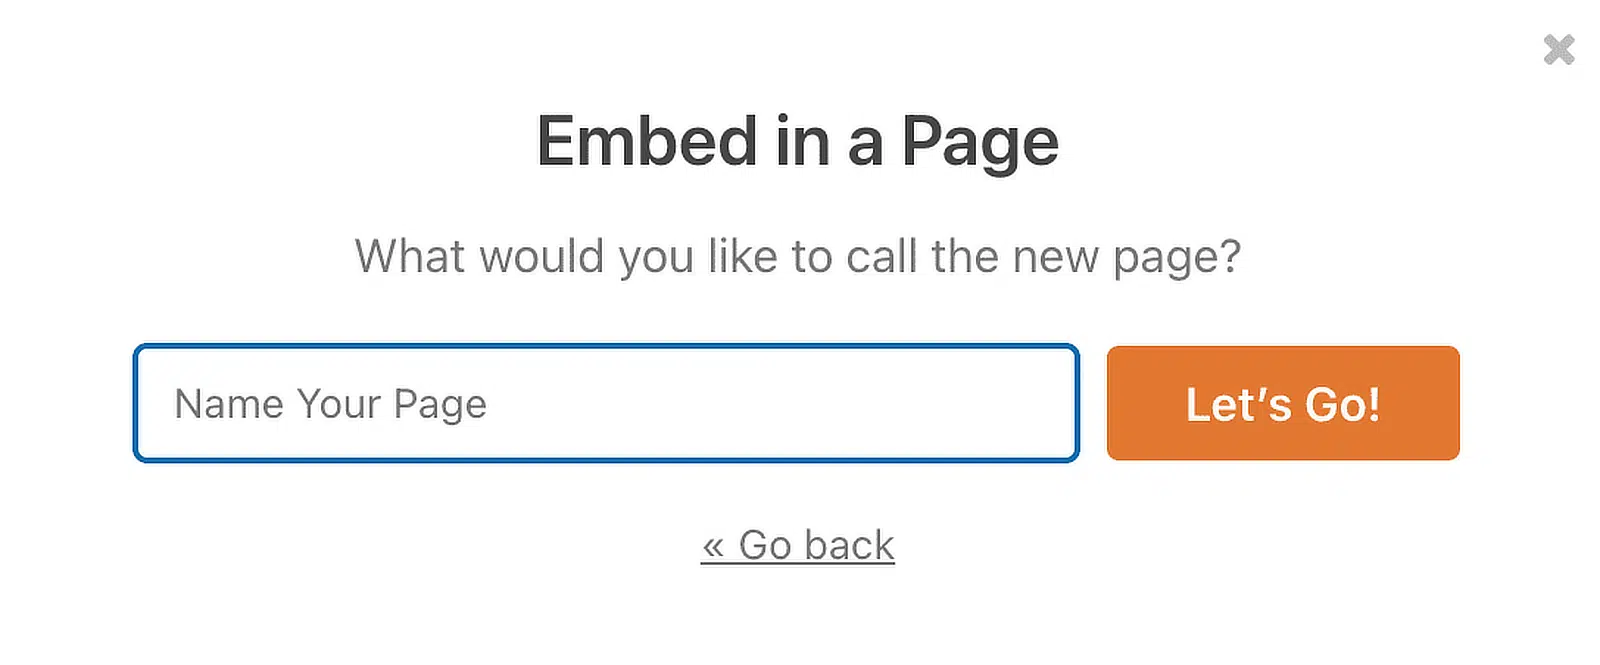
Em seguida, o WPForms pedirá que você nomeie sua página. Digite o título da página na caixa e clique em Vamos Lá.
O WPForms abrirá uma nova página para o seu formulário. Em seguida, clique em Publicar na parte superior para publicar o formulário em seu site.
Ótimo trabalho. Agora você pode começar a coletar inscrições para a faculdade online, classificar e filtrar as entradas do seu formulário para ver cada inscrição e acompanhar os candidatos. A KLH Technology solutions é uma usuária de longa data do WPForms que cria formulários de inscrição como este para sites de clientes, otimizando a coleta e o gerenciamento de dados.
Crie Seu Formulário de Inscrição da Faculdade Agora!
Perguntas Frequentes sobre Formulários de Inscrição Universitária
Formulários de inscrição para faculdade são um tópico popular de interesse entre nossos leitores. Aqui estão as respostas para algumas perguntas comuns sobre eles:
O que você deve considerar ao criar um formulário de inscrição para faculdade?
Aqui estão algumas boas dicas a serem consideradas ao construir seu formulário de inscrição para faculdade.
- Mantenha o formulário o mais curto possível — Tente usar lógica condicional e formulários de várias etapas para manter alta a taxa de conversão do seu formulário de inscrição para faculdade.
- Aceite pagamentos online — É uma boa ideia coletar a taxa de inscrição eletronicamente em vez de pelo correio com um cheque.
- Faça com que pareça bom — Se você está visando um público mais jovem com seu formulário de inscrição para faculdade, você quer ter certeza de que seu formulário pareça moderno.
- Use um campo de upload de arquivo — Se você estiver solicitando documentos como redações ou históricos escolares, certifique-se de aceitar uploads de arquivos em seu formulário. Você pode combinar nossa primeira dica com esta e exigir pagamento em um formulário de upload de arquivo.
Como crio um formulário de inscrição de estudante no WordPress?
Para criar um formulário de inscrição de estudante no WordPress, use o plugin WPForms. Instale e ative o WPForms, em seguida, use o construtor de arrastar e soltar para adicionar os campos necessários, como nome, e-mail e detalhes do estudante. Você também pode usar o Addon Form Locker para segurança e restrições adicionais.
Como adiciono um formulário de admissão no WordPress?
Adicionar um formulário de admissão no WordPress é fácil com o WPForms. Após instalar e ativar o WPForms, escolha um modelo de formulário e personalize-o com os campos necessários para admissão, como informações pessoais, preferências de curso e documentos. Publique o formulário em seu site usando o shortcode fornecido.
Como crio um formulário de carreira no WordPress?
Criar um formulário de carreira no WordPress envolve o uso do plugin WPForms. Uma vez instalado e ativado, selecione um modelo de formulário de emprego e personalize-o com campos para detalhes pessoais, cargos e uploads de currículo. Incorpore o formulário em sua página de carreiras para começar a coletar inscrições.
Em seguida, aprenda como criar um formulário de inscrição em grupo
Organizar eventos, workshops ou aulas geralmente requer o registro de vários participantes simultaneamente. Este guia irá guiá-lo por cada etapa de criação de um formulário de registro em grupo no WordPress.
Crie seu formulário WordPress agora
Pronto para criar seu formulário? Comece hoje mesmo com o plugin de criação de formulários WordPress mais fácil. WPForms Pro inclui muitos modelos gratuitos e oferece uma garantia de devolução do dinheiro em 14 dias.
Se este artigo ajudou você, por favor, siga-nos no Facebook e Twitter para mais tutoriais e guias gratuitos do WordPress.

