AI Summary
Introduction
Want to customize the Stripe styling on the elements on your forms? No problem! This tutorial will walk you through the simple steps of customizing the appearance of your Stripe Credit Card field using PHP.
Please note that this snippet will only be applied to the Stripe Credit Card form field when using the Credit Card Field Mode from the WPForms Settings Payments tab is set to Payment Element.
To learn more about this option, please see this useful guide.
By default, the field will already have default options set within WPForms.

Creating the form
We’re going to begin by creating a new form and adding our fields. You’ll need to include the Stripe Credit Card field on your form.
If you need help in creating a form that will process Stripe payments, please checkout this detailed guide.
For the purpose of this tutorial, we’ve created a simple order form.

Adding the snippet
Now it’s time to add the snippet. If you need help with how and where to add custom snippets to your site, please see this tutorial.
/**
 * Customize Stripe styling when using the Payment Element
 *
 * @link https://wpforms.com/developers/how-to-customize-the-stripe-styling/
 */

function wpf_stripe_payment_element_appearance() {

    return [
        'theme' => 'stripe',
        'labels' => 'floating',
        'variables' => [
            'fontFamily' => 'Sohne, system-ui, sans-serif',
            'fontWeightNormal' => '500',
            'borderRadius' => '8px',
            'colorBackground' => '#0A2540',
            'colorPrimary' => '#EFC078',
            'accessibleColorOnColorPrimary' => '#1A1B25',
            'colorText' => 'white',
            'colorTextSecondary' => 'white',
            'colorTextPlaceholder' => '#727F96',
            'tabIconColor' => 'white',
            'logoColor' => 'dark'
        ]
    ];
}

add_filter( 'wpforms_integrations_stripe_api_payment_intents_set_element_appearance', 'wpf_stripe_payment_element_appearance' );
In this snippet, we’ve selected the Stripe theme and set the field labels to floating as well as various CSS options.
Now when we view our form, you can clearly see the changes we’ve made including the floating labels on the field.

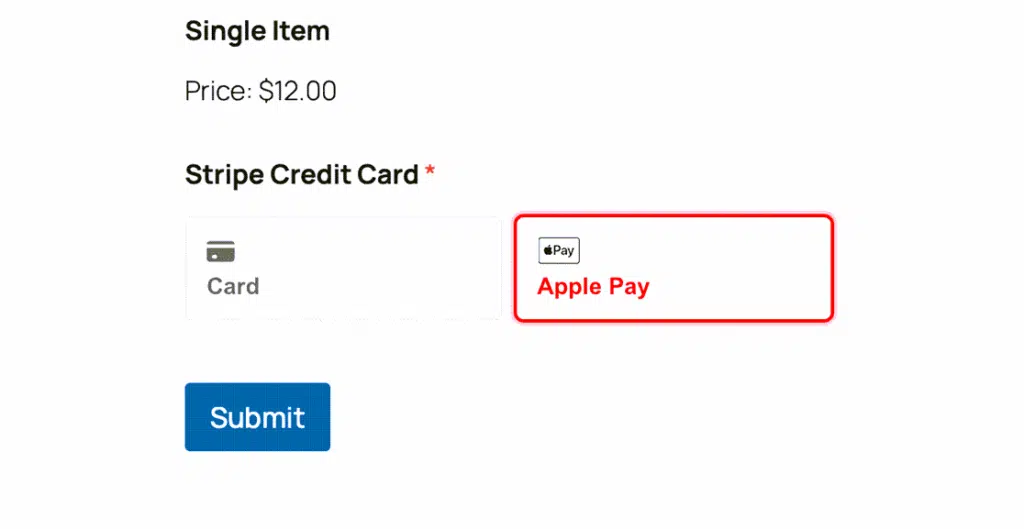
Customizing the Payment Request Button (Apple Pay and Google Pay)
If your Stripe Credit Card field is using the Payment Element, you can also customize how the Apple Pay and Google Pay button is displayed by overwriting Stripe’s appearance object.
To do this, use the wpforms_integrations_stripe_api_payment_intents_set_element_appearance filter and add a rules entry for .PaymentRequestButton. This lets you control the button’s styling, including the text color.
add_filter( 'wpforms_integrations_stripe_api_payment_intents_set_element_appearance', function ( $appearance ) {
    // Define a consistent appearance structure for Stripe Elements.
    $appearance = [
        'rules' => [
            '.PaymentRequestButton' => [
                'background-color' => '#FFF',
                'color' => '#FFFFFF',
                'border-radius' => '4px',
                'height' => '64px',
                'font-family' => 'Arial, sans-serif',
                'font-size' => '16px',
            ],
        ],
        'variables' => [
            'colorPrimary' => '#FF0000',
            'fontFamily' => 'Arial, sans-serif',
        ],
    ];
return $appearance;

});
And that’s all you need to customize the Stripe styling. Would you like to add floating labels to other form fields? Check out our tutorial on How to Create a Form With Floating Labels.