how-to-make-a-wordpress-podio-integration-in-wordpress_b

How to Make a WordPress Podio Integration in WPForms

Editorial Note: We may earn a commission when you visit links on our website.

Do you want to send form entries from WordPress to Podio? When you create a WordPress Podio integration, you can send form submissions from your website to any webform in a Podio app.

In this article, we’ll show you the easy way to connect WordPress to Podio using WPForms.

Create Your WordPress Form Now

What Is Podio?

Podio is an online collaboration tool that lets you share information and track activity in different parts of your business.

You can add apps, communicate with workmates, and build webforms to capture data.

Podio workspaces can be customized for almost any purpose. And integrating Podio with WordPress makes it even more useful. For example, you could:

Now we know a little more about Podio, we’re going to go ahead and create a WordPress Podio integration using WPForms.

How to Make a WordPress Podio Integration in WPForms

In this example, we’re going to create a WordPress form for a webinar. When someone visits our landing page and signs up to the webinar, their details will be sent to our Podio event workspace.

Before you start, you’ll need to have a Podio workspace and app set up. We added the free Simple Event Pack to our workspace. Then, we customized the form in the Participants app so that it has all of the fields we need.

If you need help getting a webform set up in Podio, here’s a guide from the Podio Help Center. Once you have your fields set up in Podio, jump back to this article.

Step 1: Install the WPForms Plugin

Start by installing the WPForms plugin on your WordPress site.

If you need help, read this guide on how to install a plugin in WordPress.

You’ll also need the Zapier addon to connect your form to Podio. To install it, go to WPForms » Addons and click Install Addon under the Zapier addon.

Installing the Zapier addon

Once you’ve activated the WPForms plugin and the Zapier addon, you can go ahead and create a new WordPress form.

Step 2: Create Your Podio Form in WordPress

WPForms lets you create almost any kind of form for your website. The process we’ll use here is similar to creating a custom GoToWebinar registration form.

To get started, go to your WordPress dashboard and click WPForms » Add New.

Type a name for your form in the Name Your Form field.

WPForms comes with tons of form templates that make it easy to get started. For our example, we’re going to use the Webinar Registration Form template to let people sign up for a webinar and add them to the participants list in Podio.

Selecting the Webinar Registration Form template

Click on Use Template for the one you want to use and keep in mind that you can customize any template to meet your specific needs.

Next, you’ll want to customize the fields on the WordPress form to match your Podio webform. Again, if you need help seeing your Podio webform, check out Podio’s webform documentation.

Our Podio webform includes the following fields:

  • Contact details
  • Email
  • Role
    • Business Owner
    • Staff
    • Speaker
    • Hobbyist
  • Special Considerations

So, we’ll make sure we have fields for all of these things in our WordPress form, too.

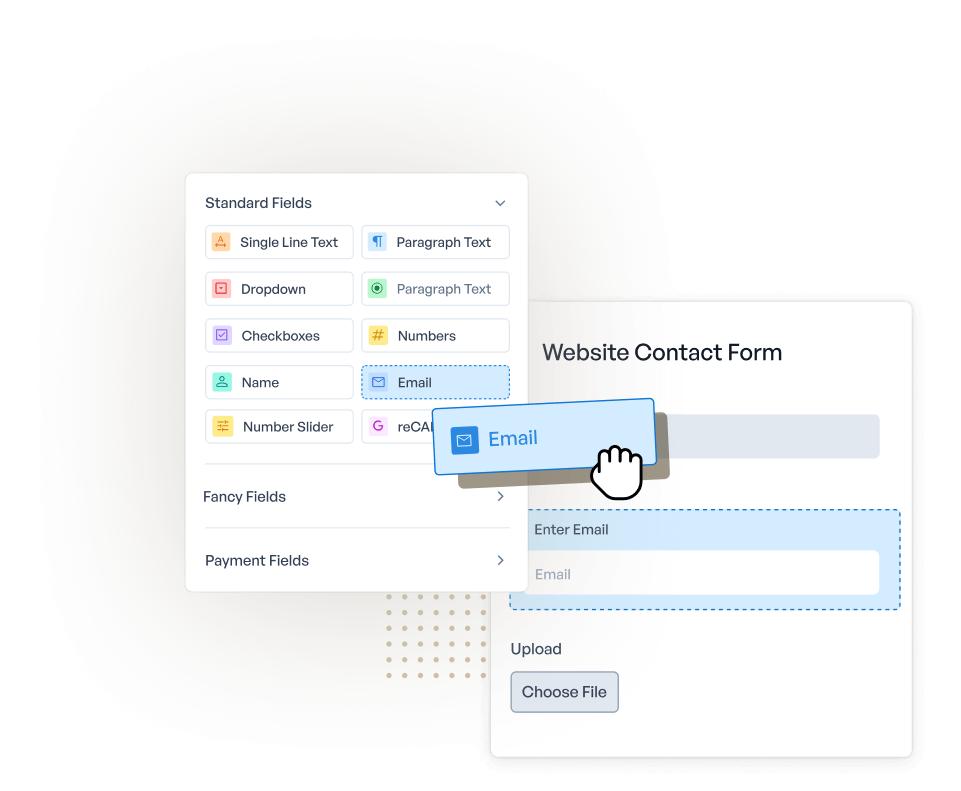
To add a new field, drag it from the left side of the form builder into the preview area on the right side of the form builder. Then click on the field to make changes to its label, descriptions, choices, and more.

Customizing your Podio form

You can also use the WPForms form builder to:

  • Drag fields up and down to reorder them.
  • Mark fields as Required.
  • Show or hide fields based on smart conditional logic.

Here’s our completed customize Podio form in the form builder:

A custom Podio form

Make sure to go through the form settings and click Save before you leave the form builder. Then you can add your form to your website.

Step 3: Add Your Podio Form to Your Website

It’s really easy to add a form to WordPress using WPForms. You don’t need to use any code. And you can place forms in several places, including:

  1. Blog posts
  2. Pages
  3. Landing pages
  4. Sidebar or footer widgets

For our example, we’re going to embed our form on a WordPress page.

To start, create a new page or open an existing one in the editor. Then click the plus (+) icon to add a new block. Search for WPForms and click the icon.

Adding a WPForms block to a page

From the dropdown, select the Podio form you created in Step 2.

Selecting your webinar registration form from the WPForms block

Now click Publish or Update to publish your form.

Publishing your webinar registration form

Great! Now the form is live on your website.

If you want to make a really compelling page for your form, you’ll find tons of tips in this article about the anatomy of a perfect landing page.

Just one more thing. We need to add a test entry so that Zapier has some data to work with. Here’s ours:

Submitting a test entry to your Podio form

Go ahead and submit your test entry. Now let’s make the magic happen in Zapier.

Step 4: Connect WPForms to Zapier

Zapier is a service that connects different web apps together.

We’re going to create a Zap that sends data from WPForms to Podio automatically when our form is submitted.

To start, click Create Zap.

Creating a new Zap

Under App event, search for WPForms and click the icon.

Choosing the WPForms app event in Zapier

Next, Zapier will ask you to choose a trigger event. The only option for WPForms is New Form Entry. Click on it, then click Continue.

Choosing New Form Entry as the trigger event in Zapier

Now Zapier will ask you to connect your Zap to your WPForms account. Click Sign in.

Choose your WPForms account to connect to Zapier

This will open a popup where you need to enter your website’s URL and your Zapier API key.

You’ll find your Zapier AKI key under WPForms » Settings » Integrations. Click the Zapier icon to reveal your key.

Copying the Zapier API key in the WPForms settings

Switch back to Zapier and copy and paste the API key into the connection window. Then click Yes, Continue to connect.

Allowing Zapier to access WPForms

Once your account is connected, Zapier will ask which form you want to use for this Zap. Choose the Podio form you made earlier.

Choosing your Podio form in Zapier

Click Continue again. Now Zapier will test your connection to WPForms to make sure everything’s working properly. Click Test trigger to begin.

Testing your trigger in Zapier

If you’ve done everything right so far, you’ll see the test entry you submitted earlier along with a success message.

A success message for a Podio form trigger test success message in Zapier

That’s the first part of the connection ready. Now click Continue to connect Podio to Zapier.

Step 5: Connect Podio to Zapier

To start, search for Podio and click the icon.

Selecting Podio as the action app in Zapier

Next, Zapier will ask you what you want to do. There are a number of options you can choose depending on what your WordPress Podio integration is going to do.

We need to add webinar attendees to our Participants list, so we’re going to click Create Item.

Choosing Create Item as the action event for Podio in Zapier

Click Continue.

Now connect to your Podio account. Click Sign in, then enter your Podio login credentials if you aren’t already signed in to your account. You’ll then need to click the green Grant Access button to allow Zapier to access your Podio account.

Allowing Zapier to access your Podio account

Click Continue again when you’re done.

Now you’ll need to map the fields from your WordPress form to your Podio webform. First, select your organization, workspace, and application.

Selecting your Podio organization, workspace, and application in Zapier

Then use the dropdowns to match the fields from your WordPress form to the ones in Podio.

Mapping form fields from WPForms to Podio in Zapier

Great! We’re almost done. Click Continue one more time.

Next, Zapier will test your Podio connection just like it did for WPForms. Click Test action to proceed.

Testing your Podio connection in Zapier

If everything is set up properly, you’ll see a success message.

A success message for a Podio action test in Zapier

Your Podio account will also be updated, which in our case means a participant was added.

A test participant in Podio

Don’t forget to click Publish Zap to make your connection live.

Publishing your Podio Zap

Create Your WordPress Form Now

Next, Set a Deadline for Form Responses

We’ve shown you how easy it is to make a WordPress Podio integration. You can use this method to send data to Podio from any form on your website.

If you’d like to close your form automatically on a particular date, check out this guide to setting an automatic expiry date on your form.

And if you’re looking for other ways to automate parts of your business, you’ll get tons of ideas from this article on killer marketing automation tools.

Ready to build your WordPress Podio integration? Get started today with the easiest WordPress form builder plugin. WPForms Pro includes a free webinar registration form and offers a 14-day money-back guarantee.

If this article helped you out, please follow us on Facebook and Twitter for more free WordPress tutorials and guides.

Using WordPress and want to get WPForms for free?

Enter the URL to your WordPress website to install.

Add a Comment

We're glad you have chosen to leave a comment. Please keep in mind that all comments are moderated according to our privacy policy, and all links are nofollow. Do NOT use keywords in the name field. Let's have a personal and meaningful conversation.

This form is protected by reCAPTCHA and the Google Privacy Policy and Terms of Service apply.