
Resumo de IA
Você quer testar seus pagamentos do Stripe no WordPress antes de realizar transações reais?
É fundamental ter um processo de pagamento tranquilo que permita aos clientes realizar transações em seu site sem problemas.
Ao testar sua integração de pagamento, você pode verificar seu processo de checkout e corrigir quaisquer problemas antes de lançar seu formulário para coletar pagamentos reais dos clientes.
Neste post, mostraremos como habilitar o modo de teste do Stripe no WordPress para que você possa simular o processamento de cartões de crédito em um ambiente seguro,
Teste Pagamentos do Stripe no WordPress Agora
Qual o Propósito do Modo de Teste do Stripe?
O modo de teste do Stripe oferece um ambiente de teste onde você pode simular transações sem incorrer em cobranças reais. Você pode usar cartões de crédito de teste para realizar essas transações simuladas com o Stripe, permitindo que você experimente com segurança seu processo de checkout e o ajuste fino para garantir a melhor experiência do cliente.
Como Habilitar o Modo de Teste do Stripe no WordPress
Quando estiver pronto para testar sua integração de pagamento do Stripe no WordPress, basta seguir os passos abaixo:
Neste Artigo
- Qual o Propósito do Modo de Teste do Stripe?
- 1. Instale o WPForms
- 2. Habilitar Modo de Teste do Stripe
- 3. Criar um Formulário para Testar Pagamentos do Stripe
- 4. Configurar Pagamentos do Stripe
- 5. Visualizar o Formulário e Realizar Testes
- 6. Visualizar Seus Dados de Pagamento de Teste
- 7. Publicar Seu Formulário e Coletar Pagamentos Reais
1. Instale o WPForms
WPForms é o construtor de formulários mais bem avaliado para WordPress que permite criar todos os tipos de formulários de pagamento e pedidos.
Ele vem com uma integração nativa do Stripe que permite realizar transações de teste. E quando você estiver pronto para aceitar pagamentos ao vivo, você pode fazer isso com um clique de botão.
Pagamentos do Stripe estão disponíveis em todos os níveis de licença do WPForms (incluindo WPForms Lite).
Embora você possa testar seus pagamentos do Stripe e aceitar transações reais na versão gratuita do WPForms, recomendamos o WPForms Pro para desbloquear toneladas de recursos avançados e remover as taxas de transação adicionais de 3%.

Após escolher um plano que funcione para você, prossiga e instale o WPForms em seu site WordPress.
Ótimo! É hora de configurar a conexão do Stripe com o WPForms e habilitar o modo de pagamento de teste.
2. Habilitar Modo de Teste do Stripe
Abra seu menu de administrador do WordPress e clique em WPForms » Configurações. Em seguida, navegue até a aba Pagamentos .
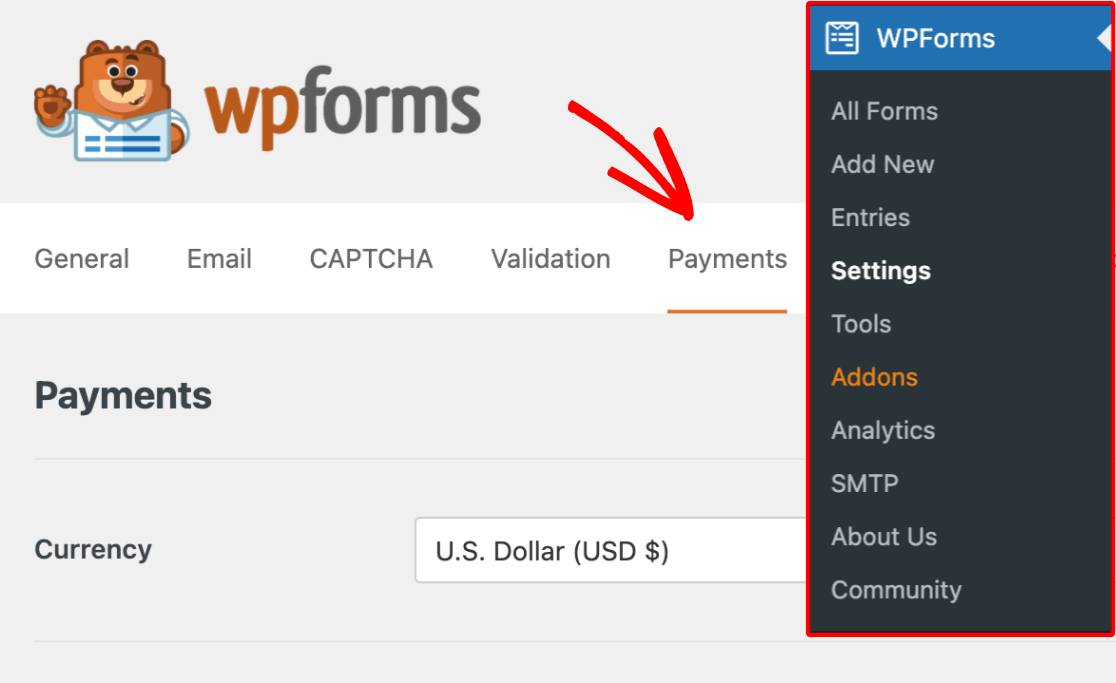
Nesta tela, você pode se conectar ao Stripe e habilitar o modo de teste para impedir que o Stripe processe pagamentos reais.
Role para baixo e selecione a caixa de seleção ao lado de Modo de Teste.

Após selecionar a caixa de seleção Modo de Teste, você verá um pop-up modal para alertá-lo que você terá que se reconectar ao Stripe quando decidir mudar para o processamento de pagamentos ao vivo. Clique em OK para prosseguir.

Agora, pressione o botão Salvar Configurações para permanecer no Modo de Teste.

Tudo o que resta agora é conectar sua conta Stripe com o WPForms. Para fazer isso, pressione o botão azul Conectar com Stripe.

Você será levado ao formulário de login do Stripe. Simplesmente insira seu e-mail e senha do Stripe e siga as instruções na tela para estabelecer a conexão.

Observação: Você pode pular o formulário de login do Stripe completamente para fazer pagamentos de teste clicando no botão Pular este formulário no topo. Mas é necessário preencher este formulário e estabelecer conexão com o Stripe para pagamentos em tempo real.
Quando terminar, retorne à tela de Pagamentos do WPForms. Você notará que o Status da Conexão agora confirma que você está conectado em Modo de Teste.

O webhook do Stripe será configurado automaticamente quando você conectar seu site ao Stripe. Ele tentará a autoconfiguração várias vezes em segundo plano.
Excelente! Na próxima etapa, criaremos um formulário de pagamento para realizar testes com o Stripe.
3. Criar um Formulário para Testar Pagamentos do Stripe
O WPForms torna incrivelmente fácil criar formulários de pagamento. Para economizar tempo, ele oferece mais de 2.100 modelos de formulários prontos.
Você pode criar um novo formulário e usar um modelo indo em WPForms » Adicionar Novo no seu painel do WordPress.

Você será levado à tela de configuração do formulário. Insira um nome para o seu formulário. Pode ser qualquer coisa e é usado apenas para sua referência interna.

Após nomear seu formulário, role para baixo e selecione um modelo apropriado. Usaremos o modelo de formulário de pagamento do Stripe para este exemplo.

Após selecionar o modelo, o WPForms levará apenas alguns segundos para carregá-lo.
Assim que o modelo for carregado, você poderá fazer personalizações para atender às suas necessidades específicas.

Por exemplo, você pode incluir os itens reais que deseja vender alterando as opções sob o campo Múltiplos Itens neste modelo.

Lembre-se de que você apresentará o mesmo formulário aos seus clientes quando estiver pronto para publicá-lo após os testes. Portanto, tente não usar um formulário incompleto apenas porque você está focado em testá-lo nesta fase.
Após personalizar seu formulário, pressione o botão Salvar no topo.
4. Configurar Pagamentos do Stripe
O campo de Cartão de Crédito do Stripe em seu formulário processará pagamentos (reais ou de teste) somente após você ter habilitado os pagamentos nas configurações do construtor de formulários.
Clique em Pagamentos » Stripe à esquerda do seu construtor de formulários. Em seguida, clique no botão de alternância Habilitar Pagamentos Stripe .
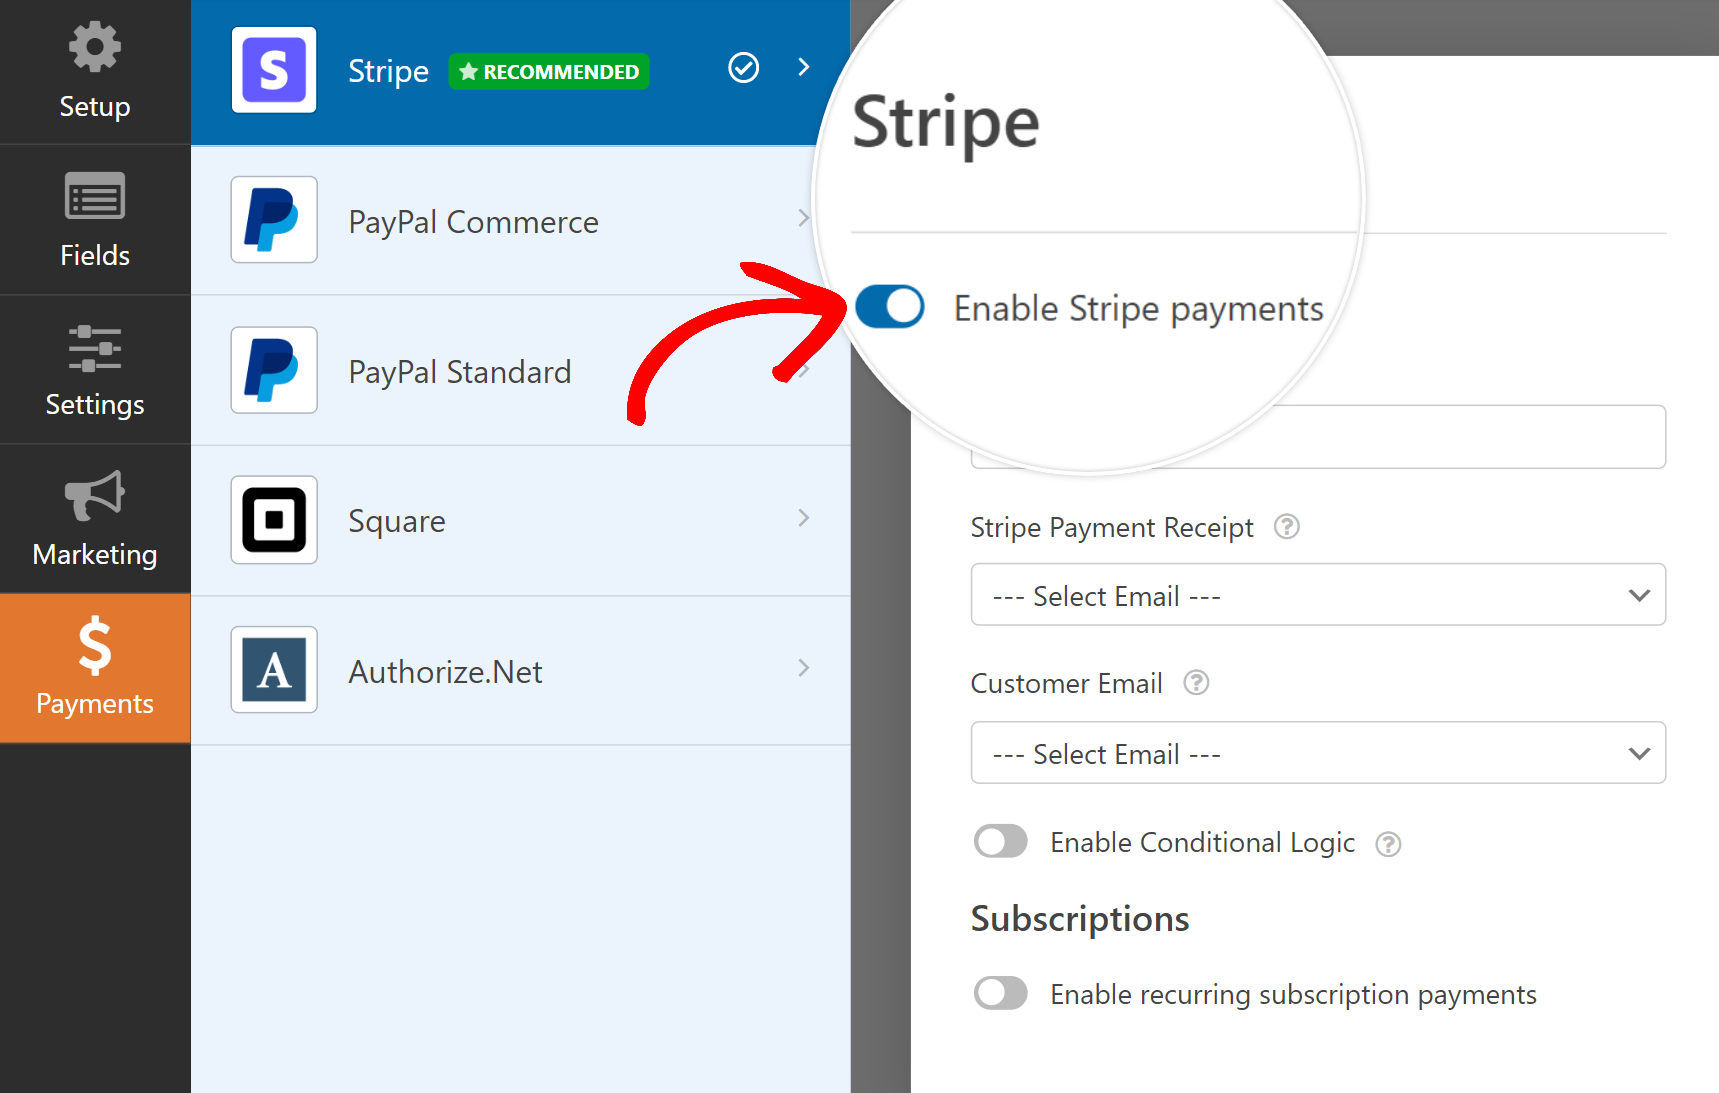
Quando fizer isso, você verá opções adicionais aparecerem para processamento de pagamentos com o Stripe. Essas configurações são opcionais, mas é uma boa ideia configurá-las.
Você também pode testar pagamentos de assinatura recorrente se esse for o método de pagamento que você deseja testar. Por padrão, o Stripe cobrará apenas pagamentos únicos.
Perfeito! O formulário agora está pronto para testes. Certifique-se de pressionar Salvar antes de prosseguir.
5. Visualizar o Formulário e Realizar Testes
Você não precisa publicar seu formulário durante a fase de testes, então pode experimentá-lo com segurança sem se preocupar que seus clientes o descubram.
Simplesmente pressione o botão Visualizar no topo, ao lado de Salvar, para entrar no modo de visualização do seu formulário.

Você pode simular pagamentos usando valores especiais de cartão de teste fornecidos pelo Stripe.
Lista de Números de Cartão de Crédito de Teste do Stripe
Estes cartões podem ser usados com qualquer CVV e qualquer data futura como data de expiração. Note que os cartões American Express exigem um CVV de 4 dígitos, enquanto todos os outros exigem um CVV de 3 dígitos.
| Tipo de Cartão | Número |
|---|---|
| Visa Crédito | 4242424242424242 |
| Visa Débito | 4000056655665556 |
| Mastercard Crédito | 5555555555554444 |
| Mastercard Série 2 | 2223003122003222 |
| Mastercard Débito | 5200828282828210 |
| Mastercard Pré-pago | 5105105105105100 |
| American Express | 378282246310005 |
| Visa Crédito (Canadá) | 4000001240000000 |
| Visa Crédito (Alemanha) | 4000002760000016 |
| Visa Crédito (Reino Unido) | 4000008260000000 |
| Visa Débito (Reino Unido) | 4000058260000005 |
Após preencher seu formulário completo e inserir os valores de teste do cartão, pressione o botão Enviar.
Parabéns! Você acabou de criar sua primeira entrada de pagamento de teste.
Mas como você pode visualizar seus dados de pagamento de teste? Cobriremos a maneira fácil de fazer isso na próxima etapa.
6. Visualizar Seus Dados de Pagamento de Teste
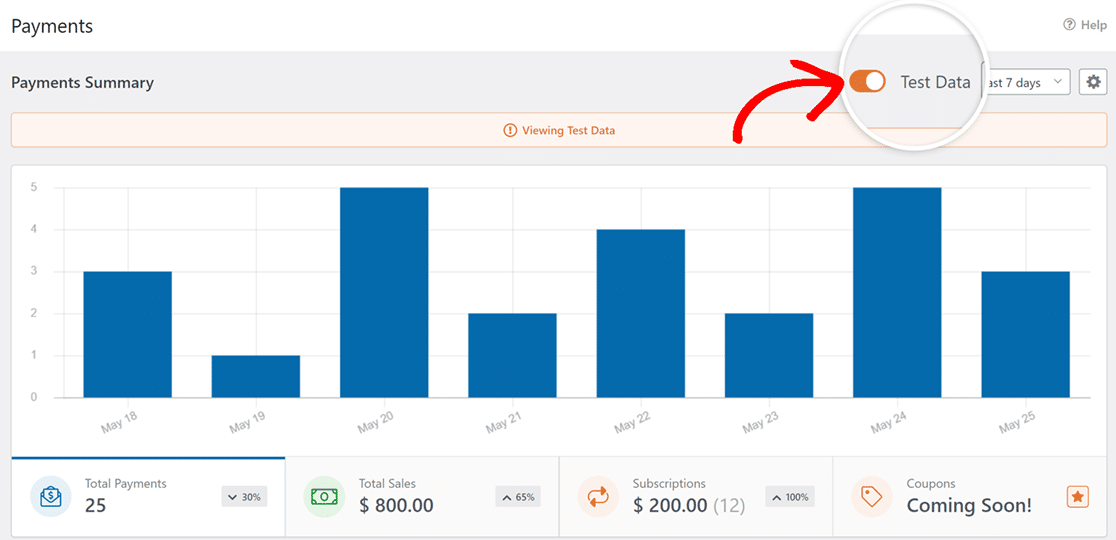
O WPForms oferece uma tela dedicada de pagamentos que acompanha todos os seus pagamentos de teste e ao vivo para sua referência.
Para acessar a tela de pagamentos, clique em WPForms » Pagamentos.

Na tela Resumo de Pagamentos, você pode alternar entre dados de pagamento ao vivo e de teste. Clique no alternador Dados de Teste ao lado do seletor de data, e o WPForms exibirá apenas os pagamentos de teste que você fez.
Se você quiser ver detalhes adicionais sobre qualquer entrada de teste específica, role para baixo até a tabela de pagamentos e clique em uma entrada que lhe interesse.

Agora você pode ver detalhes completos do pagamento e um resumo da entrada para essa submissão específica.

Sinta-se à vontade para testar seu formulário repetidamente, tentando diferentes métodos de pagamento com cartão e simulando diferentes situações.
Quando estiver satisfeito e pronto para publicar seu formulário para começar a aceitar transações ao vivo de clientes, basta seguir a próxima etapa.
7. Publicar Seu Formulário e Coletar Pagamentos Reais
Para permitir que o Stripe processe transações reais, primeiro devemos mudá-lo para o modo de pagamento ao vivo.
Isso pode ser feito retornando a WPForms » Configurações no seu menu de administração do WordPress e, em seguida, selecionando a aba Pagamentos.
Agora, desmarque a caixa de seleção Modo de Teste.

Mudar do Modo de Teste para Transações ao Vivo exige que você se reconecte com o Stripe.
Como antes, clique no botão azul Conectar com Stripe e envie o formulário de login do Stripe para restabelecer a conexão no modo ao vivo desta vez.

Clique em Salvar Configurações.
Agora, retorne ao seu formulário de pagamento Stripe navegando para WPForms » Todos os Formulários e selecionando o formulário que você criou anteriormente.

Depois de clicar no formulário, você se encontrará novamente na interface do construtor de formulários. Para publicar este formulário, clique no botão Incorporar no topo.

O WPForms oferece a flexibilidade de incorporar seu formulário diretamente em uma página existente ou criar uma nova do zero especificamente para seu formulário.
Selecionaremos Criar Nova Página aqui.

Digite um nome para sua página e clique no botão laranja Vamos Lá.

Isso o levará ao editor de blocos do WordPress. O formulário já estará incorporado dentro de um bloco em sua página. Se desejar, você pode fazer alterações adicionais no conteúdo da página e até mesmo personalizar a aparência do seu formulário.
Quando estiver satisfeito com a aparência da página e do seu formulário, prossiga e pressione o botão Publicar.

Brilhante! Seu formulário agora está publicado, então você pode facilmente coletar pagamentos com cartão de crédito via Stripe de clientes reais.

E aí está! Agora você está pronto para ativar o Modo de Teste do Stripe no WordPress.
Em seguida, Inicie um Programa de Doações Mensais
Agora que você pode testar e trabalhar com pagamentos do Stripe dentro do WordPress, talvez você queira considerar iniciar um programa de doações mensais para gerar doações consistentemente para sua causa.
Além disso, se você está lutando para criar campanhas de geração de leads atraentes e não está obtendo os resultados esperados, pode ser hora de considerar o uso de uma ferramenta poderosa de geração de leads que pode cuidar de todo o trabalho braçal para você.
Teste Pagamentos do Stripe no WordPress Agora
Pronto para construir seu formulário? Comece hoje mesmo com o plugin construtor de formulários WordPress mais fácil. WPForms Pro inclui muitos modelos gratuitos e oferece uma garantia de devolução do dinheiro em 14 dias.
Se este artigo ajudou você, por favor, siga-nos no Facebook e Twitter para mais tutoriais e guias gratuitos do WordPress.


O "modo de teste" realmente precisa ser uma opção no nível do formulário, não em todo o site. Temos muitos formulários de registro ativos em nosso site que aceitam pagamentos e precisam permanecer funcionais enquanto testamos pagamentos em um novo formulário.
Olá Jon. Obrigado pelo seu feedback! Temos uma solicitação de recurso para isso, embora não esteja disponível no momento.
Recomendamos ter um site de staging onde você possa ativar o Modo de Teste sem interromper o processo de pagamento em seus outros formulários. Se você não tiver um recurso de site de staging em seu plano de hospedagem, pode considerar usar o plano gratuito do InstaWP para isso. O InstaWP tem um plugin que copiará seu site para você.