
Resumo de IA
Quer adicionar um mapa ao seu formulário de contato do WordPress para que os visitantes possam encontrar facilmente a localização do seu negócio? Adicionar um mapa ao seu formulário ajuda os visitantes a saberem exatamente onde você está localizado antes de entrar em contato.
É especialmente útil se você tem uma vitrine física, escritório ou área de serviço que os clientes precisam visitar. Mas os mapas em formulários de contato podem fazer mais do que apenas exibir sua localização.
Com a configuração correta, você também pode ajudar os visitantes a preencherem os campos de endereço mais rapidamente com preenchimento automático ou até mesmo exibir vários locais se você tiver vários escritórios ou lojas.
Neste tutorial, mostrarei duas maneiras de adicionar mapas aos seus formulários de contato no WordPress. Ambos os métodos usam o WPForms e seu addon de Geolocalização. Vamos começar!
Crie seu formulário WordPress agora
Por que Adicionar um Mapa em um Formulário de Contato?
Claro, não é segredo que a maioria dos proprietários de pequenas empresas com sites sabe por que você precisa de um formulário de contato. Mas você pode estar se perguntando por que adicionar um mapa a esse formulário de contato.
Se você administra um negócio local, adicionar um mapa ao seu formulário de contato deixa claro instantaneamente onde você está localizado. Esta pode ser uma ótima ideia por vários motivos:
- Se os clientes precisam visitar seu negócio pessoalmente, um mapa elimina qualquer dúvida. Eles podem ver exatamente onde você está localizado antes de entrar em contato, o que reduz as perguntas "onde você está localizado?" em sua caixa de entrada.
- Quando você ativa o preenchimento automático de endereço, os visitantes podem digitar algumas letras e selecionar o endereço completo em um menu suspenso. Isso acelera a conclusão do formulário e reduz erros de digitação que podem causar problemas de comunicação.
- Tem mais de um escritório ou loja? Você pode incorporar um mapa interativo que mostra todos os seus locais e permite que os visitantes selecionem qual deles desejam contatar ou visitar. Isso roteia as consultas para a equipe certa automaticamente.
- Um mapa em sua página de contato sinaliza que você é um negócio real com presença física. Isso é especialmente importante para serviços locais, lojas de varejo ou escritórios profissionais.
A melhor parte? Em vez de ter que codificar um mapa em seu site ou pagar a um desenvolvedor web, você pode fazer isso facilmente com o WPForms Pro. É um dos melhores plugins de mapa para WordPress!
Como Adicionar um Mapa ao Seu Formulário de Contato do WordPress
Com o WPForms Pro e o addon de Geolocalização, você pode adicionar recursos de mapa aos seus formulários de contato em pouco tempo. Siga estas instruções fáceis e passo a passo para começar:
Etapa 1: Baixe o Plugin WPForms
O WPForms é um poderoso construtor de formulários que facilita a criação de formulários de contato, formulários de registro e muito mais. Ele tem mais de 2.100+ modelos de formulários do WordPress que você pode usar.
O que eu mais gosto no WPForms é como ele combina a criação de formulários com ferramentas de geolocalização integradas. Você não precisa juntar vários plugins ou escrever código personalizado para adicionar mapas aos seus formulários.
Para adicionar mapas aos seus formulários de contato, você precisará do WPForms Pro, que inclui o addon Geolocation e todos os recursos de mapa que abordaremos neste tutorial.

Para começar, compre uma licença do WPForms Pro. Em seguida, instale e ative o WPForms em seu site. Se precisar de ajuda com a instalação, siga este guia passo a passo sobre como instalar um plugin do WordPress.
Atualize para o WPForms Pro Agora! :)
Etapa 2: Instale e Ative o Addon de Geolocalização
Agora que o WPForms Pro está instalado, você precisa ativar o addon Geolocation. É ele que potencializa todos os recursos de mapa em seus formulários de contato.
No seu painel do WordPress, vá para WPForms » Addons. Use a barra de pesquisa para localizar o addon Geolocation e clique em Install Addon. Assim que ele instalar (geralmente em poucos segundos), clique em Activate.
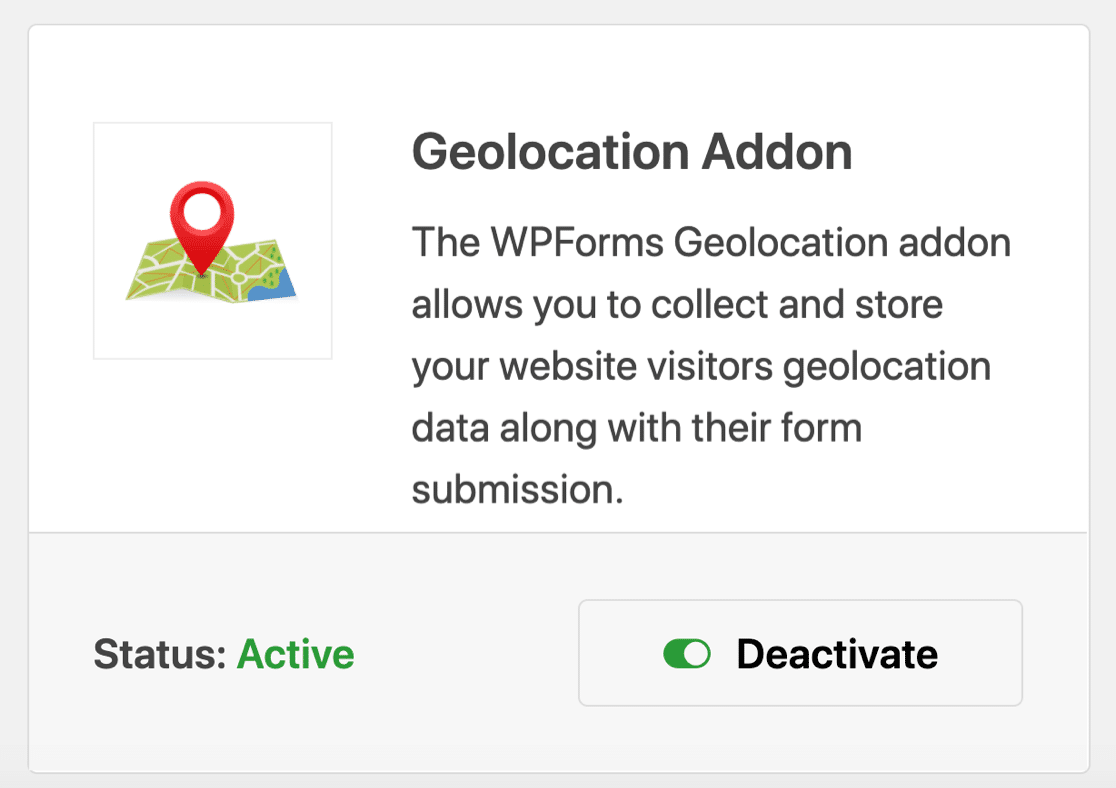
Com o addon ativado, você agora tem acesso a três maneiras de usar mapas em seus formulários:
- Exibir os Locais do Seu Negócio: Mostre aos visitantes exatamente onde seu negócio está localizado com um mapa incorporado em seu formulário. Isso funciona muito bem para negócios locais, escritórios ou lojas onde os clientes visitam pessoalmente.
- Ativar Autocompletar de Endereço: Os visitantes podem preencher os campos de endereço mais rapidamente com sugestões de autocompletar. Conforme eles digitam, o endereço completo aparece em um menu suspenso, reduzindo erros e agilizando o preenchimento do formulário.

Eu sei que isso parece técnico, mas o WPForms tem um guia passo a passo que o torna muito mais fácil do que parece. Para instruções completas de configuração, confira a documentação do Addon de Geolocalização.
Depois de adicionar sua chave de API e salvar as configurações, você estará pronto. O Addon de Geocodificação está pronto para uso e você pode começar a adicionar mapas interativos aos seus formulários.
Etapa 3: Crie Seu Formulário de Contato
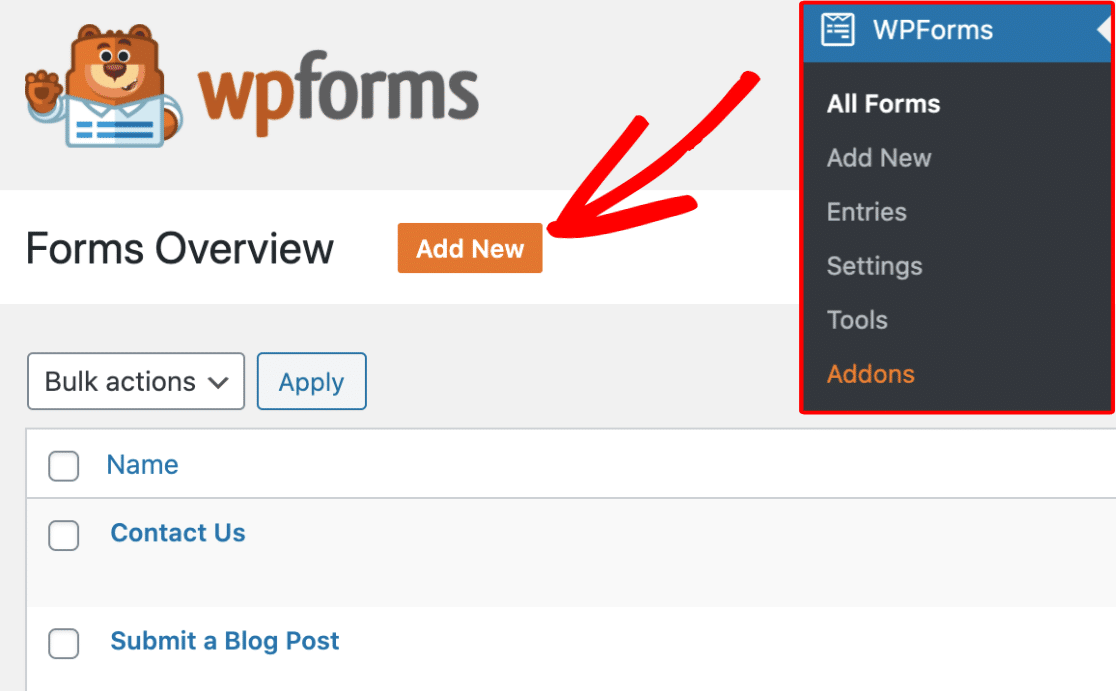
Com o addon de Geolocalização configurado, você está pronto para construir seu formulário de contato. Isso leva cerca de 5 minutos. Vá para WPForms » Adicionar Novo no seu painel do WordPress para abrir o construtor de formulários.
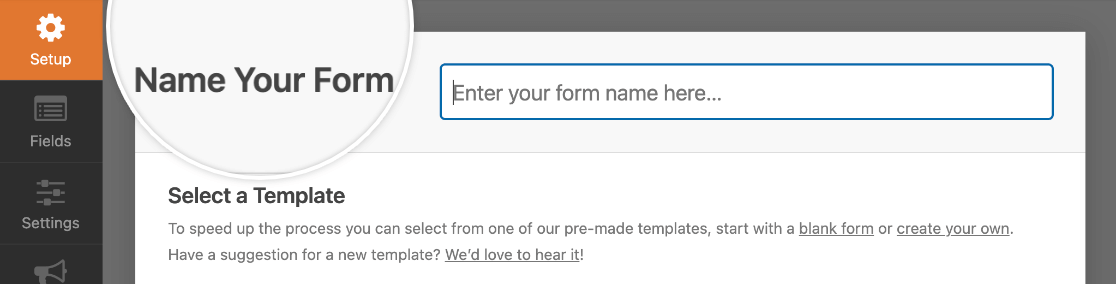
Dê um nome ao seu formulário no campo Nome do Formulário. Algo como “Entre em Contato” funciona bem. Você verá algumas opções aqui. Se quiser economizar tempo, pode escolher entre nossos mais de 2.100 modelos de formulários WordPress.
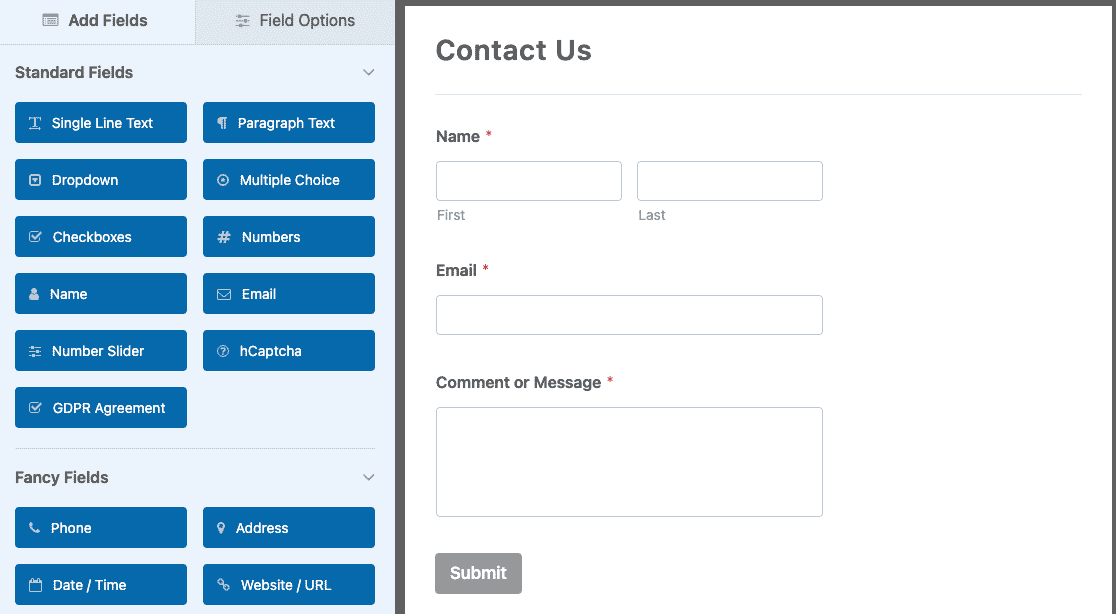
Recomendo escolher o Modelo de Formulário de Contato Simples. Isso lhe dá um formulário de contato pronto com os campos essenciais já adicionados.
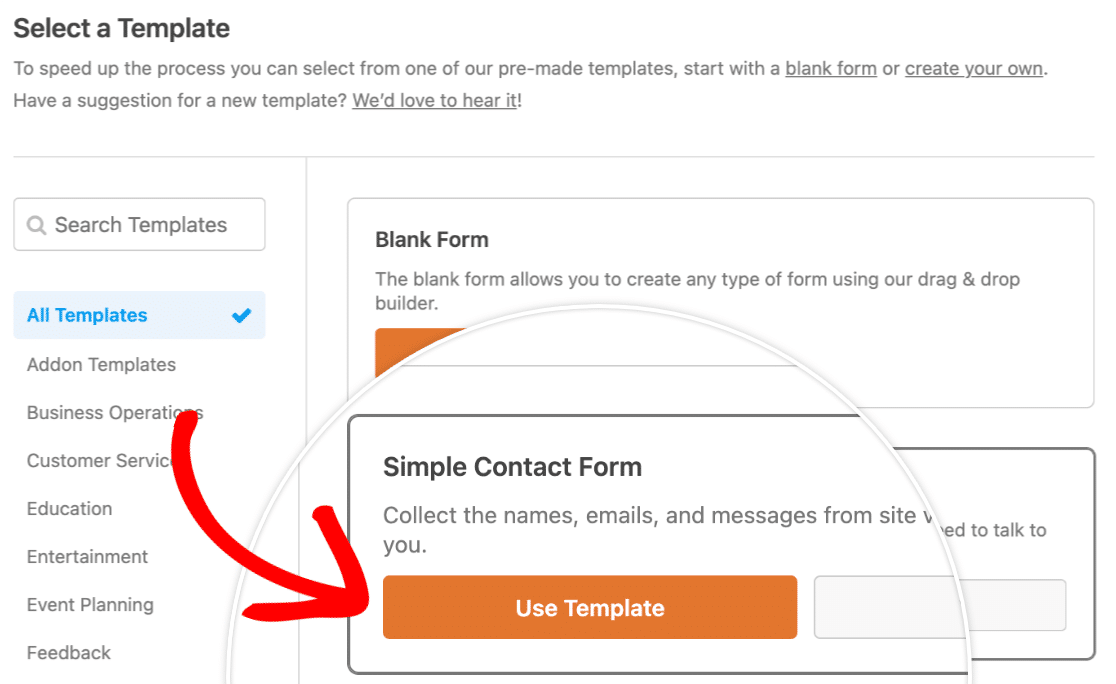
O modelo inclui um campo de Nome, um campo de E-mail e um campo de Comentário ou Mensagem. Você pode personalizar esses campos, adicionar novos ou remover os que não precisa. O construtor de formulários usa arrastar e soltar, então reorganizar os campos é simples.
Agora, provavelmente há algumas outras configurações de formulário que você pode querer configurar, como notificações e confirmações. Se for o caso (e eu recomendo muito isso), confira nosso guia detalhado sobre como criar seu primeiro formulário.
Dica Profissional
Outra opção se você não quiser configurar manualmente cada campo, mas tiver requisitos personalizados, é deixar o Construtor de Formulários com IA do WPForms cuidar disso para você.
Simplesmente passe o mouse sobre o botão roxo Gerar com IA e clique em Gerar Formulário. Você será direcionado para a tela do construtor de formulários com IA. É aqui que você descreve que tipo de formulário deseja.
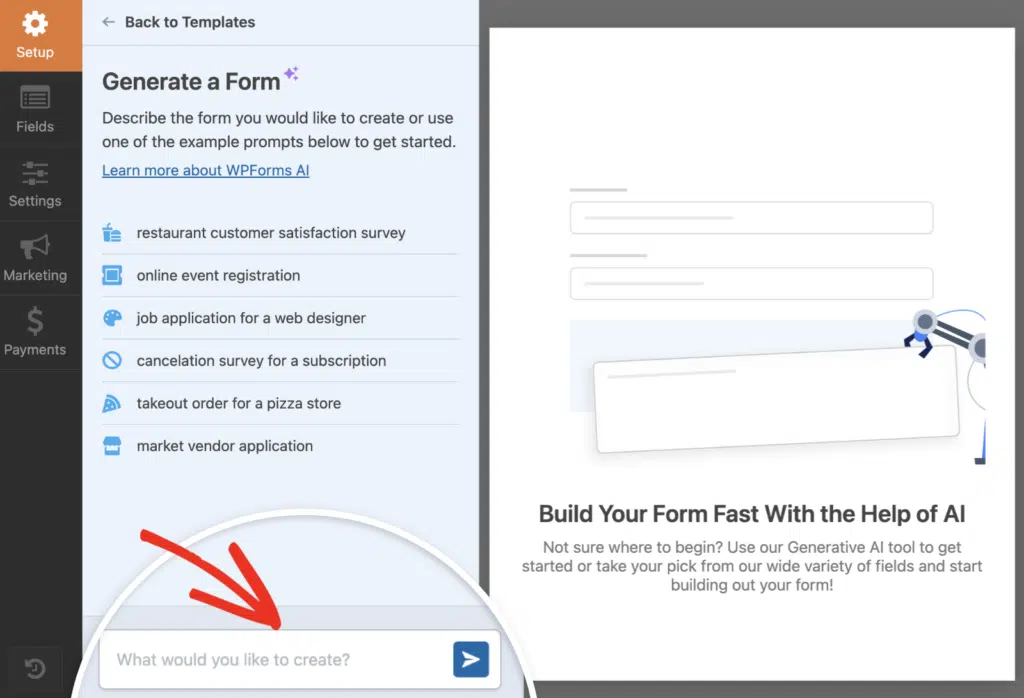
Você pode digitar seu próprio prompt ou escolher entre as sugestões à esquerda. Assim que você gerar, a IA leva alguns segundos para construir seu formulário.
Experimente o Construtor de IA do WPForms! :)
Etapa 4: Adicione um Mapa ao Seu Formulário de Contato
Agora vem a parte importante de adicionar um mapa ao seu formulário de contato. O WPForms oferece duas maneiras de fazer isso, dependendo do que você deseja realizar:
- Opção 1: Exibir a Localização do Seu Negócio (Campo de Mapa)
- Opção 2: Adicionar Autocompletar de Endereço para Visitantes (Campo de Texto de Linha Única ou Endereço)
Vamos detalhar ambas as opções para que você possa escolher a que melhor se adapta às suas necessidades.
Opção 1: Exibir Sua Localização com o Campo de Mapa
Use esta opção se você quiser mostrar aos visitantes onde seu negócio está localizado. Isso incorpora um mapa interativo diretamente no seu formulário de contato.
No construtor de formulários, role o painel esquerdo até Fancy Fields e você verá o campo Map listado lá. Arraste-o para a pré-visualização do seu formulário à direita.
Onde você o coloca depende da sua preferência. Algumas pessoas gostam de colocá-lo no topo para que seja imediatamente visível. Outras preferem mais abaixo. Escolha o que parecer natural para o layout do seu formulário.

Após adicionar o campo Map, selecione-o para exibir suas opções de configuração à esquerda. Encontre a seção Locations, pois é aqui que você inserirá os endereços do seu negócio.
Clique na caixa Address e comece a digitar sua localização. Você notará que sugestões de autocompletar aparecem enquanto você digita. Escolha a correspondência correta para fixar as coordenadas exatas do mapa.

Agora adicione um Nome para este local. Use algo descritivo como “Filial Oeste” ou “Sede Corporativa”. Os visitantes verão este rótulo quando interagirem com o marcador, portanto, a clareza é importante.
Há também um campo de Descrição se você quiser adicionar informações suplementares como horário de funcionamento, detalhes de contato específicos ou notas específicas do local.

Pronto para adicionar outro local?
Clique no botão de mais (+) abaixo da sua entrada atual. Um novo conjunto de campos de entrada aparece. Siga os mesmos passos: insira o endereço, aguarde o preenchimento automático, selecione a correspondência, nomeie-o e, opcionalmente, descreva-o.
Ao terminar, o mapa é preenchido automaticamente com marcadores para cada endereço que você inseriu. Os visitantes podem interagir com esses marcadores para ver os nomes e descrições que você forneceu.
Agora que você configurou seu mapa com vários locais, pode optar por exibir os locais ou até mesmo torná-los selecionáveis (principalmente ideal para formulários de reserva).
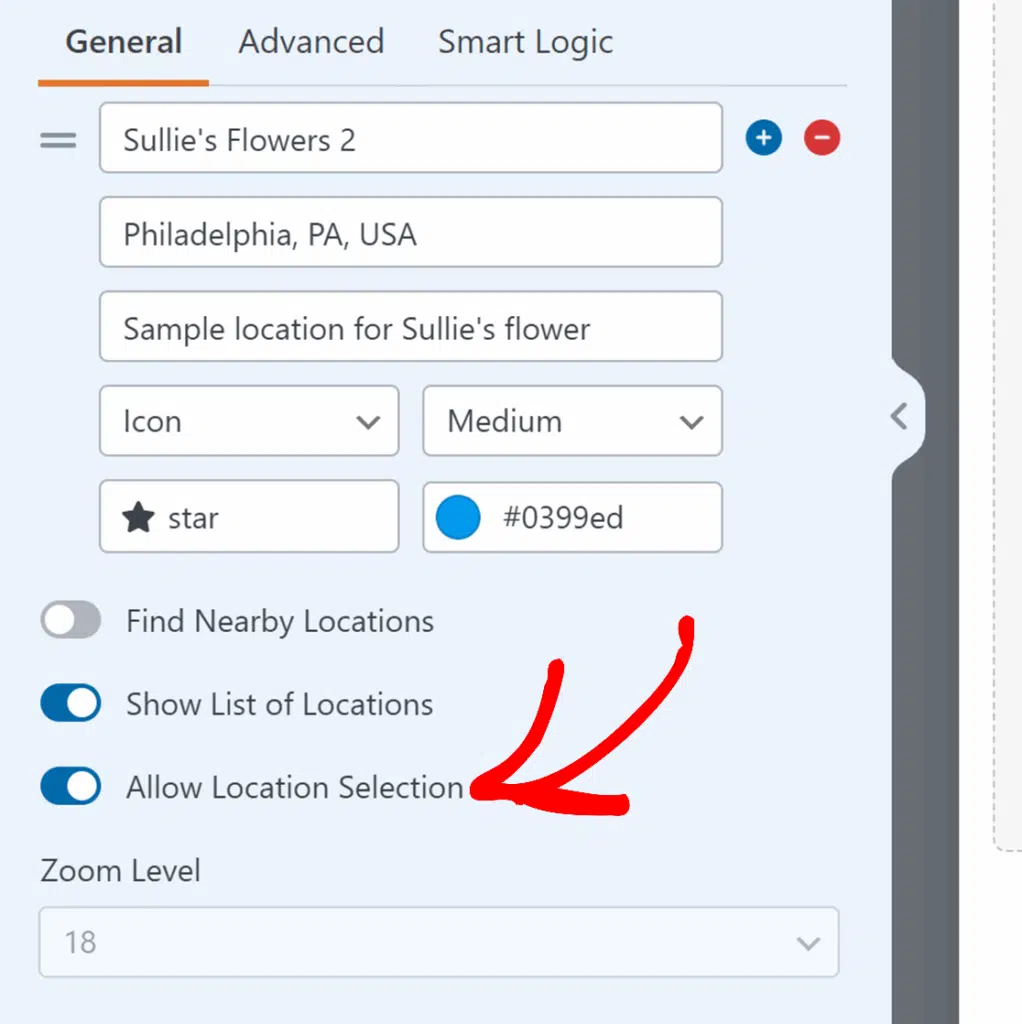
No painel de opções do campo Mapa, procure o controle deslizante Mostrar Lista de Locais e ative-o. Isso exibe todos os seus endereços de local em uma lista organizada logo abaixo do próprio mapa.
Você notará imediatamente que algo útil aparece abaixo disso: a opção Permitir Seleção de Local. Os visitantes agora podem clicar em qualquer local para selecioná-lo como seu local de reserva preferido.
Opção 2: Adicionar Preenchimento Automático de Endereço para Visitantes
Use esta opção se precisar que os visitantes preencham um campo de endereço em seu formulário de contato (como para solicitações de orçamento, reservas de serviços ou consultas de envio). O mapa os ajuda a inserir o endereço com precisão.
No construtor de formulários, adicione um campo de Texto de Linha Única ou um campo de Endereço ao seu formulário. Você pode clicar no nome do campo ou arrastá-lo para o seu formulário.
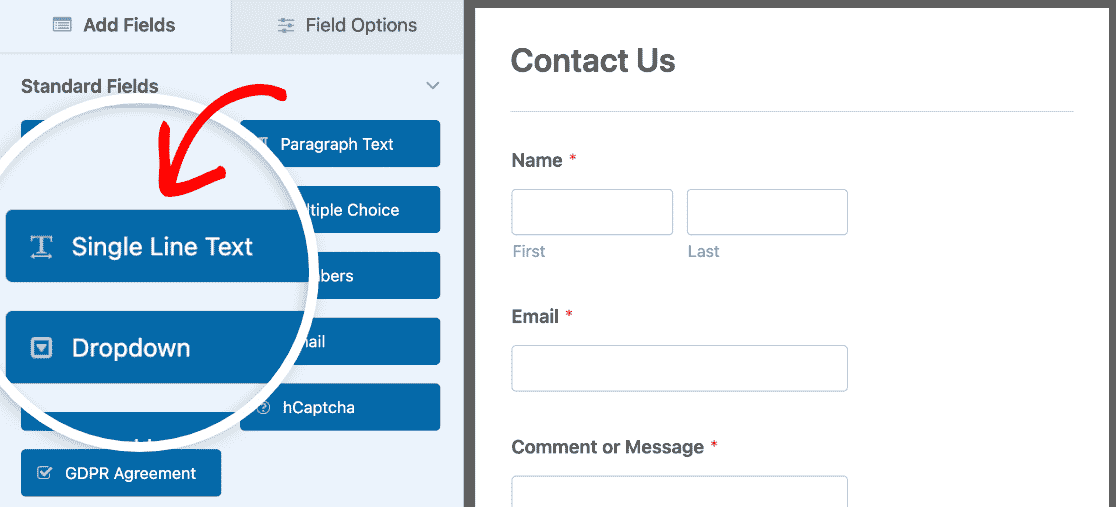
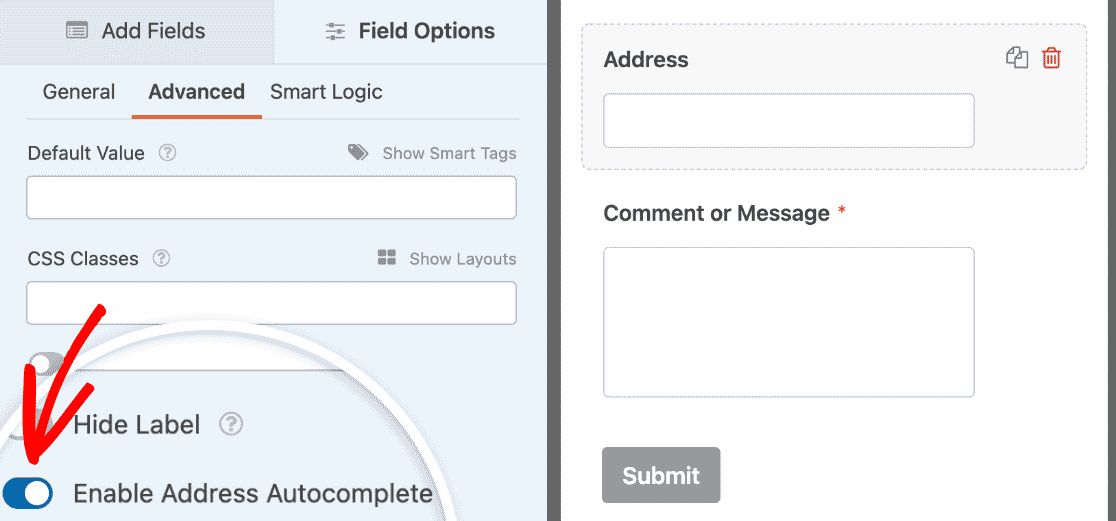
Clique no campo que você acabou de adicionar para abrir suas configurações. Altere o rótulo para “Seu Endereço” ou algo semelhante. Em seguida, clique na guia Avançado nas configurações do campo.

Role para baixo e ative Habilitar Preenchimento Automático de Endereço. Isso permite que os visitantes comecem a digitar o endereço e o selecionem em um menu suspenso.
Em seguida, ative Exibir Mapa. Você pode escolher se o mapa aparece acima ou abaixo do campo de entrada usando o menu suspenso.
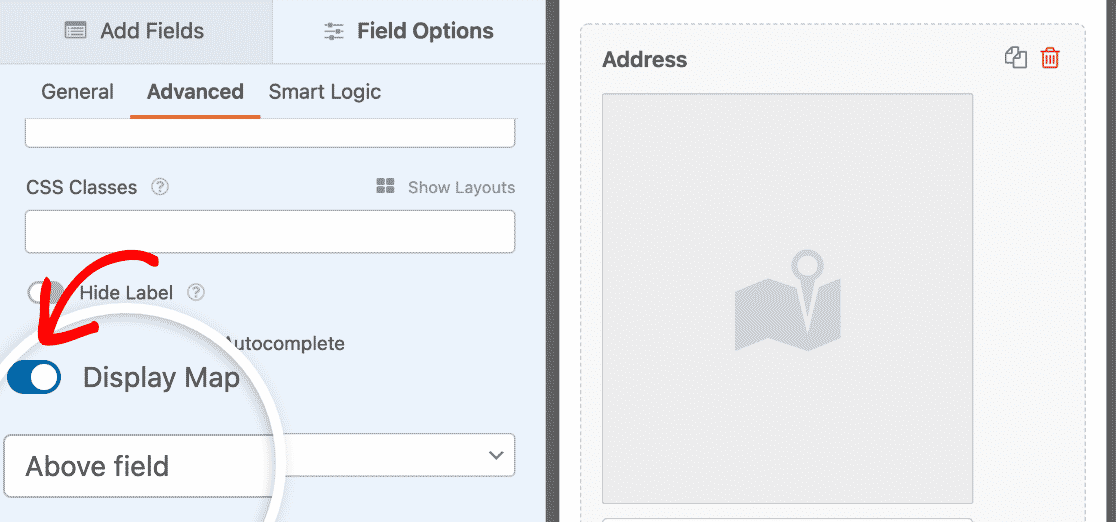
Agora, quando os visitantes preencherem este campo, eles verão um mapa que se atualiza enquanto digitam. Eles também podem arrastar o pino do mapa para refinar sua localização exata.

Esta opção funciona muito bem para empresas de serviços, formulários de entrega ou qualquer situação em que você precise do endereço do visitante. Depois de adicionar seu mapa usando qualquer uma das opções, clique em Salvar no canto superior direito.
Etapa 5: Publique o Mapa do Seu Formulário de Contato
Pronto para publicar seu formulário de contato com um mapa? Com seu plugin WPForms Pro, é muito fácil incorporar seu formulário em seu site. Com o formulário ainda aberto no construtor, clique no botão Incorporar no canto superior direito.

Aqui, você pode selecionar qualquer página do WordPress que desejar, seja uma página existente ou uma nova página. Neste tutorial, clicarei em Criar Nova Página.

Dê um título à sua página. algo como “Fale Conosco” ou “Entre em Contato”, o que você quiser e que se encaixe nas suas necessidades e, em seguida, clique no botão Vamos Lá!.
O WPForms insere automaticamente seu formulário na página. Você verá seu formulário de contato com o mapa já no lugar. A partir daqui, você pode adicionar um texto introdutório acima do formulário, ajustar o layout da página ou estilizar um pouco seu formulário.

Para ajustar a aparência do seu formulário de contato, clique em qualquer lugar ao redor do formulário no editor de página. Isso abre o painel de estilização no lado direito, onde você pode personalizar a aparência do formulário.
Para estilização rápida, escolha um design pré-definido no menu suspenso Tema do Formulário. Opções como Moderno, Clássico ou Minimalista dão ao seu formulário um visual profissional instantâneo que combina com o design do seu site.

Se você quiser mais controle, o painel também permite personalizar elementos individuais como cores, fontes, espaçamento e estilos de botão.
Quando tudo estiver certo e o mapa exibir sua localização corretamente, clique em Publicar. Seu formulário de contato com mapa agora está no ar. Aqui está uma ideia de como ficará:

Perguntas Frequentes sobre Como Adicionar um Formulário de Contato com Mapa no WordPress
Tem dúvidas sobre como adicionar mapas aos seus formulários de contato do WordPress? Aqui estão as respostas para as perguntas mais comuns que ouvimos:
Preciso de uma chave de API do Google Maps para usar mapas no WPForms?
Sim, você precisa de uma chave de API do Google Maps ou de uma chave de API do Mapbox para usar os recursos de mapa no WPForms. O addon Geolocation requer um desses para se conectar ao serviço de mapeamento.
Não se preocupe! O WPForms fornece instruções passo a passo para obter sua chave de API na documentação do addon Geolocation. A configuração geralmente leva cerca de 10 minutos.
Qual é a diferença entre o campo Mapa e a autocompleção de endereço com um mapa?
- O Campo Mapa exibe sua(s) localização(ões) comercial(is) para os visitantes. Ele mostra onde você está. Use isso quando quiser que as pessoas vejam seu escritório, loja ou área de serviço em seu formulário de contato.
- A Autocompleção de endereço com um mapa ajuda os visitantes a preencherem seus próprios endereços mais rapidamente. Conforme eles digitam, o sistema sugere o endereço deles e o exibe em um mapa. Use isso quando precisar coletar a localização do visitante.
Posso mostrar várias localizações comerciais em um único mapa?
Sim. O campo Mapa permite que você adicione quantas localizações precisar, como vários escritórios, lojas, filiais ou centros de serviço.
Cada localidade recebe seu próprio marcador no mapa, e você pode personalizar os ícones e cores dos marcadores. Os visitantes podem clicar em cada marcador para ver o nome e os detalhes da localização.
Para instruções passo a passo, confira a documentação do campo Mapa.
O mapa funcionará em dispositivos móveis?
Com certeza. Mapas criados com o WPForms são totalmente responsivos e funcionam perfeitamente em smartphones e tablets.
Visitantes podem dar zoom, mover e interagir com o mapa como fariam no desktop. O recurso de preenchimento automático de endereço também funciona perfeitamente no celular.
Adicionar um mapa deixa meu formulário de contato lento?
Não. O WPForms carrega mapas de forma eficiente para que eles não deixem sua página lenta. O mapa só carrega quando necessário e não impacta o desempenho do seu formulário.
O WPForms é otimizado para manter seu site rápido, mesmo com recursos interativos como mapas.
Posso personalizar a aparência do mapa no meu formulário?
Sim. Com o campo Mapa, você pode personalizar ícones e cores de marcadores para combinar com sua marca.
Você também pode controlar quais controles de mapa aparecem (zoom, tela cheia, tipo de mapa, etc.) e ajustar o nível de zoom inicial.
Para mapas com preenchimento automático de endereço, você pode escolher se o mapa aparece acima ou abaixo do campo de entrada.
Verei de onde vêm as submissões de formulário em um mapa?
Sim. Quando o addon Geolocation está ativo, o WPForms captura automaticamente dados de localização (com permissão do visitante) para cada submissão de formulário.
Você pode visualizar esses dados em um mapa no seu painel do WordPress ao ver as entradas individuais do formulário. Isso ajuda você a entender de onde seus leads e clientes estão vindo geograficamente.
Em seguida, confira outros recursos do WPForms Pro
Adquira o WPForms Pro hoje para acessar o addon Geolocation que permite adicionar esses mapas incríveis.
Você terá acesso a uma tonelada de outros recursos úteis também.
- Um Construtor Fácil de Usar – Crie seus próprios formulários em minutos sem escrever uma única linha de código.
- Pesquisas – Colete dados por meio de pesquisas e enquetes e veja-os em relatórios bonitos. Você também pode adicionar um recurso Salvar e Continuar a pesquisas longas para que os usuários possam pausar e concluir seus formulários mais tarde.
- Páginas de Formulário – Faça com que mais pessoas concluam seus formulários criando páginas de formulário sem distrações em apenas um clique.
- Formulários de Pedido – Integre Stripe (todos os planos), Square (Pro) e PayPal (Pro) diretamente em seus formulários e aceite dinheiro online.
- Relatórios de Jornada do Usuário – Veja onde as pessoas estavam em seu site antes de preencherem seu formulário.
- Formulários Seguros – Proteja formulários com opções anti-spam como captcha personalizado, hCaptcha ou Google reCAPTCHA v2 ou v3.
- Formulários Conversacionais – Veja as taxas de conversão dispararem com formulários modernos e altamente envolventes.
- Mais de 2.100 Modelos – Nunca mais crie um formulário do zero com modelos pré-construídos dos tipos de formulário mais populares que existem.
- Suporte Premium – Acesse uma equipe amigável e experiente que o ajudará a guiar na direção certa se precisar de ajuda com os formulários do seu site.
- ...e muito mais.
Na verdade, se você olhar para WPForms Lite vs Pro, verá que há uma tonelada de razões pelas quais o Pro é tão popular.
Crie seu formulário WordPress agora
Pronto para criar seu formulário? Comece hoje mesmo com o plugin de criação de formulários WordPress mais fácil. WPForms Pro inclui muitos modelos gratuitos e oferece uma garantia de devolução do dinheiro em 14 dias.
Se este artigo ajudou você, por favor, siga-nos no Facebook e Twitter para mais tutoriais e guias gratuitos do WordPress.


Olá,
É possível usar um mapa personalizado como referência base para verificar se o endereço inserido pelo usuário está dentro de uma determinada área ou não?
Oi Elia – Atualmente, não temos a opção de usar um mapa personalizado como referência para ver se o endereço inserido pelo usuário está em uma área. Concordo que isso seria útil e adicionarei isso ao nosso rastreador de solicitações de recursos para que esteja no radar de nossos desenvolvedores.