
Resumo de IA
Você quer criar um cadastro de e-mail fácil para os visitantes do seu site usando Constant Contact e formulários WordPress? É um processo super rápido e simples de executar. Também facilita para seus visitantes se inscreverem em seus e-mails com apenas um clique rápido em uma caixa de seleção.
Crie seu formulário WordPress agora
Fique comigo por um tempo e eu mostrarei como adicionar facilmente uma caixa de seleção de inscrição ao seu formulário para que você possa começar a aumentar sua lista de e-mails rapidamente.
Constant Contact e Formulários WordPress: Adicionar uma Caixa de Seleção de Inscrição
Conectar Constant Contact e WordPress é rápido e fácil usando WPForms, que é o que vou usar neste tutorial. O WPForms se integra perfeitamente ao Constant Contact, então você terá um formulário publicado, coletando endereços de e-mail em minutos. São 3 passos rápidos. É isso!
Pronto? Vamos começar.
Configuração
Para agilizar o processo, vamos garantir que você tenha algumas coisas configuradas e prontas antes de começarmos. Isso manterá as coisas funcionando sem problemas enquanto percorremos o tutorial juntos.
- WPForms. Certifique-se de registrar uma conta (você precisará do plano Básico ou superior para acessar a integração com o Constant Contact) e instalar o plugin WPForms em seu site WordPress.
- Constant Contact. Como este tutorial específico é voltado para usuários do Constant Contact, certifique-se de ter uma conta atualizada e suas informações de login em mãos.
Nível de Dificuldade: Iniciante
Etapa 1: Conectar WPForms e Constant Contact
Embora você também possa concluir esta etapa mais tarde — e eu mencionarei onde quando chegarmos lá — eu sempre gosto de garantir que minhas integrações estejam conectadas desde o início.
No painel do seu WordPress, navegue até WPForms » Configurações e clique na guia Integrações.
Nessa tela, localize a opção de integração com o Constant Contact.
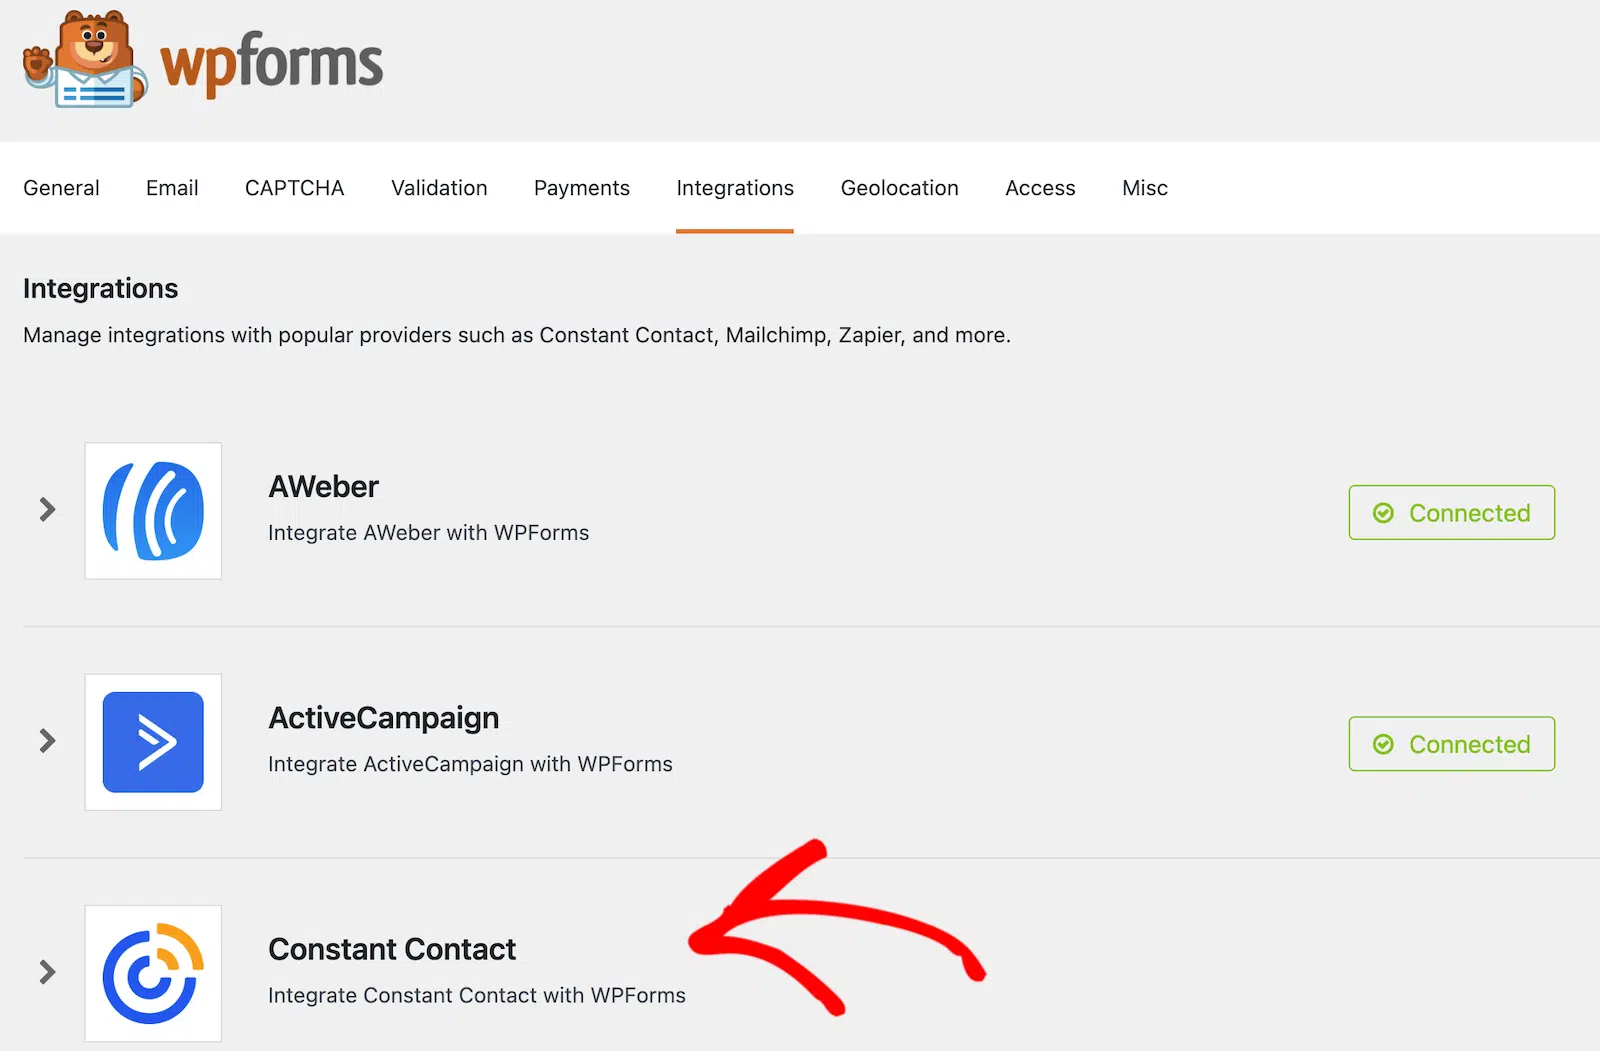
Clique em Constant Contact para começar a configurar a integração.
Quando as opções aparecerem, clique no link que diz Clique aqui para se registrar no Constant Contact. Você verá um prompt para fazer login na sua conta do Constant Contact e, em seguida, passará pelo processo de configuração.
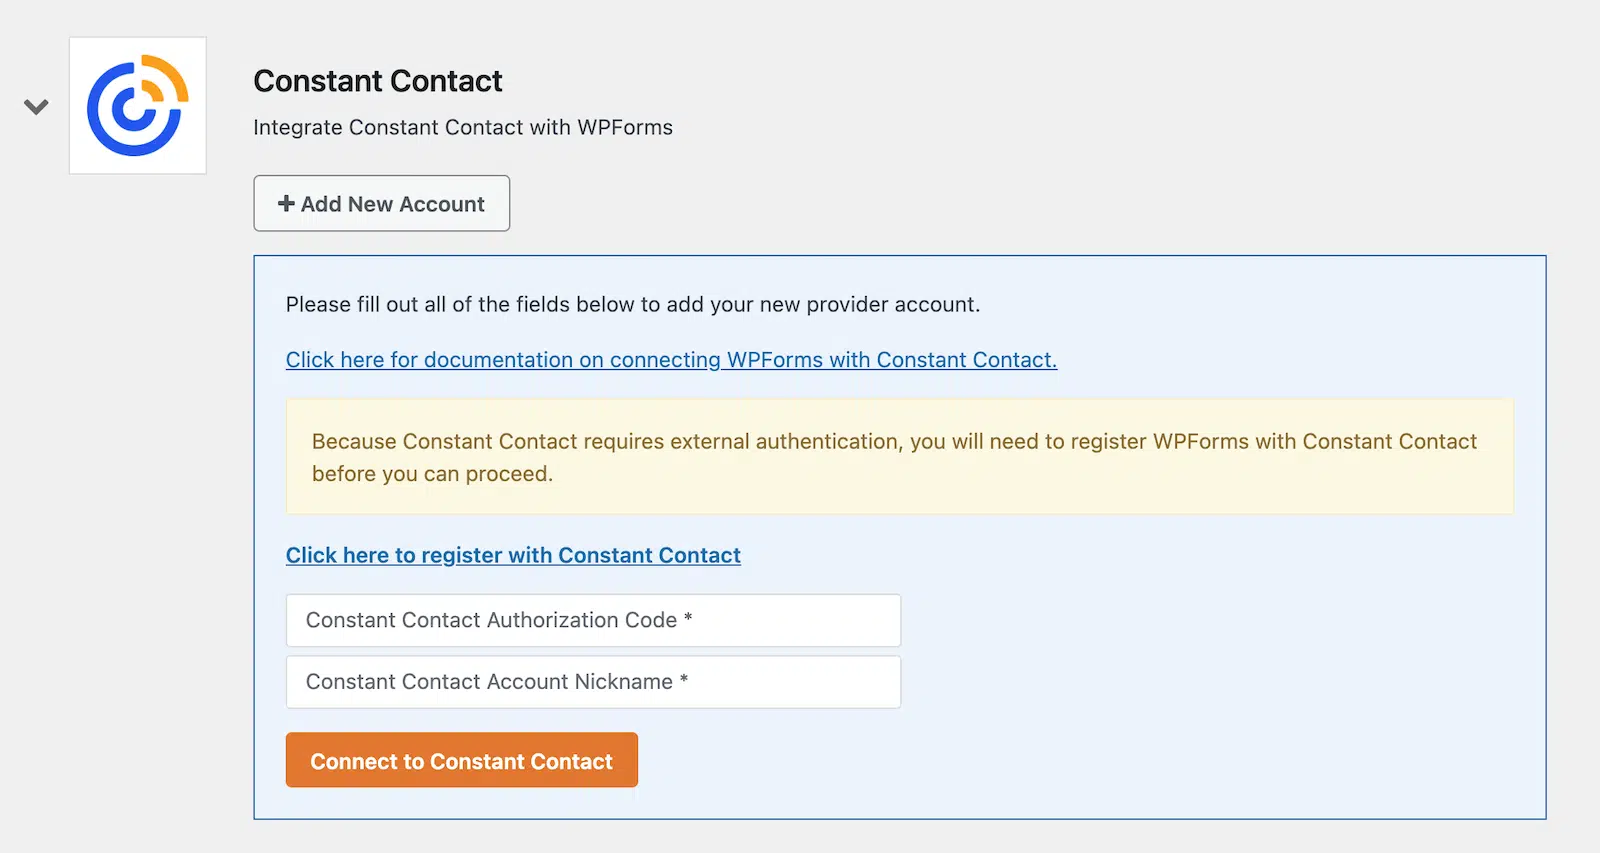
Ao concluir a autenticação da sua conta, você receberá um código de autorização do Constant Contact. Copie e cole-o no campo correspondente, dê um apelido à sua conta e clique em Conectar ao Constant Contact para finalizar a configuração.
Quando o processo for concluído com sucesso, você verá um indicador informando que está conectado.
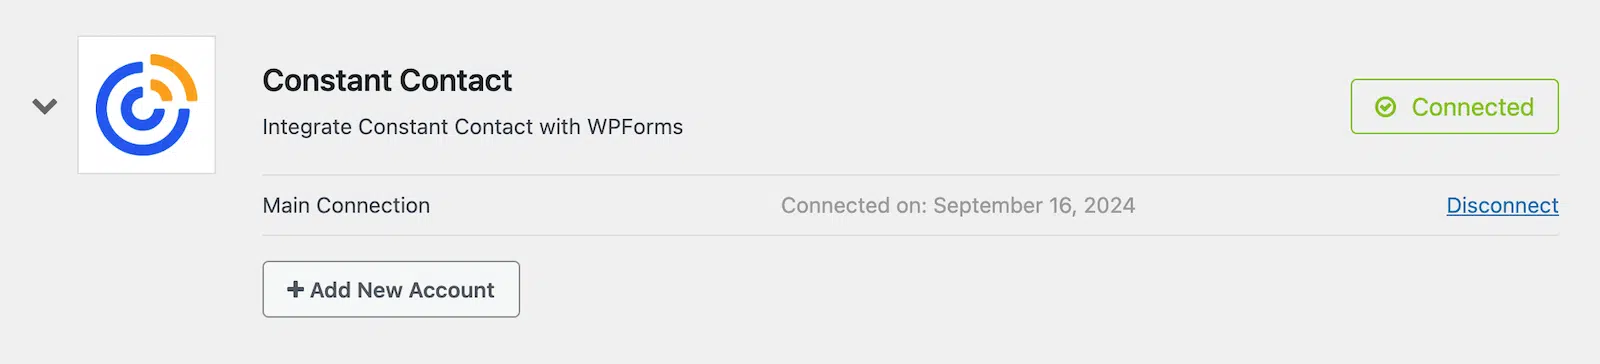
Bem fácil, né? Com a conexão estabelecida, vamos em frente e configurar seu formulário.
Etapa 2: Criar um Formulário
Na barra de navegação esquerda do seu painel do WordPress, vá para WPForms » Adicionar Novo.
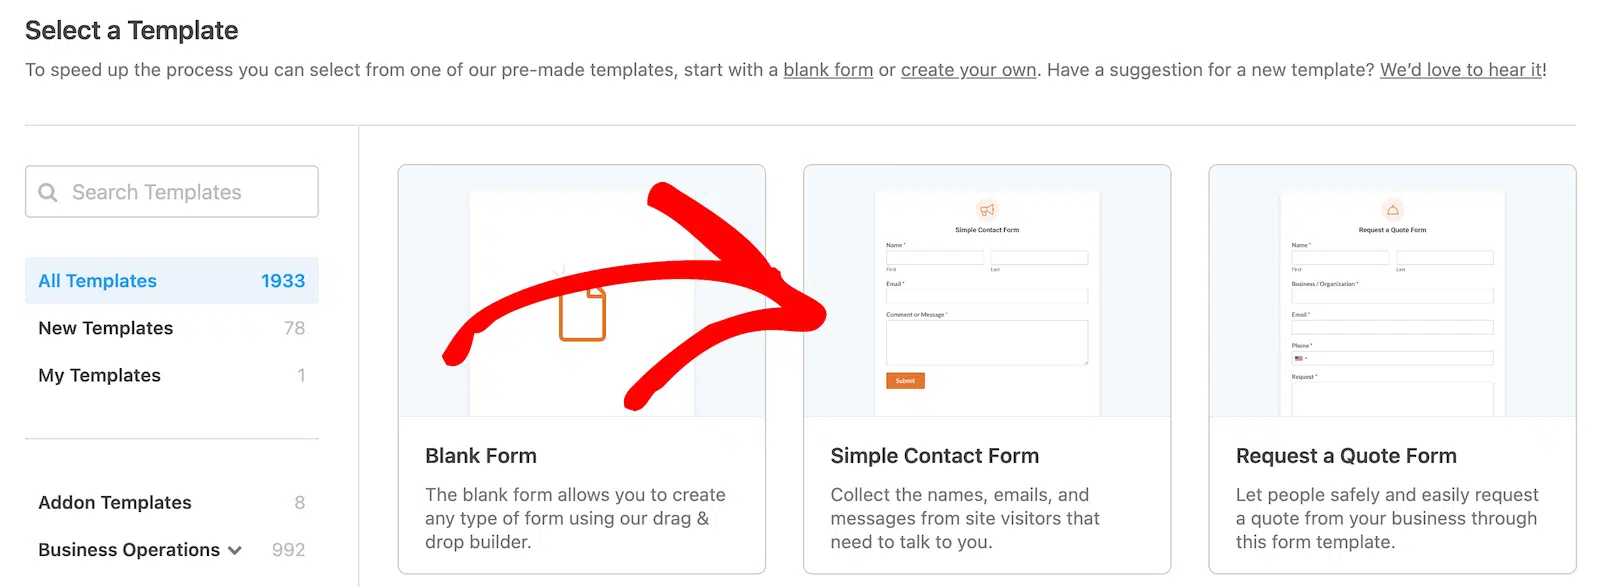
Você verá uma tela com opções de modelos. O WPForms vem com mais de 2.100 modelos de formulários. Você pode usá-los como estão ou editá-los para torná-los seus. Os modelos podem economizar muito tempo, então é isso que faremos aqui.
Selecione o modelo Formulário de Contato Simples. Se você não o vir perto do topo das suas opções de modelo por algum motivo, também pode pesquisar por ele.
Ao selecionar o modelo, ele será aberto no editor de formulários. Você verá que ele inclui campos para Nome, E-mail e Comentário ou Mensagem. Sinta-se à vontade para adicionar ou remover campos conforme achar melhor. Tudo o que você precisa fazer é arrastá-los e soltá-los das opções de campo à esquerda no construtor de formulários.

Este formulário parece bom para mim como está, então tudo o que vou fazer é adicionar uma caixa de seleção que permitirá às pessoas se inscreverem em meus e-mails.
Para fazer isso, basta arrastar um campo de Caixas de seleção das opções de Campos Padrão e soltá-lo no construtor de formulários onde eu quiser.
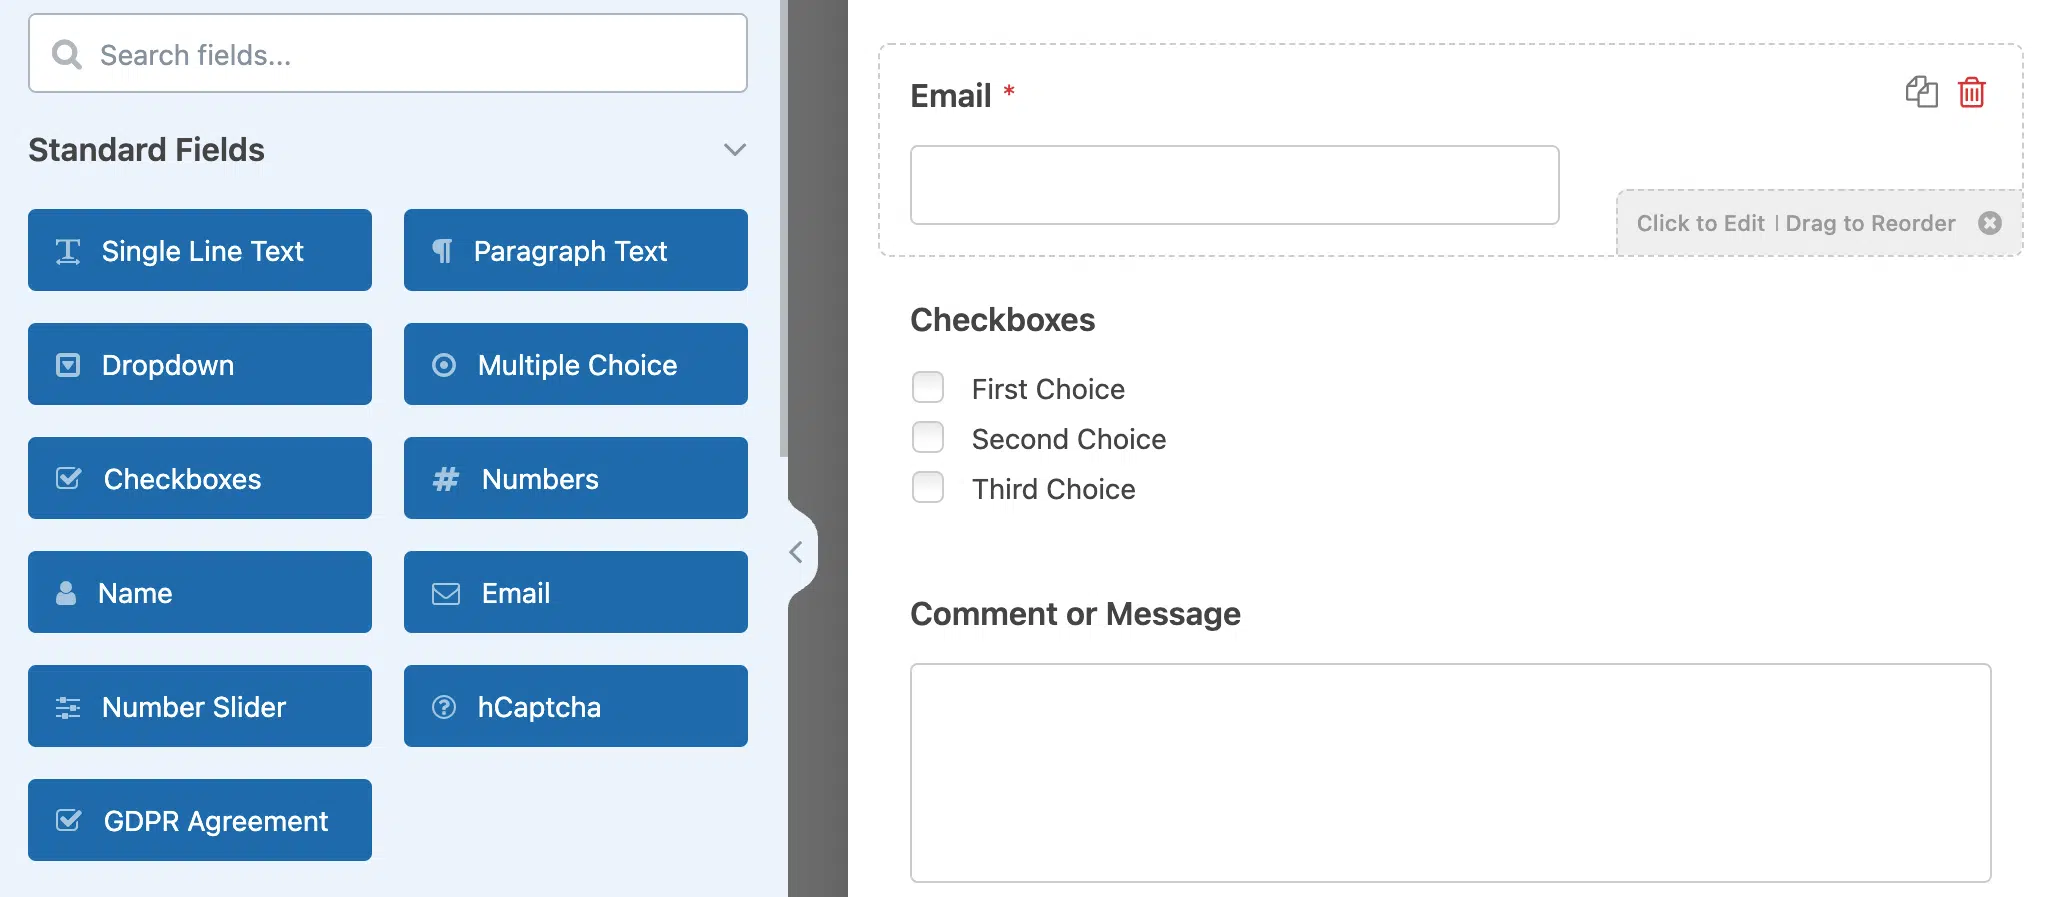
Existem 3 opções por padrão. Se você clicar no campo, poderá remover 2 delas e alterar a opção restante para qualquer texto que desejar usar para a opção de inscrição. Vou usar "Inscreva-se em nosso e-mail!" para o meu.
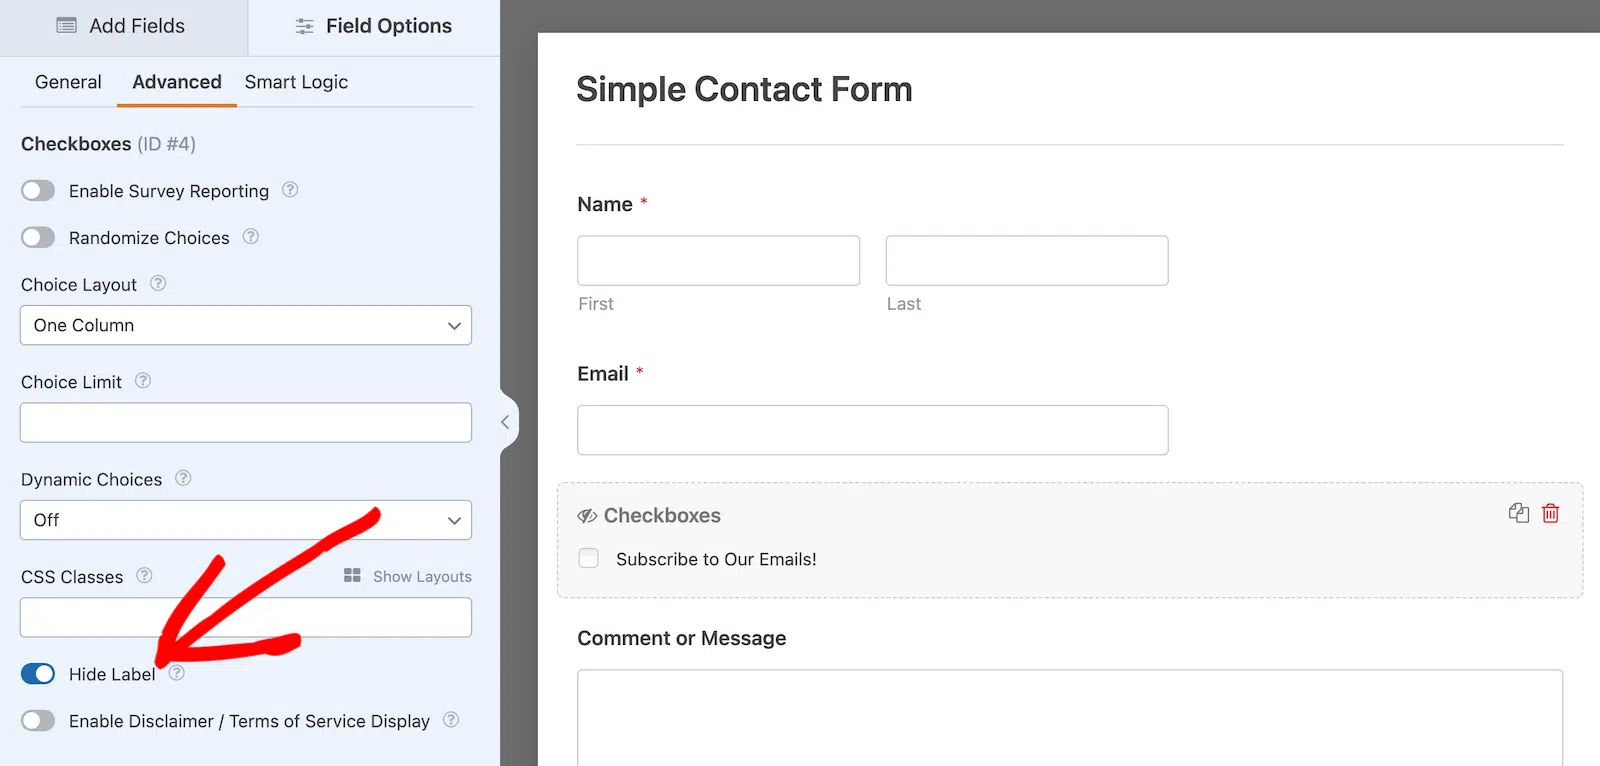
No entanto, não queremos que os usuários vejam o título Caixas de seleção no formulário, então vamos ocultá-lo.
Com as opções do campo de caixas de seleção ainda abertas, clique na guia Avançado. Em seguida, role para baixo até ver uma opção de alternância para Ocultar Rótulo. Ative isso. Então você verá que o título das caixas de seleção está oculto da vista pública.
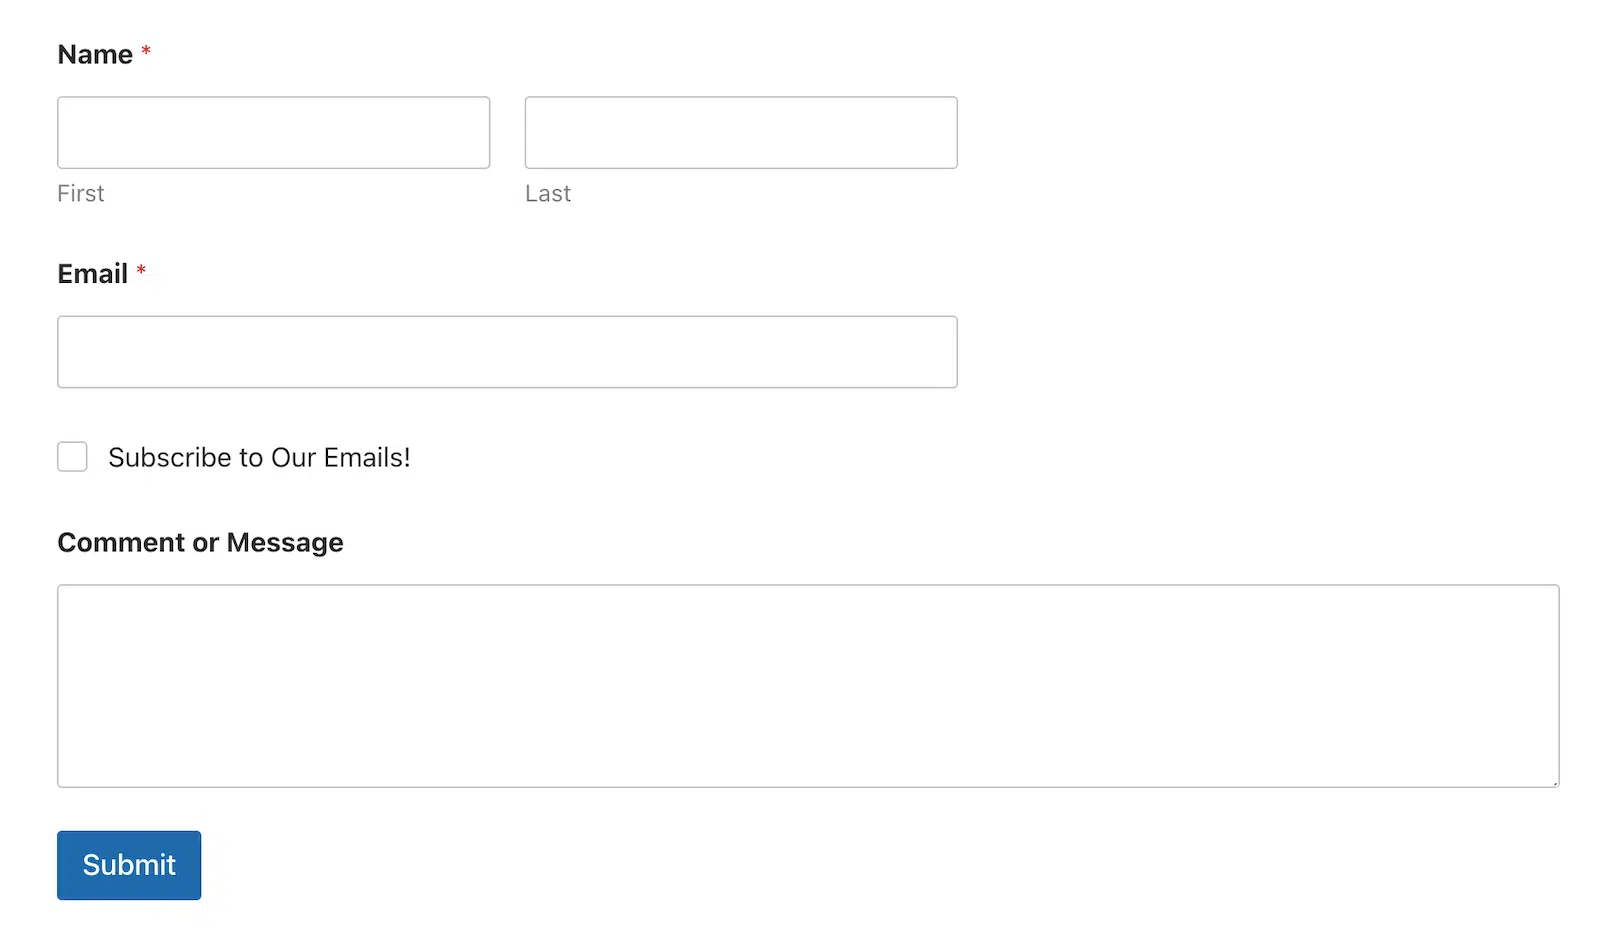
Agora clique no botão laranja Salvar no canto superior direito.
Se você visualizar seu formulário, deverá ver a caixa de seleção sem o título.
Estamos quase terminando! Tudo o que temos a fazer é mapear os campos do formulário para o Constant Contact e habilitar a lógica condicional. Mas não se preocupe, mesmo que isso pareça complicado, é rápido e indolor.
Etapa 3: Mapear Campos do Formulário para Constant Contact
Se você não configurou a integração do Constant Contact antes de iniciar este tutorial, é aqui que você a configurará. Ele o guiará pelas etapas, se necessário.
Vou assumir que você já a configurou, então apenas continuaremos com a próxima etapa.
Com o construtor de formulários ainda aberto, navegue até Marketing » Constant Contact na navegação lateral do WPForms. Clique no botão Adicionar Nova Conexão e você será solicitado a inserir um apelido para a conexão. Isso é apenas para seu uso.
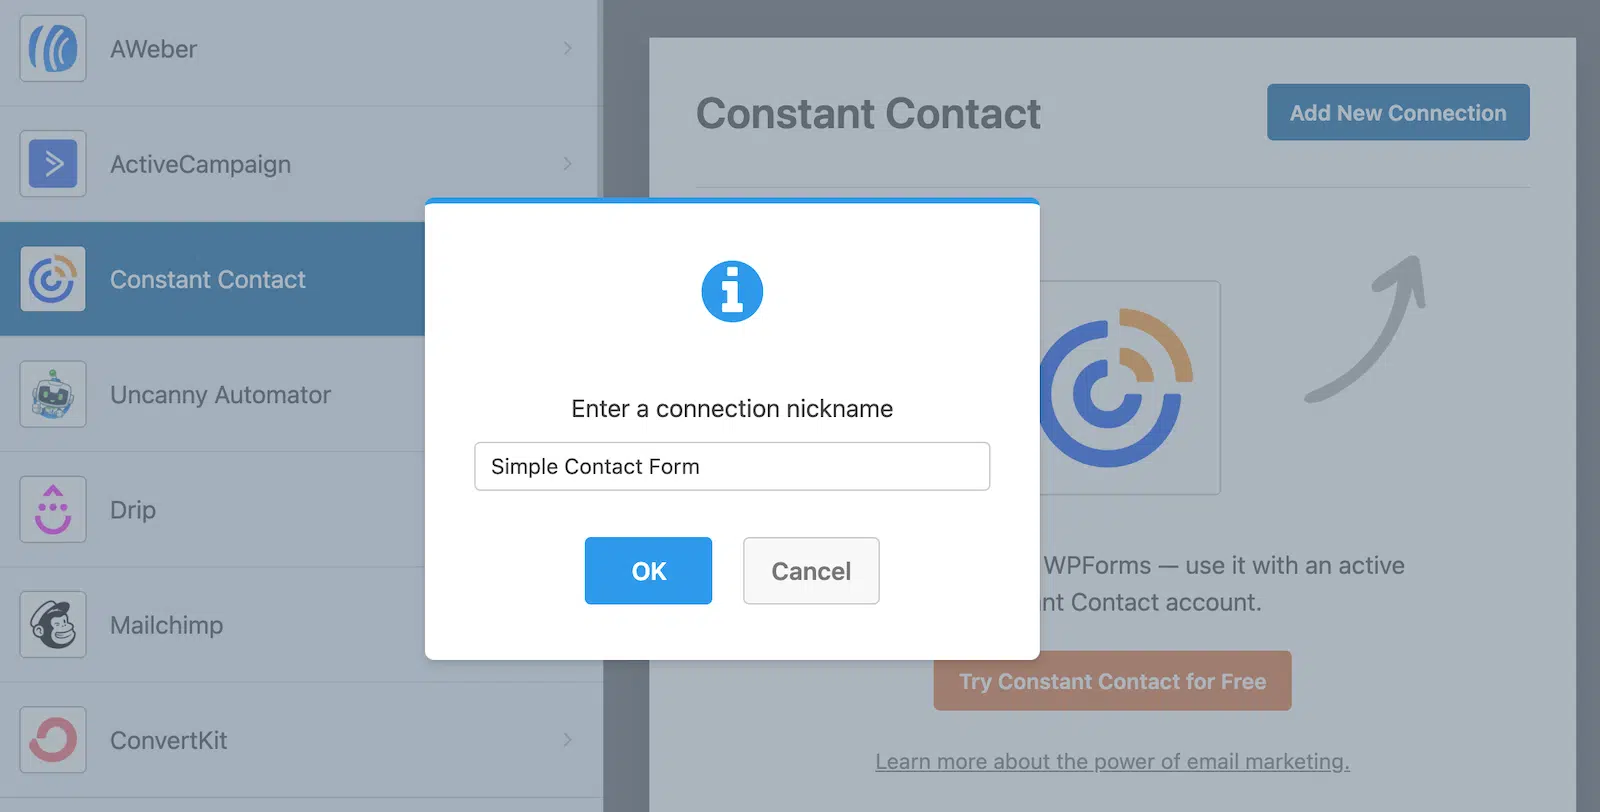
Depois de dar um apelido à conexão, você verá opções para mapear campos do formulário entre o formulário que você criou no WPForms e sua conta do Constant Contact.
Selecione a conta e a lista de e-mail para onde deseja enviar as informações coletadas em seu formulário de contato. Em seguida, você pode mapear os Campos da Lista. Um endereço de e-mail é obrigatório, mas recomendo também mapear o campo de nome para que o nome do assinante vá para o Constant Contact.

Após selecionar os campos que deseja mapear, role para baixo até ver um interruptor para Lógica Condicional. Clique no interruptor para Habilitar Lógica Condicional.

Depois de habilitar a lógica condicional, você pode dizer o que fazer com informações específicas do seu formulário. Neste caso, quando alguém seleciona a caixa de seleção para se inscrever em e-mails, queremos garantir que o nome e o endereço de e-mail sejam adicionados à nossa lista do Constant Contact.
Faremos isso dizendo para processar a conexão se o campo de caixas de seleção for Inscreva-se em nossos e-mails! Em outras palavras, processe a conexão se a opção de inscrição for selecionada.

Seu formulário agora está completo! Clique no botão laranja Salvar no canto superior direito. Tudo o que você precisa fazer agora é incorporar o formulário em seu site. Você pode fazer isso usando o botão Incorporar no construtor de formulários. Se precisar de ajuda, confira nosso guia sobre 3 maneiras de incorporar um formulário em seu site WordPress.
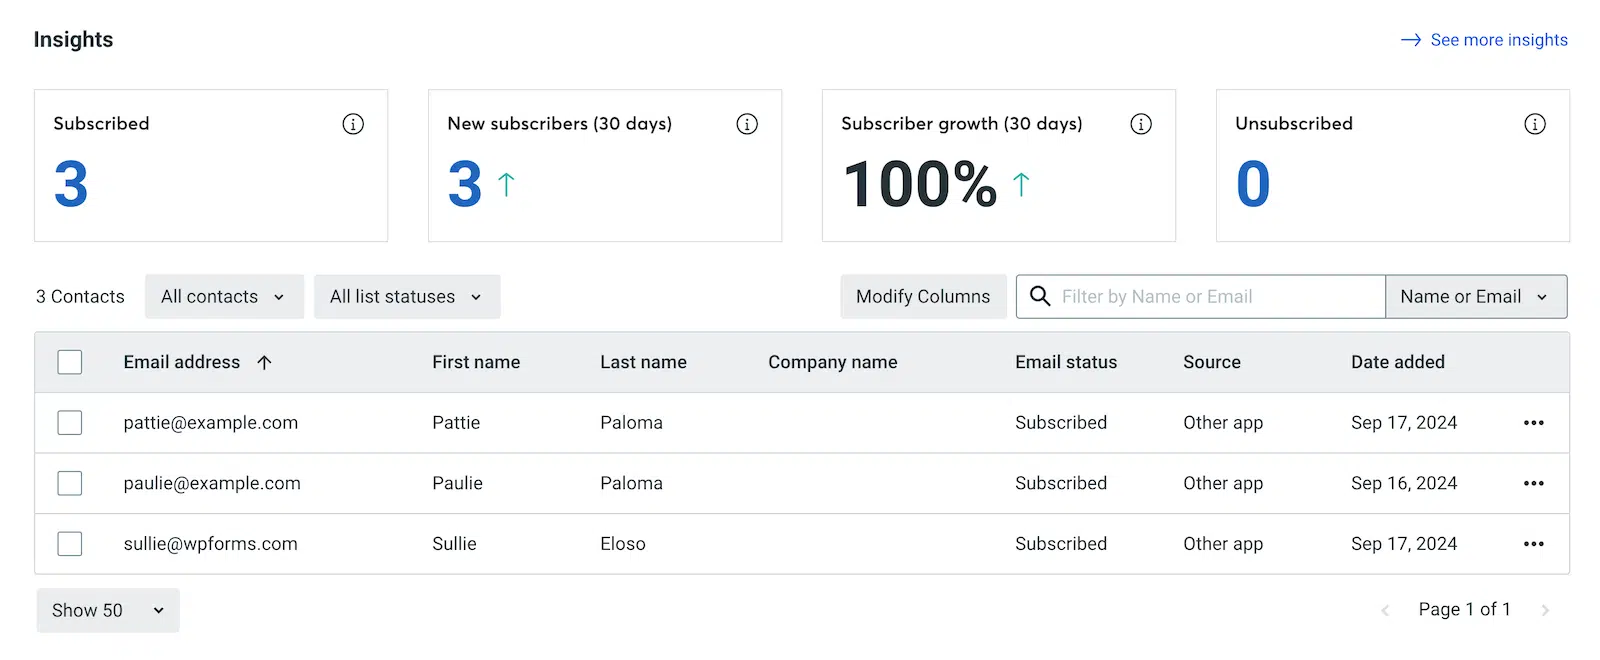
Assim que seu formulário estiver ativo em seu site, você poderá acessar sua conta Constant Contact para ver quem está se inscrevendo.
E é só isso! Mesmo que tenhamos passado por isso passo a passo, ainda foi bem fácil, certo? Conecte Constant Contact e WordPress usando WPForms, e depois apenas 3 passos rápidos. Nada complicado. :)
A integração Constant Contact funciona com WPForms Lite?
Não — você precisará de pelo menos a licença WPForms Basic para usar a integração Constant Contact e adicionar uma caixa de seleção de inscrição aos seus formulários.
Posso adicionar assinantes a mais de uma lista Constant Contact ao mesmo tempo?
Você selecionará uma lista por conexão Constant Contact, mas pode adicionar várias conexões a um único formulário. Portanto, se alguém marcar a caixa, você pode enviá-lo para uma lista de newsletter e uma lista de clientes ao mesmo tempo.
Devo pré-marcar a caixa de seleção de inscrição para os visitantes?
É melhor deixá-la desmarcada. Caixas de opt-in pré-marcadas não estão em conformidade com o GDPR e regras de consentimento semelhantes, e as próprias políticas anti-spam da Constant Contact esperam um opt-in explícito. Deixe o visitante fazer a escolha.
O que acontece se alguém já for um assinante e preencher o formulário novamente?
Constant Contact não criará um duplicado. Ele atualiza o registro de contato existente com quaisquer novas informações do formulário, para que sua lista permaneça limpa.
Posso usar isso em outros formulários além de um formulário de contato?
Sim. A mesma configuração de caixa de seleção + lógica condicional funciona em qualquer formulário que você criar com WPForms — formulários de registro, solicitações de orçamento, formulários de lead magnet, formulários de checkout, formulários de comentários, em qualquer lugar onde você colete um endereço de e-mail.
E se eu não vir Constant Contact em minhas integrações?
Vá para WPForms » Addons e instale o addon Constant Contact primeiro. Assim que estiver ativo, a opção de integração aparecerá em WPForms » Configurações » Integrações, pronta para você conectar sua conta.
Posso marcar assinantes com base em qual formulário eles vieram?
Constant Contact usa listas em vez de tags para segmentação, portanto, a abordagem mais limpa é enviar os assinantes de cada formulário para sua própria lista dedicada (por exemplo, “Inscrições do Blog” vs. “Downloads de Lead Magnet”). Você pode então segmentar suas campanhas a partir daí.
Preciso configurar um e-mail de confirmação separado?
Constant Contact cuida do e-mail de boas-vindas em seu sistema — você pode personalizá-lo em sua conta Constant Contact nas configurações da lista. O WPForms também envia sua própria mensagem de confirmação de formulário para o visitante, que você pode editar na guia Configurações » Confirmações do formulário.
Em seguida, Aumente sua Lista de E-mails para Impulsionar Conversões
O marketing por e-mail é uma parte importante de qualquer estratégia de marketing. Se você está em dúvida sobre sua importância, confira algumas estatísticas recentes de marketing por e-mail.
Para saber mais sobre como construir e expandir sua lista de e-mails, confira nossos posts sobre por que você deve construir uma lista de e-mails e como expandi-la rapidamente.
Crie seu formulário WordPress agora
Pronto para criar seu formulário? Comece hoje mesmo com o plugin de criação de formulários WordPress mais fácil. WPForms Pro inclui muitos modelos gratuitos e oferece uma garantia de devolução do dinheiro em 14 dias.
Se este artigo ajudou você, por favor, siga-nos no Facebook e Twitter para mais tutoriais e guias gratuitos do WordPress.


Olá, ótimo artigo – você precisa ter o wp pro para popular assinantes de e-mail no constant contact? isso parece ser discutido em outros artigos e não consigo uma resposta real. Não quero perder tempo se eu for para a versão “lite” e não conseguir integrar os dois. Obrigado
Olá Suzie,
Pergunta muito válida. Nossa integração com o Constant Contact funciona com o WPForms Lite. Espero que isso ajude🙂