
Resumo de IA
Você quer usar o Akismet com formulários Elementor?
Embora o Elementor Forms inclua algumas opções anti-spam, ele não se integra com o Akismet.
Na verdade, a gama de ferramentas de prevenção de spam no Elementor Forms é bastante limitada.
Mas existe uma maneira muito fácil de lidar com esse problema.
Neste post, mostraremos como você pode usar o Akismet com formulários Elementor para criar formulários de contato sem spam em seu site.
Filtre Spam de Formulários com Akismet Agora
O Akismet Funciona com Formulários Elementor?
Por padrão, não há como conectar o Akismet com formulários Elementor. Isso ocorre porque o Elementor ainda não adicionou suporte para o Akismet.
No entanto, o bom é que o Elementor se integra com outros construtores de formulários como o WPForms, que oferecem mais opções de prevenção de spam, incluindo o Akismet.
Portanto, se você deseja bloquear envios de spam para formulários que está incorporando usando o Elementor, sua melhor opção é criar um formulário habilitado para Akismet no WPForms e, em seguida, usar o widget WPForms no Elementor para incorporar o formulário em qualquer lugar da sua página.
Agora que você sabe mais sobre como usar o Akismet no Elementor, vamos detalhar as etapas que você precisará realizar.
Como Usar o Akismet Com Formulários Elementor
Neste Artigo
Passo 1: Instalar o WPForms
Como o Elementor não suporta o Akismet diretamente, aproveitaremos a integração nativa do WPForms com o Akismet. Podemos então usar o widget WPForms do Elementor para adicionar um formulário com o filtro de spam Akismet habilitado a uma página.
Embora o WPForms suporte o Akismet em todos os planos de preços, recomendamos adquirir o WPForms Pro. Em seguida, prossiga e instale o WPForms em seu site.

Com uma licença Pro, você terá acesso a mais de 2.100 modelos de formulários pré-construídos, juntamente com uma variedade de recursos avançados como Cupons e Formulários de Leads.
Após instalar o WPForms, é hora de configurar o Akismet.
Etapa 2: Instalar e Configurar o Akismet
O Akismet geralmente vem pré-instalado no WordPress. Mas se você ainda não o tem instalado, pode instalá-lo abrindo seu menu de administração do WordPress e indo em Plugins » Adicionar Novo.

Em seguida, procure por Akismet e clique em Instalar Agora.

Depois de instalar e ativar o Akismet, você será redirecionado para a página de configurações do Akismet. Você também pode visitar essa página manualmente indo em

Na página de configurações do Akismet, clique no botão Configurar sua Conta Akismet.

Você será levado à página de preços do Akismet. Selecione um plano de licença apropriado para o seu negócio. Pegaremos o plano Pessoal para este tutorial.

O Akismet permite que você selecione seu próprio preço para o plano Pessoal. Você pode mover o controle deslizante até zero para obter o Akismet gratuitamente.

Role para baixo para encontrar caixas de seleção para confirmar que você está usando o Akismet para sites não comerciais. O plano Pessoal gratuito do Akismet está disponível apenas para proprietários de sites que não estão usando seu site para fins comerciais.
Portanto, se você é um blogueiro sem nada para vender, pode usar o Akismet totalmente de graça. Caso contrário, escolha um plano pago e siga as etapas abaixo.

Insira suas informações de faturamento na tela de checkout e pressione Continuar para Pagamento.

Se você selecionou o plano gratuito, pode optar por atribuir um método de pagamento mais tarde e pular a inserção dos detalhes do seu cartão de crédito.
Role para baixo e clique em Completar Checkout.

Você será levado para a página de login do WordPress.com (porque o Akismet pertence à mesma empresa por trás do WordPress.com). Clique no botão Continuar para prosseguir.

Você encontrará sua chave de API assim que fizer login. Copie a chave de API do Akismet.

Agora, retorne à aba do navegador com a tela de configurações do Akismet e clique em Inserir Chave de API Manualmente.

Simplesmente cole sua chave de API dentro da caixa e clique no botão Conectar com Chave de API.

Assim que você se conectar com a API, o Akismet estará pronto para uso em seu site.
Etapa 3: Criar um Formulário de Contato WordPress
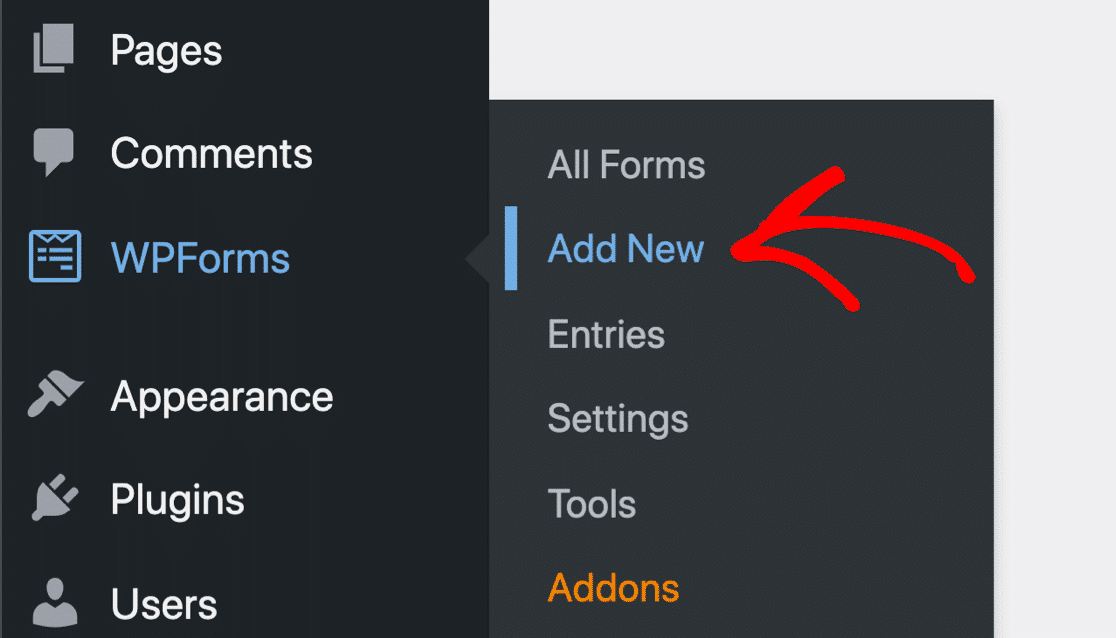
Com o Akismet configurado, podemos prosseguir e criar um novo formulário usando o WPForms. No seu painel do WordPress, vá para WPForms » Adicionar Novo.
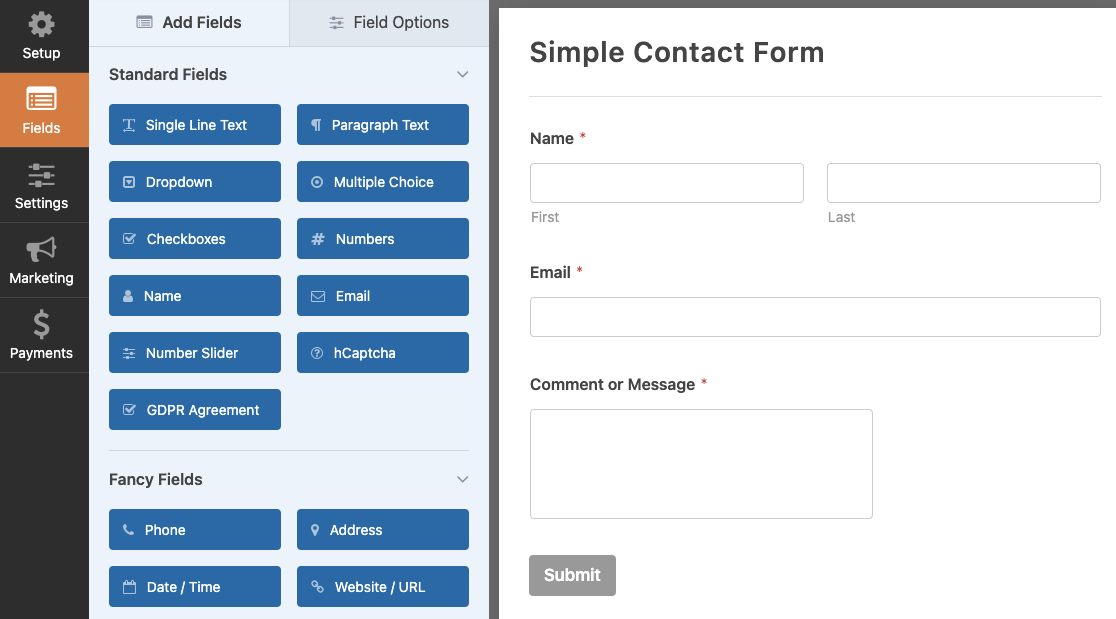
Agora você verá a tela de configuração do formulário, onde pode nomear seu formulário e começar com um modelo de formulário pronto. Para este tutorial, usaremos o modelo Formulário de Contato Simples.

Assim que você selecionar seu modelo, ele será carregado dentro do seu construtor de formulários. Você pode personalizar o modelo de formulário adicionando outros campos ao seu formulário ou editando os existentes.
Quando estiver satisfeito com a aparência do seu formulário, passe para a próxima etapa.
Etapa 4: Habilitar o Akismet em seu Formulário WordPress
Enquanto estiver dentro do construtor de formulários do WPForms, navegue até WPForms » Proteção contra Spam e Segurança.
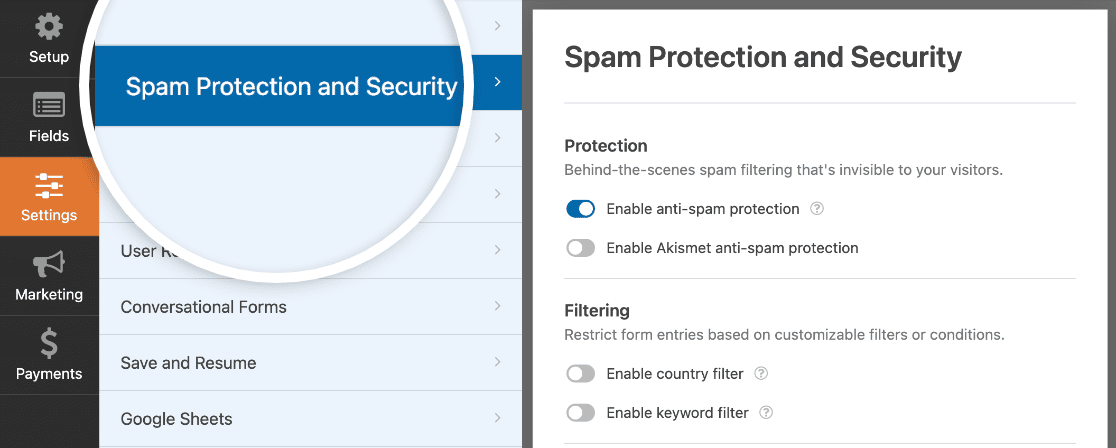
Você verá várias opções anti-spam disponíveis aqui. Simplesmente clique no botão de alternância Ativar proteção anti-spam do Akismet para adicionar o filtro de spam do Akismet ao seu formulário.
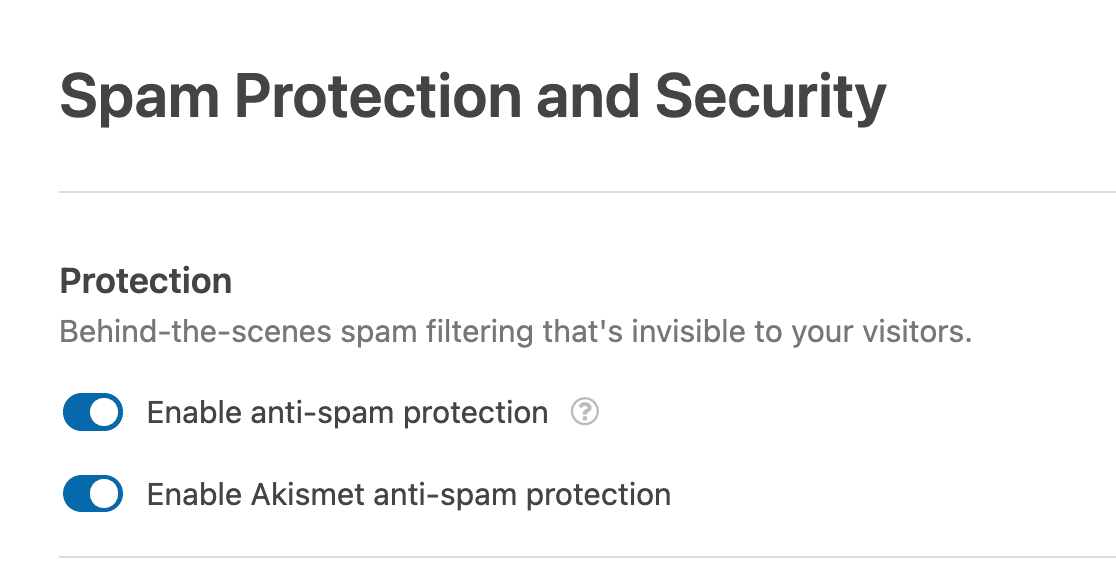
Ótimo. Agora que você ativou o Akismet, os envios do seu formulário serão verificados automaticamente pelo Akismet em busca de sinais de spam.
Prossiga e pressione Salvar para salvar suas configurações.

Brilhante! Temos tudo configurado agora. Tudo o que resta é incorporar este formulário usando o Elementor.
Etapa 5: Publicar seu Formulário Habilitado para Akismet com Elementor
Após salvar seu formulário, retorne ao seu painel do WordPress e vá para Páginas. Em seguida, selecione o botão Adicionar Nova.
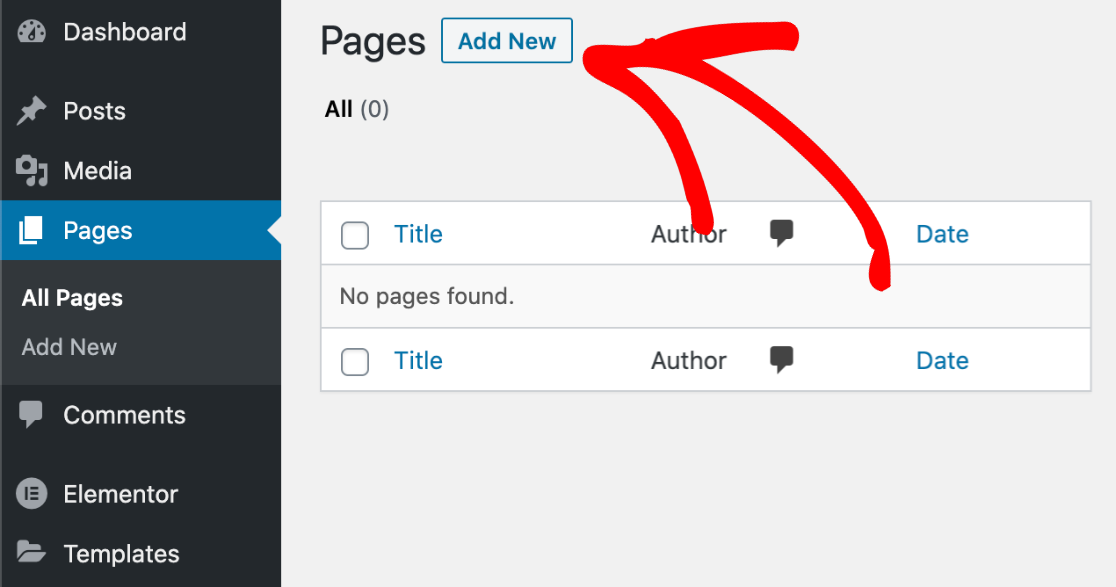
Isso o levará ao seu editor de blocos do WordPress. Se você tiver o Elementor instalado, verá um botão azul Editar com Elementor.

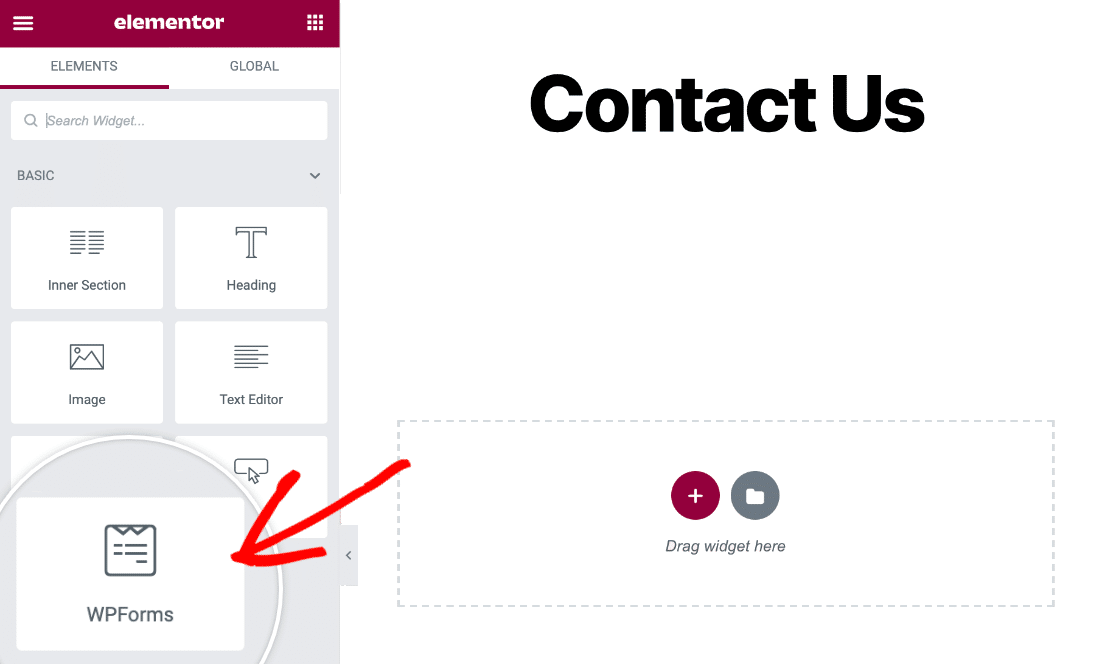
Assim que você pressionar este botão, o editor de páginas do Elementor começará a carregar. Dentro da interface do Elementor, você pode encontrar o widget WPForms à sua esquerda.
Arraste e solte o bloco WPForms no lado direito.
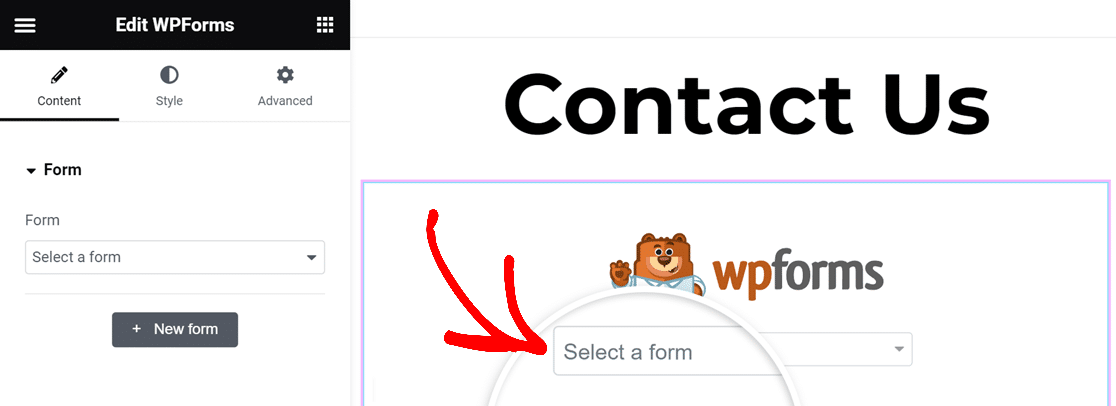
Depois de adicionar o widget WPForms à sua página, você pode selecionar qualquer formulário que tenha criado e salvo anteriormente com o WPForms usando o menu suspenso.
Selecionaremos nosso formulário de contato simples usando este menu suspenso.
Seu formulário selecionado aparecerá exatamente como você o configurou no WPForms. Neste ponto, você também pode personalizar extensivamente a aparência do seu formulário, como mostrado em nosso guia sobre criação de formulários com Elementor.
Quando estiver pronto para incorporar este formulário, basta pressionar o botão Publicar na parte inferior do painel esquerdo.
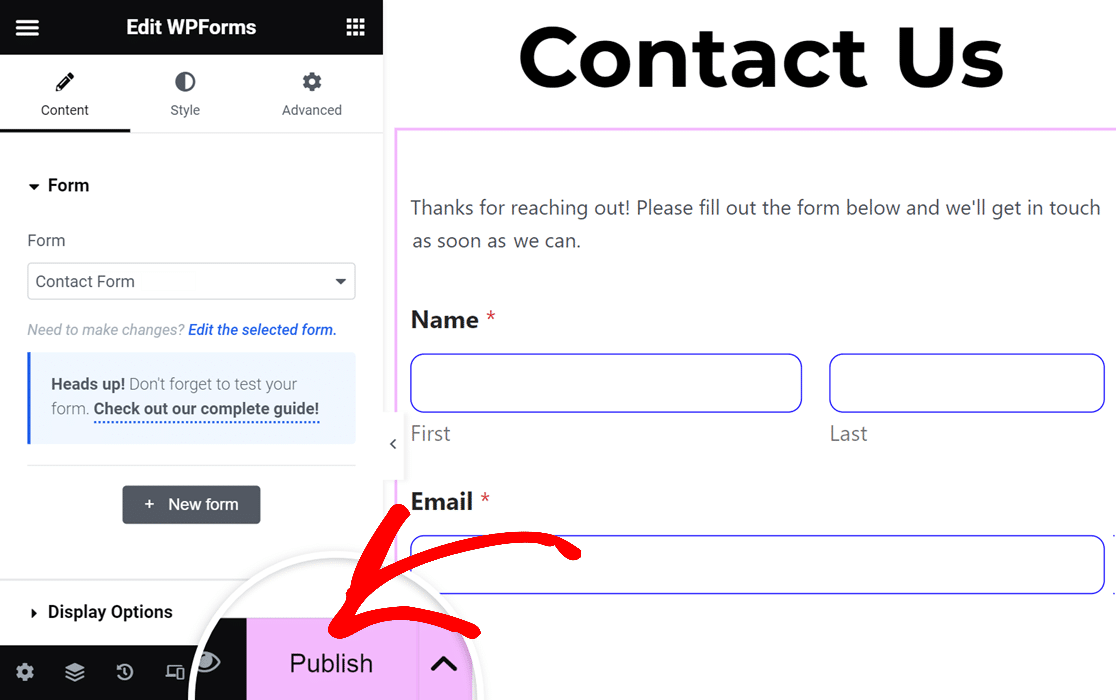
Seu formulário anti-spam Akismet agora será incorporado imediatamente em seu site.
Mas antes de fazer qualquer outra coisa, recomendamos fortemente testar seu formulário para garantir que o Akismet esteja filtrando corretamente as submissões de spam.
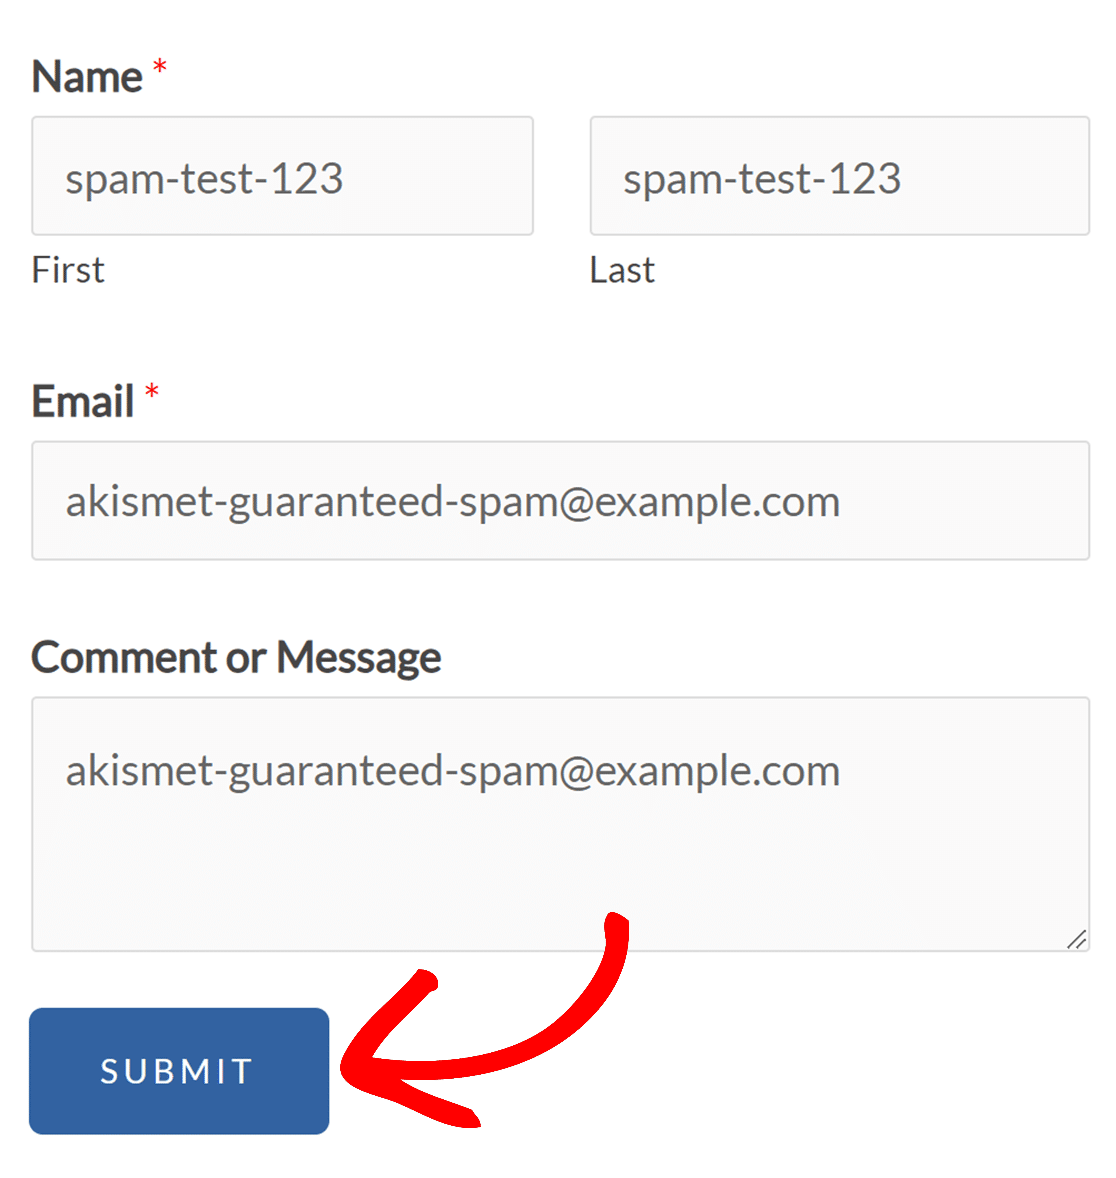
Para fazer isso, basta visitar o formulário que você acabou de publicar com o Elementor e tentar inserir um dos gatilhos de spam do Akismet, como:
- Nome: spam-test-123
- Email: [email protected]
- Corpo do Comentário: akismet-guaranteed-spam
Preencher o formulário com uma entrada de spam como a acima e, em seguida, pressionar enviar.
Se o Akismet estiver funcionando corretamente, você notará que sua mensagem não será enviada e um erro aparecerá indicando que a entrada foi identificada como spam.
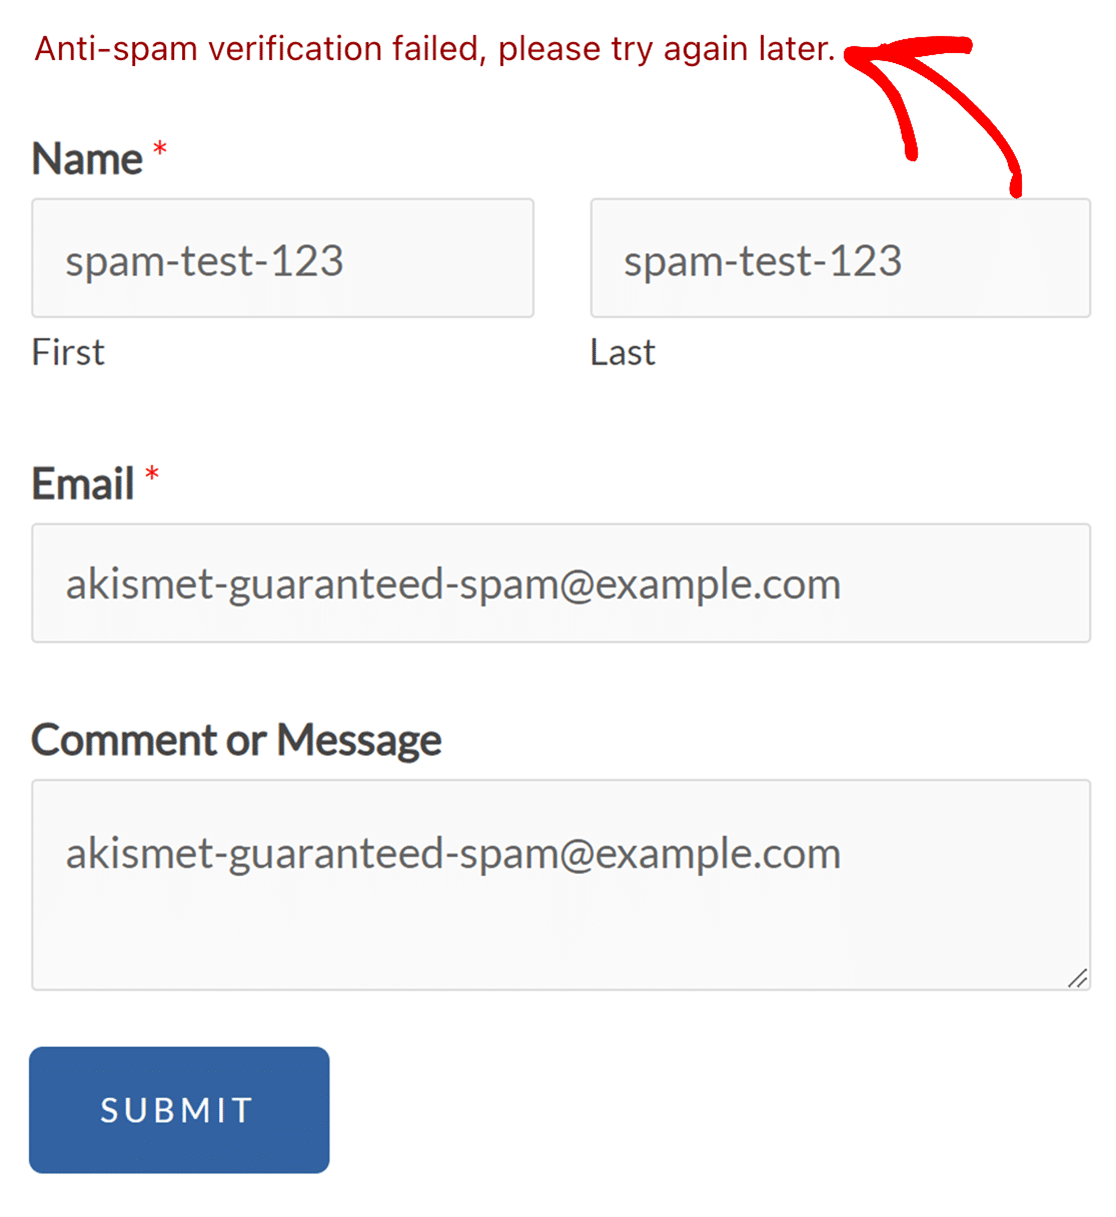
E é exatamente isso que queremos que aconteça.
Com as etapas que mostramos acima, você agora pode usar facilmente o Akismet com Formulários Elementor e manter seu site livre de spam.
Em seguida, Integre o WPForms com o WooCommerce
Se você tem uma loja de e-commerce, deve automatizar o máximo de processos que puder para economizar tempo. Uma das melhores maneiras de fazer isso é integrando o WPForms com o WooCommerce.
Além disso, você sabia que pode criar formulários de acordeão com o WPForms? É uma excelente maneira de facilitar o preenchimento dos seus formulários e melhorar a experiência do usuário.
Filtre Spam de Formulários com Akismet Agora
Pronto para construir seu formulário? Comece hoje mesmo com o plugin construtor de formulários WordPress mais fácil. WPForms Pro inclui muitos modelos gratuitos e oferece uma garantia de devolução do dinheiro em 14 dias.
Se este artigo ajudou você, por favor, siga-nos no Facebook e Twitter para mais tutoriais e guias gratuitos do WordPress.

