Résumé de l'IA
Vous souhaitez accepter les paiements de vos clients via vos formulaires WordPress ? WPForms facilite l'intégration de Square et permet de commencer à collecter des paiements en ligne en utilisant WPForms Lite.
Dans ce guide, nous allons vous expliquer comment configurer Square avec WPForms Lite afin que vous puissiez commencer à recevoir des paiements directement depuis vos formulaires.
Exigences :
- Vous aurez besoin de la version 1.9.5 ou supérieure de WPForms pour accéder aux paiements Square avec WPForms Lite.
- Assurez-vous que vous avez installé la dernière version de WPForms afin de respecter la version minimale requise pour l'addon Square.
- Square exige que votre site ait le SSL (HTTPS) activé sur la page où vous ajoutez un formulaire de paiement en direct, car cela vous permet d'envoyer en toute sécurité les données de la carte de crédit à Square. Pour plus de détails, veuillez consulter le guide de WPBeginner sur l'ajout de SSL et HTTPS dans WordPress.
Installation de WPForms Lite
Avant de commencer, vous devez installer et activer le plugin WPForms Lite sur votre site WordPress. Vous pouvez installer WPForms Lite à partir du répertoire des plugins de WordPress.
Si vous n'êtes pas familier avec l'installation de plugins WordPress, consultez le guide de WPBeginner pour apprendre comment faire.
Connexion de votre compte Square
Une fois que WPForms Lite est actif, vous devez lier votre compte Square. Allez dans WPForms " Settings, puis cliquez sur l'onglet Payments .
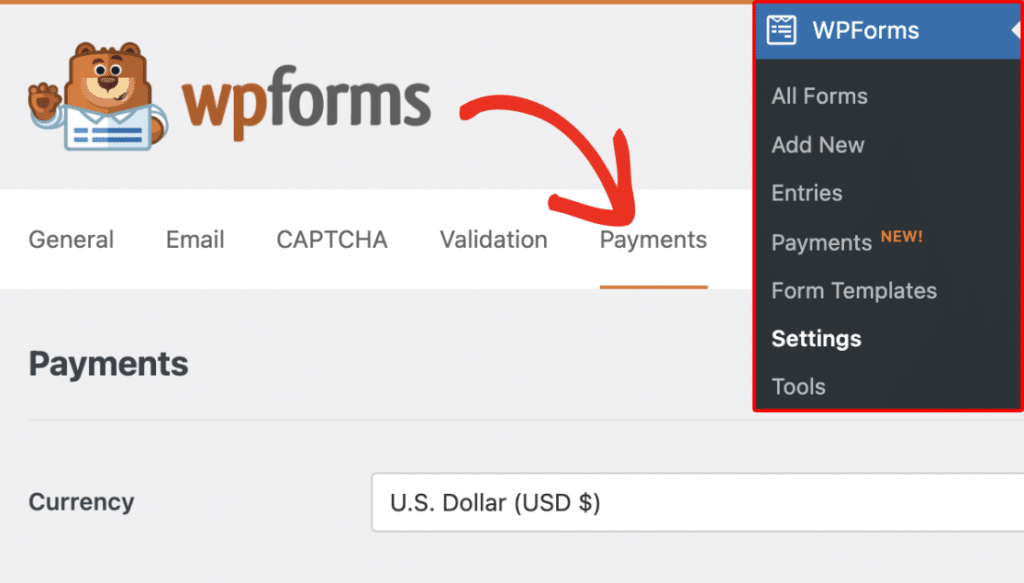
Dans la section Paiements, assurez-vous que la liste déroulante Devise est réglée sur la même devise que celle utilisée par votre compte Square.

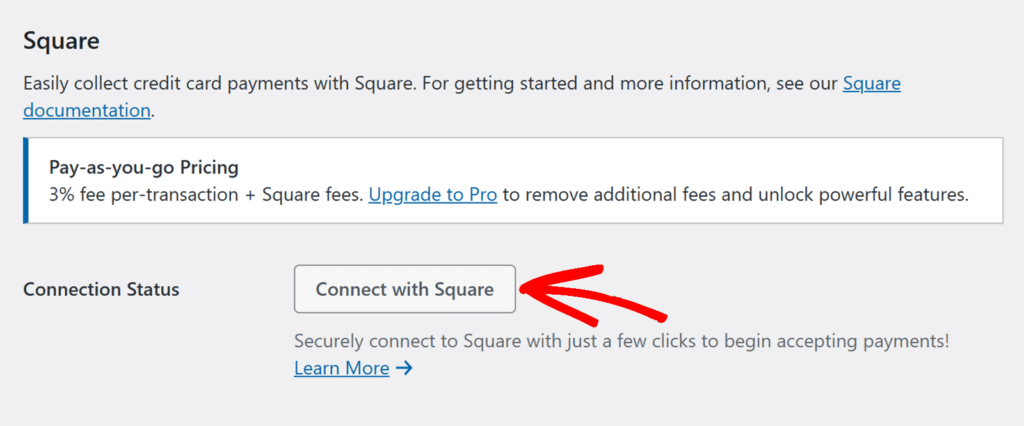
Faites défiler jusqu'à la section Square et cliquez sur Connect with Square. Vous serez redirigé vers l'écran de connexion Square où vous pourrez vous connecter et autoriser la connexion.
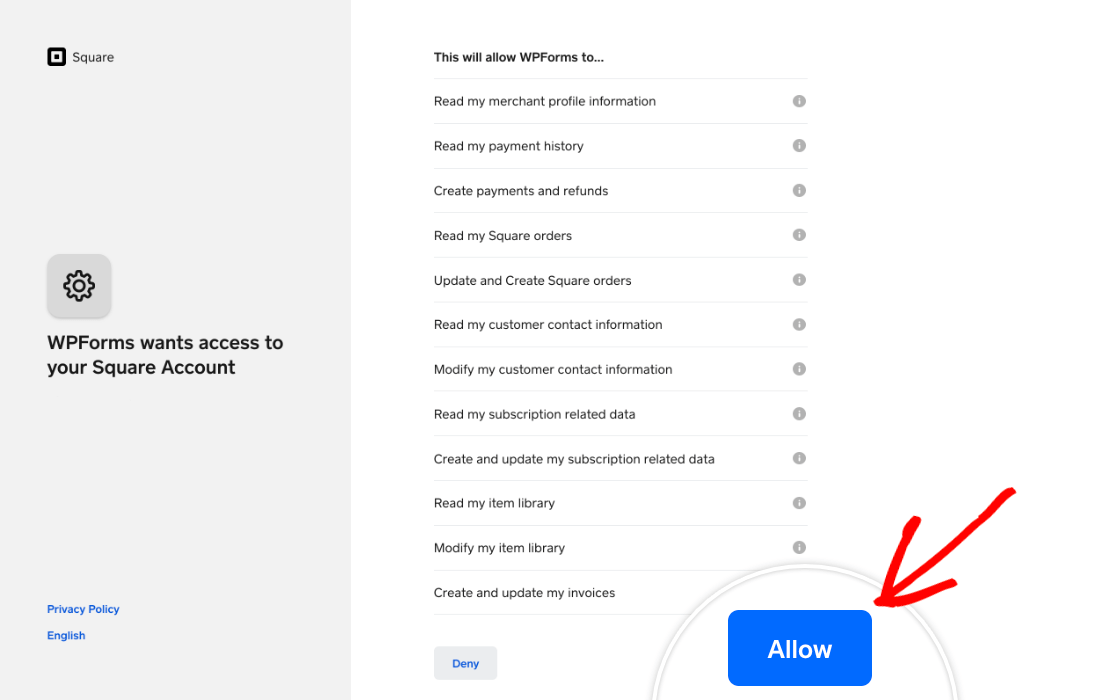
Square vous demandera alors si vous souhaitez accorder à WPForms certaines permissions liées à votre compte. Cliquez sur Autoriser pour continuer.
Une fois la connexion établie, vous serez renvoyé sur votre site. Une coche verte apparaît à côté de l'état de la connexion si celle-ci a réussi.

WPForms va également intégrer l'emplacement de votre entreprise dans les paramètres. Si votre compte Square possède plusieurs sites actifs, vous pouvez choisir celui que vous souhaitez utiliser dans la liste déroulante " Business Location".

Remarque : les emplacements sont gérés dans votre compte Square. Pour obtenir de l'aide sur l'ajout, la suppression ou la modification d'emplacements, veuillez consulter la documentation de Square à ce sujet.
Enfin, veillez à enregistrer vos paramètres avant de quitter cet écran.
Configuration de Square Webhooks
Les webhooks permettent à WPForms de recevoir des mises à jour en temps réel de Square lorsqu'un paiement est effectué, remboursé ou mis à jour. Avec les webhooks de Square activés, vos formulaires restent synchronisés automatiquement, vous n'avez donc pas à suivre manuellement les changements de paiement.
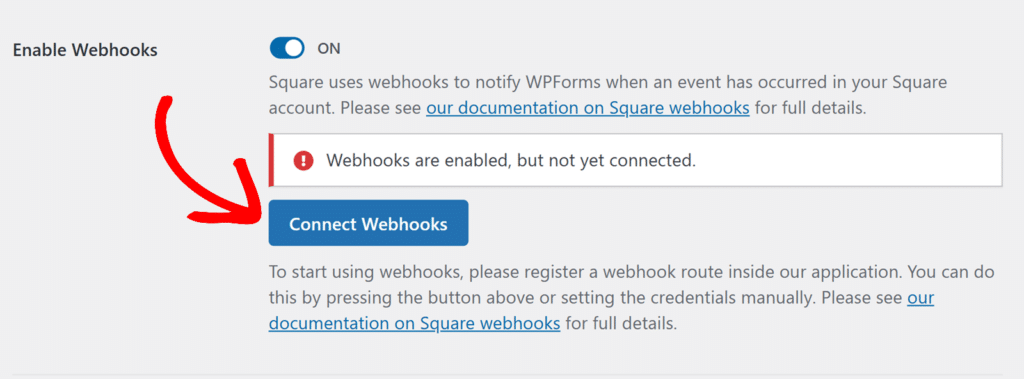
Pour apprendre à connecter les webhooks de Square à WPForms, suivez notre guide sur la configuration des webhooks de Square.
Activation de Square Payments dans le générateur de formulaires
Après avoir connecté votre site à Square, vous pouvez activer les paiements pour un formulaire spécifique. Pour ce faire, créez un nouveau formulaire ou modifiez un formulaire existant pour ouvrir le générateur de formulaires.
Dans le générateur de formulaires, veillez à inclure :
- Un champ Email et un champ Nom
- Champ des éléments de paiement (élément unique, éléments multiples, éléments de la case à cocher ou éléments de la liste déroulante)
- Un champ de paiement Square
Ces champs sont nécessaires au bon déroulement du paiement.
Après avoir ajouté vos champs, allez dans Paiements " Square. Activez l'option Activer les paiements uniques.
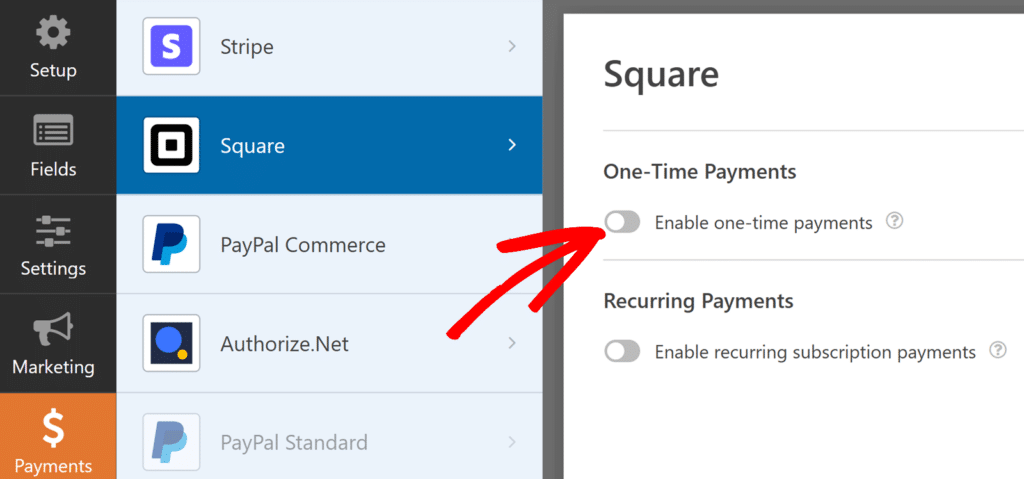
Une fois l'option activée, quelques paramètres supplémentaires apparaissent :
Tout d'abord, saisissez une Description du paiement, qui apparaîtra sur le relevé de carte de crédit de votre client ; il est donc judicieux d'utiliser un nom qu'il reconnaîtra.

Ensuite, vous pouvez associer quelques champs facultatifs de votre formulaire à votre compte Square si vous le souhaitez. À l'aide des menus déroulants, sélectionnez l'e-mail et le nom de votre formulaire.

Si votre formulaire est destiné à accepter des paiements uniques, vous pouvez enregistrer vos modifications et tester votre formulaire de paiement. En revanche, si vous devez accepter des paiements récurrents, vous devrez procéder à des paramétrages supplémentaires.
Activation des paiements récurrents
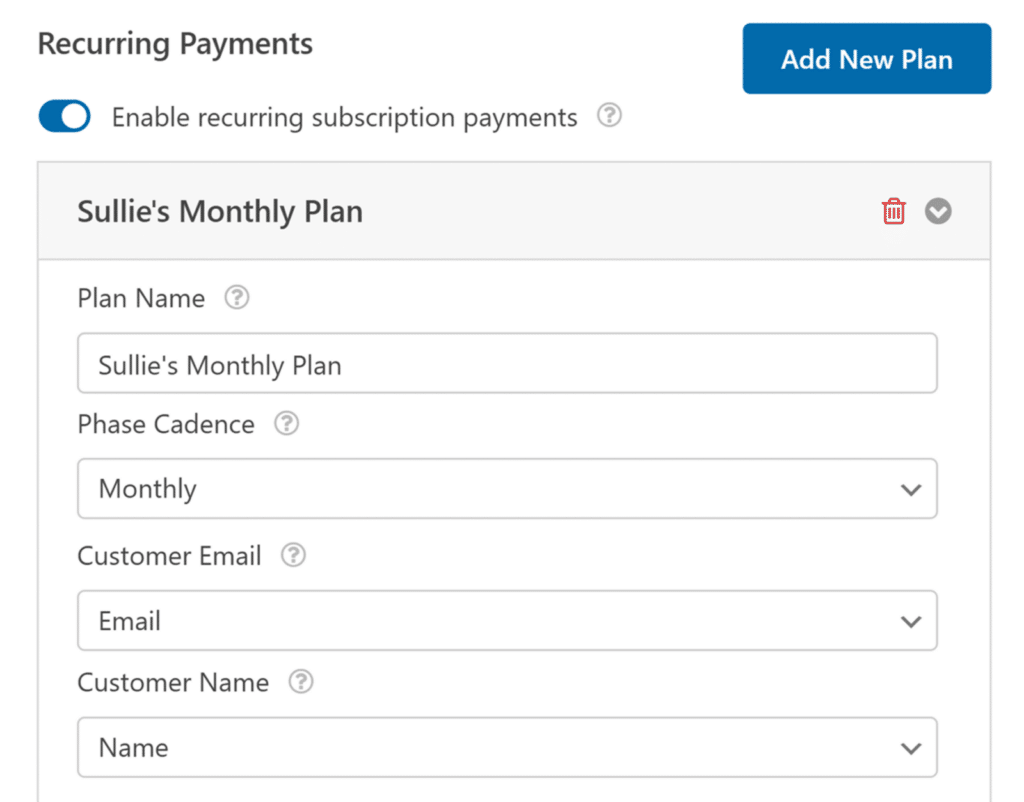
Si votre formulaire est destiné à collecter des paiements récurrents, activez l'option Activer les paiements récurrents.

Une fois cette option activée, vous devez remplir les autres champs de cette section :
- Nom du plan : Saisissez un titre pour l'abonnement. Celui-ci apparaîtra dans les transactions de ce formulaire dans votre compte Square.
- Phase Cadence : Sélectionnez la fréquence des paiements. Les options comprennent le paiement mensuel, le paiement annuel et d'autres encore.
- Email du client : Sélectionnez le champ Email de votre formulaire afin que le client puisse être contacté. Ce champ est nécessaire pour créer un abonnement pour un client dans Square.
- Nom du client: Sélectionnez le champ qui contient le nom du client.
Test de Square Payments
Après avoir configuré Square avec WPForms, vous devrez envoyer un paiement test avant de lancer votre formulaire pour vous assurer que tout fonctionne comme prévu.
Nous vous recommandons de consulter notre guide pour tester les paiements Square afin d'obtenir une description complète.
Visualisation des entrées de paiement
Une fois que votre formulaire est publié et que les utilisateurs commencent à effectuer des paiements, vous pouvez consulter les détails du paiement à partir de votre tableau de bord WordPress.
Allez dans WPForms " Paiements pour accéder à la page de présentation. Vous pouvez y consulter toutes vos entrées de paiement et suivre vos revenus.
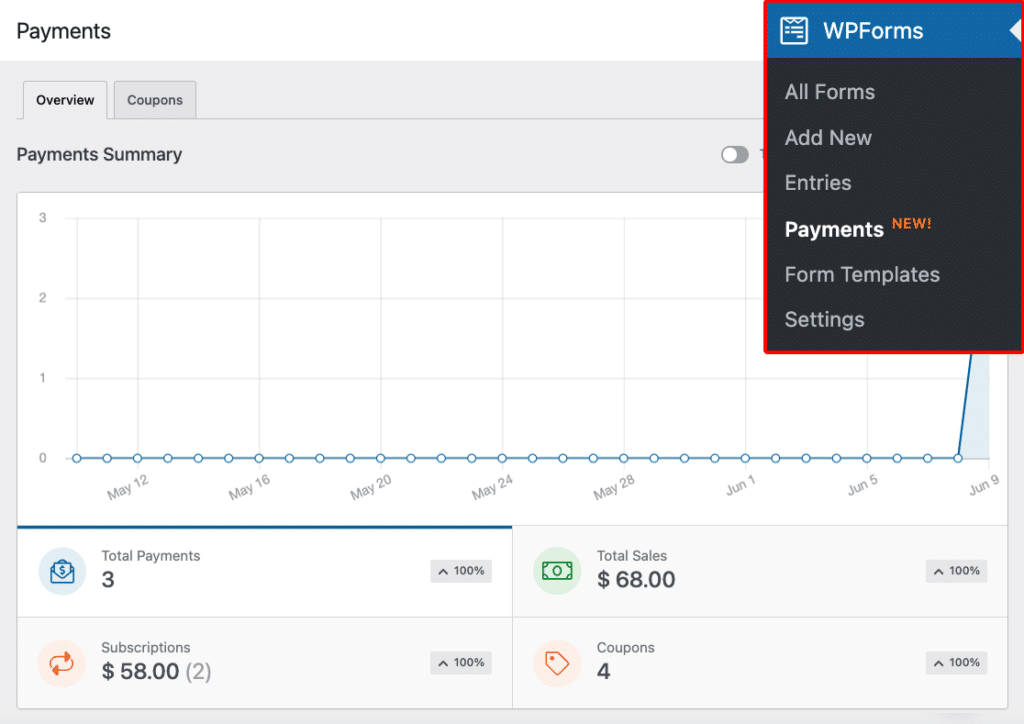
Pour en savoir plus, consultez notre guide sur la visualisation et la gestion des paiements par formulaire.
Questions fréquemment posées
Voici quelques-unes des questions les plus fréquemment posées sur l'addon Square.
Serai-je facturé pour l'utilisation de Square dans mes formulaires ?
Si vous utilisez WPForms Lite, des frais de 3% sont appliqués à chaque transaction en plus des frais de traitement de Square. Pour supprimer ces frais supplémentaires, vous devez passer à la licence WPForms Pro ou à une licence supérieure.
Pour connaître les frais de vente actuels de Square pour les transactions en ligne à distance, consultez sa page de tarification.
Voilà, c'est fait ! Vous êtes maintenant prêt à accepter les paiements Square en utilisant WPForms Lite.
Ensuite, vous souhaitez en savoir plus sur la gestion des paiements dans WPForms ? Consultez notre tutoriel sur la création de formulaires de paiement dans WPForms pour plus d'informations.
