
Resumo de IA
Você quer criar um formulário de contato do MailerLite no WordPress?
Se você usa o MailerLite para suas campanhas de e-mail, sabia que pode conectar seus formulários do WordPress à sua conta do MailerLite?
Neste artigo, mostraremos como criar um formulário de contato do MailerLite no WordPress para gerenciar facilmente seus assinantes de e-mail.
Crie Seu Formulário do MailerLite no WordPress Agora
O MailerLite Tem um Formulário de Contato?
Sim, o MailerLite tem seu próprio plugin para WordPress que permite criar formulários de contato. No entanto, sua funcionalidade é limitada. Para criar formulários mais funcionais que aumentem as conversões, integre sua conta do MailerLite com plugins do WordPress como o WPForms.
Conectar o MailerLite a um plugin de criação de formulários permite que você crie formulários mais dinâmicos e sofisticados, enquanto ainda coleta leads em sua conta do MailerLite.
Como Criar um Formulário de Contato do MailerLite no WordPress
É bem simples criar um formulário de contato do MailerLite no WordPress. Tudo o que você precisa fazer é seguir os passos abaixo:
Neste Artigo
- 1. Instale um Plugin de Formulário Compatível com MailerLite (WPForms + Addon MailerLite)
- 2. Conecte o WPForms ao MailerLite
- 3. Crie Seu Formulário e Configure as Definições dos Campos
- 4. Defina Regras para Enviar Contatos para o MailerLite (Opcional)
- 5. Incorpore Seu Formulário do MailerLite no WordPress
Vamos começar.
Observação: O tutorial abaixo assume que você já tem uma conta no MailerLite. Se não tiver, você pode começar com o MailerLite gratuitamente.
1. Instale um Plugin de Formulário Compatível com MailerLite (WPForms + Addon MailerLite)
Primeiro de tudo, você precisa de um plugin de formulário de contato para WordPress que tenha uma integração nativa com o MailerLite.
Para este tutorial, estamos usando o WPForms. Embora exista um plano gratuito limitado, você precisará de um plano pago para conectar seus formulários ao MailerLite.
Com o WPForms Pro, você obtém toneladas de recursos como lógica condicional, várias integrações de marketing, bem como o addon MailerLite. Ele também é fácil de usar, criando uma ótima experiência para o usuário.

Você pode ver este guia sobre como instalar o WPForms em seu site para obter ajuda.
Após o plugin estar ativo em seu site, ative o addon MailerLite para que você possa conectar suas contas.
Para fazer isso, navegue até WPForms » Addons no seu painel do WordPress.

Nesta página de addons, procure pelo addon MailerLite. Em seguida, clique no botão Instalar abaixo dele.

Levará apenas alguns segundos para o addon MailerLite instalar e ativar em seu site (o status será "Ativo" quando terminar).

Agora que você instalou o WPForms e ativou o addon MailerLite, vamos começar a configurar a integração.
2. Conecte o WPForms ao MailerLite
Para integrar o MailerLite ao WPForms, você precisará obter sua chave de API do MailerLite.
Para esta integração com o MailerLite, você precisará obter sua chave de API do MailerLite.
Deixando o WordPress aberto em sua aba atual, abra uma nova aba ou janela e faça login no painel da sua conta MailerLite. Clique em Integrações. Em API do MailerLite, clique em Usar.

Pressione o botão Gerar Novo Token.

Um modal popup solicitará um nome para o token. Insira um nome para o seu token (pode ser qualquer coisa) e pressione o botão Criar Token.

Copie o token.

Após copiar o token da API, retorne à página do WPForms que você deixou aberta em outra aba ou janela.
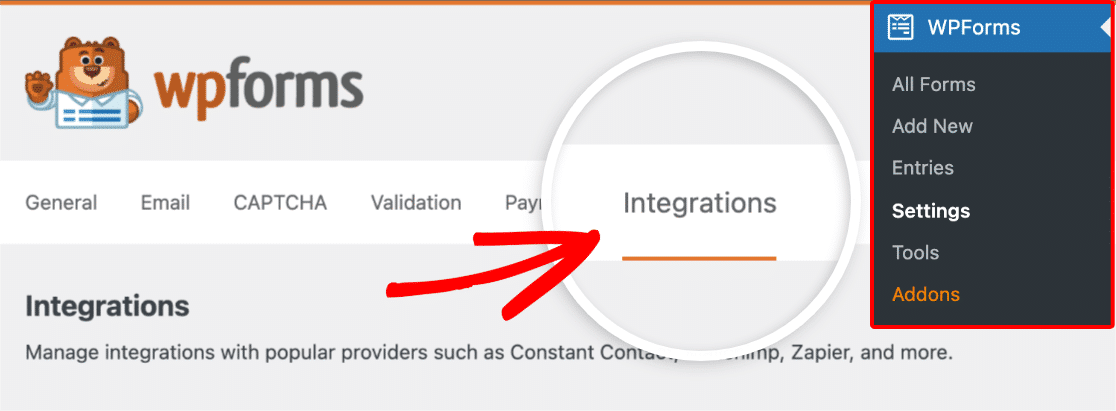
Na sua área de administração do WordPress, clique em WPForms » Configurações. No menu horizontal, selecione Integrações.
Encontre o MailerLite e clique nele para expandir as opções. Em seguida, clique em Adicionar Nova Conta.

Insira o token da API no campo Chave da API do MailerLite. Sua conexão também precisará de um apelido, que pode ser qualquer nome que você queira dar a ela.
Pressione Conectar ao MailerLite quando terminar.

Agora você deve ver um status verde Conectado aparecer.

Com isso, podemos começar a criar formulários do WordPress que se comunicam com sua conta MailerLite.
3. Crie Seu Formulário e Configure as Definições dos Campos
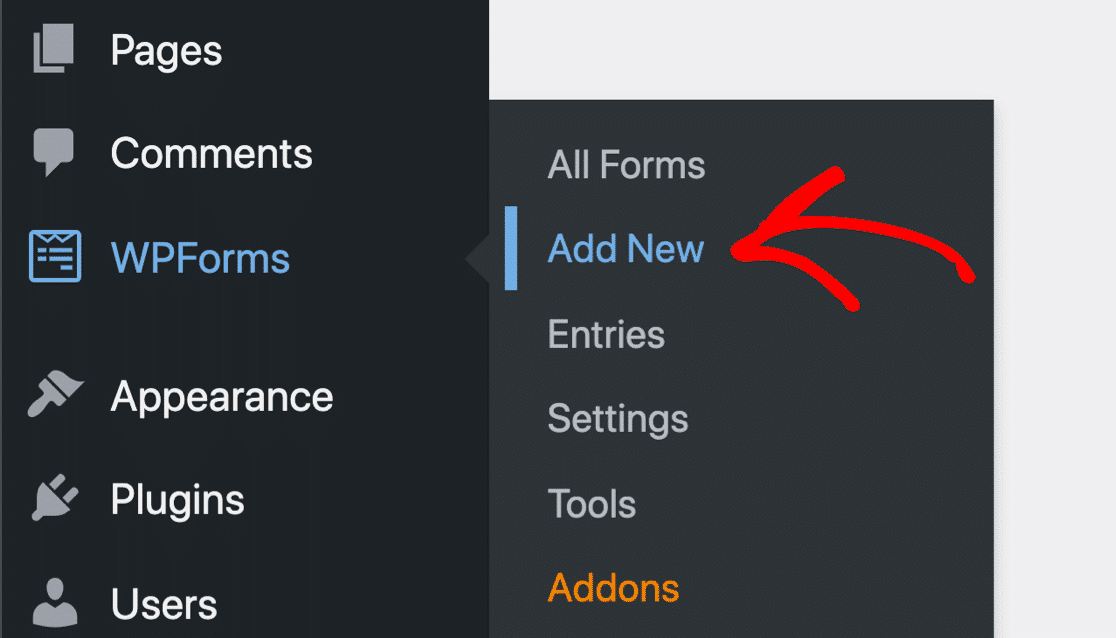
Agora, a parte divertida: construir seu formulário! No seu painel do WordPress, navegue até WPForms » Adicionar Novo.
Nomeie seu formulário, em seguida, escolha um modelo dos mais de 2.100 modelos de formulário do WPForms.
Usaremos o modelo de Formulário de Contato Simples para este tutorial.

Após selecionar um modelo, a tela do construtor de formulários do WPForms será aberta. Você pode usar o editor de arrastar e soltar para personalizar seu formulário e adicionar novos campos.

Para conectar o MailerLite a este formulário, clique na opção Marketing na barra lateral esquerda. Selecione MailerLite e pressione o botão Adicionar Nova Conexão.

Insira um apelido para a conexão e, em seguida, clique em OK.

Agora, use os menus suspensos para configurar sua conexão MailerLite com o WPForms. Aqui estão as principais configurações que você encontrará:

Observação: Campos marcados com um asterisco (*) são obrigatórios.
- Selecionar Conta*: Use este menu suspenso para selecionar sua conta MailerLite pelo apelido
- Ação a Executar*: Escolha a ação que você deseja automatizar quando um lead enviar seu formulário (Inscrever, Cancelar Inscrição ou Excluir)
- E-mail*: Isso permite que você escolha o campo de e-mail do seu formulário do WordPress para que possa combiná-lo corretamente com o campo de e-mail na sua área de assinantes do MailerLite
- Tipo*: Escolha para qual lista novos contatos serão adicionados (Ativo, Cancelado, ou Não Confirmado)
- Grupo: Atribua contatos a diferentes grupos de interesse que você já criou no MailerLite.
Essas configurações básicas são suficientes para fazer sua conexão WPForms e MailerLite funcionar. No entanto, este addon MailerLite oferece opções adicionais que você pode aproveitar, como mapear campos personalizados do MailerLite para o WordPress.
Dica Pro: Mapeie Campos Personalizados do MailerLite para Campos de Formulário do WordPress
O MailerLite oferece muita flexibilidade quando se trata de gerenciamento de assinantes.
Se você deseja coletar informações mais detalhadas de cada contato, pode criar campos adicionais no WPForms e mapeá-los para campos personalizados na área de gerenciamento de assinantes da sua conta MailerLite.
Basta usar os menus suspensos para corresponder seus nomes de campo personalizados do MailerLite aos campos de formulário que você criou no WPForms.
Por exemplo, mapeamos os campos de nome do WPForms para o MailerLite.
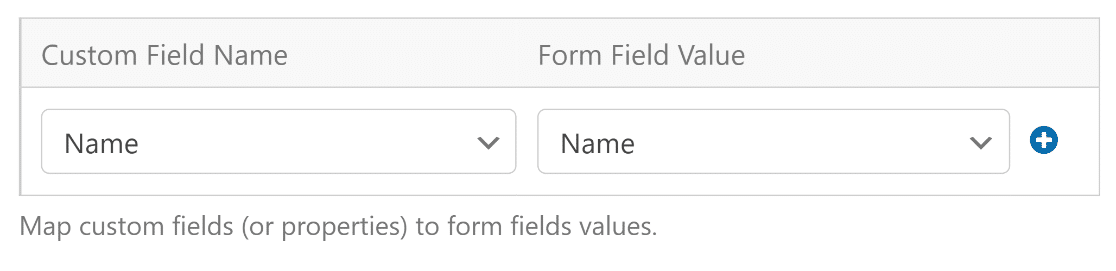
Você pode adicionar mais mapeamentos de campos pressionando o botão azul de mais (+).

Agora, vamos ver como a lógica condicional ajuda a dar mais controle sobre quais contatos são enviados para sua lista de assinantes do MailerLite.
4. Defina Regras para Enviar Contatos para o MailerLite (Opcional)
Às vezes, as preferências de um contato podem determinar se você deseja adicioná-lo à sua lista de e-mails. O WPForms inclui um poderoso recurso de lógica condicional que permite alterar o comportamento da integração com base nas respostas do usuário.
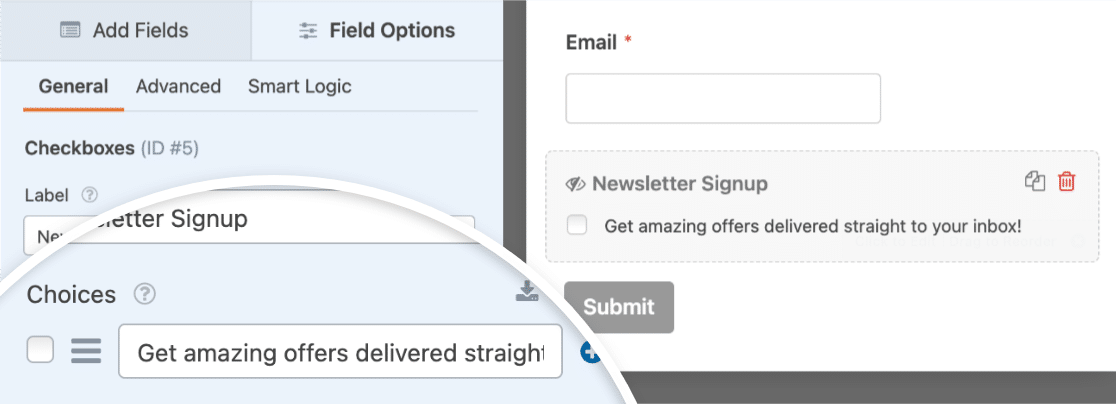
Por exemplo, você pode adicionar um campo de Caixas de Seleção ao seu formulário de contato e usá-lo para determinar se um lead deseja receber sua newsletter. Isso significa que você não precisa de um formulário de inscrição separado, simplificando o processo para todos.
Você pode adicionar um duplo opt-in se desejar. Adicionamos apenas uma única opção para o campo de Caixas de Seleção neste exemplo, que podemos usar como um opt-in para determinar se um usuário deseja ingressar em nossa newsletter.
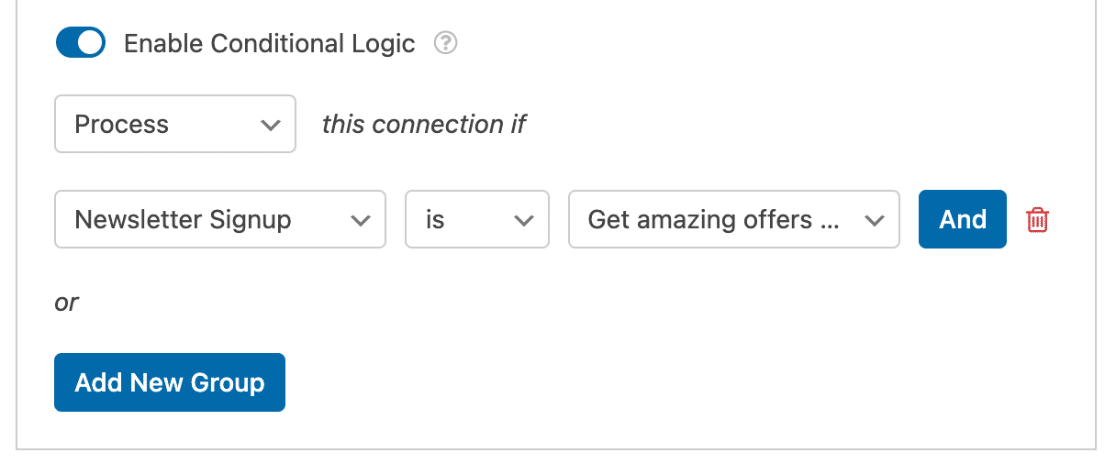
Agora, vá para Marketing » MailerLite na barra lateral esquerda do construtor de formulários e ative a opção Ativar Lógica Condicional.

Aqui, vamos definir uma regra que exige que uma conexão só seja processada se a opção Inscrição na Newsletter estiver marcada. Isso é extremamente simples de fazer usando menus suspensos, como mostrado abaixo.
Não se esqueça de pressionar Salvar no canto superior direito do construtor de formulários antes de prosseguir.
Agora é hora de incorporar o formulário em seu site ou página de destino!
5. Incorpore Seu Formulário do MailerLite no WordPress
Pronto para publicar seu formulário? Clique no botão Incorporar no canto superior direito da tela do construtor de formulários.

O WPForms agora perguntará se você deseja adicionar seu novo formulário do MailerLite a uma nova página ou a uma página existente. Para este exemplo, escolheremos a opção Criar Nova Página.

Em seguida, dê um nome à sua nova página e clique no botão Vamos Lá.

Quando você pressionar o botão, será redirecionado para o editor de blocos do WordPress para uma nova página. Na página, você verá seu formulário já incorporado.
Você pode editar quaisquer outros elementos da página como faria normalmente no WordPress. Assim que estiver satisfeito com a aparência da página, pressione o botão Publicar.

Execute um Teste
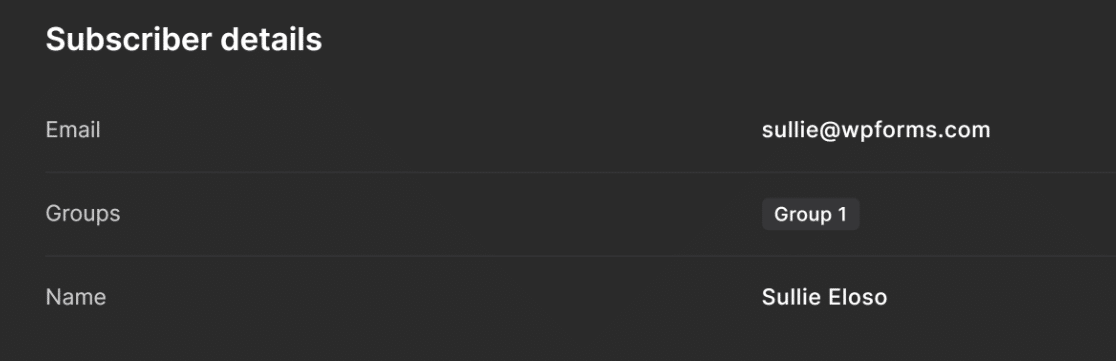
É uma boa ideia testar se a integração está funcionando corretamente. Você pode enviar uma entrada de teste para si mesmo antes e depois que um formulário for publicado e ver se os dados estão sendo enviados corretamente do seu formulário do WordPress para sua conta do MailerLite.

Após concluir o teste de envio do formulário, abra sua conta do MailerLite e verifique se você recebeu os dados do WPForms.
E é isso! Agora você sabe como criar um formulário do MailerLite no WordPress.
Em seguida, explore plugins de e-mail para WordPress
Por trás de cada site WordPress de sucesso, vários plugins de e-mail permitem que você atinja seus objetivos de marketing.
Selecionamos cuidadosamente uma lista dos melhores plugins de e-mail que podem ajudar a aumentar sua lista de e-mails, melhorar a entregabilidade e enviar notificações para que você fique por dentro de tudo.
E se você está se perguntando quanto custaria para começar uma campanha de marketing por e-mail, aqui está nosso guia completo sobre os custos de marketing por e-mail.
Além disso, se você quiser aprender sobre todas as coisas que pode fazer com o WPForms, talvez você goste de conferir nosso guia sobre criação de escalas de classificação com emojis no WordPress para coletar feedback de clientes de uma forma divertida e interativa!
Crie Seu Formulário do MailerLite no WordPress Agora
Pronto para construir seu formulário? Comece hoje mesmo com o plugin construtor de formulários WordPress mais fácil. WPForms Pro inclui muitos modelos gratuitos e oferece uma garantia de devolução do dinheiro em 14 dias.
Se este artigo ajudou você, por favor, siga-nos no Facebook e Twitter para mais tutoriais e guias gratuitos do WordPress.

