Riassunto AI
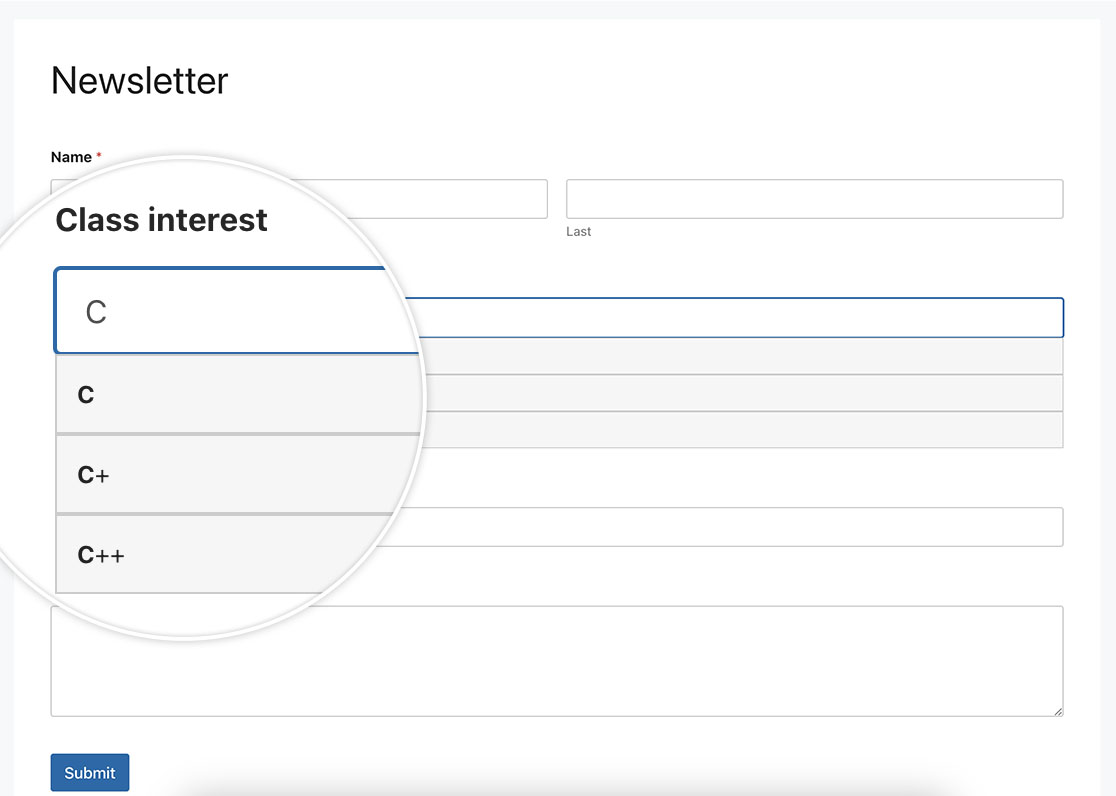
Vuoi creare un campo di completamento automatico nel tuo modulo? La funzionalità di completamento automatico può migliorare notevolmente l'esperienza utente fornendo suggerimenti mentre l'utente digita, risparmiando tempo e garantendo la coerenza dei dati. In questo articolo, ti mostreremo come utilizzare JavaScript per implementare il completamento automatico per un campo di immissione di testo con un elenco di risposte pre-approvate.
Creazione del modulo
Inizieremo creando un nuovo modulo e aggiungendo i nostri campi, che includeranno almeno un campo modulo Testo a riga singola. Se hai bisogno di aiuto per creare il tuo modulo, ti preghiamo di consultare questa utile guida.
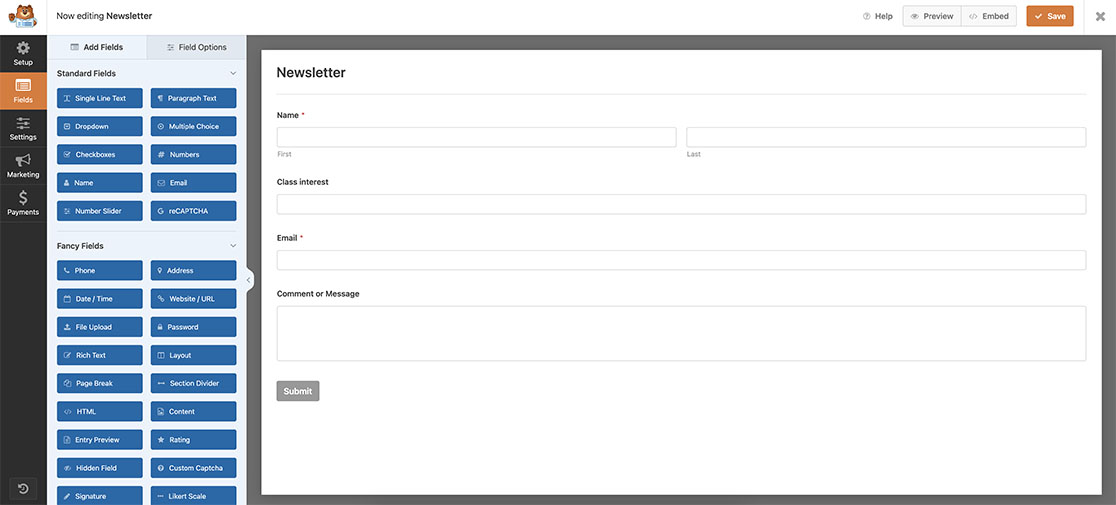
Creazione di un campo di completamento automatico
Ora è il momento di aggiungere questo snippet al tuo sito. Se hai bisogno di assistenza su dove e come aggiungere uno snippet personalizzato al tuo sito, dai un'occhiata a questo tutorial.
/**
 * Turn any Single Line Text field into an autocomplete field
 *
 * @link https://wpforms.com/developers/how-to-create-an-autocomplete-field-in-your-form/
 */

function wpf_dev_text_autocomplete( ) {
?>

<script>
function autocomplete(inp, arr) {

  /*the autocomplete function takes two arguments,
  the text field element and an array of possible autocompleted values:*/
  var currentFocus;

  /*execute a function when someone writes in the text field:*/
  inp.addEventListener("input", function(e) {
      var a, b, i, val = this.value;

      /*close any already open lists of autocompleted values*/
      closeAllLists();
      if (!val) { return false;}
      currentFocus = -1;

      /*create a DIV element that will contain the items (values):*/
      a = document.createElement("DIV");
      a.setAttribute("id", this.id + "autocomplete-list");
      a.setAttribute("class", "autocomplete-items");

      /*append the DIV element as a child of the autocomplete container:*/
      this.parentNode.appendChild(a);

      /*for each item in the array...*/
      for (i = 0; i < arr.length; i++) {

        /*check if the item starts with the same letters as the text field value:*/
        if (arr[i].substr(0, val.length).toUpperCase() == val.toUpperCase()) {

          /*create a DIV element for each matching element:*/
          b = document.createElement("DIV");

          /*make the matching letters bold:*/
          b.innerHTML = "<strong>" + arr[i].substr(0, val.length) + "</strong>";
          b.innerHTML += arr[i].substr(val.length);

          /*insert a input field that will hold the current array item's value:*/
          b.innerHTML += "<input type='hidden' value='" + arr[i] + "'>";

          /*execute a function when someone clicks on the item value (DIV element):*/
          b.addEventListener("click", function(e) {

              /*insert the value for the autocomplete text field:*/
              inp.value = this.getElementsByTagName("input")[0].value;

              /*close the list of autocompleted values,
              (or any other open lists of autocompleted values:*/
              closeAllLists();
          });
          a.appendChild(b);
        }
      }
  });

  /*execute a function presses a key on the keyboard:*/
  inp.addEventListener("keydown", function(e) {
      var x = document.getElementById(this.id + "autocomplete-list");
      if (x) x = x.getElementsByTagName("div");
      if (e.keyCode == 40) {

        /*If the arrow DOWN key is pressed,
        increase the currentFocus variable:*/
        currentFocus++;

        /*and and make the current item more visible:*/
        addActive(x);
      } else if (e.keyCode == 38) { //up

        /*If the arrow UP key is pressed,
        decrease the currentFocus variable:*/
        currentFocus--;

        /*and and make the current item more visible:*/
        addActive(x);
      } else if (e.keyCode == 13) {

        /*If the ENTER key is pressed, prevent the form from being submitted,*/
        e.preventDefault();
        if (currentFocus > -1) {

          /*and simulate a click on the "active" item:*/
          if (x) x[currentFocus].click();
        }
      }
  });

  function addActive(x) {

    /*a function to classify an item as "active":*/
    if (!x) return false;

    /*start by removing the "active" class on all items:*/
    removeActive(x);
    if (currentFocus >= x.length) currentFocus = 0;
    if (currentFocus < 0) currentFocus = (x.length - 1);

    /*add class "autocomplete-active":*/
    x[currentFocus].classList.add("autocomplete-active");
  }

  function removeActive(x) {

    /*a function to remove the "active" class from all autocomplete items:*/
    for (var i = 0; i < x.length; i++) {
      x[i].classList.remove("autocomplete-active");
    }
  }

  function closeAllLists(elmnt) {

    /*close all autocomplete lists in the document,
    except the one passed as an argument:*/
    var x = document.getElementsByClassName("autocomplete-items");
    for (var i = 0; i < x.length; i++) {
      if (elmnt != x[i] && elmnt != inp) {
        x[i].parentNode.removeChild(x[i]);
      }
    }
  }

  /*execute a function when someone clicks in the document:*/
  document.addEventListener("click", function (e) {
      closeAllLists(e.target);
  });
}

/*An array containing all the programming class names*/
var classes = ["JavaScript","HTML/CSS","Python","C","C+","C++","Java","TypeScript","Pearl","R","SQL","PHP"];

/*initiate the autocomplete function on the "myInput" element, and pass along the countries array as possible autocomplete values:*/
autocomplete(document.getElementById("wpforms-3241-field_6"), classes);
</script>

<?php
}

add_action( 'wpforms_wp_footer_end', 'wpf_dev_text_autocomplete', 30 );
L'istruzione autocomplete(document.getElementById(“wpforms-3241-field_6”), classes); prenderà di mira specificamente l'ID del modulo 3241 e l'ID del campo 6 e quando quel campo viene cliccato, attiverà questo snippet e tenterà di eseguire un completamento automatico in base ai caratteri digitati nel campo durante la ricerca all'interno dell'elenco classes che abbiamo qui nello snippet.
var classes = ["JavaScript","HTML/CSS","Python","C","C+","C++","Java","TypeScript","Pearl","R","SQL","PHP"];
Dovrai aggiornare l'elenco classes per adattarlo alle tue esigenze. Dovrai anche aggiornare wpforms-3241-field_6 per adattarlo ai tuoi ID. Per aiuto nel trovare i tuoi ID, ti preghiamo di consultare questo tutorial.
Aggiunta del CSS
Il nostro passo finale è aggiungere un po' di CSS. Copia e incolla questo CSS sul tuo sito. Per aiuto su come e dove aggiungere CSS personalizzato, consulta questo tutorial.
.autocomplete-items div {
  padding: 10px;
  cursor: pointer;
  background-color: #f6f6f6;
  border: 1px solid #cccccc;
  font-size: 12px;
}

/*when hovering an item:*/
.autocomplete-items div:hover {
  background-color: #e9e9e9;
}

/*when navigating through the items using the arrow keys:*/
.autocomplete-active {
  background-color: #1E90FF !important;
  color: #ffffff;
}
E questo è tutto! Abbiamo trasformato con successo un campo Testo a riga singola in un campo di completamento automatico. Vuoi aggiungere un campo selettore di colori al tuo modulo? Dai un'occhiata al nostro tutorial su Come aggiungere un selettore di colori al tuo modulo.